2009 CHEVROLET CORVETTE steering wheel
[x] Cancel search: steering wheelPage 62 of 434

Servicing Your Airbag-Equipped
Vehicle
Airbags affect how the vehicle should be serviced.
There are parts of the airbag system in several places
around the vehicle. Your dealer/retailer and the
service manual have information about servicing the
vehicle and the airbag system. To purchase a service
manual, seeService Publications Ordering Information
on page 7-15.
{CAUTION:
For up to 10 seconds after the ignition is turned off
and the battery is disconnected, an airbag can still
in�ate during improper service. You can be injured
if you are close to an airbag when it in�ates. Avoid
yellow connectors. They are probably part of the
airbag system. Be sure to follow proper service
procedures, and make sure the person performing
work for you is quali�ed to do so.
Adding Equipment to Your
Airbag-Equipped Vehicle
Q:Is there anything I might add to or change
about the vehicle that could keep the airbags
from working properly?
A:Yes. If you add things that change your vehicle’s
frame, bumper system, height, front end or side
sheet metal, they may keep the airbag system from
working properly. Changing or moving any parts of
the front seats, safety belts, the airbag sensing and
diagnostic module, steering wheel, instrument panel,
the inside review mirror, front sensors, or airbag
wiring can affect the operation of the airbag system.
1-58
Page 72 of 434

Keyless Trunk Opening
Press the hatch/trunk release button located on the rear
of the hatch/trunk lid above the license plate to open the
trunk if the keyless access transmitter is within range.
SeeHatch on page 2-13for additional information.
There are other conditions that can affect the
performance of the transmitter. SeeKeyless Access
System on page 2-4Keyless Access System.
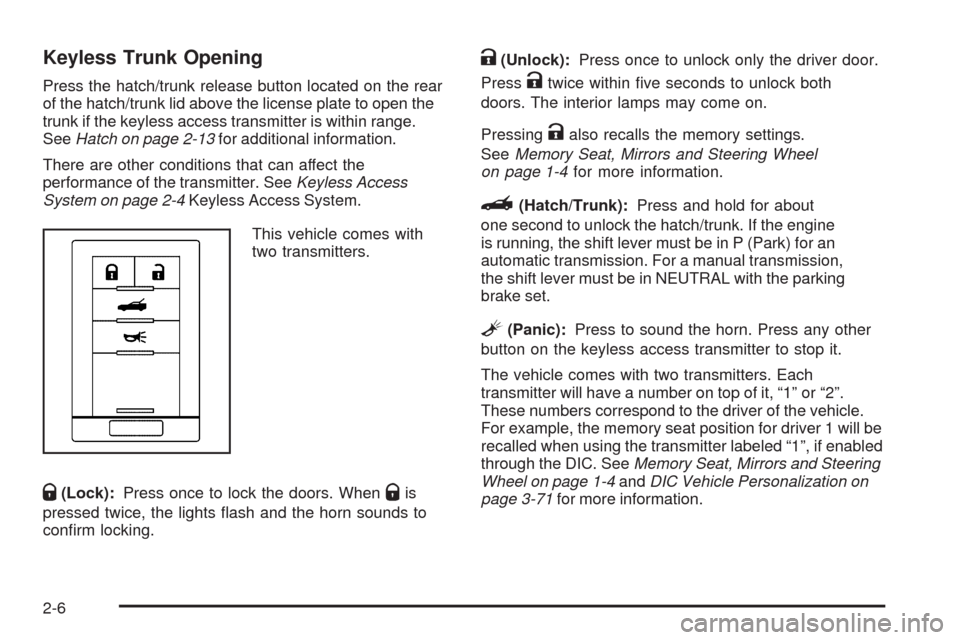
This vehicle comes with
two transmitters.
Q(Lock):Press once to lock the doors. WhenQis
pressed twice, the lights �ash and the horn sounds to
con�rm locking.
K(Unlock):Press once to unlock only the driver door.
Press
Ktwice within �ve seconds to unlock both
doors. The interior lamps may come on.
Pressing
Kalso recalls the memory settings.
SeeMemory Seat, Mirrors and Steering Wheel
on page 1-4for more information.
}(Hatch/Trunk):Press and hold for about
one second to unlock the hatch/trunk. If the engine
is running, the shift lever must be in P (Park) for an
automatic transmission. For a manual transmission,
the shift lever must be in NEUTRAL with the parking
brake set.
L(Panic):Press to sound the horn. Press any other
button on the keyless access transmitter to stop it.
The vehicle comes with two transmitters. Each
transmitter will have a number on top of it, “1” or “2”.
These numbers correspond to the driver of the vehicle.
For example, the memory seat position for driver 1 will be
recalled when using the transmitter labeled “1”, if enabled
through the DIC. SeeMemory Seat, Mirrors and Steering
Wheel on page 1-4andDIC Vehicle Personalization on
page 3-71for more information.
2-6
Page 80 of 434

Hatch/Trunk Lid Release
There are several ways to release the hatch/trunk lid.
If your vehicle has an automatic transmission, the shift
lever must be in P (Park). For manual transmission
vehicles, the parking brake must be set when the
ignition is started for the hatch/trunk release to operate.
The parking brake does not need to be set when the
ignition is off for the hatch/trunk release to operate.
SeeParking Brake on page 2-32.
V(Hatch/Trunk):Press the hatch/trunk lid release
button, located on the instrument panel to the left of the
steering wheel. The theft-deterrent alarm system
must not be armed.
}(Hatch/Trunk):Press the hatch/trunk lid release
button on the keyless access transmitter. SeeKeyless
Access System on page 2-4.
Press the hatch/trunk release button located on the rear
of the hatch/trunk lid above the license plate, as long
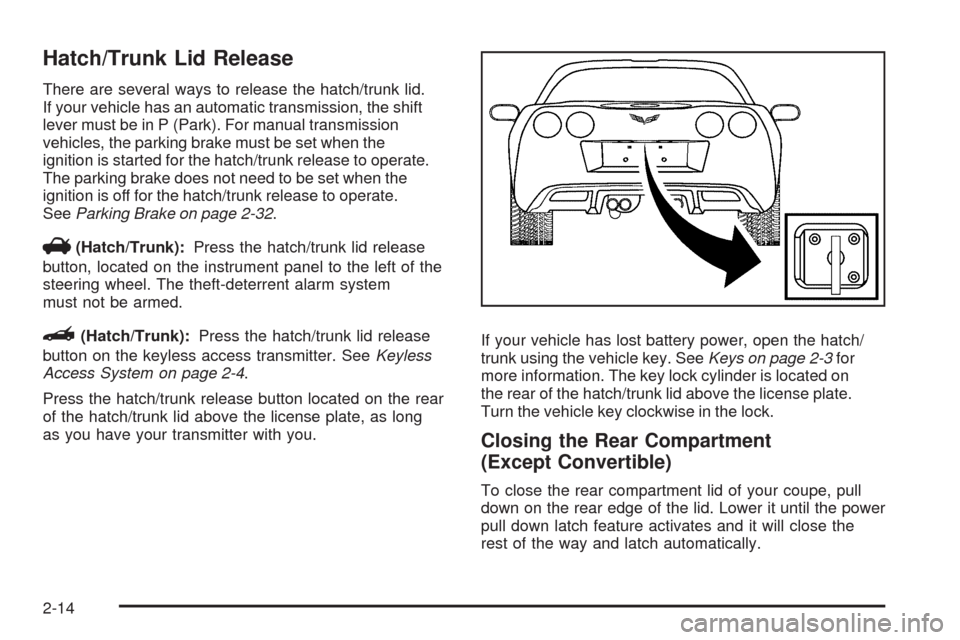
as you have your transmitter with you.If your vehicle has lost battery power, open the hatch/
trunk using the vehicle key. SeeKeys on page 2-3for
more information. The key lock cylinder is located on
the rear of the hatch/trunk lid above the license plate.
Turn the vehicle key clockwise in the lock.
Closing the Rear Compartment
(Except Convertible)
To close the rear compartment lid of your coupe, pull
down on the rear edge of the lid. Lower it until the power
pull down latch feature activates and it will close the
rest of the way and latch automatically.
2-14
Page 94 of 434

Manual Paddle Shift
While in the S (Sport Mode) position, the paddles
located on the steering wheel can be used to manually
up-shift or down-shift the transmission.
While in S (Sport Mode), push the paddle above the
steering wheel spokes to up-shift to the next gear, or
pull on the paddle behind the steering wheel spokes to
down-shift to the next gear.
To use the system, shift from P (Park) position to
S (Sport Mode) while stopped and with the engine
running, or from D (Drive) with the vehicle moving.When accelerating the vehicle from a stop in snowy and
icy conditions, you may want to shift to 2 (Second) or
3 (Third) gear. A higher gear allows you to gain more
traction on slippery surfaces. If traction control is active,
upshifts are delayed to increase your control of the
vehicle. SeeTraction Control System (TCS) on page 4-6.
While the Manual Paddle Shift gear selection system
is active, the transmission will automatically downshift
through the gears as the vehicle slows. The transmission
will select 2 (Second) gear as the vehicle stops. From a
stop, the vehicle will start from and hold 2 (Second) gear
unless the driver manually paddle shifts into a different
gear or selects D (Drive). The driver can select 1 (First)
gear for maximum acceleration from a stop.
When using the Manual
Paddle Shift feature while
in S (Sport Mode), the
current gear will be
displayed in the Driver
Information (DIC), or the
Head-Up Display (HUD),
if the vehicle has either of
these features.
If the vehicle has a Navigation system, see “Head-Up
Display (HUD)” in the Index of the navigation manual.
2-28
Page 105 of 434

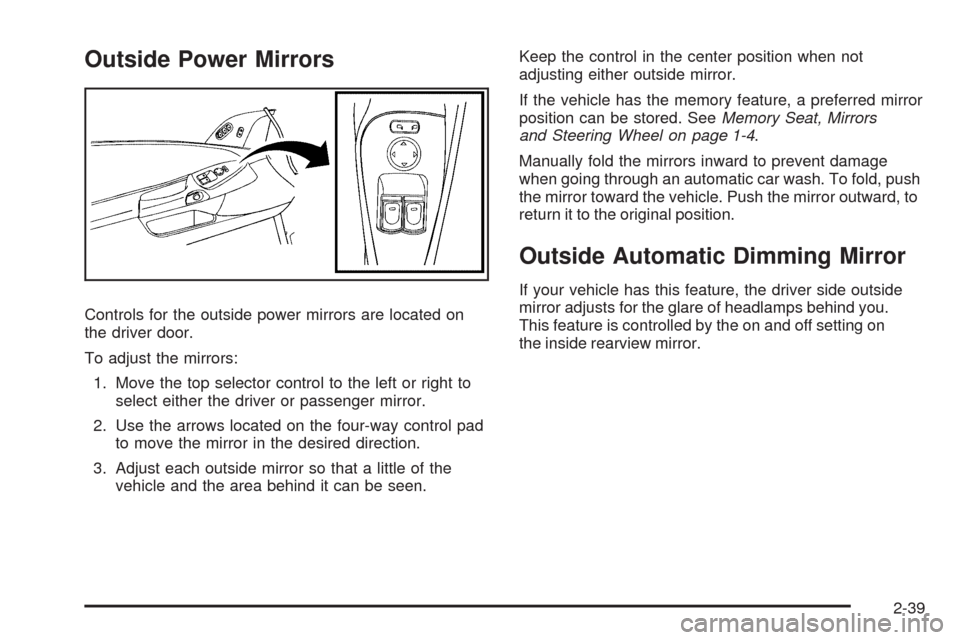
Outside Power Mirrors
Controls for the outside power mirrors are located on
the driver door.
To adjust the mirrors:
1. Move the top selector control to the left or right to
select either the driver or passenger mirror.
2. Use the arrows located on the four-way control pad
to move the mirror in the desired direction.
3. Adjust each outside mirror so that a little of the
vehicle and the area behind it can be seen.Keep the control in the center position when not
adjusting either outside mirror.
If the vehicle has the memory feature, a preferred mirror
position can be stored. SeeMemory Seat, Mirrors
and Steering Wheel on page 1-4.
Manually fold the mirrors inward to prevent damage
when going through an automatic car wash. To fold, push
the mirror toward the vehicle. Push the mirror outward, to
return it to the original position.
Outside Automatic Dimming Mirror
If your vehicle has this feature, the driver side outside
mirror adjusts for the glare of headlamps behind you.
This feature is controlled by the on and off setting on
the inside rearview mirror.
2-39
Page 108 of 434

OnStar Hands-Free Calling
OnStar Hands-Free Calling allows eligible OnStar
subscribers to make and receive calls using voice
commands. Hands-Free Calling is fully integrated into
the vehicle, and can be used with OnStar Pre-Paid
Minute Packages. Most vehicles include 30 trial minutes
good for 60 days. Hands-Free Calling can also be
linked to a Verizon Wireless service plan in the U.S.
or a Bell Mobility service plan in Canada, depending
on eligibility. To �nd out more, refer to the OnStar
Owner’s Guide in the vehicle’s glove box, visit
onstar.com or onstar.ca, or speak with an OnStar
advisor by pressing the OnStar button or calling
1-888-4-ONSTAR (1-888-466-7827).
OnStar Turn-by-Turn Navigation
Vehicles with the OnStar Turn-by-Turn Navigation
system can provide voice-guided driving directions.
Press the OnStar button to have an OnStar advisor
locate a business or address and download driving
directions to the vehicle. Voice-guided directions to the
desired destination will play through the audio system
speakers. See the OnStar Owner’s Guide for more
information.
OnStar Virtual Advisor
OnStar Virtual Advisor is a feature of OnStar
Hands-Free Calling that uses minutes to access
location-based weather, local traffic reports, and stock
quotes. Press the phone button and give a few simple
voice commands to browse through the various topics.
See the OnStar Owner’s Guide for more information.
This feature is only available in the continental U.S.
OnStar Steering Wheel Controls
This vehicle may have a Talk/Mute button that can
be used to interact with OnStar Hands-Free Calling.
SeeAudio Steering Wheel Controls on page 3-106
for more information.
On some vehicles, the mute button can be used to
dial numbers into voice mail systems, or to dial phone
extensions. See the OnStar Owner’s Guide for more
information.
2-42
Page 134 of 434

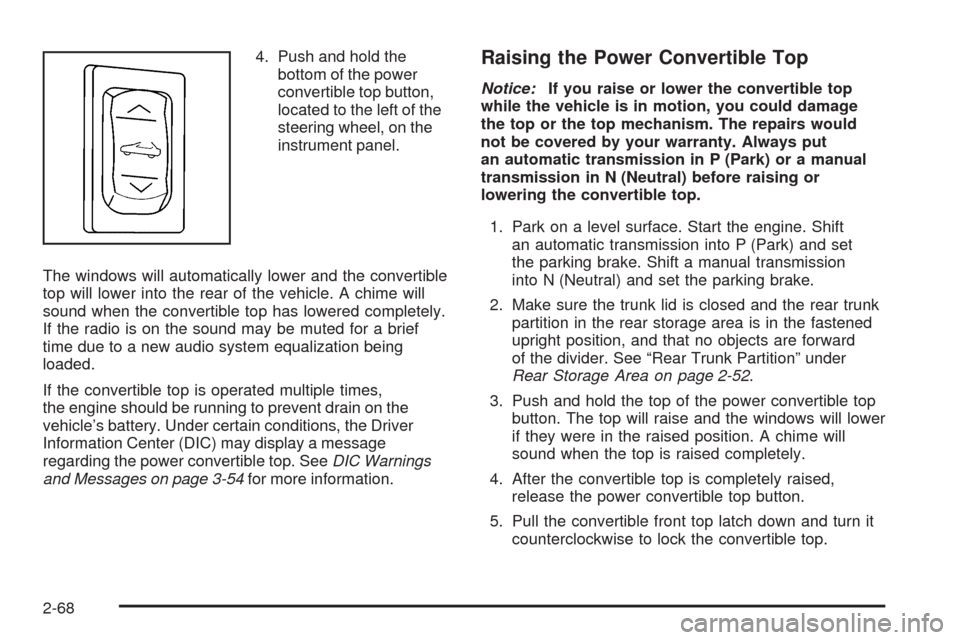
4. Push and hold the
bottom of the power
convertible top button,
located to the left of the
steering wheel, on the
instrument panel.
The windows will automatically lower and the convertible
top will lower into the rear of the vehicle. A chime will
sound when the convertible top has lowered completely.
If the radio is on the sound may be muted for a brief
time due to a new audio system equalization being
loaded.
If the convertible top is operated multiple times,
the engine should be running to prevent drain on the
vehicle’s battery. Under certain conditions, the Driver
Information Center (DIC) may display a message
regarding the power convertible top. SeeDIC Warnings
and Messages on page 3-54for more information.Raising the Power Convertible Top
Notice:If you raise or lower the convertible top
while the vehicle is in motion, you could damage
the top or the top mechanism. The repairs would
not be covered by your warranty. Always put
an automatic transmission in P (Park) or a manual
transmission in N (Neutral) before raising or
lowering the convertible top.
1. Park on a level surface. Start the engine. Shift
an automatic transmission into P (Park) and set
the parking brake. Shift a manual transmission
into N (Neutral) and set the parking brake.
2. Make sure the trunk lid is closed and the rear trunk
partition in the rear storage area is in the fastened
upright position, and that no objects are forward
of the divider. See “Rear Trunk Partition” under
Rear Storage Area on page 2-52.
3. Push and hold the top of the power convertible top
button. The top will raise and the windows will lower
if they were in the raised position. A chime will
sound when the top is raised completely.
4. After the convertible top is completely raised,
release the power convertible top button.
5. Pull the convertible front top latch down and turn it
counterclockwise to lock the convertible top.
2-68
Page 138 of 434

Driver Information Center (DIC).......................3-49
DIC Operation and Displays...........................3-49
DIC Warnings and Messages.........................3-54
Other Messages...........................................3-70
DIC Vehicle Personalization............................3-71
Audio System(s).............................................3-80
Setting the Clock..........................................3-80
Radio(s)......................................................3-81
Using an MP3..............................................3-92XM Radio Messages.....................................3-95
Navigation/Radio System...............................3-95
Bluetooth
®...................................................3-96
Theft-Deterrent Feature................................3-106
Audio Steering Wheel Controls......................3-106
Radio Reception.........................................3-108
Diversity Antenna System.............................3-108
XM™ Satellite Radio Antenna System..............3-108
Section 3 Instrument Panel
3-2