Page 1251 of 1903
Downloaded from www.Manualslib.com manuals search engine GENERAL INFORMATION
Description
The differential includes the differential side gears and the shaft mounted differential pinion gears. Direct contact
between the gears and the differential case is prevented by the differential side gear thrust washers installed under
the gears. The differential pinion shaft is held in position by a differential pinion shaft lock pin that extends through
the end of the differential pinion shaft and the differential case.
The differential transaxle assembly consists of the following components:
•Differential case (part of the final drive carrier)
• 2 pinion gears supported by a pinion shaft
• 2 side gears supported by the differential case and half-shafts
08–308Chery Automobile Co., Ltd.
Page 1253 of 1903
Downloaded from www.Manualslib.com manuals search engine Operation
The differential operates through the gear mesh with the ring gear bolted to the differential case. The engine power
is transmitted to the axle shafts through the pinion mate and side gears. The side gears are connected to the axle
shafts.
Specifications
Clearance Specifications
Clearance Between Side Gear And Planetary Gear0.028 - 0.150 mm
Adjusting Washer 0.93 - 1.00 mm
Special Tools
Installer Connector (40 mm)
MD-998819
Installer CapMD-998812
1 - Front/Rear Bearing Of Differential
2 - Adjustment Gasket-Axle Shaft Gear
3 - Axle Shaft Gear
4 - Planetary Gear Shaft
5 - Thrust Washer
6 - Spherical Washer-Planetary Gear7 - Anchor Pin-Planetary Gear Shaft
8 - The Driving Gear-Speedometer
9 - Differential Housing
10 - The Driven Gear Of Main Reducing Gear
11 - Bolt-The Driven Gear Of Main Reducing Gear And The
Differential Housing
GENERAL INFORMATION
LTSM080109
08–310Chery Automobile Co., Ltd.
Page 1255 of 1903
Downloaded from www.Manualslib.com manuals search engine DIFFERENTIAL UNIT REPAIR
Differential Carrier
Removal & Installation
NOTE :
The following special tools are required to perform the repair procedure:
•MD-998801 - Bearing Remover
1. Remove the transaxle input shaft assembly, transaxle output shaft assembly, 1st-2nd shift fork, 3rd-4th shift fork and 5th-reverse fork shaft together as a unit (See Transaxle Assembly Unit Repair in Section 08 Transaxle).
2. Remove the transaxle differential assembly.
3. Mount the differential in a vice.
4. Remove the drive gear bolts (1).
5. Using special tool MD-998801 (1), disassemble the differential-front/rear shaft bearing.
6. Tap the drive gear off the differential case assembly using a suitable tool.
7. Remove the pinion mate shaft use a suitable tool.
LTSM080117
LTSM080110
LTSM080112
08–312Chery Automobile Co., Ltd.
Page 1256 of 1903

Downloaded from www.Manualslib.com manuals search engine 8. Turn the pinion mate gear, then remove the pinion mate gear, pinion mate thrust washer, side gear and side gearthrust washer from the differential case.
Inspection
1. Clean all components.
2. Inspect the following components for wear: •Ring gear
• Adjusting washers
• Side gears
• Spherical washers
• Planetary gears
• Planetary gear shaft
Assembly
1. Install the adjustment shim-axle shaft gear/axle shaft gear/spherical washer-planetary gear/planetary gear/plan-
etary gear shaft.
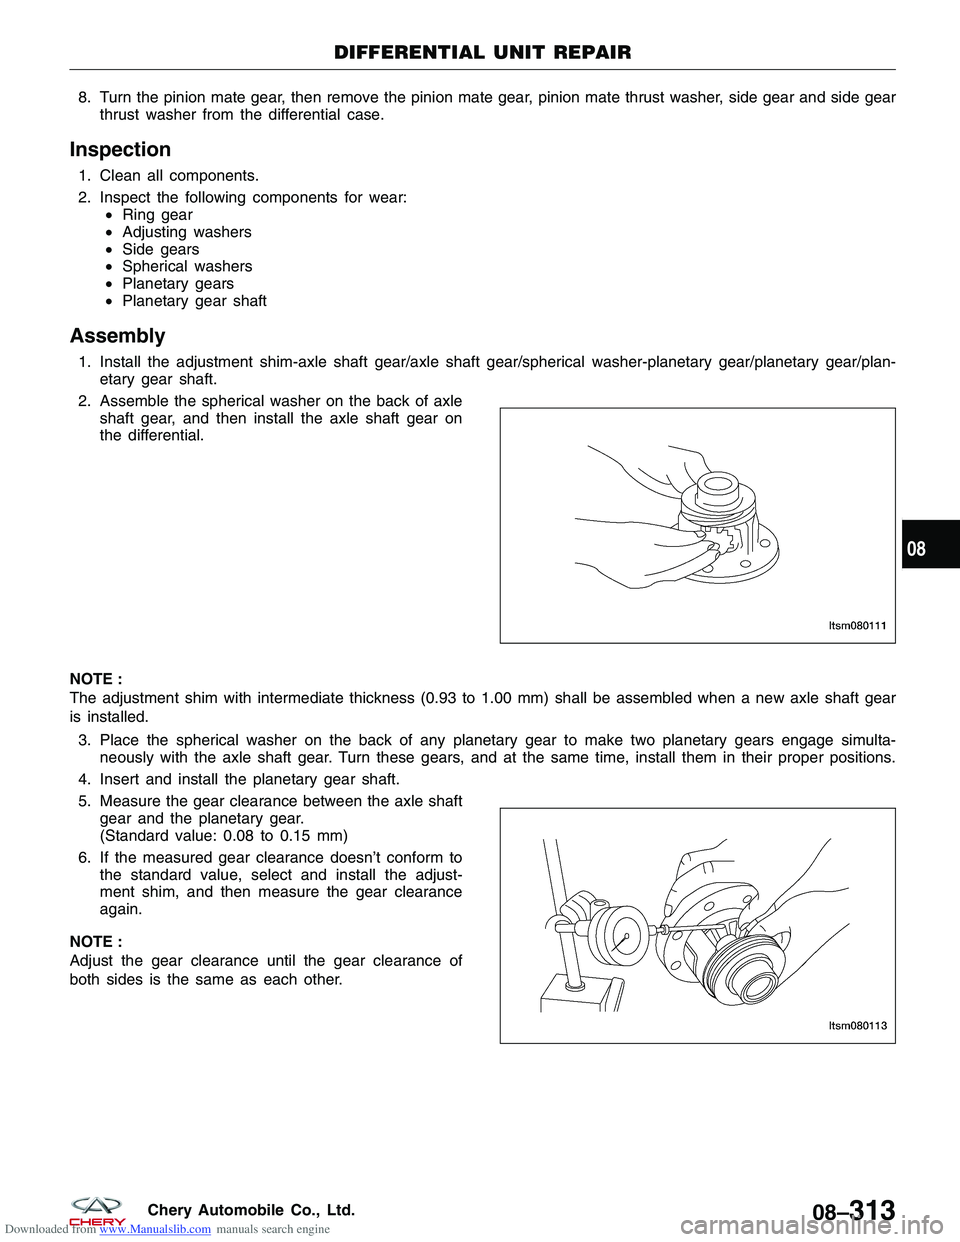
2. Assemble the spherical washer on the back of axle shaft gear, and then install the axle shaft gear on
the differential.
NOTE :
The adjustment shim with intermediate thickness (0.93 to 1.00 mm) shall be assembled when a new axle shaft gear
is installed. 3. Place the spherical washer on the back of any planetary gear to make two planetary gears engage simulta- neously with the axle shaft gear. Turn these gears, and at the same time, install them in their proper positions.
4. Insert and install the planetary gear shaft.
5. Measure the gear clearance between the axle shaft gear and the planetary gear.
(Standard value: 0.08 to 0.15 mm)
6. If the measured gear clearance doesn’t conform to the standard value, select and install the adjust-
ment shim, and then measure the gear clearance
again.
NOTE :
Adjust the gear clearance until the gear clearance of
both sides is the same as each other.
DIFFERENTIAL UNIT REPAIR
LTSM080111
LTSM080113
08
08–313Chery Automobile Co., Ltd.
Page 1257 of 1903
Downloaded from www.Manualslib.com manuals search engine 7. Install the lock pin (2).
8. Install the lock pin in the position shown in the fig-ure.
CAUTION:
After the lock pin is taped in, the axle shaft
gear and the planetary gear should operate
normally.
9. Using special tools MD-998812 (1) and MB-998819(2), install the differential front/rear bearing (3).
10. Install the driven gear of main reducing gear.
11. Apply thread sealant to the threads of all bolts.
1 - Differential Housing
2 - Lock Pin
3 - Pinion Shaft
DIFFERENTIAL UNIT REPAIR
LTSM080114
LTSM080115
LTSM080116
08–314Chery Automobile Co., Ltd.
Page 1258 of 1903
Downloaded from www.Manualslib.com manuals search engine 12. Tighten the ring gear bolts (1) in the sequenceshown in the figure.
(Tighten: Ring gear bolts to 132 N·m)
DIFFERENTIAL UNIT REPAIR
LTSM080117
08
08–315Chery Automobile Co., Ltd.
Page 1287 of 1903
Downloaded from www.Manualslib.com manuals search engine Rear Axle Assembly (4x4)
Description
Rear axle is mounted on the rear sub-frame assembly.
1 - Drive Pinion Lock Nut
2 - Companion Flange
3 - Side Fluid Seal
4 - Drive Pinion Front Bearing
5 - Drive Pinion
6 - Fluid-Filling Bolt
7 - Washer
8 - Fluid-Limiting Bolt
9 - Drive Gear
10 - Carrier Cover Bolts
11 - Carrier Cover12 - Bearing Cap Bolts
13 - Bearing Cap
14 - Differential Assembly
15 - Differential Bolts
16 - Washer
17 - Driven Gear Connecting Bolts
18 - Driven Gear Side Fluid Seal
19 - Driven Gear Washer
20 - Rear Axle Cover
21 - Drive Pinion Washer
ON-VEHICLE SERVICE
LTSM160009
09
09–13Chery Automobile Co., Ltd.
Page 1288 of 1903

Downloaded from www.Manualslib.com manuals search engine Operation
The axle receives power from the transaxle through the rear intermediate drive shaft. The drive shaft is connected to
the pinion gear which rotates the differential through the gear mesh with the ring gear bolted to the differential case.
The engine power is transmitted to the axle shafts through the pinion mate and side gears.
Removal & Installation
1. Drain the differential gear fluid.
2. Remove the rear intermediate drive shaft to rear axle flange bolts.(Tighten: Rear intermediate drive shaft to rear axle flange bolts to 65 ± 6 N·m)
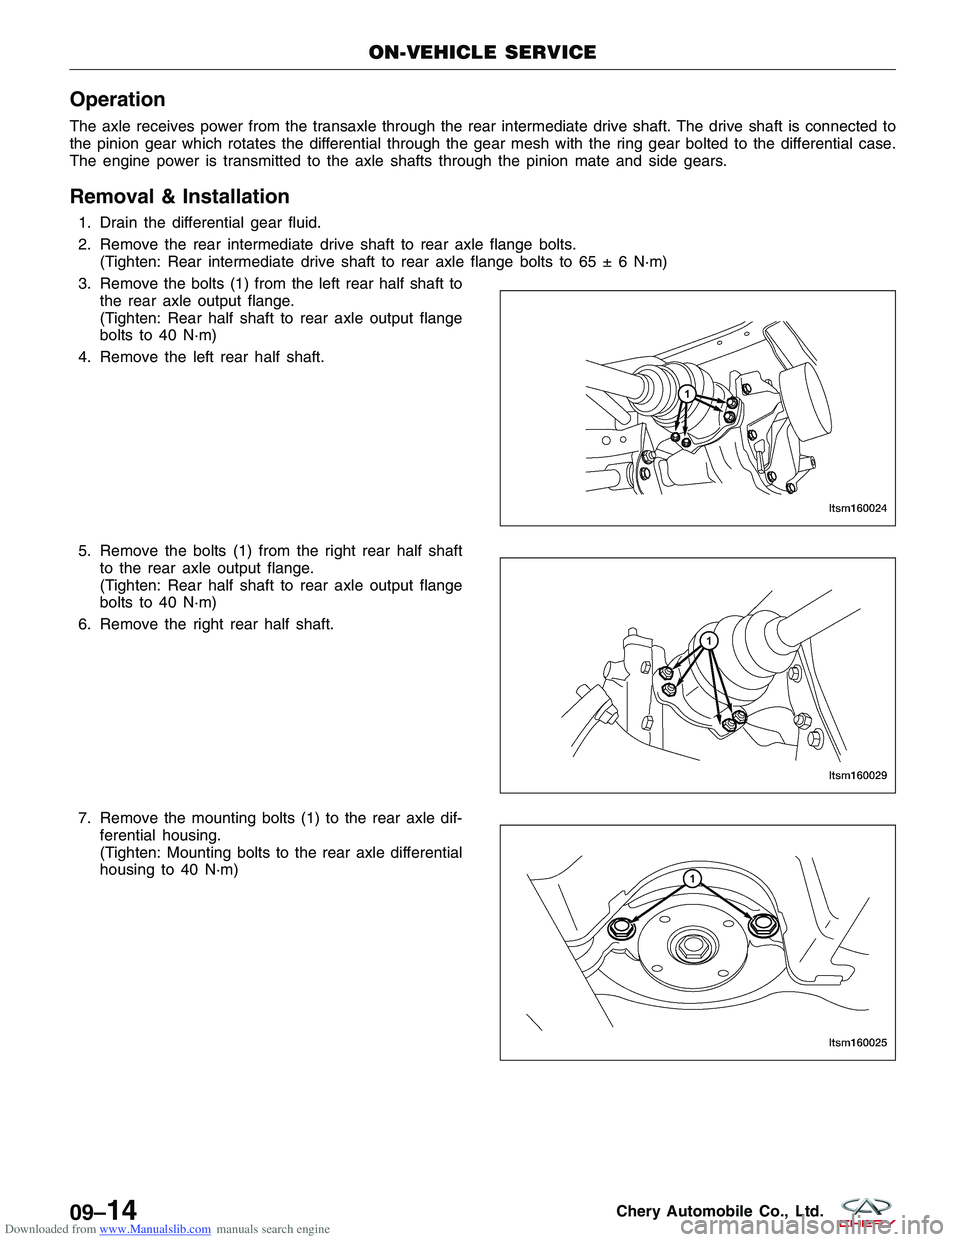
3. Remove the bolts (1) from the left rear half shaft to the rear axle output flange.
(Tighten: Rear half shaft to rear axle output flange
bolts to 40 N·m)
4. Remove the left rear half shaft.
5. Remove the bolts (1) from the right rear half shaft to the rear axle output flange.
(Tighten: Rear half shaft to rear axle output flange
bolts to 40 N·m)
6. Remove the right rear half shaft.
7. Remove the mounting bolts (1) to the rear axle dif- ferential housing.
(Tighten: Mounting bolts to the rear axle differential
housing to 40 N·m)
ON-VEHICLE SERVICE
LTSM160024
LTSM160029
LTSM160025
09–14Chery Automobile Co., Ltd.