2009 BMW Z4 SDRIVE35I hardtop
[x] Cancel search: hardtopPage 96 of 248
Climate
94
Rear window defroster
The defroster switches off auto-
matically after a certain time or
when the hardtop is opened.
Temperature
To increase the temperature, turn
the rotary switch clockwise
towards red.
For a lower temperature, turn the
rotary switch counterc lockwise towards blue.
Defrosting windows and removing
condensation
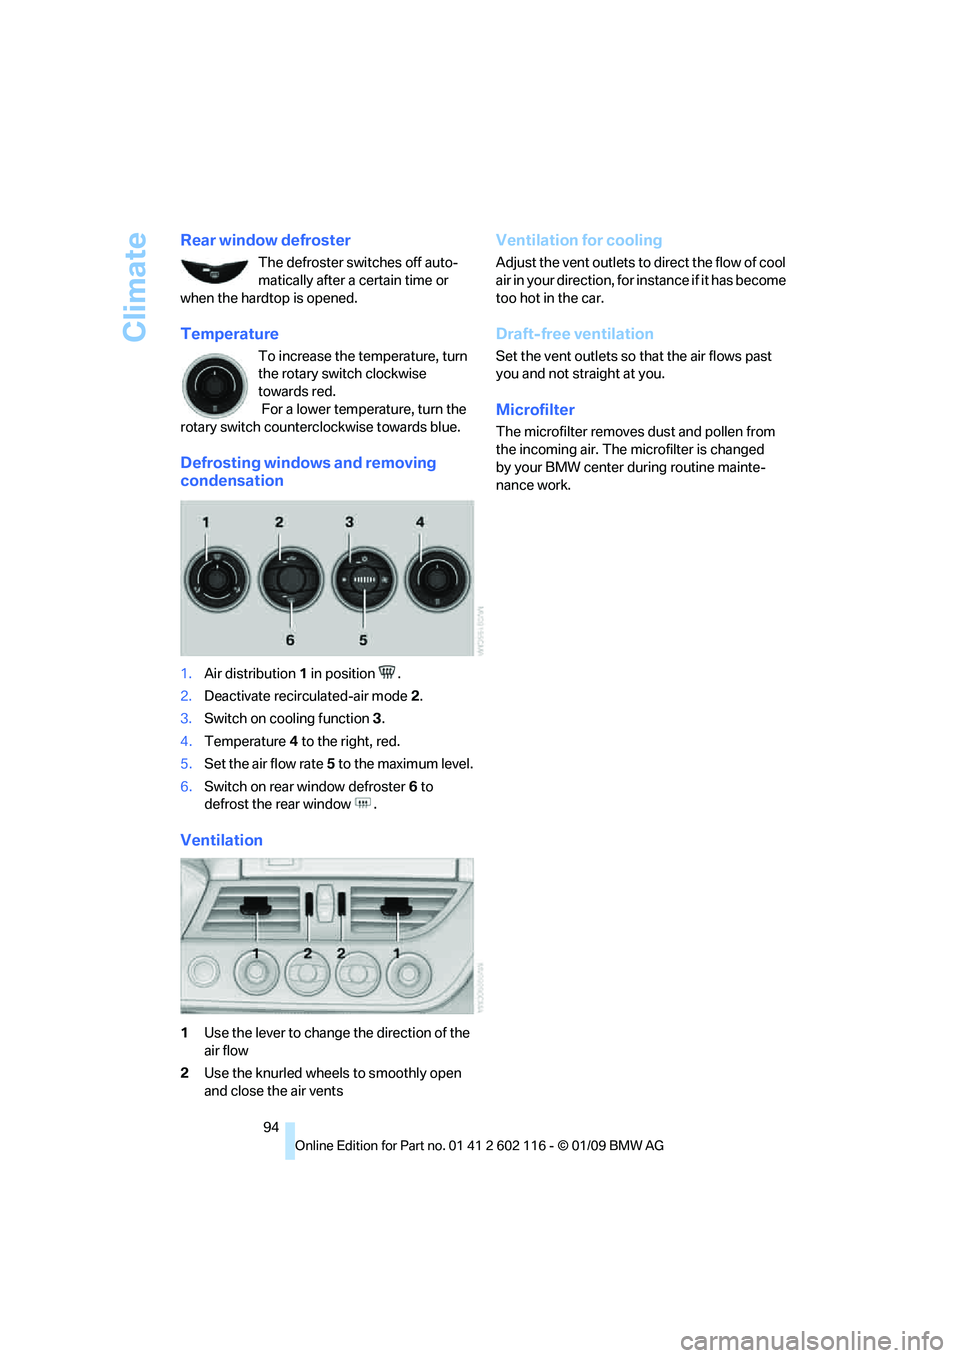
1.Air distribution 1 in position .
2. Deactivate recirc ulated-air mode 2.
3. Switch on cooling function 3.
4. Temperature 4 to the right, red.
5. Set the air flow rate 5 to the maximum level.
6. Switch on rear window defroster 6 to
defrost the rear window .
Ventilation
1 Use the lever to change the direction of the
air flow
2 Use the knurled wheels to smoothly open
and close the air vents
Ventilation for cooling
Adjust the vent outlets to direct the flow of cool
air in your direction, for instance if it has become
too hot in the car.
Draft-free ventilation
Set the vent outlets so that the air flows past
you and not straight at you.
Microfilter
The microfilter removes dust and pollen from
the incoming air. The microfilter is changed
by your BMW center during routine mainte-
nance work.
Page 98 of 248
Climate
96
Switching the cooling function
on and off
The cooling function cools and
dehumidifies the incoming air
before reheating it as required,
according to the temperature set-
ting. This function is only available while the
engine is running.
The cooling function he lps prevent condensa-
tion on the windows or removes it quickly.
Depending on the weathe r, the windshield may
fog over briefly when the engine is started.
The cooling function is automatically switched
on along with the AUTO program.
Maximum cooling
Maximum cooling is achieved most
quickly at outside temperatures
above 32 7/06 and when the
engine is running.
The automatic climate control goes into recir-
culated-air mode at the lowest temperature. Air
flows at maximum rate from the vents for the
upper body area. You should therefore open the
vents for maximum cooling.
AUTO program
The AUTO program auto matically adjusts the
air distribution to the windshield and side win-
dows, towards the upper bo dy area, and into the
footwell and knee area.
The air flow rate and air distribution, in addition
to your temperature specifications, will be
adapted to outside influenc es as a result of sea-
sonal changes, e.g. sunlight or window conden-
sation.
The cooling is switched on automatically with
the AUTO program.
Switching on/off
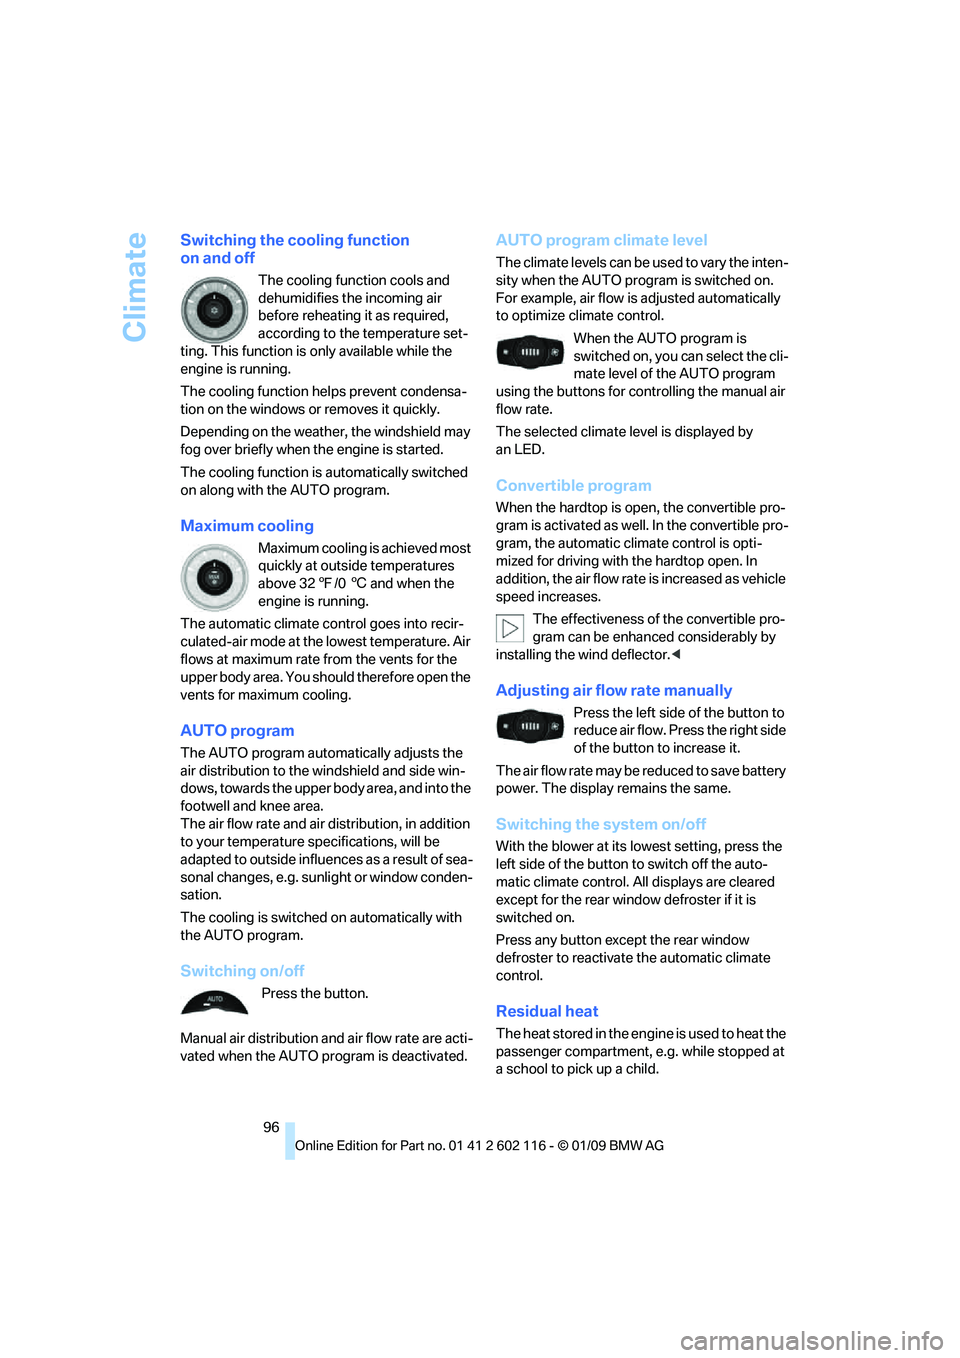
Press the button.
Manual air distribution and air flow rate are acti-
vated when the AUTO program is deactivated.
AUTO program climate level
The climate levels can be used to vary the inten-
sity when the AUTO program is switched on.
For example, air flow is adjusted automatically
to optimize climate control.
When the AUTO program is
switched on, you ca n select the cli-
mate level of the AUTO program
using the buttons for controlling the manual air
flow rate.
The selected climate le vel is displayed by
an LED.
Convertible program
When the hardtop is open, the convertible pro-
gram is activated as well. In the convertible pro-
gram, the automatic climate control is opti-
mized for driving with the hardtop open. In
addition, the air flow rate is increased as vehicle
speed increases.
The effectiveness of the convertible pro-
gram can be enhanced considerably by
installing the wind deflector. <
Adjusting air flow rate manually
Press the left side of the button to
reduce air flow. Press the right side
of the button to increase it.
The air flow rate may be reduced to save battery
power. The display remains the same.
Switching the system on/off
With the blower at its lowest setting, press the
left side of the button to switch off the auto-
matic climate control. All displays are cleared
except for the rear window defroster if it is
switched on.
Press any button except the rear window
defroster to reactivate the automatic climate
control.
Residual heat
T h e h e a t s t o r e d i n t h e e n g i n e i s u s e d t o h e a t t h e
passenger compartment, e.g. while stopped at
a school to pick up a child.
Page 99 of 248

Controls
97Reference
At a glance
Driving tips
Communications
Navigation
Entertainment
Mobility
This function can be switched on
using the right button under the
following conditions:
> Up to 15 minutes after the engine has been
switched off
> Radio readiness is switched on.
> While the engine is at operating
temperature
> As long as battery voltage is sufficient
> At an outside temperature below
777/25 6
The middle LED is lit when the function is on.
Automatic recirculated-air control
AUC/recirculated-air mode
Switch on the desired operating
mode by pressing this button
repeatedly:
> LED off: outside air flows in continuously.
> Left-hand LED on, AUC mode: a sensor
detects pollutants in th e outside air. If nec-
essary, the system blocks the supply of out-
side air and recirculates the inside air. As
soon as the concentration of pollutants in
the outside air has decreased sufficiently,
the system automatically switches back to
outside air supply.
> Right-hand LED on, recirculated-air mode:
the supply of outside air is permanently
shut off. The system then recirculates the
air currently within the vehicle.
If condensation starts to form on the
inside window surfaces during operation
in the recirculated-air mode, you should switch
it off while also increasing the air flow rate as
required.
The recirculated-air mode should not be used
over an extended period of time, otherwise the
air quality inside the ca r will deteriorate contin-
uously. <
Defrosting windows and removing
condensation
Quickly removes ice and conden-
sation from the windshield and
front side windows.
Switch on the cooling function as well.
Rear window defroster
The defroster switches off auto-
matically after a certain time or
when the hardtop is opened.
Ventilation
1 Lever for changing the direction of the
air flow.
2 Knurled wheels for opening and closing the
air vents.
3 Knurled wheel for adju sting the amount of
cool air from the vents to the upper body
area. In this way you can optimize the air
temperature for the upper body area.
Ventilation for cooling
Adjust the vent outlets to direct the flow of cool
air in your direction, for instance if it has become
too hot in the car.
Draft-free ventilation
Set the vent outlets so that the air flows past
you and not straight at you.
Microfilter/activated-charcoal filter
The microfilter traps dust and pollen in the
incoming air. The activated-charcoal filter pro-
vides additional protection by filtering gaseous
pollutants from the outs ide air. Your BMW cen-
ter replaces this combined filter during routine
maintenance.
Page 103 of 248
Controls
101Reference
At a glance
Driving tips
Communications
Navigation
Entertainment
Mobility
Calibrating the digital compass
The digital compass must be calibrated in the
following situations:
> An incorrect compass direction is shown.
> The compass direction shown does not
change although the direction of
travel does.
> Not all compass directions are shown.
Procedure
1.Make sure that no la rge metal objects or
overhead power lines are in the vicinity of
your vehicle and that you have enough
space to drive in a circle.
2. Set the currently valid compass zone.
3. ensure that the retractable hardtop is fully
closed.
4. Press the adjustment button for approx.
6-7 seconds to call up C. Then drive in at
least one full circle at a speed of no more
than 4mph or 7km/h.
If calibration is successful, the display
changes from C to a compass direction.
5. Open the retractable hardtop fully and
repeat step 4.
Setting right-hand/left-hand steering
Your digital compass is factory-set to right-
hand or left-hand steeri ng, in accordance with
your vehicle.
Setting the language
You can set the language of the display:
Press the adjustment button for approx.
12-13 seconds. Briefly press the adjustment
button again to switch between English, "E",
and German, "O".
The setting is automatically saved after approx.
10 seconds.
Glove compartment
Opening
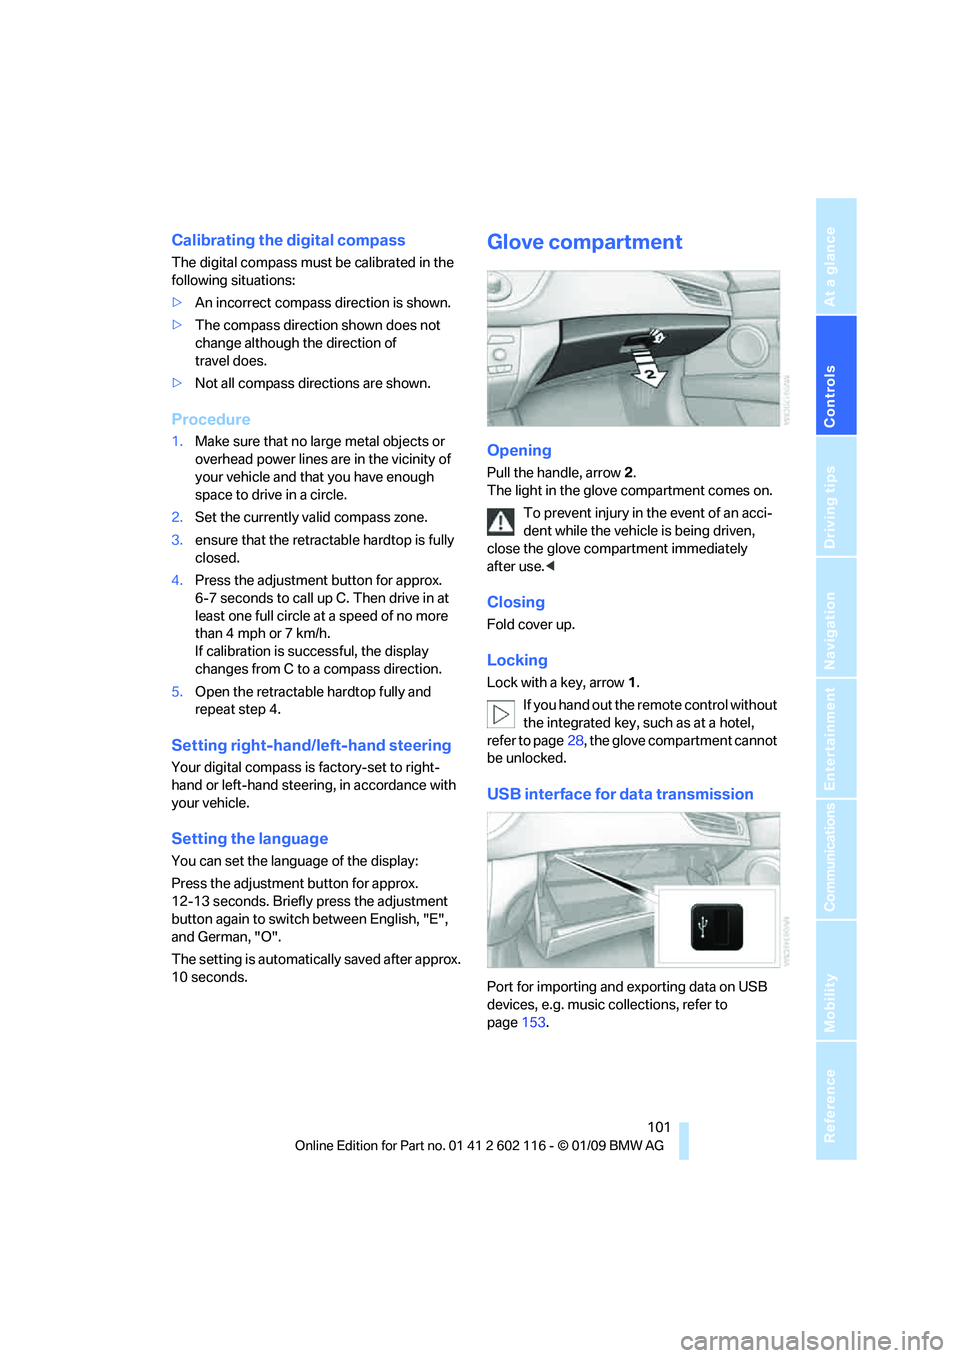
Pull the handle, arrow 2.
The light in the glove compartment comes on.
To prevent injury in the event of an acci-
dent while the vehicle is being driven,
close the glove compartment immediately
after use. <
Closing
Fold cover up.
Locking
Lock with a key, arrow 1.
If you hand out the remote control without
the integrated key, such as at a hotel,
refer to page 28, the glove compartment cannot
be unlocked.
USB interface for data transmission
Port for importing and exporting data on USB
devices, e.g. music collections, refer to
page 153.
Page 107 of 248
Controls
105Reference
At a glance
Driving tips
Communications
Navigation
Entertainment
Mobility
Enlarging the cargo bay
When the hardtop is closed you can enlarge the
cargo bay:
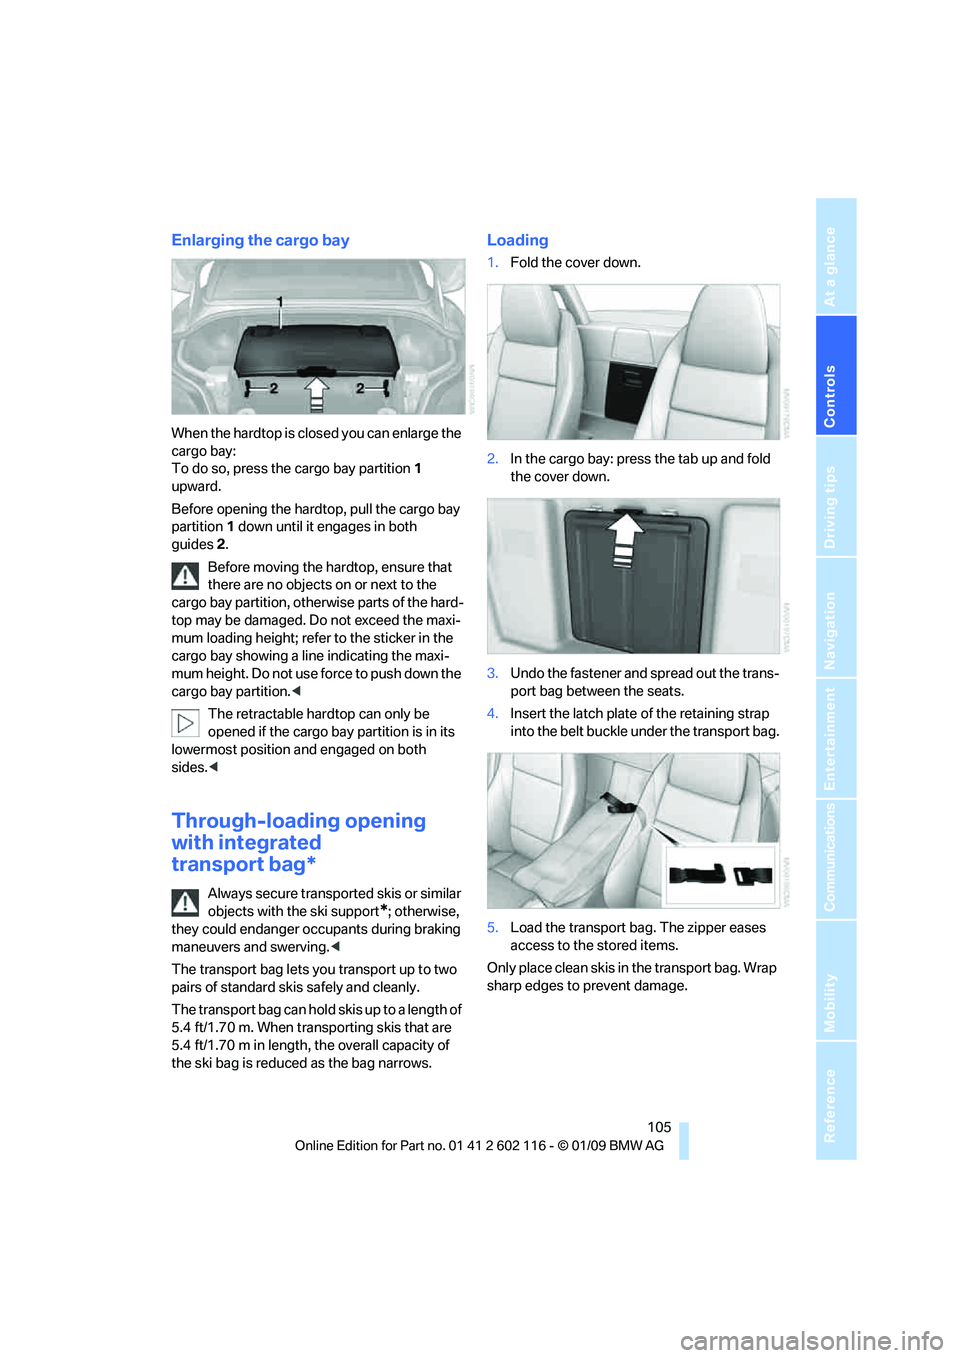
To do so, press the cargo bay partition 1
upward.
Before opening the hardtop, pull the cargo bay
partition 1 down until it engages in both
guides 2.
Before moving the hardtop, ensure that
there are no objects on or next to the
cargo bay partition, othe rwise parts of the hard-
top may be damaged. Do not exceed the maxi-
mum loading height; refer to the sticker in the
cargo bay showing a line indicating the maxi-
mum height. Do not use fo rce to push down the
cargo bay partition. <
The retractable hard top can only be
opened if the cargo bay partition is in its
lowermost position and engaged on both
sides. <
Through-loading opening
with integrated
transport bag*
Always secure transported skis or similar
objects with the ski support
*; otherwise,
they could endanger occupants during braking
maneuvers and swerving. <
The transport bag lets you transport up to two
pairs of standard skis safely and cleanly.
The transport bag can hold skis up to a length of
5.4 ft/1.70 m. When transporting skis that are
5.4 ft/1.70 m in length, th e overall capacity of
the ski bag is reduced as the bag narrows.
Loading
1. Fold the cover down.
2. In the cargo bay: press the tab up and fold
the cover down.
3. Undo the fastener and spread out the trans-
port bag between the seats.
4. Insert the latch plate of the retaining strap
into the belt buckle under the transport bag.
5. Load the transport bag. The zipper eases
access to the stored items.
Only place clean skis in the transport bag. Wrap
sharp edges to prevent damage.
Page 116 of 248
Things to remember when driving
114
Load
The permissible load is the sum of the occu-
pants' weights and the weight of the cargo. The
greater the weight of the occupants, the less
cargo/luggage can be transported.
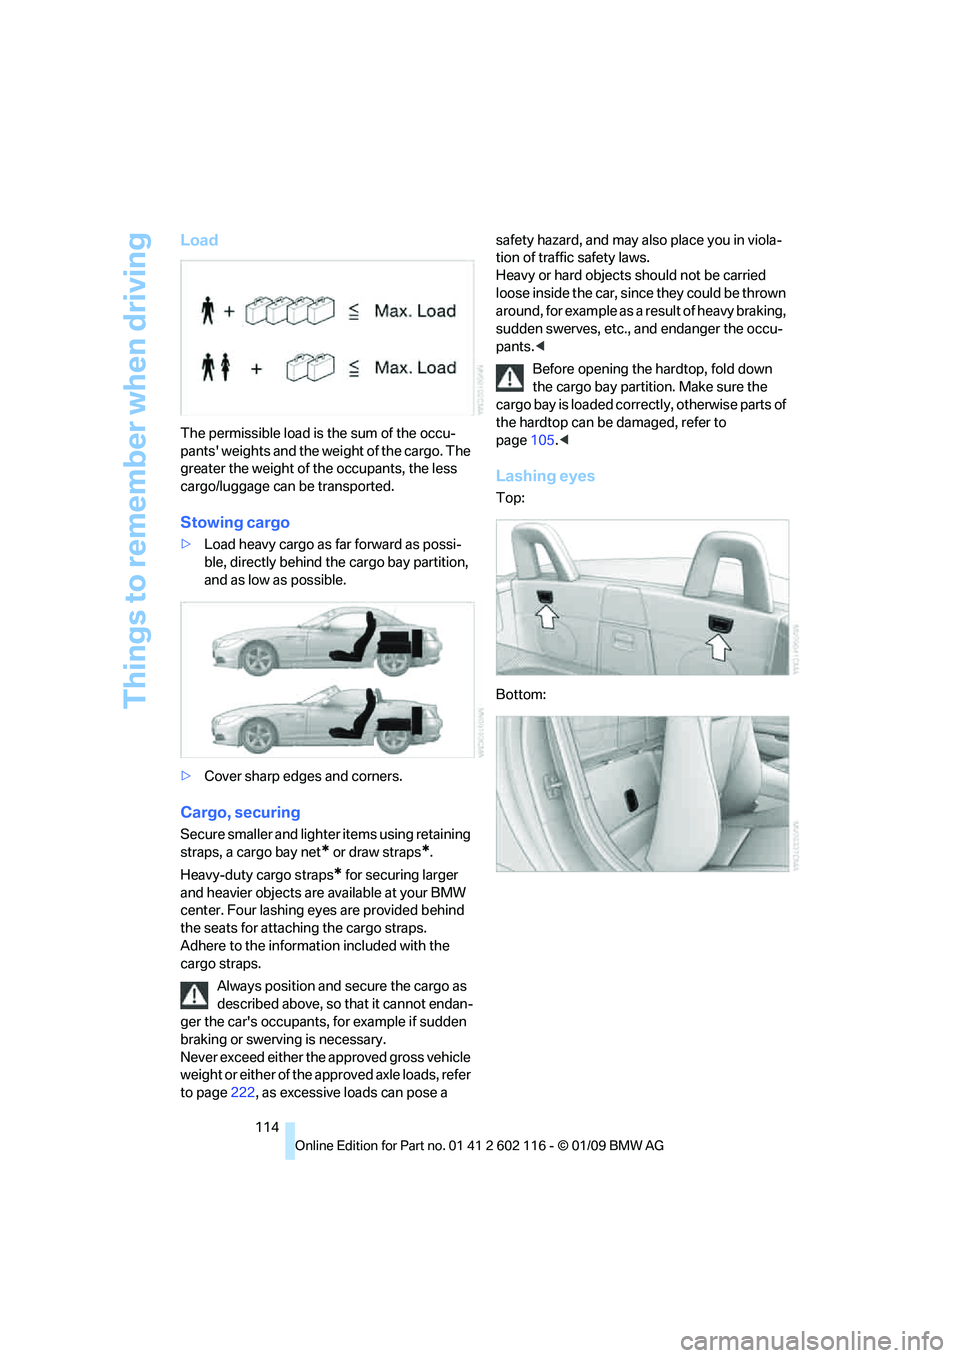
Stowing cargo
>Load heavy cargo as far forward as possi-
ble, directly behind the cargo bay partition,
and as low as possible.
> Cover sharp edges and corners.
Cargo, securing
Secure smaller and lighter items using retaining
straps, a cargo bay net
* or draw straps*.
Heavy-duty cargo straps
* for securing larger
and heavier objects are available at your BMW
center. Four lashing eyes are provided behind
the seats for attaching the cargo straps.
Adhere to the informat ion included with the
cargo straps.
Always position and secure the cargo as
described above, so that it cannot endan-
ger the car's occupants, for example if sudden
braking or swerving is necessary.
Never exceed either the approved gross vehicle
weight or either of the a pproved axle loads, refer
to page 222, as excessive loads can pose a safety hazard, and may al
so place you in viola-
tion of traffic safety laws.
Heavy or hard objects should not be carried
loose inside the car, since they could be thrown
around, for example as a result of heavy braking,
sudden swerves, etc., and endanger the occu-
pants. <
Before opening the hardtop, fold down
the cargo bay partition. Make sure the
cargo bay is loaded correctly, otherwise parts of
the hardtop can be damaged, refer to
page 105.<
Lashing eyes
Top:
Bottom:
Page 207 of 248

Mobility
205Reference
At a glance
Controls
Driving tips
Communications
Navigation
Entertainment
7-gear sport automatic transmission
with dual clutch
Before driving into an automatic car wash, per-
form the following steps to ensure that the vehi-
cle can roll:
1. Insert the remote control, even with conve-
nient access, into the ignition lock.
2. Engage transmission position N.
3. Release the parking brake.
4. Switch off the engine.
5. Leave the remote control in the ignition lock
so that the vehicle can roll.
Transmission position P is engaged:
> Automatically after approx. 30 minutes
> When you take the remo te control out of the
ignition lock
Steam jets / high -pressure washers
When using steam jets or high-pressure
washers, ensure that you maintain suffi-
cient clearance to the vehicle and do not exceed
a temperature of 60°C.
Insufficient clearance or excessive pressure or
temperature can lead to component damage or
water penetration. Follow the operating instruc-
tions of the high-pressure washer. <
When using high-pressure washers, do
not spray against the seals of the retract-
able hardtop, the sensor s and the cameras, e.g.
of the Park Distance Control or Rear View Cam-
era, for an extended period and maintain a dis-
tance of at least 12 in/30 cm. <
Manual car wash
When washing the vehicle by hand, use large
quantities of water and car shampoo if neces-
sary. Clean the vehicle with a sponge or wash-
ing brush, applying light pressure only.
Before cleaning the windshield, deacti-
vate the rain sensor or switch off the igni-
tion to prevent unintent ional activation of the
wipers. <
Observe local regulations pertaining to
washing vehicles by hand. <
Headlamps
Do not rub them dry and do not use abrasive or
corrosive cleaning agents.
Remove contamination, such as insects, by
soaking with shampoo or insect remover and
then rinsing with plenty of water.
Thaw ice with a windshield de-icer and do not
use an ice scraper.
Windows
Clean the inside and outside surfaces of the
windows and the mirrors with window cleaner.
Do not clean the mirrors with cleaners
containing quartz. <
Retractable hardtop
Proceed as you would in a normal car wash.
When you open a we t hardtop, water
drops may run into the cargo bay. If nec-
essary, remove items from the cargo bay
beforehand to avoid water stains or soiling. <
Paintwork care
Regular care contributes to value retention and
protects the paintwork against the long-term
effects of damaging substances.
Region-specific environmental influences can
damage the vehicle paintwork. Therefore, it is
important to adapt the frequency and scope of
car care accordingly.
Immediately remove aggressive materials such
as spilled fuel, oil, grease, brake fluid, tree sap or
bird droppings to prevent damage to the
paintwork.
Repairing paintwork damage
Immediately repair scratches or similar
damage, such as that caused by stones
hitting the vehicle, wher e necessary to prevent
rusting. <
BMW recommends having paintwork damage
repaired by a profession al paint repair work-
shop according to BMW specifications using
original BMW paint materials.
Page 234 of 248

Everything from A to Z
232
Care
204
– automatic car washes 204
– care products 204
– carpets 206
– CD/DVD drives 207
– chrome parts 206
– displays 207
– exterior 204
– fine wood parts 207
– headlamps 205
– high-pressure washer 205
– interior 206
– leather 206
– light-alloy wheels 206
– paintwork 205
– plastic parts 207
– retractable hardtop 205
– rubber seals 206
– safety belts 207
– sensors and cameras 207
– upholstery and cloth trim 206
– washing the car manually 205
– windows 205
Cargo, securing 114
Cargo bay
– capacity 222
– convenient access 35
– lamp, refer to Interior lamps 90
– opening from inside 33
– opening from outside 33
Cargo loading
– securing cargo 114
– stowing cargo 114
– vehicle 113
Car jack
– jacking points 211
Car key, refer to Integrated
key/remote control 28
Car phone
– installation location, refer to
Center armrest 102
– refer to separate Owner's Manual
Car phone, refer to Telephone 164
Car radio, refer to Radio 141Car shampoo
207
Car wash 113
– with convenient access 36
Car wash, refer to the Caring for your vehicle brochure
Catalytic converter, refer to Hot exhaust system 111
CBS Condition Based
Service 202
CD, audio playback 146
CD/DVD changer 14
6
– controls 138
– fast forward/reverse 148
– random sequence 147
– switching on/off 138
– tone control 138
– volume 138
CD/DVD player 146
– controls 138
– fast forward/reverse 148
– random sequence 147
– switching on/off 138
– tone control 138
– volume 138
CD changer
– selecting a track 146
CD player
– selecting a track 146
Center armrest 102
Center brake lamp
– replacing bulb 211
Center console, refer to Around the center
console 14
Central locking
– from inside 32
– from outside 29
Central locking system 29
– convenient access 35
– setting unlocking
characteristics 29
Changes, technical, refer to For your own safety 5
Changing bulbs, refer to Lamps and bulbs 208
Changing the measurement
units on the Control
Display 68
Changing wheels 211Chassis number, refer to
Engine compartment 198
Check Control 73
Child-restraint systems 48
Child seats, refer to
Transporting children
safely 48
Chrome parts 207
Chrome polish 207
Cigarette lighter, refer to Lighter 104
Cleaning headlamps 60
– washer fluid 61
Cleaning your BMW, refer to Care 204
Clock 64
– 12h/24h mode 72
– setting the time and date 72
– setting time 71
Closing
– from inside 32
– from outside 29
Cockpit 10
Cold start, refer to Starting
the
engine 51
Combined instrument, refer to Instrument cluster 12
Comfort access, refer to
Convenient access 35
Comfort area, refer to Around the center console 14
Compartment for remote control, refer to
Ignition lock 50
Compass 100
Computer 65
– displays on Control
Display 66
Computer, refer to iDrive 16
Concierge service 179
Condensation, refer to When the vehicle is parked 112
Condition Based Service
CBS 202
Configuring settings, refer to Personal Profile 28
Confirmation signals for locking/unlocking the
vehicle 31