2009 BMW Z4 SDRIVE35I roof
[x] Cancel search: roofPage 40 of 248
Opening and closing
38
Retractable hardtop
The retractable hardtop combines reliable
weather protection with simple and convenient
operation.
Please note:
> It is advisable that yo u close the retractable
hardtop when you park the vehicle. Not only
does the closed hardtop protect the vehicle
interior against unanticipated weather dam-
age, it also offers theft protection. However,
even when the hardtop is closed, valuables
should only be stored in the locked
cargo bay.
> Do not attach roof rack systems to the
retractable hardtop, and in particular do not
attach magnetic racks.
> Do not attach rack sy stems to the luggage
compartment lid, and in particular do not
attach magnetic racks.
> When the retractable hardtop is operated,
the luggage compartment lid swings back
and up. Before operat ing the retractable
hardtop, ensure that there is enough clear-
ance, e.g. in tight parking spaces.
> If you open the hardtop while it is wet, e.g.
after driving in the rain, water may drip into
the cargo bay. If necessary, remove items
from the cargo bay beforehand to avoid
water stains or soiling.
Do not place any objects on the retract-
able hardtop or on the luggage compart-
ment lid, otherwise they could fall during move-
ments of the retracta ble hardtop and cause
damage or injury.
Driving when the hardtop is not fully opened or
not fully closed may result in damage or injury.
Do not reach into th e mechanism while the
hardtop is opening or closing. Keep children
away from the swiveling area of the retractable
hardtop. <
The retractabl e hardtop cannot be moved
at temperatures below + 14 7/–10 6. A
message appears on the Control Display.
opened and closed when the vehicle is
stationary. To avoid causing damage, do not
drive off until the hardtop has stopped
moving. <
Before opening and closing
Do not let the hardtop stop in an interme-
diate position when opening or closing.
Otherwise, there is the danger of personal injury
since the hardtop will be lowered automatically
after a few minutes. <
> Comply with the safety precautions
described above.
> Ensure that the luggage compartment lid is
closed.
> The vehicle should be pa rked on fairly level
ground. Excessive angle is indicated by
alamp.
> Fold down the cargo bay partition and make
sure it engages, refer to the instructions
below.
> Do not place any object s next to or on the
cargo bay partition and close the storage
compartment on the left side of the
cargo bay.
> Do not exceed the maximum loading height
under the cargo bay partition; refer to the
label in the cargo bay showing a line indicat-
ing the maximum height.
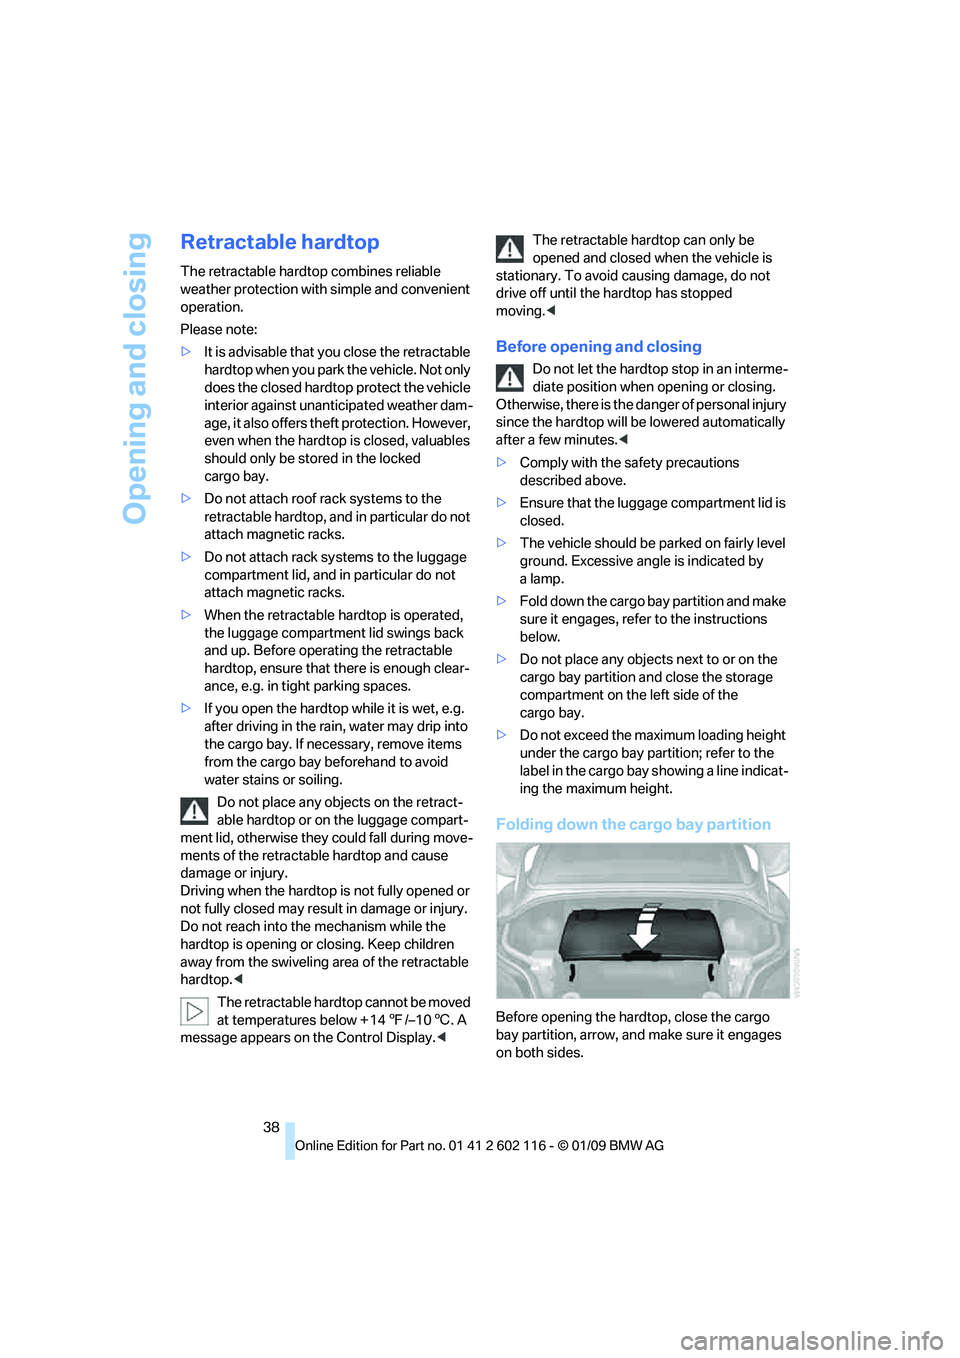
Folding down the cargo bay partition
Before opening the hardtop, close the cargo
bay partition, arrow, an d make sure it engages
on both sides.
Page 105 of 248
Controls
103Reference
At a glance
Driving tips
Communications
Navigation
Entertainment
Mobility
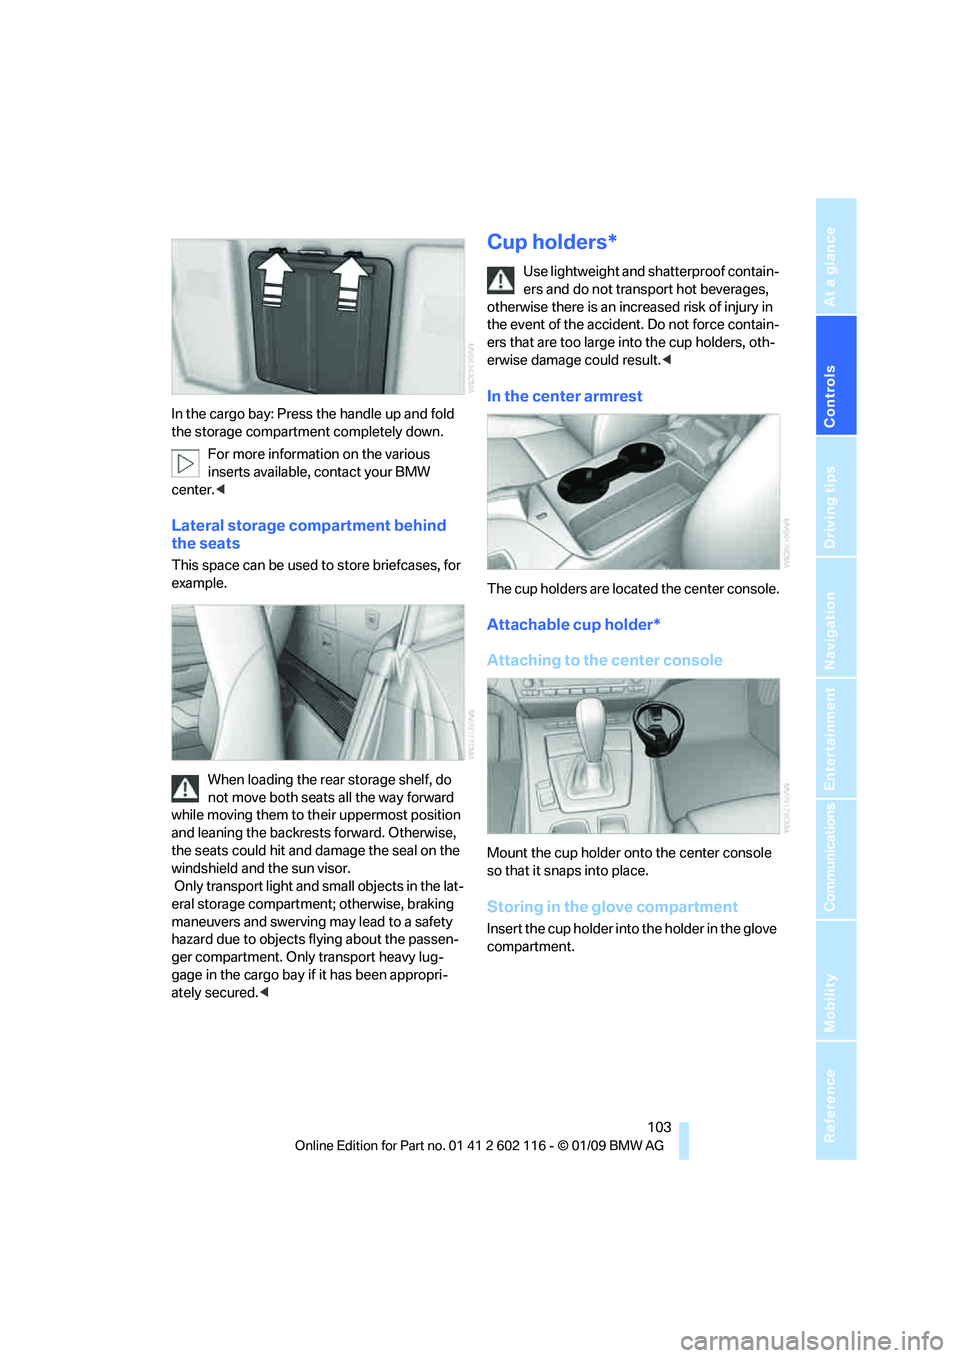
In the cargo bay: Press the handle up and fold
the storage compartment completely down.For more information on the various
inserts available, contact your BMW
center. <
Lateral storage compartment behind
the seats
This space can be used to store briefcases, for
example.
When loading the rear storage shelf, do
not move both seats all the way forward
while moving them to th eir uppermost position
and leaning the backrests forward. Otherwise,
the seats could hit and damage the seal on the
windshield and the sun visor.
Only transport light and small objects in the lat-
eral storage compartment; otherwise, braking
maneuvers and swerving may lead to a safety
hazard due to objects flying about the passen-
ger compartment. Only transport heavy lug-
gage in the cargo bay if it has been appropri-
ately secured. <
Cup holders*
Use lightweight and shatterproof contain-
ers and do not transp ort hot beverages,
otherwise there is an increased risk of injury in
the event of the accident. Do not force contain-
ers that are too large in to the cup holders, oth-
erwise damage could result. <
In the center armrest
The cup holders are located the center console.
Attachable cup holder*
Attaching to the center console
Mount the cup holder onto the center console
so that it snaps into place.
Storing in the glove compartment
Insert the cup holder into the holder in the glove
compartment.
Page 112 of 248
Things to remember when driving
110
Things to remember when driving
Break-in period
Moving parts need breaking-in time to adjust to
each other. Please follow the instructions below
in order to achieve the optimal service life and
economy of operation for your vehicle.
Engine and differential
Always obey all official speed limits.
Up to 1,200 miles/2,000 km
Drive at varying engine and road speeds, but do
not exceed an engine speed of 4,500 rpm or a
road speed of 100 mph/160 km/h.
Do not drive with full-throttle operation, and do
not use the transmission 's kick-down mode or
Launch Control.
After driving 1,200 miles/2,000 km
Engine and vehicle speeds can be gradually
increased.
Tires
Due to technical factors associated with their
manufacture, tires do no t achieve their full trac-
tion potential until afte r an initial break-in
period. Therefore, drive cautiously during the
first 200 miles/300 km.
Brake system
Brakes require an initial break-in period of
approx. 300 miles/500 km to achieve optimized
contact and wear patterns between brake pads
and rotors. Drive cautiously during this break-in
period.
Clutch
The function of the clut ch reaches its optimal
level only after a distan ce driven of approx.
300 miles/500 km. During this break-in period,
engage the clutch gently.
Following part replacement
The same break-in procedures should be
observed if any of the components mentioned
above have to be renewe d in the course of the
vehicle's operating life.
Saving fuel
The fuel consumption of your vehicle depends
on several factors. You can lower fuel consump-
tion and the environmental impact by taking
certain measures, adjusting your driving style
and having the vehicle serviced regularly.
Remove any unneeded cargo
Additional weight incr eases fuel consumption.
Remove any mounted parts after you
have finished using them
Remove additional mirrors and the luggage rack
when they are no longer in use. Mounted parts
affect the vehicle's aerodynamics and increase
fuel consumption.
Close both windows
An open glass roof or window causes higher air
resistance and thus increases fuel con-
sumption.
Check tire inflation pressure regularly
Check the tire inflation pr essure at least twice a
month and before embarking on a long journey,
and correct it if necessary.
Low tire inflation pressure causes higher rolling
resistance and thus increases fuel consumption
and tire wear.
Set off immediately
Do not let the engine wa rm up while the car is
still standing, but set off immediately at moder-
ate engine speed. This is the fastest way for the
cold engine to reach its operating temperature.
Page 176 of 248
Telephone
174
To read and dial entries:
You can have all entrie
s in your voice phone
book read aloud in the or der in which they were
entered and select a specific entry to establish a
connection:
Selecting an entry
The connection to the phone number of the
selected entry is established.
Redialing
To redial the phone number dialed last:
Notes
Important for voice commands
For voice commands, bear in mind the
following:
> Pronounce the commands smoothly and at
normal volume, avoiding excessive empha-
ses and pauses.
> Keep the doors, windows and glass roof
closed to prevent interference from outside
noise.
> Avoid ambient noise in the vehicle while
speaking.
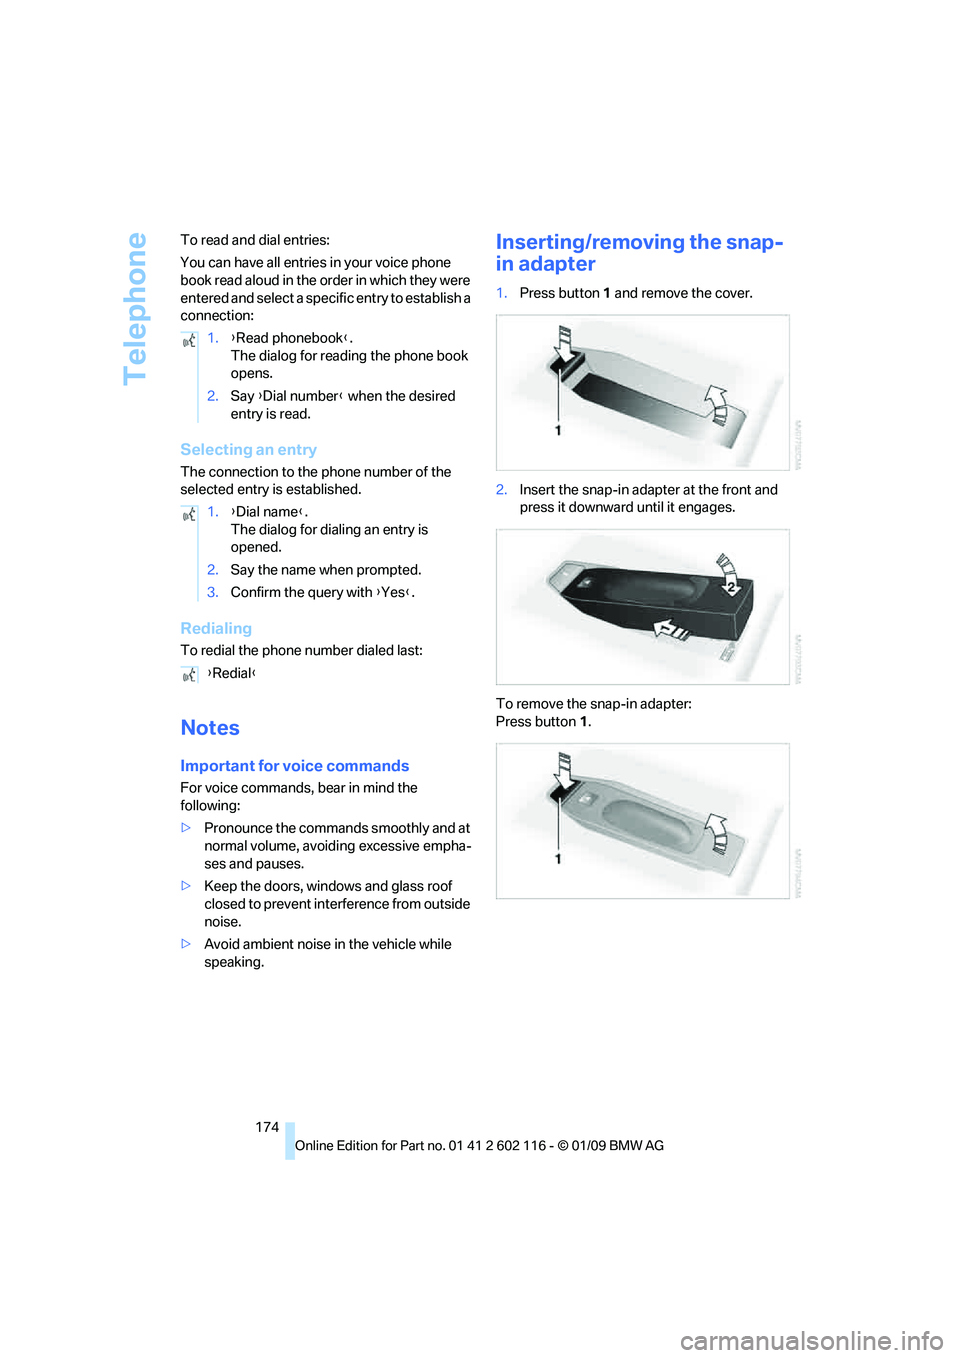
Inserting/removing the snap-
in adapter
1.Press button 1 and remove the cover.
2. Insert the snap-in adapter at the front and
press it downward until it engages.
To remove the snap-in adapter:
Press button 1.
1.
{Read phonebook}.
The dialog for reading the phone book
opens.
2. Say {Dial number } when the desired
entry is read.
1. {Dial name }.
The dialog for dialing an entry is
opened.
2. Say the name when prompted.
3. Confirm the query with { Yes}.
{ Redial }
Page 242 of 248
Everything from A to Z
240
Roadside parking lamps
90
Roadworthiness test, refer to
Service requirements 69
Roof load capacity 222
Rope, refer to Tow-starting,
towing away 216
Rotary/pushbutton, refer to iDrive 16
Route 128,129
– bypassing sections 129
– changing 128
– changing criteria 128
– displaying streets or towns/
cities 129
– map display 130
– selecting 128
Route instructions, refer to Destination guidance
through voice
instructions 129
Route map, refer to Map display 130
Route section, changing 129
Route selection 128
RSC Runflat System
Component, refer to Run-
Flat Tires 195
Runflat System Component
RSC, refer to Run-Flat
Tires 195
Run-Flat Tires 195
– continuing driving with a damaged tire 82
– flat tire 81
– Flat Tire Monitor 81
– new tires 195
– replacing 195
– tire inflation pressure 190
– winter tires 196
S
Safety-belt height
adjustment 45
Safety belts 44
– damage 45
– indicator/warning lamp 45
– reminder 45
– sitting safely 41 Safety systems
– airbags
85
– Antilock Brake System ABS 78
– brake system 78
– driving stability control systems 78
– Dynamic Stability Control
DSC 78
– safety belts 44
Safety tires, refer to Run-Flat
Tires 195
Satellite radio 144
– enabling channel 144
– selecting channel 145
– storing channel 145
Saving fuel 110
Screen, refer to iDrive controls 16
Screw thread for tow fitting 215
SDARS, refer to Satellite
radio 144
Seat adjustment
– electric 42
– mechanical 42
Seat and mirror memory 43
Seat belt reminder, refer to
'Fasten safety belts'
reminder 45
Seat heating 43
Seats 41
– adjusting electrically 42
– adjusting the seats 42
– heating 43
– memory, refer to Seat and mirror memory 43
– saving a setting, refer to Seat and mirror memory 43
– sitting safely 41
Securing cargo 106
Securing the vehicle
– from inside 32
– from outside 29
Selecting new scale for navigation 130
Selector lever 56
– automatic transmission with Steptronic 54 Selector lever lock, refer to
Changing selector lever
positions, shiftlock 54
Selector lever positions
– automatic transmission with
Steptronic 54
Service, refer to Roadside Assistance 213
Ser
vice car, refer to Roadside
Assistance 213
Service data in the remote
control 202
Service Interval Display, refer
to Condition Based Service
CBS 202
Service Request 183
Service requirement display, refer to Condition Based
Service CBS 202
Service requirements 69
Services status 184
Servotronic 85
Settings
– changing on Control Display 75
– clock, 12h/24h mode 72
– DVD 149
– language 75
Settings and information 68
Shifting 57
Shifting, sport automatic
transmission 57
Shifting gears
– automatic transmission with
Steptronic 54
– manual transmission 53
Shiftlock
– automatic transmission, refer to Changing selector
lever positions 54
Shift paddles on steering wheel 57
Short commands for the voice
activation system 223
Short route in navigation, refer to Selecting route 128
Side airbags 85