2009 BMW Z4 SDRIVE35I warning light
[x] Cancel search: warning lightPage 15 of 248

At a glance
13Reference
Controls
Driving tips
Communications
Navigation
Entertainment
Mobility
Indicator and warning lamps
The concept
Indicator and warning lamps can light up in a
variety of combinations and colors.
Some lamps are checked for proper functioning
and thus come on briefly when the engine is
started or the ignition is switched on.
Explanatory text messages
Text messages at the upper edge of the Control
Display explain the meaning of the displayed
indicator and warning lamps.
You can call up more information, e.g. on the
cause of a malfunction and on how to respond,
via Check Control, refer to page 73.
In urgent cases, this information will be shown
as soon as the corresponding lamp comes on.
Indicator lamps without text messages
The following indicator lamps notify you that
certain functions are active:
High beams/headlamp flasher 90
Lamp flashes:
DSC or DTC is regulating the propul-
sive forces in order to maintain driving
stability 78
Parking brake set 52
Canada: Parking brake set 52
Engine malfunction with adverse
effect on exhaust emissions 203
Canada: Engine malfunction with
adverse effect on exhaust
emissions 203
Page 31 of 248

Controls
29Reference
At a glance
Driving tips
Communications
Navigation
Entertainment
Mobility
>Settings for the display on the Control Dis-
play and in the instrument cluster:
>12h/24h format of the clock, refer to
page 71
> Date format, refer to page 72
> Brightness of Control Display, refer to
page 76
> Language on the Control Display, refer
to page 75
> Units of measure for fuel consumption,
distance covered/remaining distances,
and temperature, refer to page 68
> Show visual warning for Park Distance Con-
trol PDC
*, refer to page 77
> Light settings:
>Welcome lamps, refer to page 88
> Pathway lighting, refer to page 89
> Daytime running lamps, refer to page 89
> Automatic climate control: activating/deac-
tivating AUTO program, cooling function
and automatic recirculated-air control, set-
ting temperature, air fl ow rate and distribu-
tion, refer to page 95 ff
> Entertainment:
>Audio volume, refer to page 138
> Tone control, refer to page 138
> Volume, refer to page 139
Central locking system
The concept
The central locking system functions when the
driver's door is closed.
The system simultaneously engages and
releases the locks on the following:
>Doors
> Luggage compartment lid
> Fuel filler door
> Center armrest
*
Operating from outside
>Via the remote control
> Using the door lock
> In cars with convenient access
*, via the
handles on the driver's and passenger's
doors
In addition, if the remo te control is used, the
welcome lamps, interior lamps and the door's
courtesy lamps
* are switched on or off. The
alarm system
* is also armed or disarmed.
For further details of the alarm system,
refer to
page 33.
Operating from inside
By means of the button for central locking, refer
to page 32.
In the event of a sufficiently severe accident, the
central locking system un locks automatically. In
addition, the hazard warning flashers and inte-
rior lamps come on.
Opening and closing:
Using the remote control
Persons or animals in a parked vehicle
could lock the doors from the inside. You
should therefore take the remote control with
you when you leave the ve hicle so that the latter
can be opened from outside. <
To operate the retractable hardtop with
the remote control, the doors and lug-
gage compartment lid must be closed and the
cargo bay partition must be folded down and
engaged on both sides. Refer also to page38.<
Unlocking
Press the button.
The interior lamps, the courtesy lamps
* and the
welcome lamps come on.
Setting unlocking characteristics
You can set whether only the driver's door or
the entire vehicle is to be unlocked when the
button is pressed for the first time.
Page 35 of 248

Controls
33Reference
At a glance
Driving tips
Communications
Navigation
Entertainment
Mobility
Opening from inside
Press the button: the luggage compartment lid
opens unless it has been locked.
Opening from outside
Press on the top half of the BMW emblem or, for
approx. 1 second, on the button of the
remote control:
The luggage compartment can be opened.
Emergency release*
Pull the lever in the cargo bay. The luggage
compartment lid is unlocked.
Closing
The handle recesses on the interior trim of the
luggage compartment lid make it easier to
pull down.
Make sure that the closing path of the
luggage compartment lid is clear, other-
wise injuries may result. <
To close the luggage compartment lid,
press it down lightly. The lid is closed
automatically. <
Alarm system*
The concept
The vehicle alarm system responds:
>When a door, the hood or the luggage com-
partment lid is opened
> To movements inside the vehicle: Interior
motion sensor, refer to page 34
> When the car's inclination changes, for
instance if an attempt is made to jack it up
and steal the wheels or to raise it prior to
towing away
> When there is an interruption in the power
supply from the battery
The alarm system signals unauthorized entry
attempts for a short time by means of:
> An acoustic alarm
> Switching on the haza rd warning flashers
> Flashing the high beams
Page 38 of 248
Opening and closing
36
Starting the engine
You can start the engine or switch on the igni-
tion when a remote control is inside the vehicle.
It is not necessary to insert a remote control into
the ignition swit ch, refer to page 50.
Switching off the engine in cars with
automatic transmission
The engine can only be switched off when the
selector lever is in position P, refer to page 52.
To switch the engine off when the selector lever
is in position N, the re mote control must be in
the ignition switch.
Before driving a vehicle with automatic
transmission in to a car wash
1.Insert the remote control into the ignition
switch.
2. Depress the brake.
3. Move the selector lever to position N.
4. Switch off the engine.
The vehicle can roll.
Malfunction
Convenient access may malfunction due to
local radio waves. If this happens, open or close
the vehicle via the buttons on the remote con-
trol or using the integr ated key. To start the
engine afterward, insert the remote control into
the ignition switch.
Warning lamps
The warning lamp in the instrument
cluster lights up when you attempt to
start the engine: the engine cannot
be started. The remote co ntrol is not inside the
vehicle or is malfunctioning. Take the remote
control with you inside the vehicle or have it
checked. If necessary, insert another remote
control into the ignition switch.
The warning lamp in the instrument
cluster lights up while the engine is
running: the remote control is no
longer inside the vehicle. After the engine is
switched off, the engine can only be restarted
within approx. 10 seconds. The indicator lamp in the instrument
cluster comes on and a message
appears on the Control Display:
replace the battery in the remote control.
Replacing the battery
The remote control for convenient access con-
tains a battery that will ne ed to be replaced from
time to time.
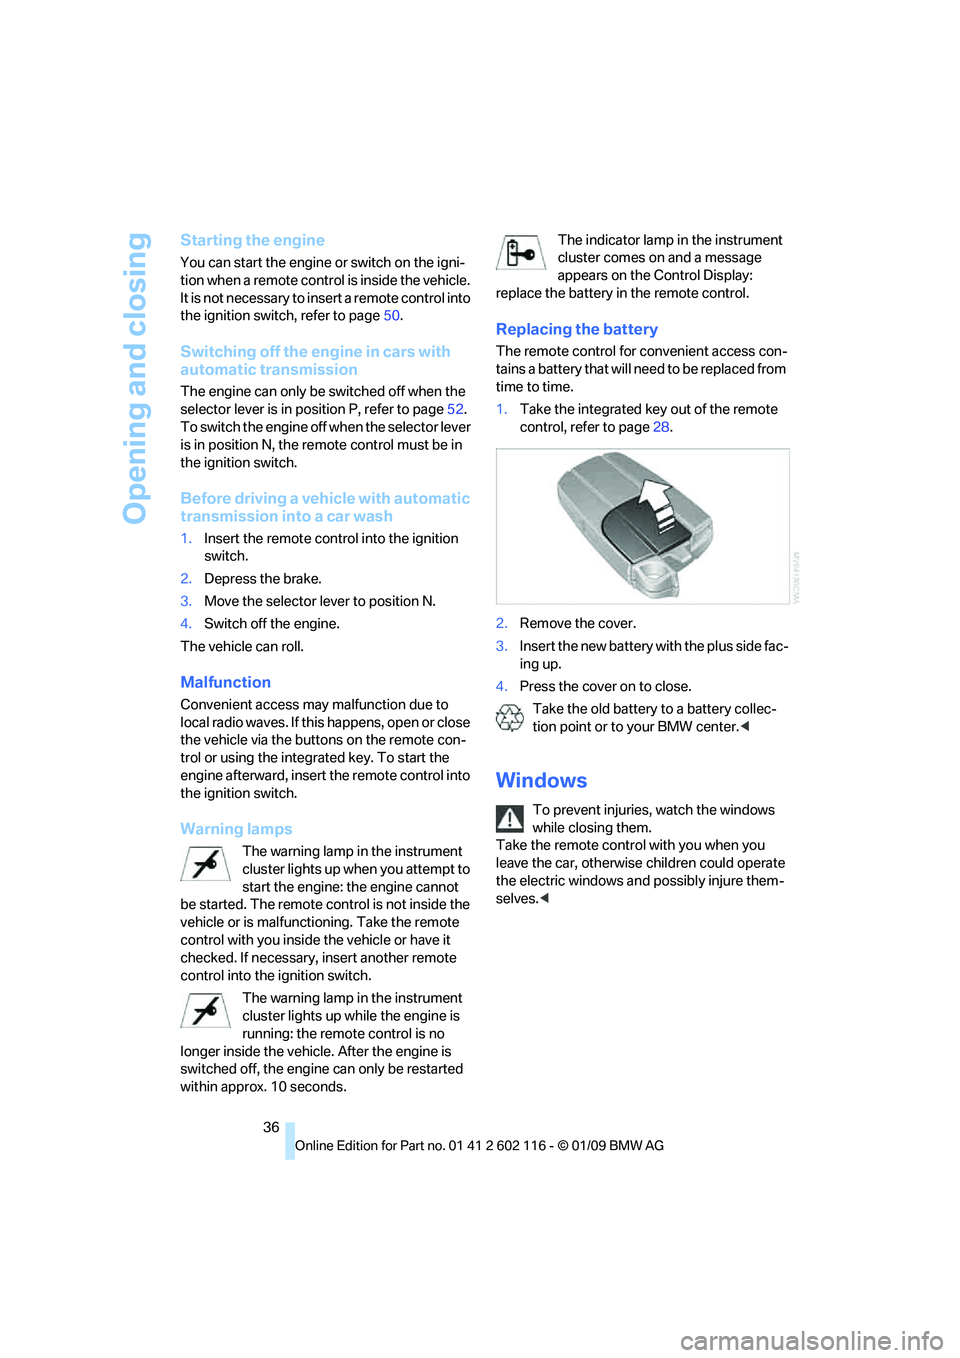
1. Take the integrated ke y out of the remote
control, refer to page 28.
2. Remove the cover.
3. Insert the new battery wi th the plus side fac-
ing up.
4. Press the cover on to close.
Take the old battery to a battery collec-
tion point or to your BMW center.<
Windows
To prevent injuries, watch the windows
while closing them.
Take the remote contro l with you when you
leave the car, otherwise children could operate
the electric windows and possibly injure them-
selves. <
Page 64 of 248
Driving
62
Maintaining current speed
Tap the lever, arrow 1, or pull it briefly, arrow 2.
The car's current speed is stored and main-
tained. It is displayed on the speedometer and
briefly in the instrument cluster.
On uphill gradients, it may prove impossible to
maintain the set speed if current engine power
output is insufficient. If the engine braking
effect is insufficient on downhill slopes, the sys-
tem will brake the vehicle slightly.
Increasing desired speed
Repeatedly press the lever to the resistance
point or beyond, arrow 1, until the desired
speed is reached.
> Each time the lever is pressed to the resis-
tance point, the desired speed is increased
by approx. 1 mph or 1 km/h.
> Each time the lever is pressed beyond the
resistance point, the desired speed is
increased by up to 5 mph or 10 km/h.
The system stores and maintains the speed.
Accelerating using the lever
Accelerating slightly:
Press the lever to the resistance point, arrow 1,
and hold until the desired speed is reached.
Accelerating significantly:
Press the lever beyond the resistance point,
arrow 1, and hold until the desired speed is
reached.
The vehicle accelerates without pressure on
the accelerator pedal. The system stores and
maintains the speed.
Decreasing speed
Repeatedly pull the lever to the resistance point
or beyond, arrow 2, until the desired speed is
displayed.
> Each time the lever is pulled to the resis-
tance point, the desired speed is decreased
by approx. 1 mph or 1 km/h.
> Each time the lever is pulled beyond the
resistance point, the desired speed is
reduced by up to 5 mph o r 10 km/h until the minimum speed of 20 mph or 30 km/h is
achieved.
The system stores and maintains the speed.
Interrupting the system
Tap the lever upwards or downwards, arrow 3.
The displays in the speedometer change color.
In addition, the system is automatically deacti-
vated:
> When you brake the vehicle
> When you switch gears very slowly or shift
to neutral in cars with a manual trans-
mission
> When you engage selector lever position N
in cars with an automatic transmission
> When you engage transmission position N
in 7-gear sport automatic transmissions
with a dual clutch
> When you activate the DTC Dynamic Trac-
tion Control or deactivate DSC.
> When DSC or ABS is intervening
Cruise control is not de activated by depressing
the accelerator pedal. Once the accelerator
pedal is released, the st ored speed is achieved
again and maintained.
Warning lamp
The warning lamp comes on, for
example, when cruise control has
been deactivated as a result of DSC
intervention. A message appears on the Control
Display.
Deactivating the system
> Press the lever upward or downward twice,
arrow 3.
> Switch off the ignition.
The stored speed is cleared.
Resuming a speed stored beforehand
Press the button, arrow 4. The last stored
speed is resumed and maintained.
Page 66 of 248
Everything under control
64
Everything under control
Odometer, outside
temperature display, clock
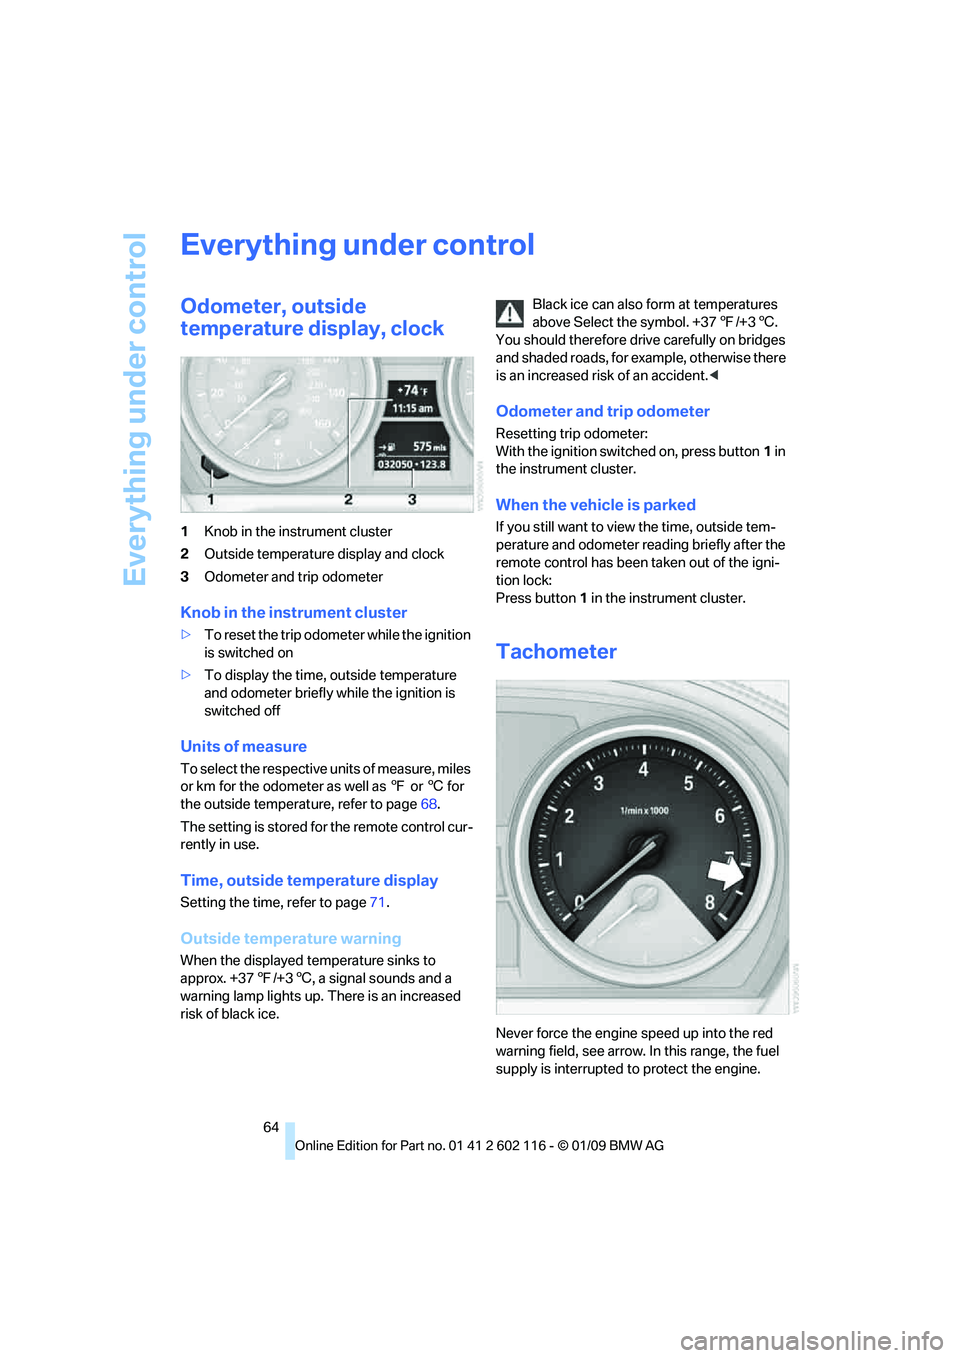
1Knob in the instrument cluster
2 Outside temperature display and clock
3 Odometer and trip odometer
Knob in the instrument cluster
>To reset the trip odometer while the ignition
is switched on
> To display the time, outside temperature
and odometer briefly while the ignition is
switched off
Units of measure
To select the respective units of measure, miles
or km for the odometer as well as 7 or 6 for
the outside temperat ure, refer to page68.
The setting is stored fo r the remote control cur-
rently in use.
Time, outside temperature display
Setting the time, refer to page 71.
Outside temperature warning
When the displayed temperature sinks to
approx. +37 7/+3 6, a signal sounds and a
warning lamp lights up. There is an increased
risk of black ice. Black ice can also form at temperatures
above Select the symbol. +37
7/+3 6.
You should therefore driv e carefully on bridges
and shaded roads, for example, otherwise there
is an increased risk of an accident. <
Odometer and trip odometer
Resetting trip odometer:
With the ignition switched on, press button 1 in
the instrument cluster.
When the vehicle is parked
If you still want to view the time, outside tem-
perature and odometer re ading briefly after the
remote control has been taken out of the igni-
tion lock:
Press button 1 in the instrument cluster.
Tachometer
Never force the engine speed up into the red
warning field, see arrow. In this range, the fuel
supply is interrupted to protect the engine.
Page 67 of 248
Controls
65Reference
At a glance
Driving tips
Communications
Navigation
Entertainment
Mobility
Coolant temperature
A warning lamp will come on if the coolant, and
therefore the engine, becomes too hot. In addi-
tion, a message will appear on the Control
Display.
Check coolant level, refer to page201.
Engine oil temperature*
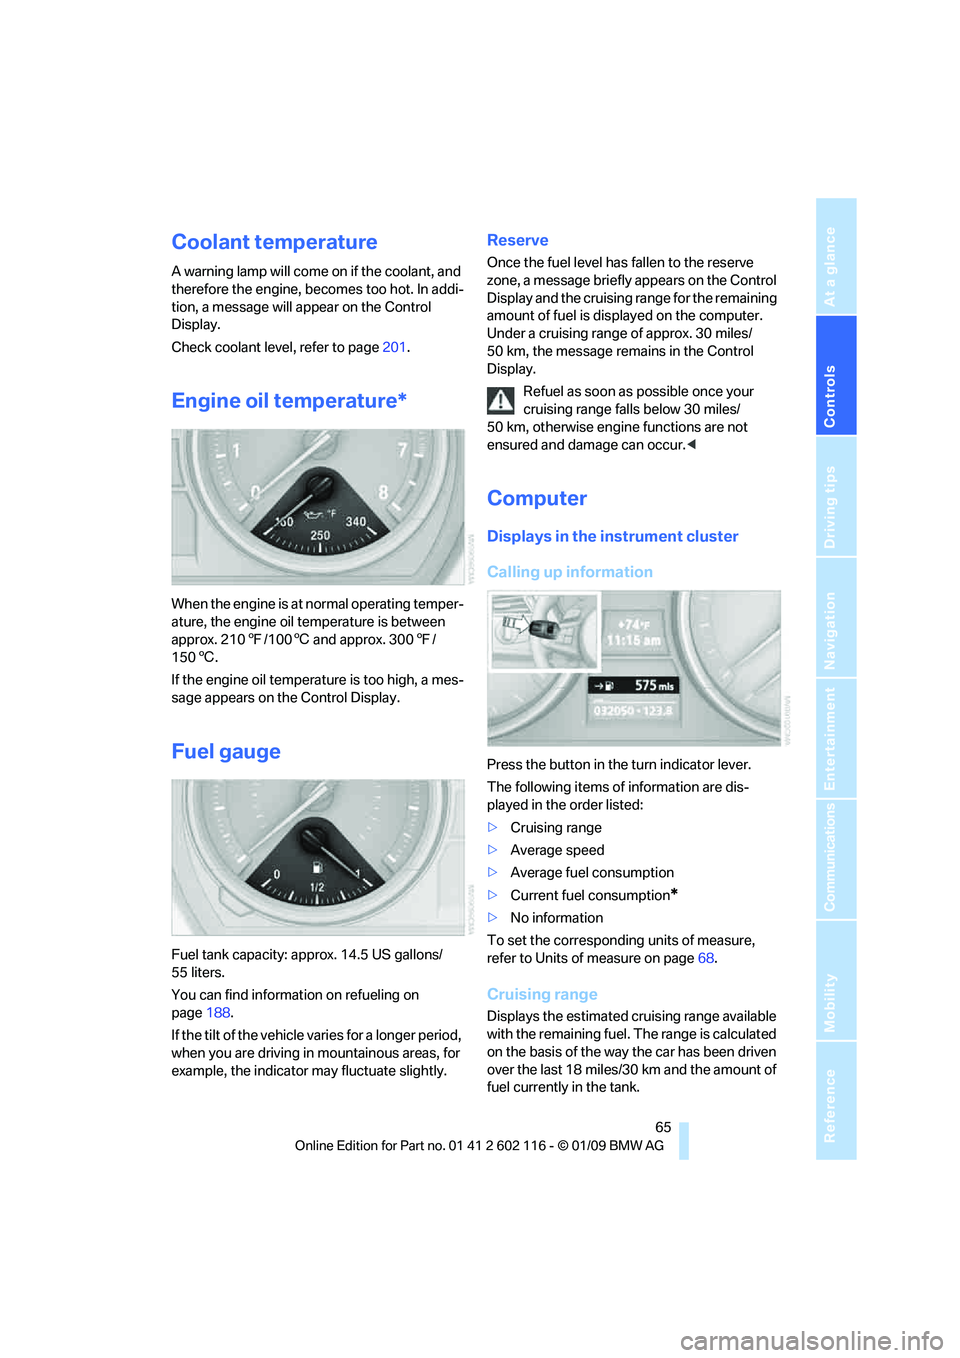
When the engine is at normal operating temper-
ature, the engine oil temperature is between
approx. 210 7/100 6 and approx. 300 7/
150 6.
If the engine oil temperature is too high, a mes-
sage appears on the Control Display.
Fuel gauge
Fuel tank capacity: approx. 14.5 US gallons/
55 liters.
You can find information on refueling on
page 188.
If the tilt of the vehicle varies for a longer period,
when you are driving in mountainous areas, for
example, the indicator may fluctuate slightly.
Reserve
Once the fuel level has fallen to the reserve
zone, a message briefly appears on the Control
Display and the cruising range for the remaining
amount of fuel is displayed on the computer.
Under a cruising range of approx. 30 miles/
50 km, the message remains in the Control
Display.
Refuel as soon as possible once your
cruising range falls below 30 miles/
50 km, otherwise engine functions are not
ensured and damage can occur. <
Computer
Displays in the instrument cluster
Calling up information
Press the button in the turn indicator lever.
The following items of information are dis-
played in the order listed:
>Cruising range
> Average speed
> Average fuel consumption
> Current fuel consumption
*
>No information
To set the corresponding units of measure,
refer to Units of measure on page 68.
Cruising range
Displays the estimated cr uising range available
with the remaining fuel. The range is calculated
on the basis of the way the car has been driven
over the last 18 miles/30 km and the amount of
fuel currently in the tank.
Page 75 of 248
Controls
73Reference
At a glance
Driving tips
Communications
Navigation
Entertainment
Mobility
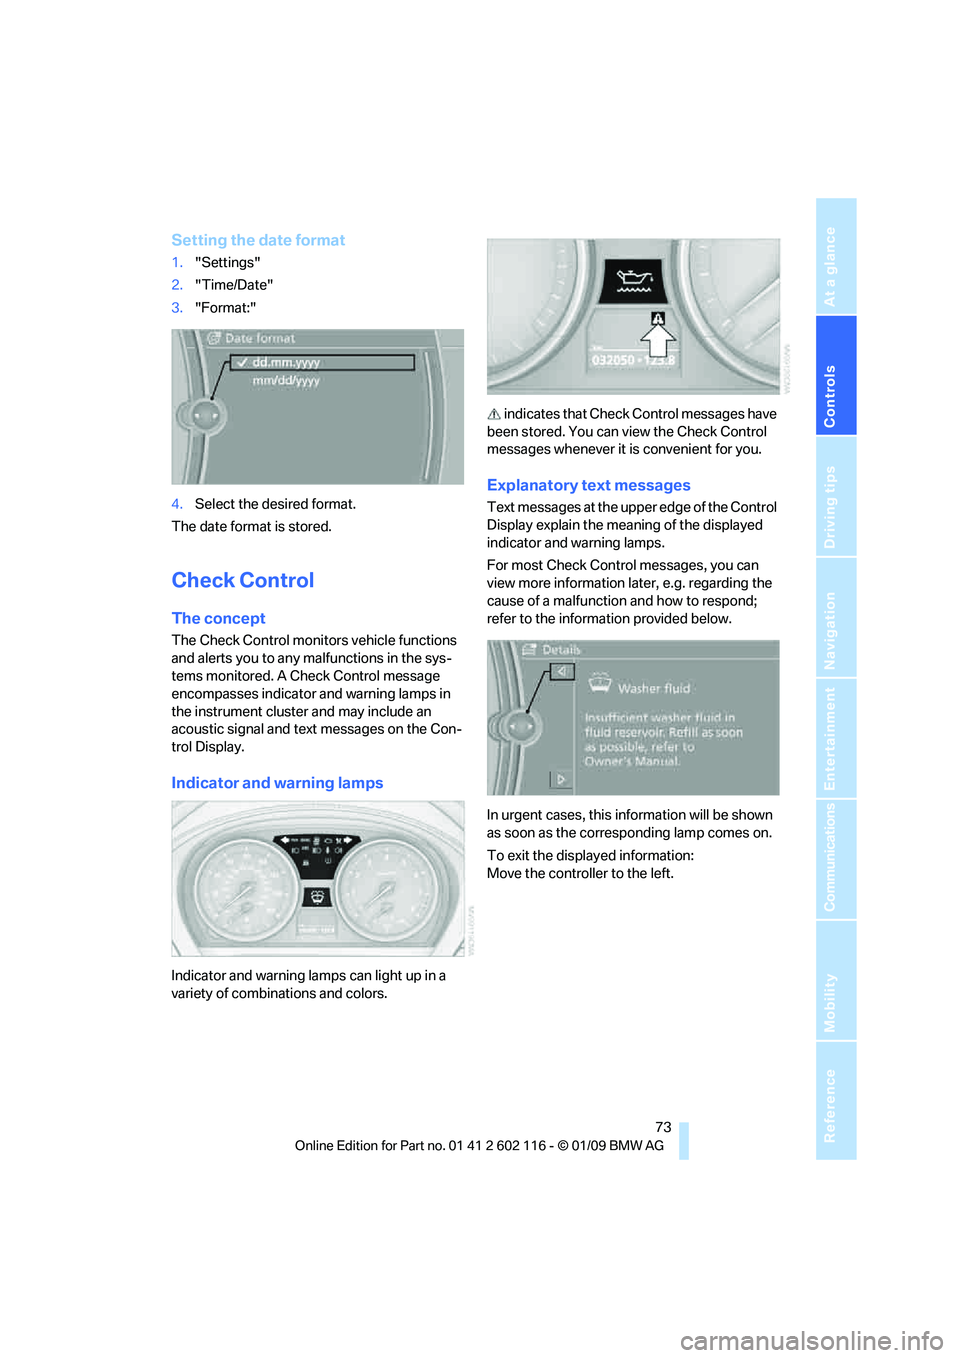
Setting the date format
1."Settings"
2. "Time/Date"
3. "Format:"
4. Select the desired format.
The date format is stored.
Check Control
The concept
The Check Control monitors vehicle functions
and alerts you to any malfunctions in the sys-
tems monitored. A Ch eck Control message
encompasses indicator and warning lamps in
the instrument cluster and may include an
acoustic signal and text messages on the Con-
trol Display.
Indicator and warning lamps
Indicator and warning la mps can light up in a
variety of combinations and colors. indicates that Check
Control messages have
been stored. You can view the Check Control
messages whenever it is convenient for you.
Explanatory text messages
Text messages at the upper edge of the Control
Display explain the meaning of the displayed
indicator and warning lamps.
For most Check Control messages, you can
view more information la ter, e.g. regarding the
cause of a malfunction and how to respond;
refer to the information provided below.
In urgent cases, this information will be shown
as soon as the corresponding lamp comes on.
To exit the displayed information:
Move the controller to the left.