2009 BMW Z4 SDRIVE35I child lock
[x] Cancel search: child lockPage 40 of 248
Opening and closing
38
Retractable hardtop
The retractable hardtop combines reliable
weather protection with simple and convenient
operation.
Please note:
> It is advisable that yo u close the retractable
hardtop when you park the vehicle. Not only
does the closed hardtop protect the vehicle
interior against unanticipated weather dam-
age, it also offers theft protection. However,
even when the hardtop is closed, valuables
should only be stored in the locked
cargo bay.
> Do not attach roof rack systems to the
retractable hardtop, and in particular do not
attach magnetic racks.
> Do not attach rack sy stems to the luggage
compartment lid, and in particular do not
attach magnetic racks.
> When the retractable hardtop is operated,
the luggage compartment lid swings back
and up. Before operat ing the retractable
hardtop, ensure that there is enough clear-
ance, e.g. in tight parking spaces.
> If you open the hardtop while it is wet, e.g.
after driving in the rain, water may drip into
the cargo bay. If necessary, remove items
from the cargo bay beforehand to avoid
water stains or soiling.
Do not place any objects on the retract-
able hardtop or on the luggage compart-
ment lid, otherwise they could fall during move-
ments of the retracta ble hardtop and cause
damage or injury.
Driving when the hardtop is not fully opened or
not fully closed may result in damage or injury.
Do not reach into th e mechanism while the
hardtop is opening or closing. Keep children
away from the swiveling area of the retractable
hardtop. <
The retractabl e hardtop cannot be moved
at temperatures below + 14 7/–10 6. A
message appears on the Control Display.
opened and closed when the vehicle is
stationary. To avoid causing damage, do not
drive off until the hardtop has stopped
moving. <
Before opening and closing
Do not let the hardtop stop in an interme-
diate position when opening or closing.
Otherwise, there is the danger of personal injury
since the hardtop will be lowered automatically
after a few minutes. <
> Comply with the safety precautions
described above.
> Ensure that the luggage compartment lid is
closed.
> The vehicle should be pa rked on fairly level
ground. Excessive angle is indicated by
alamp.
> Fold down the cargo bay partition and make
sure it engages, refer to the instructions
below.
> Do not place any object s next to or on the
cargo bay partition and close the storage
compartment on the left side of the
cargo bay.
> Do not exceed the maximum loading height
under the cargo bay partition; refer to the
label in the cargo bay showing a line indicat-
ing the maximum height.
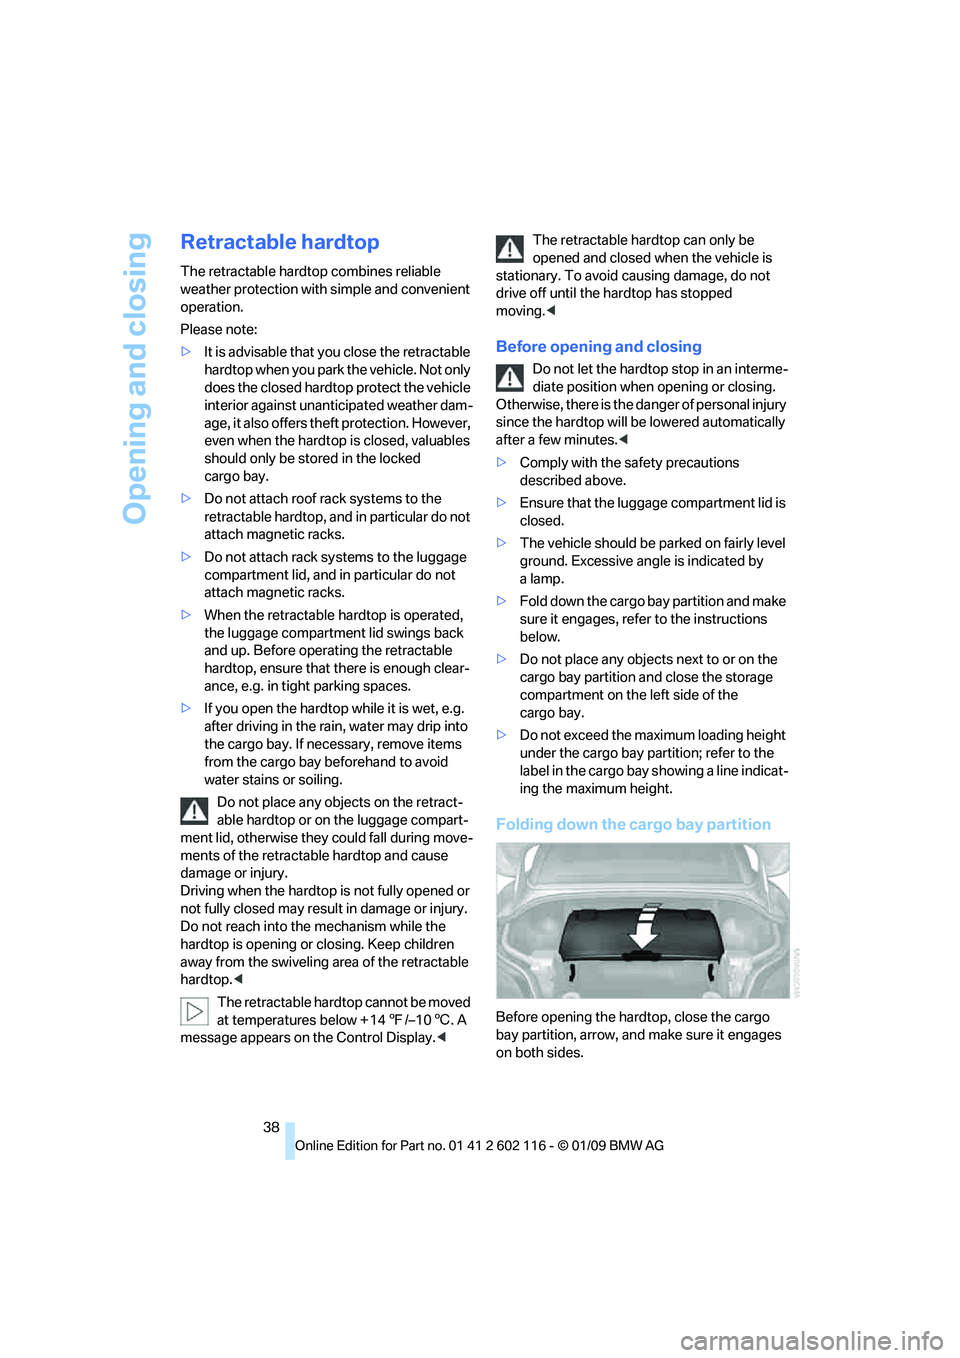
Folding down the cargo bay partition
Before opening the hardtop, close the cargo
bay partition, arrow, an d make sure it engages
on both sides.
Page 43 of 248
Controls
41Reference
At a glance
Driving tips
Communications
Navigation
Entertainment
Mobility
Adjustments
Sitting safely
The ideal sitting position can make a vital con-
tribution to relaxed, fati gue-free driving. In con-
junction with the safe ty belts, the head
restraints and the airbags, the seated position
has a major influence on your safety in the event
of an accident. To ensu re that the safety sys-
tems operate with optimal efficiency, we
strongly urge you to observe the instructions
contained in the following section.
For additional information on transporting chil-
dren safely, refer to page 48.
Airbags
Always maintain an adequate distance
between yourself and the airbags. Always
grip the steering wheel on the rim, with your
hands in the 3 o'clock and 9 o'clock positions,
to minimize the risk of injury to the hands or
arms in the event of the airbag being triggered
off. No one and nothing is to come between the
airbags and the seat occupant.
Do not use the cover of the front airbag on the
passenger side as a st orage area. Make sure
that the passenger is sitting correctly, e.g.
keeping his or her feet or legs in the footwell
and not on the dashboard; otherwise, leg inju-
ries can occur if the front airbag deploys.
Make sure that passengers do not lean their
heads against the side airbag; otherwise, seri-
ous injuries could result if the airbag suddenly
deployed. <
Even if you follow all the instructions, injuries
resulting from contact with airbags cannot be
fully excluded, depending on the circum-
stances. The ignition and inflation noise may
provoke a mild hearing loss in extremely sensi-
tive individuals. This e ffect is usually only tem-
porary.
For airbag locations and additional information
on airbags, refer to page 85.
Safety belt
Before every drive, make sure that all occupants
wear their safety belts. Airbags complement the
safety belt as an additi onal safety device, but
they do not represent a substitute.
Your vehicle has two seats, each of which is
equipped with a safety belt.
Never allow more than one person to
wear a single safety belt. Never allow
infants or small children to ride in a passenger's
lap. Make sure that the be lt in the lap area sits
low across the hips and does not press against
the abdomen.
The safety belt must not rest against the throat,
run across sharp edges, pass over hard or frag-
ile objects or be pinched. Fasten the safety belt
so that it sits as snugly as possible against the
lap and shoulder withou t being twisted. Other-
wise the belt could slide over your hips and
injure your abdomen in the event of a frontal
collision.
Avoid wearing bulky clothing and regularly pull
the belt in the upper-bo dy area taut, otherwise
its restraining effect could be impaired. <
Safety belts, refer to page 44.
Seats
Note before adjusting
Never attempt to adjust your seat while
the vehicle is moving. The seat could
respond with unexpected movement, and the
ensuing loss of vehicle control could lead to an
accident.
On the passenger seat as well, do not incline
the backrest too far to th e rear while the vehicle
is being driven, otherwise there is a danger in
the event of an accident of sliding under the
safety belt, eliminating the protection normally
provided by the belt. <
Note the information on safety belt damage on
page 45.
Page 47 of 248
Controls
45Reference
At a glance
Driving tips
Communications
Navigation
Entertainment
Mobility
Closing
Make sure you hear the latch plate engage in
the belt buckle.
The upper belt anchor is suitable for adults of
any stature as long as the seat is adjusted prop-
erly, refer to page 41.
Opening
1. Grasp the belt firmly.
2. Press the red button in the buckle.
3. Guide the belt into its reel.
Fasten safety belts reminder for driver
and passenger*
The indicator lamp comes on and an
acoustic signal sounds. In addition, a
message appears on the Control Dis-
play. Check whether the safety belt
has been fastened correctly.
The 'Fasten safety belts' reminder is issued as
long as the driver's safe ty belt has not been fas-
tened. In some country- specific versions, the
'Fasten safety belts' remi nder is also activated
at road speeds above approx. 5 mph or 8 km/h if
the passenger's safety belt is not fastened, if
objects are placed on the passenger seat, or if
driver or passenger unfasten their safety belts.
Damage to safety belts
If the safety belts are damaged or
stressed in an accident: have the belt sys-
tem, including any belt tensioners or child-
restraint systems, replaced and the belt
anchors checked. Have this work done only by
your BMW center or at a workshop that works
according to BMW repair procedures with cor-
respondingly trained perso nnel. Otherwise, it is
not guaranteed that the safety devices will func-
tion properly. <
Mirrors
Exterior mirrors
The passenger's mirror is more convex
than the driver's mirror. The objects seen
in the mirror are closer than they appear. Do not
gauge your distance from traffic behind you on
the basis of what you see in the mirror; other-
wise there is an increased risk of an accident. <
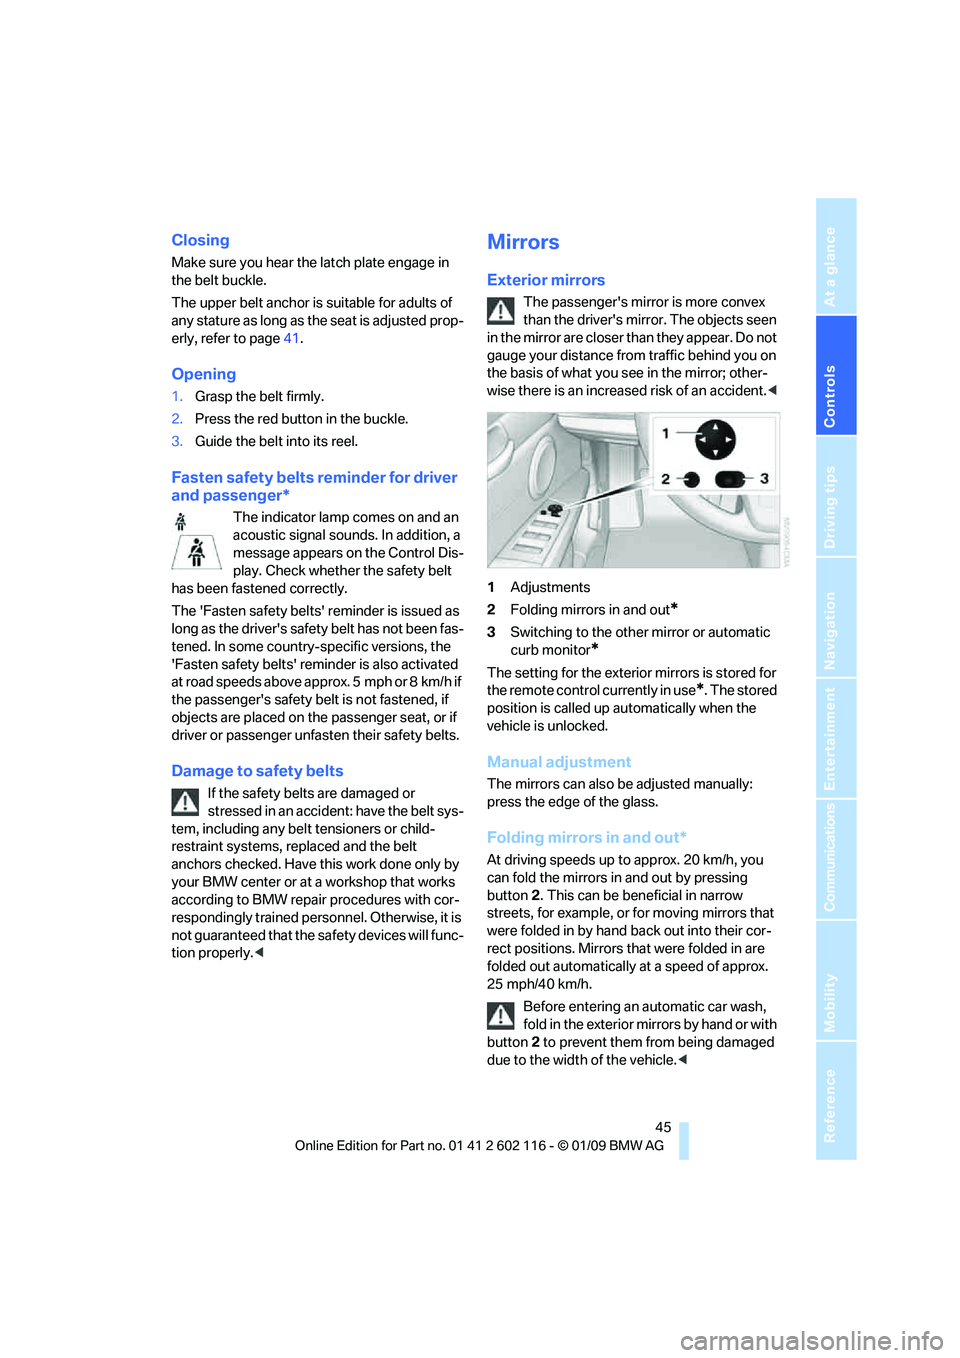
1 Adjustments
2 Folding mirrors in and out
*
3Switching to the other mirror or automatic
curb monitor
*
The setting for the exterior mirrors is stored for
the remote control currently in use
*. The stored
position is called up automatically when the
vehicle is unlocked.
Manual adjustment
The mirrors can also be adjusted manually:
press the edge of the glass.
Folding mirrors in and out*
At driving speeds up to approx. 20 km/h, you
can fold the mirrors in and out by pressing
button 2. This can be beneficial in narrow
streets, for example, or for moving mirrors that
were folded in by hand back out into their cor-
rect positions. Mirrors that were folded in are
folded out automatically at a speed of approx.
25 mph/40 km/h.
Before entering an automatic car wash,
fold in the exterior mi rrors by hand or with
button 2 to prevent them from being damaged
due to the width of the vehicle. <
Page 50 of 248
Transporting children safely
48
Transporting children safely
The right place for children
Do not leave children unattended in the
vehicle, otherwise they could endanger
themselves and/or other persons by opening
the doors, for example. <
Children on the passenger seat
Always transport children under the age
of 13 or smaller than 5 ft/150 cm in a
child-restraint system suitable for their age,
weight and size, and with the passenger airbag
deactivated. Otherwise, there is an increased
risk of injury in the event of an accident or if the
airbags deploy. <
Children 13 years of age or older must be buck-
led in with a safety belt as soon as there no
longer is any child-restr aint system that is
appropriate for their age, size and weight.
For more information on automatic deactivation
of the passenger airbags refer to page 86.
Installing child-restraint
systems
After installing a child-restraint system on
the passenger seat, make sure that the
front and side airbags for the passenger are
deactivated; otherwise, there is an increased
risk of injury if the airbags deploy.
Observe the child-restraint system manufac-
turer's instructions when selecting, installing
and using child-restraint systems. Otherwise
the protective effect may be diminished. <
Standard child-restraint systems are designed
to be secured with a lap be lt or with the lap-belt
section of a lap-and-shou lder belt. Incorrectly
or improperly installed child-restraint systems
can increase the risk of injury to children.
Always follow the installa tion instructions for
the system with the greatest care.
On the passenger seat
After installing a child-restraint system on
the passenger seat, make sure that the
front and side airbags for the passenger are
deactivated, otherwise there is an increased
risk of injury if the airbags deploy. <
Seat position
Before installing a child-restraint system, move
the passenger seat as far back and up
* as pos-
sible to obtain the best possible position for
the belt.
Backrest width*
The backrest width of the passenger's
seat must be at its widest possible set-
ting. Do not change the setting after installing
the child seat. Otherwise the child seat's stabil-
ity on the passenger's seat is limited. <
1. Adjust the backrest width to its widest set-
ting, refer to page 43.
2. Install the child seat.
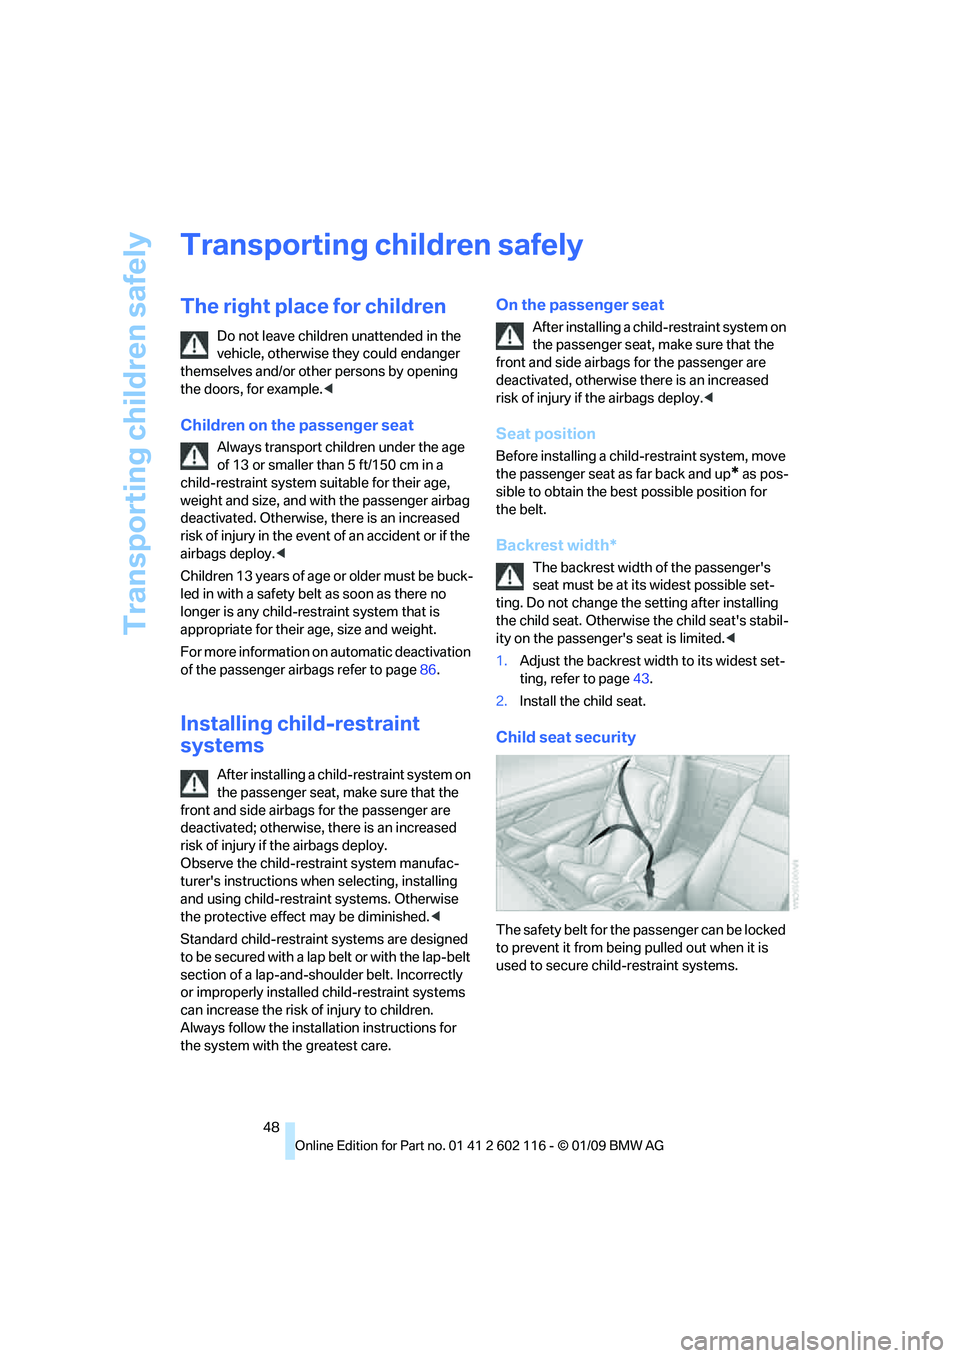
Child seat security
The safety belt for the passenger can be locked
to prevent it from being pulled out when it is
used to secure child-restraint systems.
Page 51 of 248
Controls
49Reference
At a glance
Driving tips
Communications
Navigation
Entertainment
Mobility
To Locking the safety belt
1.Secure the child-restraint system with
the belt.
2. Pull the belt strap all the way out.
3. Allow the belt strap to retract and pull it taut
against the child-restraint system.
The safety belt is locked.
To Unlocking the safety belt
1. Open the belt buckle.
2. Remove the child-restraint system.
3. Allow the safety belt strap to retract all
the way.
Page 54 of 248
Driving
52
Switching off the engine
Always take the remote control with you
when you leave the vehicle.
Set the parking brake firmly when parking; oth-
erwise, the vehicle could roll. <
Manual transmission
1.With the car at a standstill, press the start/
stop button.
2. Shift into first gear or reverse.
3. Set the parking brake.
4. Removing the remote control from the igni-
tion lock, refer to page 50.
Automatic transmission
1. With the car at a stan dstill, move the selec-
tor lever to position P.
2. Press the start/stop button.
3. Set the parking brake.
4. Removing the remote control from the igni-
tion lock, refer to page 50.
7-gear sport automatic transmission
with dual clutch
1. With the car at a stan dstill, engage trans-
mission position P.
2. Press the start/stop button.
3. Set the parking brake.
4. Removing the remote control from the igni-
tion lock, refer to page 50.
Parking brake
The concept
Your BMW is equipped with an electromechan-
ical parking brake that can be set and released
by using a button.
The parking brake is primarily used to prevent
the vehicle from rolling when it is parked.
When the vehicle is stationary, the parking
brake acts on the rear wheels via an electrome-
chanical mechanism. When the vehicle is rolling
or being driven, the parking brake acts on the disc brakes of the front and rear wheels via the
hydraulic brake system.
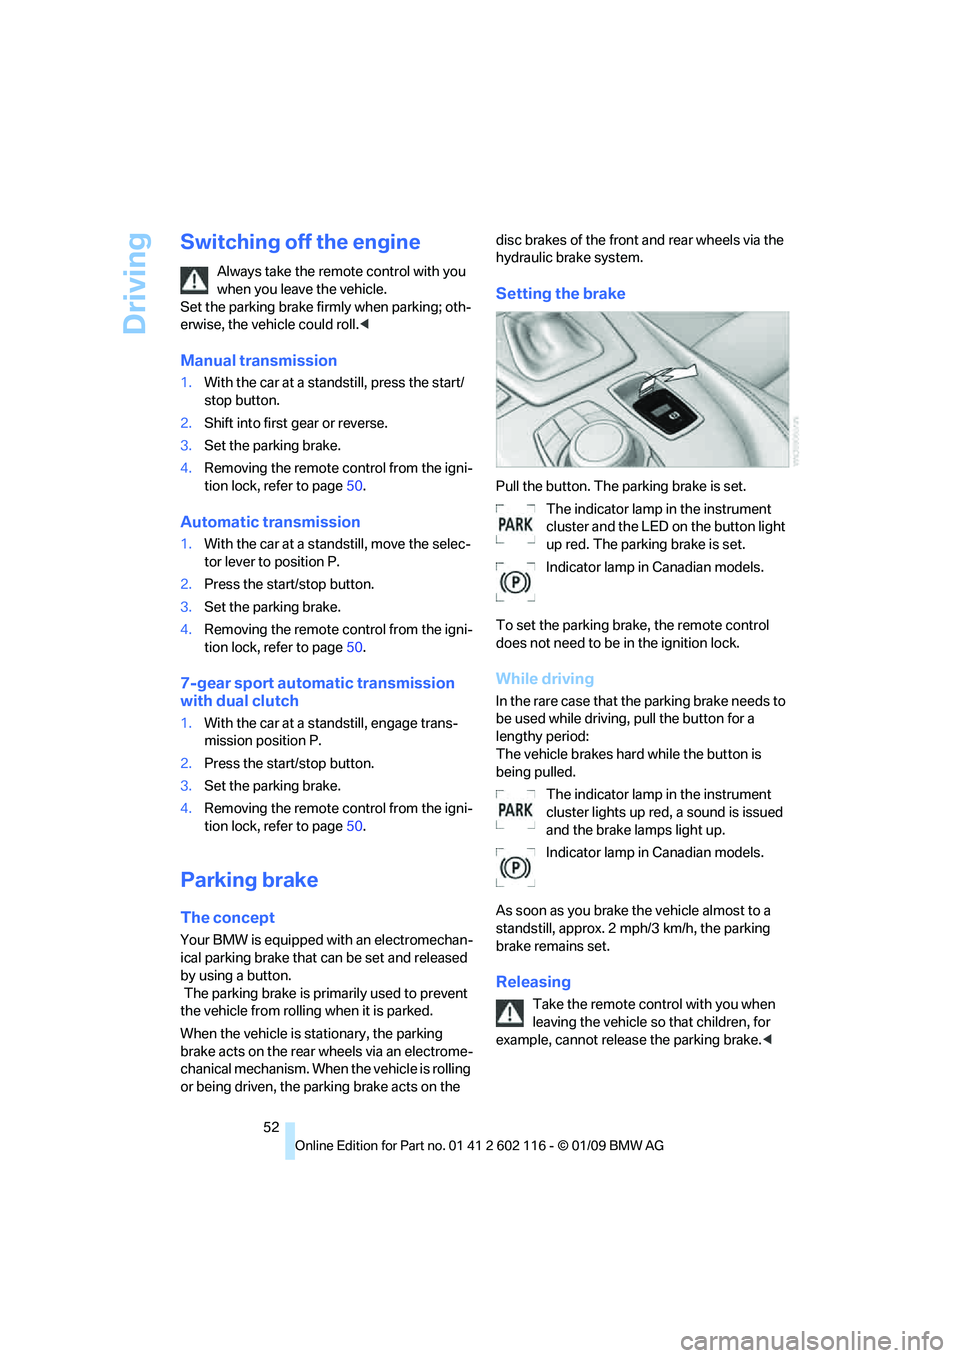
Setting the brake
Pull the button. The parking brake is set.
The indicator lamp in the instrument
cluster and the LED on the button light
up red. The parking brake is set.
Indicator lamp in Canadian models.
To set the parking brake, the remote control
does not need to be in the ignition lock.
While driving
In the rare case that the parking brake needs to
be used while driving, pull the button for a
lengthy period:
The vehicle brakes hard while the button is
being pulled. The indicator lamp in the instrument
cluster lights up red, a sound is issued
and the brake lamps light up.
Indicator lamp in Canadian models.
As soon as you brake the vehicle almost to a
standstill, approx. 2 mph/3 km/h, the parking
brake remains set.
Releasing
Take the remote cont rol with you when
leaving the vehicle so that children, for
example, cannot release the parking brake. <
Page 106 of 248
Practical interior accessories
104
Ashtray, front
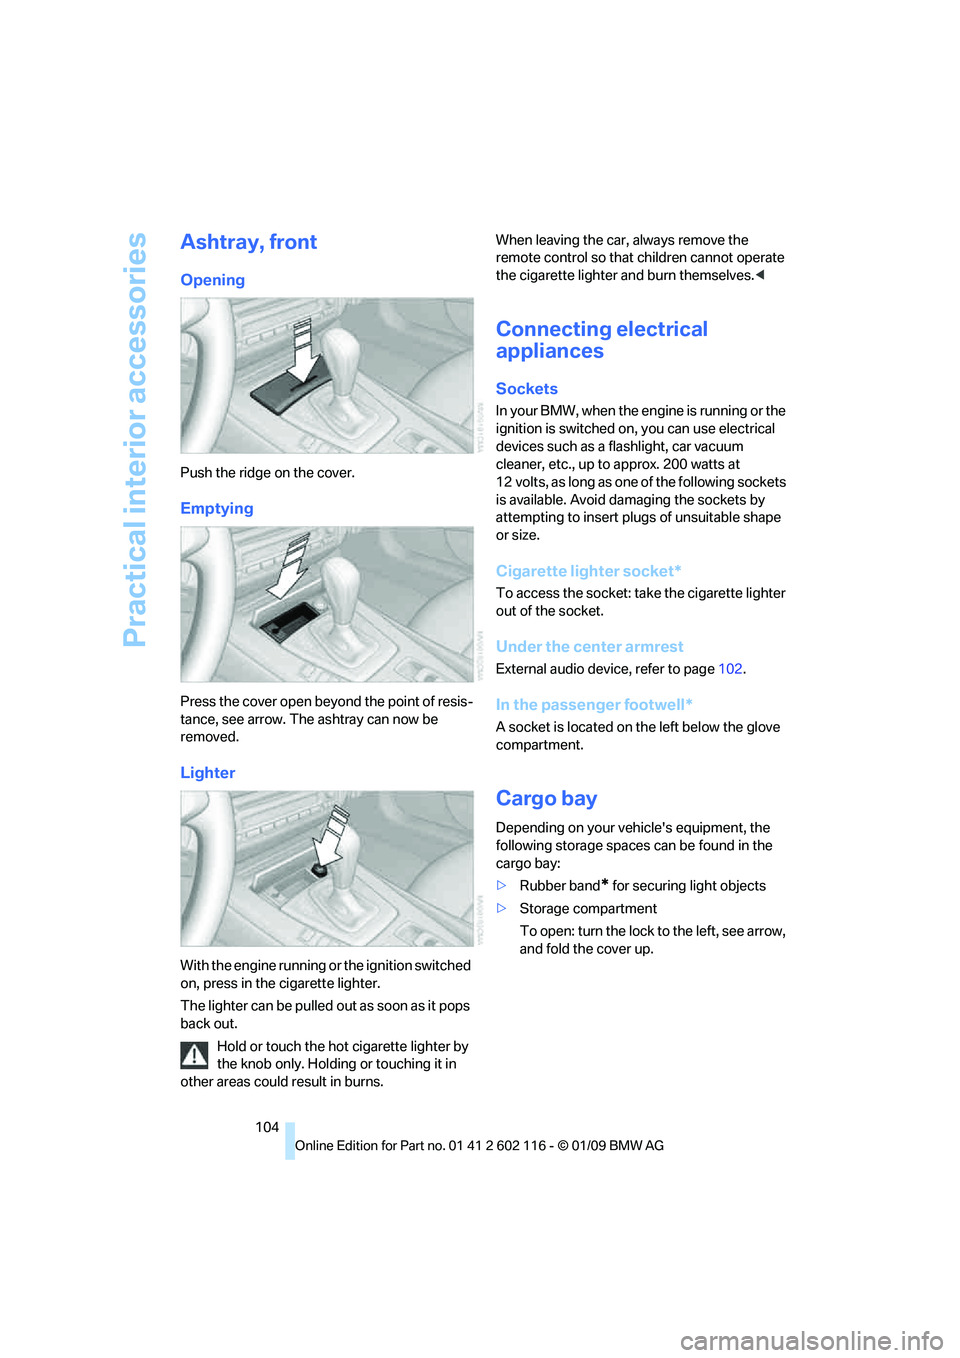
Opening
Push the ridge on the cover.
Emptying
Press the cover open beyond the point of resis-
tance, see arrow. The ashtray can now be
removed.
Lighter
With the engine running or the ignition switched
on, press in the cigarette lighter.
The lighter can be pulled out as soon as it pops
back out.
Hold or touch the hot cigarette lighter by
the knob only. Holding or touching it in
other areas could result in burns. When leaving the car,
always remove the
remote control so that children cannot operate
the cigarette lighter and burn themselves. <
Connecting electrical
appliances
Sockets
In your BMW, when the engine is running or the
ignition is switched on , you can use electrical
devices such as a flashlight, car vacuum
cleaner, etc., up to approx. 200 watts at
12 volts, as long as one of the following sockets
is available. Avoid damaging the sockets by
attempting to insert pl ugs of unsuitable shape
or size.
Cigarette lighter socket*
To access the socket: take the cigarette lighter
out of the socket.
Under the center armrest
External audio device, refer to page 102.
In the passenger footwell*
A socket is located on the left below the glove
compartment.
Cargo bay
Depending on your vehicle's equipment, the
following storage spaces can be found in the
cargo bay:
>Rubber band
* for securing light objects
> Storage compartment
To open: turn the lock to the left, see arrow,
and fold the cover up.
Page 234 of 248

Everything from A to Z
232
Care
204
– automatic car washes 204
– care products 204
– carpets 206
– CD/DVD drives 207
– chrome parts 206
– displays 207
– exterior 204
– fine wood parts 207
– headlamps 205
– high-pressure washer 205
– interior 206
– leather 206
– light-alloy wheels 206
– paintwork 205
– plastic parts 207
– retractable hardtop 205
– rubber seals 206
– safety belts 207
– sensors and cameras 207
– upholstery and cloth trim 206
– washing the car manually 205
– windows 205
Cargo, securing 114
Cargo bay
– capacity 222
– convenient access 35
– lamp, refer to Interior lamps 90
– opening from inside 33
– opening from outside 33
Cargo loading
– securing cargo 114
– stowing cargo 114
– vehicle 113
Car jack
– jacking points 211
Car key, refer to Integrated
key/remote control 28
Car phone
– installation location, refer to
Center armrest 102
– refer to separate Owner's Manual
Car phone, refer to Telephone 164
Car radio, refer to Radio 141Car shampoo
207
Car wash 113
– with convenient access 36
Car wash, refer to the Caring for your vehicle brochure
Catalytic converter, refer to Hot exhaust system 111
CBS Condition Based
Service 202
CD, audio playback 146
CD/DVD changer 14
6
– controls 138
– fast forward/reverse 148
– random sequence 147
– switching on/off 138
– tone control 138
– volume 138
CD/DVD player 146
– controls 138
– fast forward/reverse 148
– random sequence 147
– switching on/off 138
– tone control 138
– volume 138
CD changer
– selecting a track 146
CD player
– selecting a track 146
Center armrest 102
Center brake lamp
– replacing bulb 211
Center console, refer to Around the center
console 14
Central locking
– from inside 32
– from outside 29
Central locking system 29
– convenient access 35
– setting unlocking
characteristics 29
Changes, technical, refer to For your own safety 5
Changing bulbs, refer to Lamps and bulbs 208
Changing the measurement
units on the Control
Display 68
Changing wheels 211Chassis number, refer to
Engine compartment 198
Check Control 73
Child-restraint systems 48
Child seats, refer to
Transporting children
safely 48
Chrome parts 207
Chrome polish 207
Cigarette lighter, refer to Lighter 104
Cleaning headlamps 60
– washer fluid 61
Cleaning your BMW, refer to Care 204
Clock 64
– 12h/24h mode 72
– setting the time and date 72
– setting time 71
Closing
– from inside 32
– from outside 29
Cockpit 10
Cold start, refer to Starting
the
engine 51
Combined instrument, refer to Instrument cluster 12
Comfort access, refer to
Convenient access 35
Comfort area, refer to Around the center console 14
Compartment for remote control, refer to
Ignition lock 50
Compass 100
Computer 65
– displays on Control
Display 66
Computer, refer to iDrive 16
Concierge service 179
Condensation, refer to When the vehicle is parked 112
Condition Based Service
CBS 202
Configuring settings, refer to Personal Profile 28
Confirmation signals for locking/unlocking the
vehicle 31