2009 AUDI S6 trunk release
[x] Cancel search: trunk releasePage 13 of 398

Instruments and controls
General illustration
G)
0
©
©
©
©
0
©
Power window switches ...... .... ..... .. ....... .
Door handle
Memory buttons (driver's seat)
Power locking switch .......................... .
Adjuster control for outside mirrors .. .... .... .... .
Air outlets ........ ... ...... .... ...... .... ... .. .
Light switch .... .... ........... .... .... .... ... .
Control lever for :
- Turn signal and high beam
- Lane assist .... .... ... .... .... .... .......... .
Control lever for:
- Cruise control
- Adaptive Cruise Contro l .......... ...... .... .. .
@ Multifunction steering wheel with:
- Horn
55
84
49
76
108
63
67
143
124
127
- Driver's airbag . . . . . . . . . . . . . . . . . . . . . . . . . . . . . . . 219
- Shift buttons ................................ 160, 167
@
@
@
@
-Button for steering wheel heating
Instrument cluster ... .... ... .... ...... ......... .
Switches for
- Windshield wiper/washer ..... ...... ..... .. ... .
- Trip computer ..... .. ..... ... .... ...... ... .. .
Steering lock/ignition/starter switch
Buttons for
- Reset button for trip odometer ... .. .... .... ... .
!CHECK] .. .... ....... .... .... ....... .... ... .
Instrument lighting .... ... .... .... ... ..... ... .
Controls and equip
ment
1 1 1
12
71
38
116
14
15
16
Instruments and controls
@ MMI Display, see separate manual
@ Depending on equipment, switches for:
- Electronic Stabilization Program (ESP)
- Side assist .. ... ..... .. .. .. .... .... .... ... ... .
- Emergency flashers .......................... .
- Power sunshade .... .... .... .... ... .... ..... . .
- Valet key function .... ....... ...... .... ...... .
@ Buttons for
- Switching MMI display on/off
- Unlocking glove compartment
@ Glove compartment ........... .... .... ......... .
@ Front passenger's airbag .. .... .... ... .. ...... .. .
@) Climate controls ......... .. .. .... .... .... .. . .. . .
@ Ashtray ..... .... .... ....... .... .... .... ... ... .
@ Shift lever for automatic transmission
- 6-speed automatic transmission .. .. .... .... ... .
I . .
® -
mu t1tron1c ... .... .... .... .... .... ... ...... .
@ MMI Terminal, see separate manual
@ Storage with cupholder . ........ ... .. .... .... ... .
@ Electromechanical parking brake ... .... .... .... .. .
@ ISTART ]-~STOP ] button .. ... ..... ... .... .... ... .
@ Adjustable steering wheel, depending on equipment:
- mechanica l .. .. .... .... ..... .. .... ..... ... .. .
- electrica l ... ...... .... ... .. .... .... ...... ... .
@) Data Link Connector for On Board Diagnostics (OBD II)
@ Hood release . .... .... ...... ... .. .... .... ... ... .
@) Switch for
unlocking the fuel filler door ..... ...... .... ... .
- unlocking the trunk lid . .... .... .... .... ... ... .
I • •
262
146 67
70
44
99
99
219
104
96
155
163
95
121
118
114
114
27
300
297
50 •
Page 53 of 398

Opening the rear lid
- Press the center button c::5 on the master key or pull the
release button
c::5 in the driver's door=> page 50, fig. 37.
The rear lid is unlocked and opens.
Closing the rear lid
- Pull the rear lid down and allow it to drop gently into the
latch ~& -
& WARNING
• After closing the rear lid, always pull up on it to make sure that
it is properly closed. Otherwise it could open suddenly when the
vehicle is moving.
• To help prevent poisonous exhaust gas from being drawn into
the vehicle, always keep the rear lid closed while driving. Never
transport objects larger than those which fit completely into the luggage area, because then the rear lid cannot be fully closed.
• Never leave your vehicle unattended especially with the rear lid
left open. A child could crawl into the car through the luggage
compartment and pull the lid shut, becoming trapped and unable
to get out. To reduce the risk of personal injury, never let children
play in or around your vehicle. Always keep the rear lid as well as
the vehicle doors closed when not in use.
• Always ensure that no one is within range of the rear lid when
it is moving, in particular close to the hinges -fingers or hands can
be pinched.
[ i] Tips
• If the rear lid is open or not properly closed when the ignition is
turned on, the door and rear lid warning~
page 25 appears in the
instrument cluster display.
• Should you not be able to open the rear lid as described, make
sure the valet key function is not activated~
page 44.
Contro ls and eq uip
ment
Opening and closing
• If the central locking system fails (power supply), you can also
open the rear lid using the trunk escape handle from the inside
~ page 342. •
Child safety lock
Power child safety lock for the rear doors t
The power child safety lock prevents the rear doors from
being opened from the inside.
Fig. 39 Section from
driver's door: controls
The rear doors are equipped with a power child safety lock.
It is operated with the two safety buttons(!) in the driver's
door ~ fig. 39.
- Press the left and/or right safety button to disable the
rear power window(sl and prevent the respective rear
door from being opened from the inside. The LED in the
button will light up when the child safety lock is turned
on.
- Press the illuminated button again to turn the child
safety features
off.
Vehicle care I I irechnical data
Page 300 of 398

Fuel supply and filling your fuel tank Refuelling procedure
- Insert the fuel nozzle from the gasoline pump into the
fuel filler neck as far as it will go.
- Select a medium refuelling rate so that the nozzle switches off automatically when the tank is full.
Putting the fuel cap back on
- After filling your tank, twist the fuel filler cap clockwise
until you hear a definite click.
Close the fuel filler flap.
To avoid fuel spilling or evaporating from the fuel tank always close
fuel filler cap properly and completely. An improperly closed fuel
filler cap may also cause the MIL lamp=>
page 27to come on.
& WARNING
Improper refueling or handling of fuel can cause fire, explosion
and severe burns.
• Fuel is highly flammable and can cause severe burns and other
injuries.
• Failure to shut the engine off while refueling and/or to insert
the pump nozzle fully into the fuel filler neck could cause fuel to spray out of filler neck or to overflow. Fuel spray and overflowing
fuel can cause a fire.
• Never use a cellular telephone while refueling . The electromag
netic radiation can cause sparks that can ignite fuel vapors and
cause a fire.
• Never get back into your vehicle while refueling. If in excep
tional circumstances you must get back in your vehicle while refu
eling, make certain that you close the door and touch metal to
discharge static electricity before touching the filler nozzle again.
Static electricity can cause sparks that can ignite fuel vapors
released during refueling .
& WARNING (continued)
• Never smoke or have an open flame anywhere in or near your
vehicle when refueling or filling a portable fuel container.
• For your safety, we strongly recommend that you do not travel
with a portable fuel container in your vehicle. The container, full or
empty may leak and could cause a fire, especially in a crash.
• If, under exceptional circumstances, you must transport a
portable fuel container, please observe the following:
-Never fill a portable fuel container while it is anywhere in or
on the vehicle (for example, in the luggage compartment, or on
the trunk). Static electricity can build up while filling and can
ignite fuel vapors causing a fire.
- Always place a portable fuel container on the ground before
filling.
- Always keep the filler nozzle completely inside the portable
container before and during filling.
- If filling a portable container made of metal, the filler nozzle
must always be in contact with the container. This will help
prevent static electricity from discharging and cause a fire.
- Never spill fuel inside the vehicle or luggage compartment. Fuel vapors are highly flammable .
- Always observe local and state/provincial laws regarding the
use, storage and transportation of fuel containers.
- Make certain the fuel container meets industry standards
(ANSI / ASTM F852-86l.
0 Note
If any fuel has spilled onto the car, it should be removed immedi -
ately to prevent damage to the paint. _.,
Page 344 of 398

lllftl.,___W_ h_ a _ t_d_ o_ l _d _o_ n_ o_ vv_ ? ______________________________________________ _
What do I do now?
Trunk escape handle
In case of an emergency, the rear lid can be opened from
the inside using the trunk escape handle.
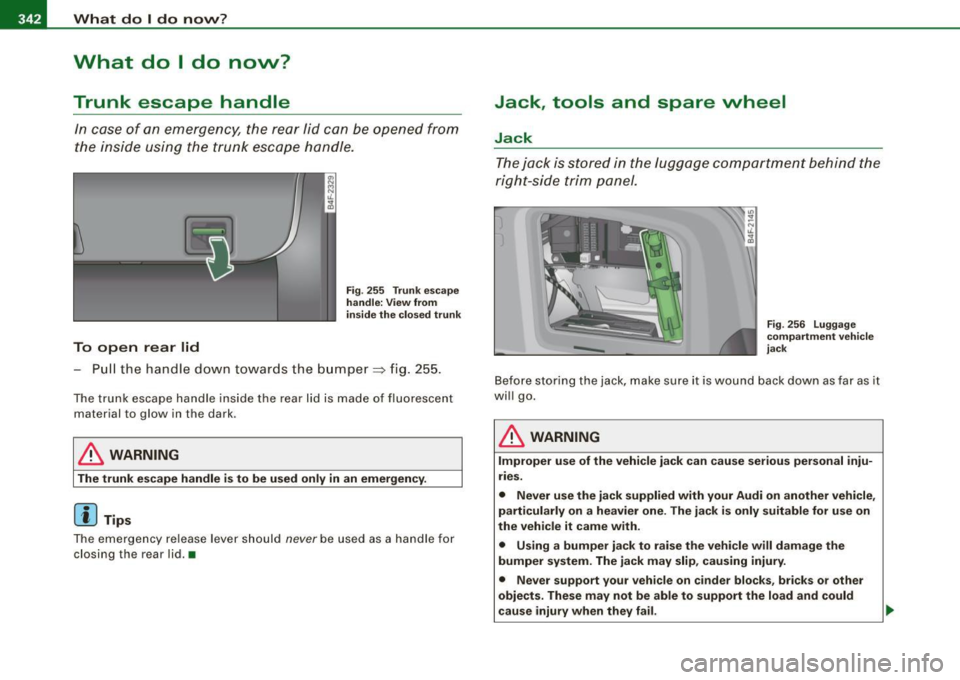
To open rear lid
Fig. 255 Trunk escape
handle: View from
inside the closed trunk
- Pull the handle down towards the bumper ::} fig. 255.
The trunk escape handle inside the rear lid is made of fluorescent
material to glow in the dark.
& WARNING
The trunk escape handle is to be used only in an emergency.
[ i ] Tips
The emergency release lever should never be used as a handle for
closing the rear lid. •
Jack, tools and spare wheel
Jack
The jack is stored in the luggage compartment behind the
right-side trim panel.
--
Fig . 256 Luggage
compartment vehicle
jack
Before storing the jack, make sure it is wound back down as far as it
will go.
& WARNING
Improper use of the vehicle jack can cause serious personal inju
ries.
• Never use the jack supplied with your Audi on another vehicle,
particularly on a heavier one. The jack is only suitable for use on
the vehicle it came with.
• Using a bumper jack to raise the vehicle will damage the
bumper system. The jack may slip , causing injury.
• Never support your vehicle on cinder blocks, bricks or other
objects. These may not be able to support the load and could
cause injury when they fail.