2009 AUDI S6 engine
[x] Cancel search: enginePage 167 of 398
_______________________________________________ A_ u_t _o _ m_ a_ t _i_ c_ t_r _a _n _ s_ m __ is_s_ i _o _ n __ llll
Autom ati c selec to r l eve r lock
The se lector lever is locked in the P and N positions when the igni
tion is turned on . To move the lever from these positions the driver
must depress the brake pedal. As a reminder to the driver, the
follow ing warning appears in the instrument cluster disp lay when
the selector is in
P and N :
When stationary app ly footbrake while selecting gear
A time delay e lement preven ts the selector lever from locking when
it is moved through the
N position (going from R to Dl. The locking
e lement will lock the selector lever if the lever is left in N (Neutral)
for mor e than approximately 1 second, without the brake peda l
being pressed .
At sp eeds above about 3 mph (5 km/h) the Automatic Shift Lock is
automatically deactivated in the
N posi tion .
Interl ock button
The lock button on the selector lever prevents the lever from being
accid entally sh ift ed into certain pos it ions. Pressing th is button
deactivates the selector leve r lock . Dependi ng on the direction of
the shift, the se le ctor lev er locks a t different positions . Th e positions
are highligh ted in the illus trati on =>
page 164 , fig. 167 .
Igniti on k ey saf ety in te rlo ck
The key canno t be removed from the ignition un less the selector
lever is in th e
P park position . When th e ignition k ey is remov ed, the
selector lever wil l be l ocked in the
P posi tion .•
A pplies to veh ic les : wit h mu ltit ro nic® Cont inuous ly Va riab le Transm iss io n (CVT )
Kick-down
The kick- down feature allo ws the ve hic le to generate
maximum acceler ati on .
When you press the acce lerator pedal beyond the resistance point
t hat is reached at ful l th rottle, the transmission wi ll select a lower
gear ra tio bas ed on vehic le spe ed and engine RPM. The engine RPM
Controls and equip
ment
wi ll be control led to produce maximum vehic le acceleration as long
as yo u conti nue to press the acce lerato r pedal beyond this resis
tance point .
& WARNING
Be careful when us ing the ki ck-down feature on slippery roads .
Rapid acceleration may cau se the vehicle to skid . •
A pplies to veh icl es : wi th mu ltitro nic® C ontinuo usly V ari ab le Tra nsm iss ion (CVT)
Dynamic shift program (DSP)
The multitronic® tr ansmissi on is elect ro nic ally
controlled.
The transmission se lects the appropriate gear ratio (upshifts and
downsh ifts) automatical ly based on preset driving programs.
The transmission wil l selec t one of the
economy programs when
yo u drive at a steady speed o r a gra dually changing speeds without
heavy acceleration . T his gives bes t fuel efficiency , with early
upshifting and delayed downshif ting .
The transmission will au tomat ically select the
s porty shift programs
when you drive at higher speeds, or with heavy acce leration and
freque ntly changing speeds . Upshifts are delayed to make full use
of engine power. Downshifting takes place at higher engine speeds
t han in t he economy programs .
The se lection of the most suitable shift program is a continuous,
automatic process . The driver can also make the transmission
sw itch to a spor ty progra m by
quickly pressing down the gas peda l.
This caus es the transmission to shift down into a lower gear ratio
and makes qu ick acceleration possible (to pass another vehic le) You
do not need to press the gas peda l into the kickdown range . After
the trans missi on has upshifte d, the o riginal p rogram is selected
according to your driving style . _.,
I • •
Page 168 of 398

-L~A~u~t~o~m~a~t ::,:i c~t::!r.!:a~n~ s~m!.!!:i s~ s ~ io~n :..._ ____________________________________________ _
An additional shift program allows the automat ic t ransmission to
select the p roper gear for uphill and downhill gradients.
This prevents the transmission from shifting up and down unneces sari ly on hills. The transmission will shift down to a lower gear ratio
when the driver presses the brake pedal on a downhill gradient . This
makes use of the braking effect of the engine without the need to
shift down manually.
If you are driving in hills and mountains, the transmission will
continuously adjust the gear ratio to the road grade. If you press the
brake pedal when driving downhi ll, the transmission will down shift
automatically . This increases the braking effect of the engine .
If the cru ise control is on when you are traveling downh ill, the trans
mission will automatically select a lower gear ratio in order to main
tain the set vehic le speed . This wil l cause the engine speed to
increase. •
Applies to v ehicles: wit h mult it ro n ic® Co ntin uous ly V ariab le Tra nsm iss io n (CVT )
tiptronic ® manual shift progr am
Using the manual shif t program ( tiptronic® J you can
manually shift between seven pre-programmed gear
r at io s ( tra nsmission p ositi ons).
Fig . 16 8 C enter
c onsole : shifting
m anu ally Fi
g. 169 Di sp la y:
m anu al shift progr am ,
se lec ted ge ar
Switching to manual shift program
Pus h th e se lecto r leve r to the r ight from D. As soon as the
transmission has sw itched over, t he selected gear
ap pears in t he display ~ fig . 169.
To upshift Push the se lector lever forward to t he p lus position
~ fig.168
0-
To downshift
- Pu sh t he lever t o the minus posi tion
Q .
When accelerati ng, the transm ission wi II automatica lly shift into the
next higher gear before the engine reaches the maximum RPM.
When accelera ting, if you apply a ligh t thrott le, the tipt ron ic® wi ll
automatically shift into the next higher gear to save fuel. If you apply
a heavy throttle , the transmiss ion wi ll stay in gear engaged unti l
near maximum RPM are reached, or until the driver manually shifts
into a higher gear .
I f you take your foot off the accelerator peda l when driving down a
steep incline, the tiptronic ® will downshift from the selected gear
into the next l ower gea r based on r oad speed a nd engine RPM . The
automatic downshifting is interrupted as soon as you apply throttle
again . .,_
Page 169 of 398
_______________________________________________ A_ u_t _o _m_ a_ t_ i_ c _ t_r _ a _n _s_ m_ i_ s _ s_ i_ o _ n _ ___._
[ i J Tips
• When you shift into the next lower gear, the engine will down
shift only when there is no possibility of over -revv ing.
• When the kick-down comes on , the transmission will shif t down
to a lower gear depending on vehicle and engine speeds.
• The tiptronic® is inopera tive when the t ransmission is in the fail
safe mode .•
Ap plies t o vehi cles: w it h mu lt it ro nic® Co ntin uou sly Va ria ble Tra nsm iss io n (CVT )
Steering wheel with tiptronic ®
The shift buttons on the steering wheel allow the driver to
shift gears manually.
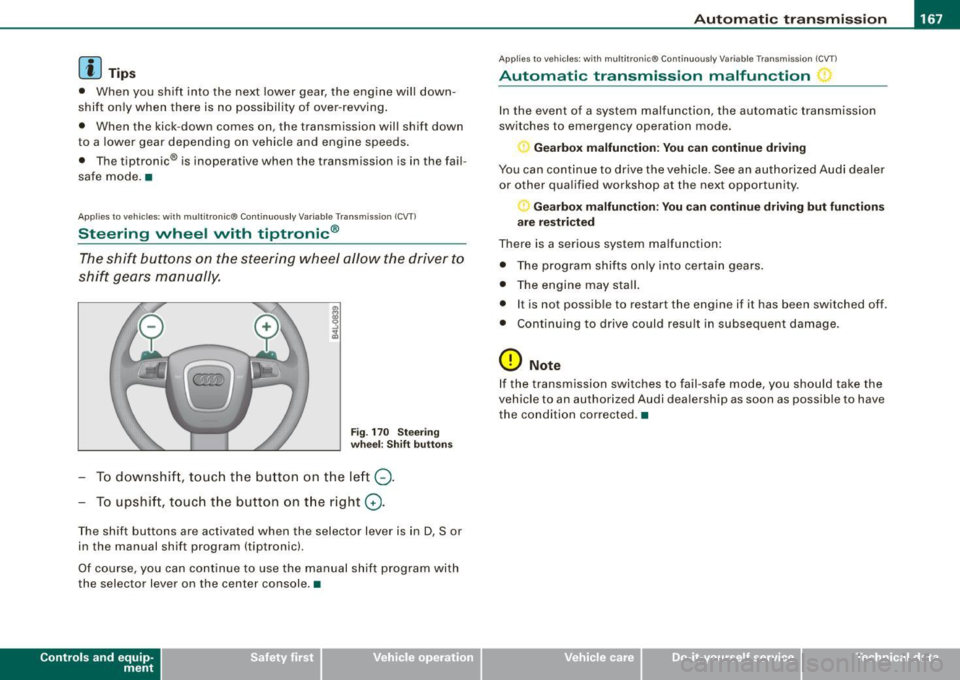
Fig . 170 Steering
wheel: Shift buttons
To downshift , touch the button on the left Q.
To upshift, touch the button on the right G).
The shift buttons are activated when the selector lever is in D, Sor
in the manual shift program (tiptron ic).
Of course, you can continue to use the manual shift program with
the selec tor lever on the center console .•
Con tro ls and eq uip
ment
A pp lies to vehicles: w it h muh it r on ic® Cont inuous ly Variable Transm iss ion ( CVT)
Automatic transmission malfunction
In the event of a system malfunction, the automatic transmission
switches to emergency operation mode.
Gearbox malfunction: You can continue driving
You can continue to drive the vehicle . See an authorized Audi dealer
or other qualified workshop at the next opportunity .
Gearbox malfunction: You can continue driving but functions
are restricted
There is a serious system malfunction:
• The program shifts only into certain gears.
• The engine may stall.
• It is not possible to res tar t t he engine i f it has been switched off .
• Continuing to drive could result in subsequent damage .
0 Note
If the transmission switches to fail -safe mode , you should take the
vehicle to an authorized Audi deale rship as soon as possible to have
the condition corrected .•
Vehicle care I I irechnical data
Page 187 of 398
____________________________________________ A_ d_a--' p=-- t_iv _e_ A_ ir_ S_u_ s-=- p_e _ n_ s _ io_ n __ llll
Ap plies to vehicl es: wi th Adap tive Ai r Su sp ension
Chassis controls
Four different driving modes can be set by the driver.
The automatic contro l processes are speed -and time -dependent.
For example, it is not possib le to raise the suspension to the lift
mode above certain speeds.
L ev el a djustment
automatic
dynamic
aut om ati c Ground clearan
ce
about 4.7 - 4 .1 inches
(120 -105 mm)
about 4.7 inches (120 mm)
about 4.1 inches (105 mm)
a bo ut 5.3 inches ( 135 mm)
Se lect the automatic mode i f you p refer suspension and damping
settings emphasizing comfort .
• Low ering : When a speed of about 75 mph (120 km/h) is exceeded
for more than 30 seconds, the vehicle is automatically lowered by about 0.6 inch (15 mm) to the dynamic level which is more suitable
for highway speeds. Road holding is optimized as a result of the lower center of gravity and fuel consumption is reduced as a result
of reduced wind res istance.
• Rais ing : The vehicle is automatically raised again if the speed
falls below about 44 mph (70 km/h) for a period of 2 minutes . The
vehic le is raised immediate ly when speed falls below about 22 mph
(35 km/h).
s ta nd ard
Select the standard mode if you desire a suspension setting with a
special emphasis on comfort. In the standard mode there is
no
lowering of the suspension. Even a t high speeds, the vehicle stays
at the same level. Damping characteristics with a decided emphasis
on comfort are selected in this mode.
Controls and equip
ment d
y n ami c
Select the dynamic mode if you prefer a sporty suspension setting .
In this mode, the vehicle is lowered whi le it is still stationary and
spo rty damping characteristics are selected . The warn ing light
c.::i
in the instrument cluster will come on for a few seconds just to
remind you of the reduced ground clearance .
If y ou switch off the engine wh ile the ve hicle is in the dynamic mode
and then switch on the ignition once again, the
c.::i warning light
wi ll also come on again f or a few seconds as a reminder .
lift
Select the lift mode when you have to travel over poor sect ions of
road (e .g. trails). In the lift mode, the vehic le is raised by 0.6 inch (15
m m) compared to norma l leve l while it is stil l stationary and
damping characteristics are adjusted to emphasize comfort .
The lift mode can be activated only at speeds below 50 mp h (80
km/h) . When a speed of about 62 mph (100 km/h) is exceeded, the
system automatical ly leaves lift mode and the mode set previously
(standard, automat ic, dynam ic) is activated aga in. •
App lies to v ehic les : with Ada ptive Air Suspens io n
Setting the driving modes
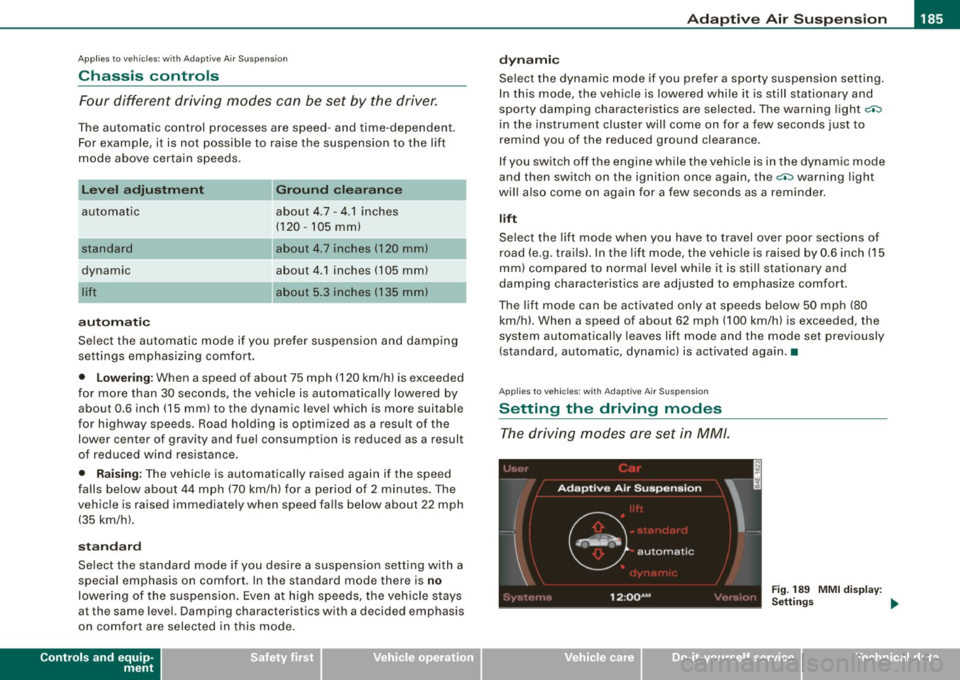
The driving modes are set in MM/.
Fig . 189 MMI di splay:
Settin gs _,.
I • •
Page 190 of 398

• .___H_ o_ m _ e _L_i _ n _k _® ____________________________________________________ _
Homelink®
Universal remote control
Applies to vehic les: w ith Home link ® universal remote cont ro l
General information
The HomeLink® fe ature c an learn th e up to th re e r adio
fre que nc y c odes for m ost cu rrent t ransmi tters us ed for
operating gar age do ors, es tate gates , home o r out doo r
lighti ng sy stems, an d other de vice s.
Yo u must first pro gram t he Hom elink ® trans mitter b efor e you c an
use the system=>
page 189, "Pro gramm ing th e Home link® tra ns
mit ter".
In o rd er to pro gram t he Homelink® tra nsmitter fo r dev ices utiliz ing
ro lling code, a second person on a ladder who can safe ly reach the
ga rag e door o pener motor is reco m me nd ed. It is also necessa ry to
l ocate the "learn" button on yo ur garage do or opener moto r. R efer
to t he op era tin g instr uctions for the open er, as the loc ation and
co lor of th is button may vary by manufacturer .
Y o u c an still u se the o rigi na l r emo te c ontrol for th e dev ice at a ny
tim e.
& WARNING
• Never use the Homelinkl1JI transmitter with any garage door
opener that does have not the safety stop and reverse feature as
required by federal safety standards . This includes any garage
door opener model manufactured before April 1, 1982.
• A garage door opener which cannot detect an object , signaling
the door to stop and reverse does not meet current federal safety standards . Using a garage door opener without these features
increases risk of serious injury or death .
& WARNING (continued)
• For safety reasons never release the parking brake or start the
engine while anyone is standing in front of the vehicle.
• A garage door or an estate gate may sometimes be set in
motion when the Homelink ® remote control is being
programmed . If the device is repeatedly activated , this can over
strain motor and damage its electrical components -an over
heated motor is a fire hazard!
• To avoid possible injuries or property damage , please always
make absolutely certain that no persons or objects are located in
the range of motion of any equipment being operated.
[ i ] Tips
• If y ou wou ld l ik e mor e inf ormation o n Hom elink®, wh ere to
purchase the Homelink ® compatib le products, or wou ld li ke to
pu rchase th e Home link® Ho m e Lightin g Pack age, please call toll
fre e: 1 -8 0 0 -355 -3515.
• For Declara tion of Comp lia nc e to Un ited St ates FCC and Indust ry
C anada regulations=>
page 3 75. •
Page 191 of 398
___________________________________________________ H_ o_m _ e_ L_ i_ n _k_ @_R _ __.11111
Ap plies to vehic les: wit h Hom elin k® un iversal remo te contro l
Programming the Homelink ® transmitter
The transmitter is programmed in two phases. For rolling
code transmitters, a third phase is also necessary.
[i Ii It~
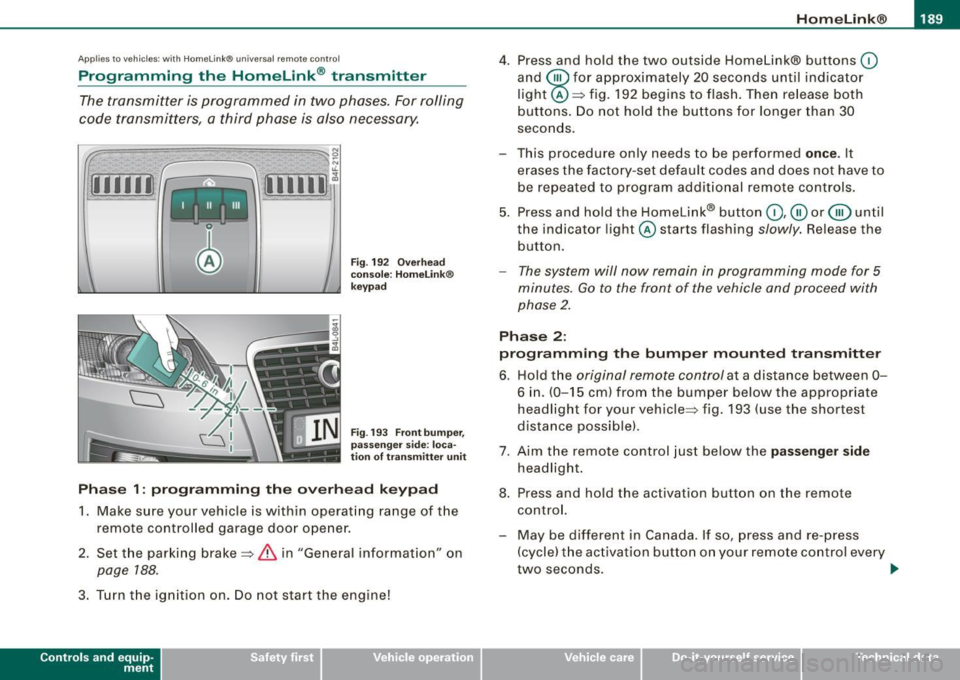
Fig . 192 Overhead
console: HomeLink®
keypad
Fig . 193 Front bumper,
passenger side : loca
tion of transmitter unit
Phase 1: programming the overhead keypad
1. Make sure your vehicle is with in operating range of the
remote controlled garage door opener.
2. Set the parking brake=>
& in "General information " on
page 188 .
3. Turn the ignition on . Do not start the engine!
Con tro ls and eq uip
ment
4. Press and hold the two outside Homelink® buttons (0
and @for approximately 20 seconds until indicator
light @=> fig. 192 begins to flash. Then release both
buttons. Do not hold the buttons for longer than 30
seconds.
This procedure only needs to be performed
once. It
erases the factory-set default codes and does not have to be repeated to program additional remote controls.
5. Press and hold the Homelink® button
(0 ,@ or @ until
the indicator l ight @starts flashing
slowly. Release the
button.
- The system will now remain in programming mode for 5
minutes.
Go to the front of the vehicle and proceed with
phase 2.
Phase 2:
programming the bumper mounted transmitter
6. Hold the original remote control at a distance between 0-
6 in. (0-15 cm ) from the bumper below the appropriate
headlight for your vehicle=> fig . 193 (use the shortest
distance possible) .
7. Aim the remote control just below the
passenger side
headlight.
8. Press and hold the activation button on the remote control.
- May be different in Canada. If so, press and re-press (cycle) the activation button on your remote control every
two seconds. .,_
Vehicle care I I irechnical data
Page 208 of 398
___ S_a_ f_ e_ t-= y_ b_e_ l_ t _s _______________________________________________ _
- Make sure that your passengers also b uckle up and prop
erly wea r th eir sa fety belts.
Protect children wit h a child restraint system appropriate
for the size and age.
The warning light i in the instrument cluster lights up when the
ignition is switched on as a reminder to fasten the safety belts. In
addition , you will hear a warning tone.
After the ignition is switched on, the warning light in the instrument cluster will a lways come on for about 6 seconds and if the driver has
not fastened the safety belt, a warning tone will also sound for
about 6 seconds . As soon as the driver has fastened the safety belt,
the warning tone will stop and the warning light will go out .
If the driver or front seat passenger have not buckled -up within
about 10 seconds after the warning tone has stopped and the
vehicle is moving faster than about 15 mph, the warning tone will
sound again for about 6 seconds and then stop for 24 seconds and
then repeat this reminder sequence for a maximum of 2 minutes. At
speeds be low 5 mph, the warning tone will not sound.
Fa sten your safe ty belt and m ake su re that your p assengers also
properl y put on th eir s afet y belts .
& WARNING
• Safety belt s are the single mo st effective mean s available to
reduce th e risk of ser ious injur y and death in a utomobile acci
dent s. For your prote ction and th at of your pas senger s, alwa ys
c orre ctl y we ar safety belt s when t he vehicle is moving .
• Failure t o pay att ention to th e warning light that co me on,
c ould lead to per sonal injury .•
Why safety belts?
Frontal co11isions and the law of physics
Front al crashes create very strong forces for pe ople riding
in vehicles.
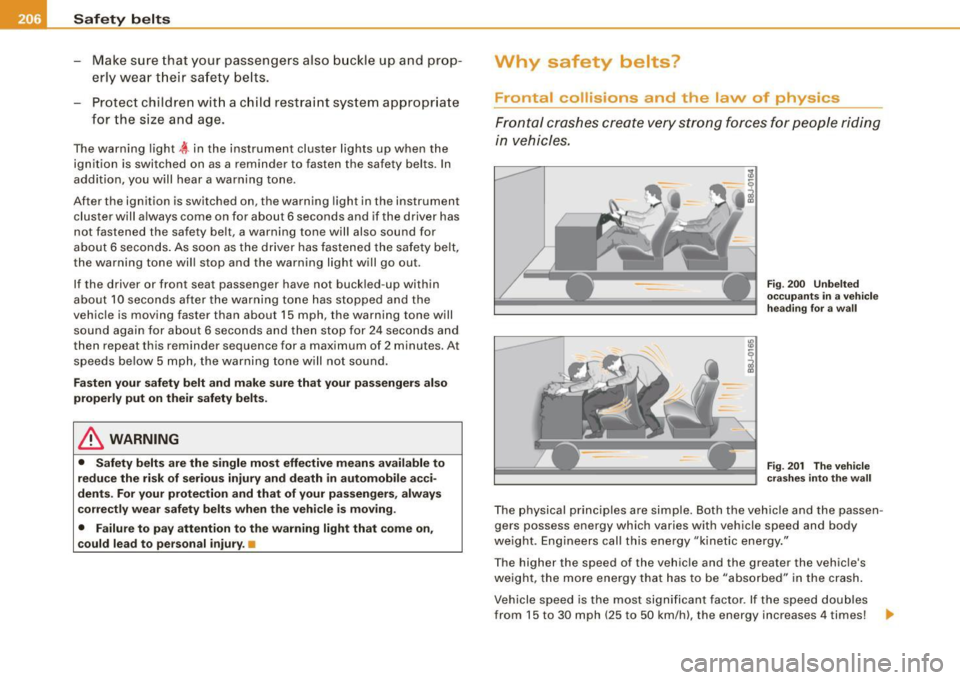
F ig. 2 00 U nbel ted
o cc up ants i n a ve hicle
he ading for a wa ll
Fi g. 2 01 T he vehi cle
c ras hes in to t he wa ll
The physical principles are simple. Both the vehicle and the passen
gers possess energy which varies with vehicle speed and body
we ight . Engineers cal l this energy "kinetic energy ."
T he higher the speed of the vehicle and the greater the vehic le's
we ight, the more energy that has to be "absorbed" in the crash .
Vehicle speed is the most significan t factor. If the speed doubles
from 15 to 30 mph (25 to 50 km/h), the energy increases 4 times! .,
Page 210 of 398
IIJl_....::S~a ~f ~e ~ty ~ b~ e~ l~ t ~s ____________________________________________ _
Safety belts protect
People think it's possible to use the hands to brace the
body in a minor collision. It's simply not true!
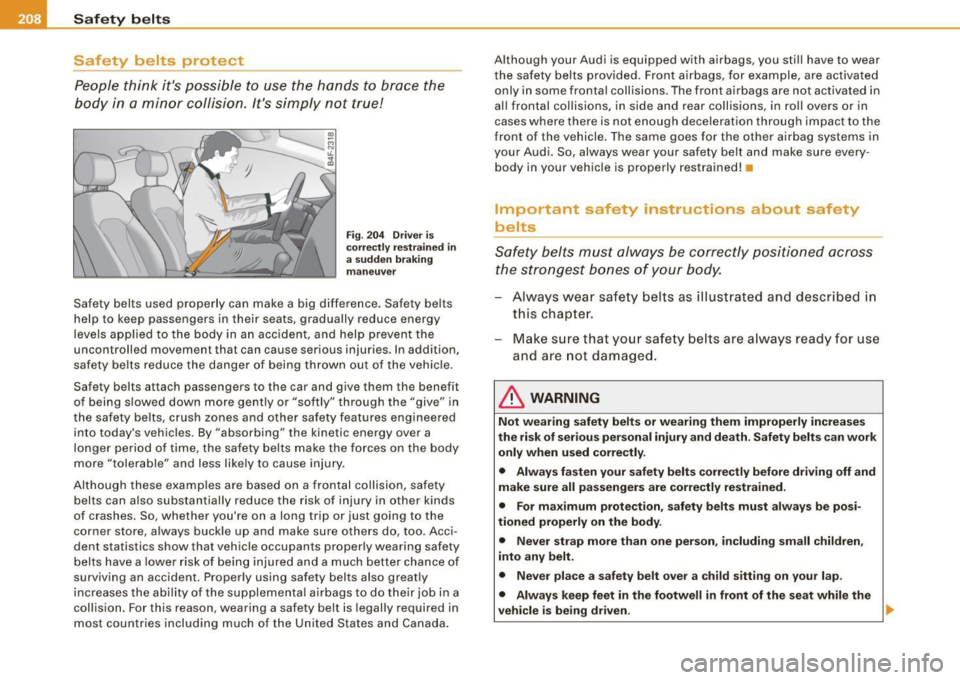
Fig . 20 4 Driv er is
cor rec tly r estrai ned in
a su dden b raking
m an euver
Safety belts used properly can make a big difference. Sa fety belts
help to keep passengers in their seats, gradually reduce energy
levels app lied to the body in an accident, and help prevent the
uncontrolled movement that can cause serious injuries. In addition,
safety be lts reduce the danger of being thrown out of the vehic le .
Safety belts attach passengers to the car and give them the benefit
of being s lowed down more gently or "softly" through the "give" in
the safety belts, crush zones and other safety features engineered
into today's vehicles. By "absorbing" the kinetic energy over a longer period of time, the safety belts make the forces on the body
more "tolerable" and less likely to cause injury .
Altho ugh these examples are based on a frontal co llision, safety
belts can a lso substantially reduce the risk of injury in other kinds
of crashes . So, whether you're on a long trip or just going to the
corner store, a lways buckle up and make sure others do, too. Acci
dent statistics show that vehicle occupants properly wearing safety
belts have a lower ris k of being injured and a much better chance of
surviving an accident. Properly using safety belts also greatly
increases the abi lity o f the supplementa l airbags to do their job in a
collision . For th is reason , wearing a safety belt is legally required in
most countries including much of the United States and Canada. Although your Audi is equipped with airbags, you sti
ll have to wear
the safety belts provided . Fron t airbags, for example, are activated
only in some frontal collisions . T he front airbags are not activated in
a ll frontal col lisions, in side and rear collisions, in roll ove rs or in
cases where there is not enough dece leration through impact to the
front of the vehicle . The same goes for the other airbag systems in
your Audi . So, always wear your safety belt and make sure every
body in your vehic le is properly restrained! •
Important safety instructions about safety
belts
Safety belts must always be co rrectly positioned across
t he strongest bones of your body.
Always wear safety belts as illustrated and described in
th is chapter.
Make s ure tha t your safe ty belts ar e always ready for use
and are not damaged .
& WARNING
Not wearing safety belts or w earing them improperl y increase s
the risk of seriou s per sonal injury and death . S afe ty belt s can work
onl y when used corre ctl y.
• Alway s fa sten your s afety belt s correctl y before dri ving off and
make sure all p assenger s ar e correctly restrain ed.
• For m aximum protect ion , safet y belt s must always be po si
ti oned properly on the body .
• Never strap more th an one person , includi ng sm all children ,
into any belt.
• Never pla ce a s afety belt ove r a child sitting on your lap .
• Alway s keep feet in t he foot well
in front of the seat while the
vehicle is being driven .
~