Page 356 of 648
�ÎThe displayed message may
vary on models or versions. On
some models, there is no
message to disconnect.
When you disconnect the iPod while
it is playing, the center display and
the audio screen (if selected) show
USB NO DATA.
If you reconnect the same iPod, the
system may begin playing where it
lef t of f , depending on what mode the
iPod is in when it is reconnected. If you see an error message in the
center display, see page .
:
354
Playing an iPod(Models with navigation system)
iPodError Messages
Features
353
When you connect your iPod to the
navigation system, the most recent
settings (Shuf f le, Repeat, etc.) will be
carried over.
�\f���—�\f���—�����y�
�������������y���
�)� �����\f�\f�y�\f�������y
2009 TL
Page 359 of 648

�Î
�Î
The audio system reads and plays
the audio f iles on the USB f lash
memory device in MP3, WMA or
AAC formats. The USB flash
memory device limit is up to 700
f olders or up to 15000 f iles.
The recommended USB f lash
memory devices are 256 Mbyte or
higher. Some digital audio players
maybecompatibleaswell.
Some USB f lash memory devices
(such as devices with security lock-
out f eatures, etc.) will not work in
this audio unit.Do not use a device such as a card
reader or hard drive as it or your
f iles may be damaged.
Do not connect your USB f lash
memory device using a hub.
Do not use an extension cable to
the USB adapter cable equipped
with your vehicle.
Only AAC f ormat f iles recorded
with iTunes are playable on this
audio unit.
This audio system can select and
play the audio f iles on a USB f lash
memory device with the same
controls used f or the disc player. To
play a USB f lash memory device,
connect it to the USB adapter cable
in the console compartment, then
press the HDD/AUX button until
you see ‘‘AUX’’ in the display. The
power mode must be ACCESSORY
or ON.
Your vehicle has the engine start/
stop button instead of an ignition
switch. For more inf ormation to
select the power mode, see page .
Depending on the sof tware the
f iles were made with, it may not be
possibletoplaysomefiles,or
display some text data.
Depending on the type and
number of f iles, it may take some
time bef ore they begin to play.
We recommend backing up your
data bef ore playing a USB f lash
memory device.
Do not keep a USB f lash memory
device in the vehicle. Direct
sunlight and high heat will damage
it.
:
178
To Play a USB Flash Memory
Device
Playing a USB Flash Memory Device (Models with navigation system)
356
NOTE:
�\f���—�\f���—�����y�
�����������\f�y���
�)� �����\f�\f�y�\f�����
�y
2009 TL
Page 366 of 648

Turn the interf ace dial, select the
Folder Random icon and press
ENTER on the interf ace selector.
The f iles are played in random
order.
To cancel this f unction, turn the
interf ace dial and select the Random
OFFicon,andthenpressENTERon
the interf ace selector.
This f unction samples all the tracks
in the current f older in the order that
they were recorded.On the USB main screen, push the
interf ace selector down to display
AUDIO MENU.
Turn the interf ace dial, select the
Scan icon and press ENTER on
the interf ace selector. Turn the interf ace dial, select
Track Scan icon and press ENTER
on the interf ace selector. Each
track or f ile is sampled f or 10
seconds. When all the tracks in
the f older have been scanned,
regular playback is resumed.
To cancel this f unction, turn the
interf ace dial and select the Scan
OFFicon,andthenpressENTERon
the interface selector to play the last
track sampled.
3.
3.
1.
2.
TRACK SCAN
Playing a USB Flash Memory Device (Models with navigation system)
Features
363
TRACK SCAN ICON SCAN OFF ICON
�\f���—�\f���—�����y�
���������\f�\f�y���
�)� �����\f�\f�y�\f�������y
2009 TL
Page 367 of 648

This f unction samples the f irst f ile in
each f older within the USB f lash
memory device.If you reconnect the same USB f lash
memory device, the system will
begin playing where it lef t of f .
On the USB main screen, push the
interf ace selector down to display
AUDIO MENU.
Turn the interf ace dial, select the
Scan icon and press ENTER on
the interf ace selector. Turn the interf ace dial, select
Folder Scan icon and press
ENTER on the interf ace selector.
The f irst f ile of the f irst f older is
sampled f or 10 seconds. If no other
operations are carried out, the f irst
f iles of the remaining f olders are
played f or 10 seconds. Af ter the f irst
f ile of the last f older is played back,
regular playback is resumed.
To cancel this f unction, turn the
interf ace dial and select the Scan
OFFicon,andthenpressENTERon
the interf ace selector. To play the radio, press the AM/FM,
or XM button. Press the DISC button
to switch to the disc mode. Press the
HDD/AUX button to switch the
mode between the HDD Audio, USB,
and Bluetooth
Audio.
1.
2. 3.
To Stop Playing a USB Flash
Memory Device
FOLDER SCAN
Playing a USB Flash Memory Device (Models with navigation system)
364
FOLDER SCAN ICON
�\f���—�\f���—�����y�
���������\f���y���
�)� �����\f�\f�y�\f�������y
2009 TL
Page 371 of 648

�Î
�Î
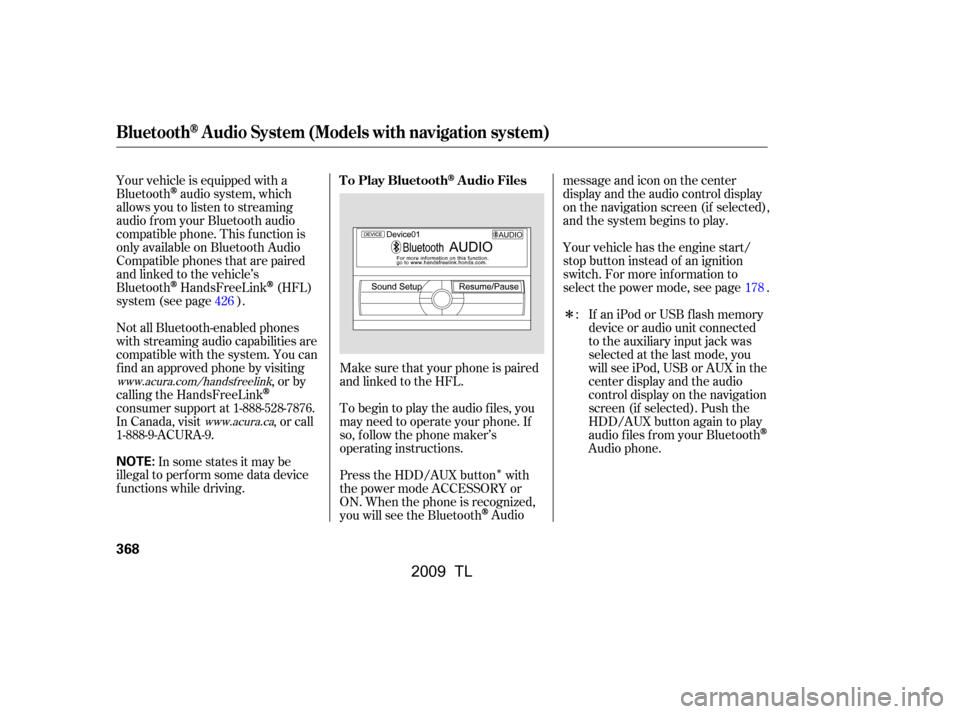
Make sure that your phone is paired
and linked to the HFL.
Your vehicle is equipped with a
Bluetooth
audio system, which
allows you to listen to streaming
audio f rom your Bluetooth audio
compatible phone. This f unction is
only available on Bluetooth Audio
Compatible phones that are paired
and linked to the vehicle’s
Bluetooth
HandsFreeLink(HFL)
system (see page ).
Not all Bluetooth-enabled phones
with streaming audio capabilities are
compatible with the system. You can
f ind an approved phone by visiting ,orby
calling the HandsFreeLink
consumer support at 1-888-528-7876.
In Canada, visit , or call
1-888-9-ACURA-9.
In some states it may be
illegal to perf orm some data device
f unctions while driving. Yourvehiclehastheenginestart/
stop button instead of an ignition
switch. For more inf ormation to
select the power mode, see page .
To begin to play the audio f iles, you
may need to operate your phone. If
so, f ollow the phone maker’s
operating instructions.
Press the HDD/AUX button with
the power mode ACCESSORY or
ON. When the phone is recognized,
you will see the Bluetooth
Audio messageandicononthecenter
display and the audio control display
on the navigation screen (if selected),
and the system begins to play.
If an iPod or USB f lash memory
device or audio unit connected
to the auxiliary input jack was
selected at the last mode, you
will see iPod, USB or AUX in the
center display and the audio
control display on the navigation
screen (if selected). Push the
HDD/AUX button again to play
audio f iles f rom your Bluetooth
Audio phone.
:
178
426
www.acura.com/handsfree link
www.acura.ca
T o Play BluetoothAudio Files
BluetoothAudio System (Models with navigation system)
368
NOTE:
�\f���—�\f���—�����y�
�������������y���
�)� �����\f�\f�y�\f�������y
2009 TL
Page 383 of 648

The security system helps to protect
your vehicle and valuables f rom thef t.
The horn sounds and a combination
of headlights, parking lights, side
marker lights and taillights f lash if
someone attempts to break into your
vehicle or remove the audio unit.
This alarm continues f or 2 minutes,
then the system resets. To reset an
activated system before the 2
minutes have elapsed, unlock the
driver’s door with the key or use the
remote transmitter/keyless access
remote.
You can also turn off an activated
system by grabbing either f ront door
handle while carrying the keyless
access remote to unlock the door.
To enter the clock setting, turn
the selector knob to select ‘‘SET,’’
then press the knob. The display
will return to the menu item
display.
Press either the RETURN or
SETUPbuttontogobacktothe
normal display. The security system automatically
sets 15 seconds after you lock the
doors, hood, and trunk. For the
system to activate, you must lock the
doors f rom the outside with the key,
driver’s lock tab, master door lock
switch, or remote transmitter
(keyless access remote on models
with keyless access system). The
security system indicator on the
instrument panel starts blinking
immediately to show you the system
is setting itself .
11.
10.
On models with keyless access system
Setting the Clock, Security System
Security System
380
SECURITY SYSTEM INDICATOR
�\f���—�
���—�����y�
�\f��
������
�y���
�)� �����\f�\f�y�\f�������y
2009 TL
Page 384 of 648

You can also set the security system
by pressing the lock button on either
f ront door handle while carrying the
keyless access remote.Once the security system is set,
opening any door (without using the
key or the remote transmitter/
keyless access remote), the hood, or
the trunk will cause the system to
alarm. It also alarms if the audio unit
is removed f rom the dashboard or
the wiring is cut.
With the system set, you can still
open the trunk with the remote
transmitter/keyless access remote
without triggering the alarm. The
alarm will sound if the trunk is
opened with the trunk release button
on the driver’s door, the trunk
release handle behind the trunk
pass-through cover, or the
emergency trunk opener. Use the remote transmitter/
keyless access remote to quickly
check that the hood, the trunk, and
all doors are closed. Push the lock
button twice within 5 seconds. There
should be an audible conf irmation
beep.
The security system will not set if
the hood, trunk, or any door is not
f ully closed. If the system will not set,
check the door and trunk open
monitor on the multi-inf ormation
display (see page ) to see if the
doors and trunk are f ully closed.
Since it is not part of the monitor
display, manually check the hood.
Do not attempt to alter this system
or add other devices to it. 11
On models with keyless access system
Security System
Features
381
NOTE:
�\f���—�
���—�����y�
�\f��
��������y���
�)� �����\f�\f�y�\f�������y
2009 TL
Page 385 of 648

Compass operation can be af f ected
by driving near power lines or
stations, across bridges, through
tunnels, over railroad crossings, past
large vehicles, or driving near large
objects that can cause a magnetic
disturbance. It can also be af f ected
by accessories such as antennas and
roof racks that are mounted by
magnets.
When you turn the ignition switch to
the ON (II) position, the compass is
self-calibrating, then the compass
display is shown in the display.The compass may need to be
manually calibrated af ter exposure to
a strong magnetic field. If the
compassseemstobecontinually
showing the wrong direction and is
not self -calibrating, or the compass
display is blinking with the CAL
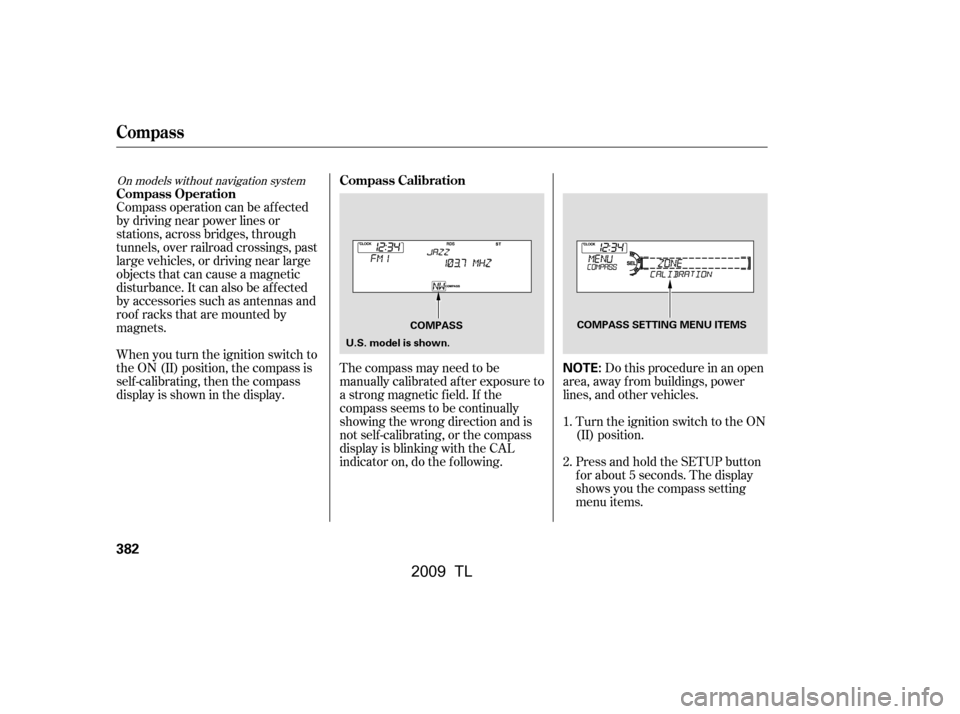
indicator on, do the f ollowing. Do this procedure in an open
area, away f rom buildings, power
lines, and other vehicles.
Turn the ignition switch to the ON
(II) position.
Press and hold the SETUP button
f or about 5 seconds. The display
shows you the compass setting
menu items.
1.
2.
On models without navigation system
Compass Operation
Compass Calibration
Compass
382
NOTE:
COMPASS SETTING MENU ITEMS
U.S. model is shown. COMPASS
�\f���—�\f���—�\f���y�
����
��������y���
�)� �����\f�\f�y�\f�������y
2009 TL