2008 VOLVO S80 key
[x] Cancel search: keyPage 94 of 275

The wipers will make an extra sweep each time the thumb wheel is adjusted upward.
When the rain sensor is activated, the symbol
will illuminate in the instrument panel.
Activating and setting the sensitivity
When activating the rain sensor, the vehicle must be running or in ignition mode II and the windshield wiper lever
must be in position 0 or in the single sweep position.
Activate the rain sensor by pressing the button
. The windshield wipers will make one sweep.
Press the lever up for the wipers to make an extra sweep. The rain sensor returns to active mode when the stalk is
released back to position 0.
Deactivating
Deactivate the rain sensor by pressing the button
or press the lever down to another wiper position.
The rain sensor is automatically deactivated when the key is removed from the ignition slot or five minutes after the
ignition has been switched off.
CAUTION
Use ample washer fluid when washing the windshield. The windshield should be thoroughly wet when the wipers
are in operation.
Before using the wipers, ice and snow should be removed from the windshield. Be sure the wiper blades are not
frozen in place.
96 03 Your driving environment
Wipers and washers
Windshield washing
Move the lever toward the steering wheel to start the windshield and headlight washers. After the lever is released the
wipers make several extra sweeps.
Heated washer nozzles (option)
The washer nozzles are heated automatically in cold weather to help prevent the washer fluid from freezing.
Page 95 of 275

High-pressure headlight washing (option)
High-pressure headlight washing consumes a large quantity of washer fluid. To save fluid, the headlights are washed
using two alternatives:
Low/high beam headlights on
The headlights will be washed the first time the windshield is washed. Thereafter, the headlights will only be washed
once for every five times the windshield is washed within a 10-minute period.
Parking lights on
Optional Active Bi -Xenon® headlights will be washed once for every five times the windshield is washed. Normal
halogen headlights will not be washed.
CAUTION
Use ample washer fluid when washing the windshield. The windshield should be thoroughly wet when the wipers
are in operation.
NOTE
One headlight is washed at a time.
97 03 Your driving environment
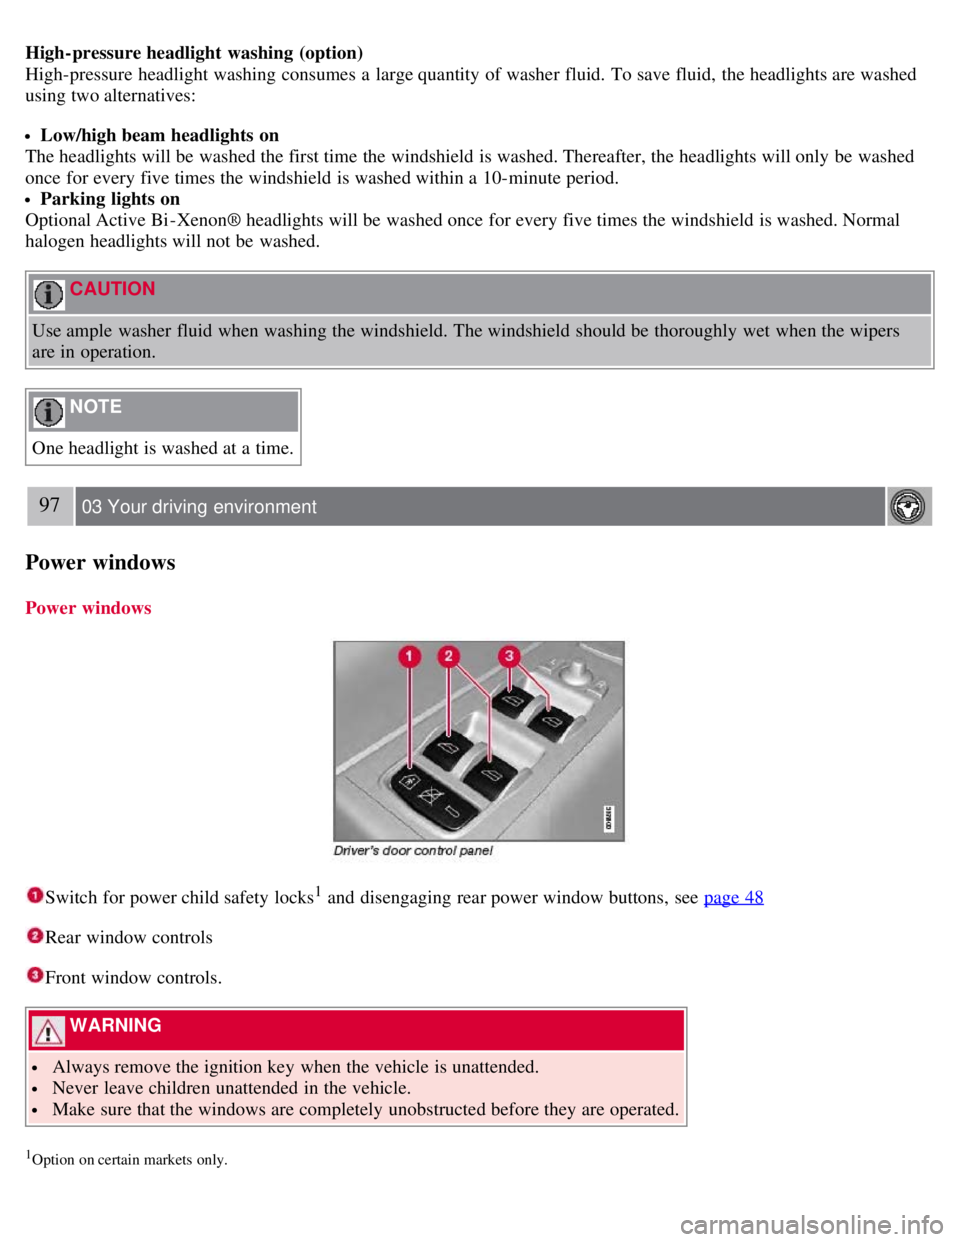
Power windows
Power windows
Switch for power child safety locks1 and disengaging rear power window buttons, see page 48
Rear window controls
Front window controls.
WARNING
Always remove the ignition key when the vehicle is unattended.
Never leave children unattended in the vehicle.
Make sure that the windows are completely unobstructed before they are operated.
1Option on certain markets only.
Page 96 of 275

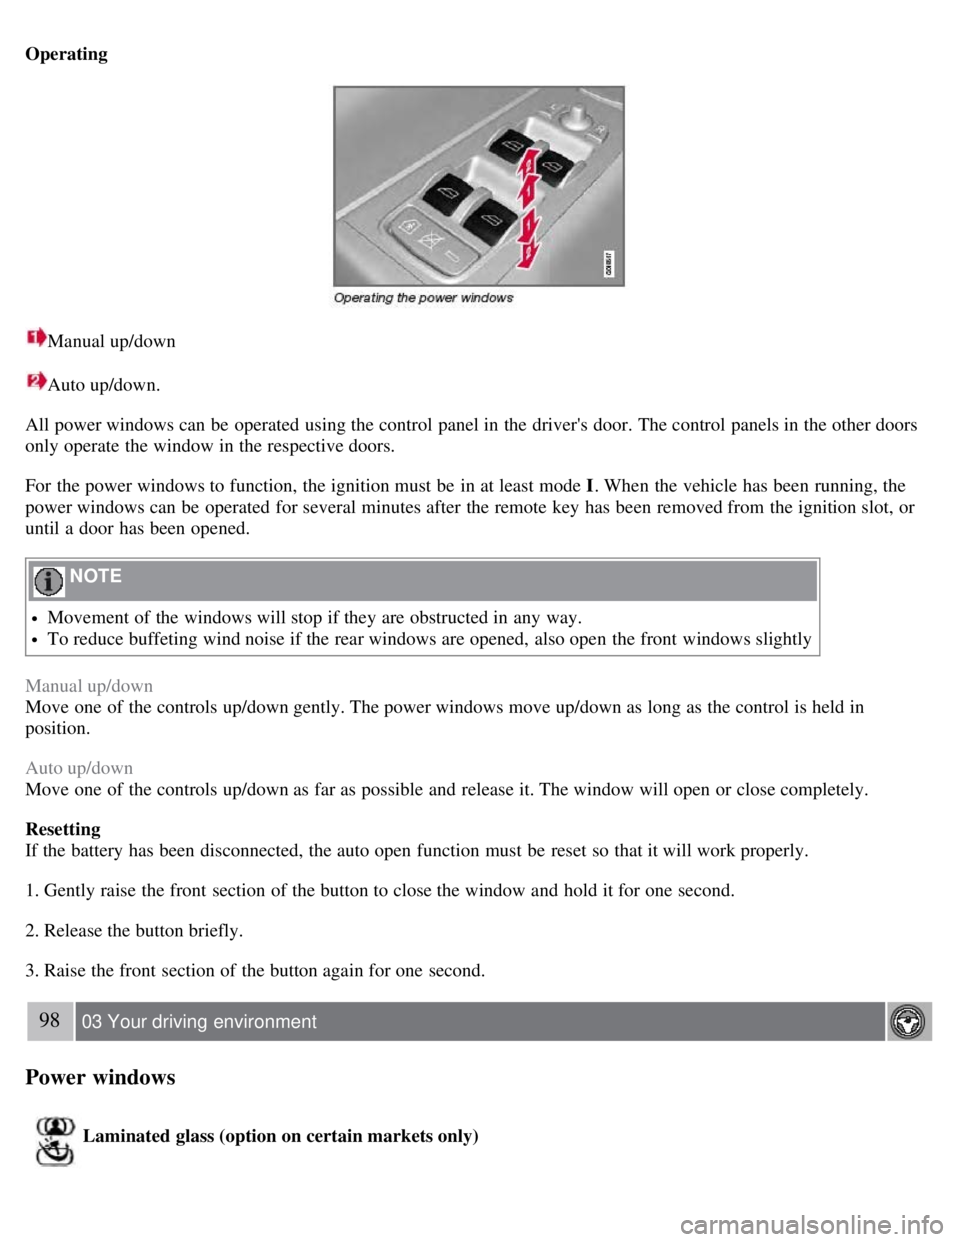
Operating
Manual up/down
Auto up/down.
All power windows can be operated using the control panel in the driver's door. The control panels in the other doors
only operate the window in the respective doors.
For the power windows to function, the ignition must be in at least mode I . When the vehicle has been running, the
power windows can be operated for several minutes after the remote key has been removed from the ignition slot, or
until a door has been opened.
NOTE
Movement of the windows will stop if they are obstructed in any way.
To reduce buffeting wind noise if the rear windows are opened, also open the front windows slightly
Manual up/down
Move one of the controls up/down gently. The power windows move up/down as long as the control is held in
position.
Auto up/down
Move one of the controls up/down as far as possible and release it. The window will open or close completely.
Resetting
If the battery has been disconnected, the auto open function must be reset so that it will work properly.
1. Gently raise the front section of the button to close the window and hold it for one second.
2. Release the button briefly.
3. Raise the front section of the button again for one second.
98 03 Your driving environment
Power windows
Laminated glass (option on certain markets only)
Page 97 of 275

This glass is reinforced to help provide protection against break-ins and improved sound insulation in the passenger
compartment. The windshield and side windows have laminated glass.
99 03 Your driving environment
Mirrors
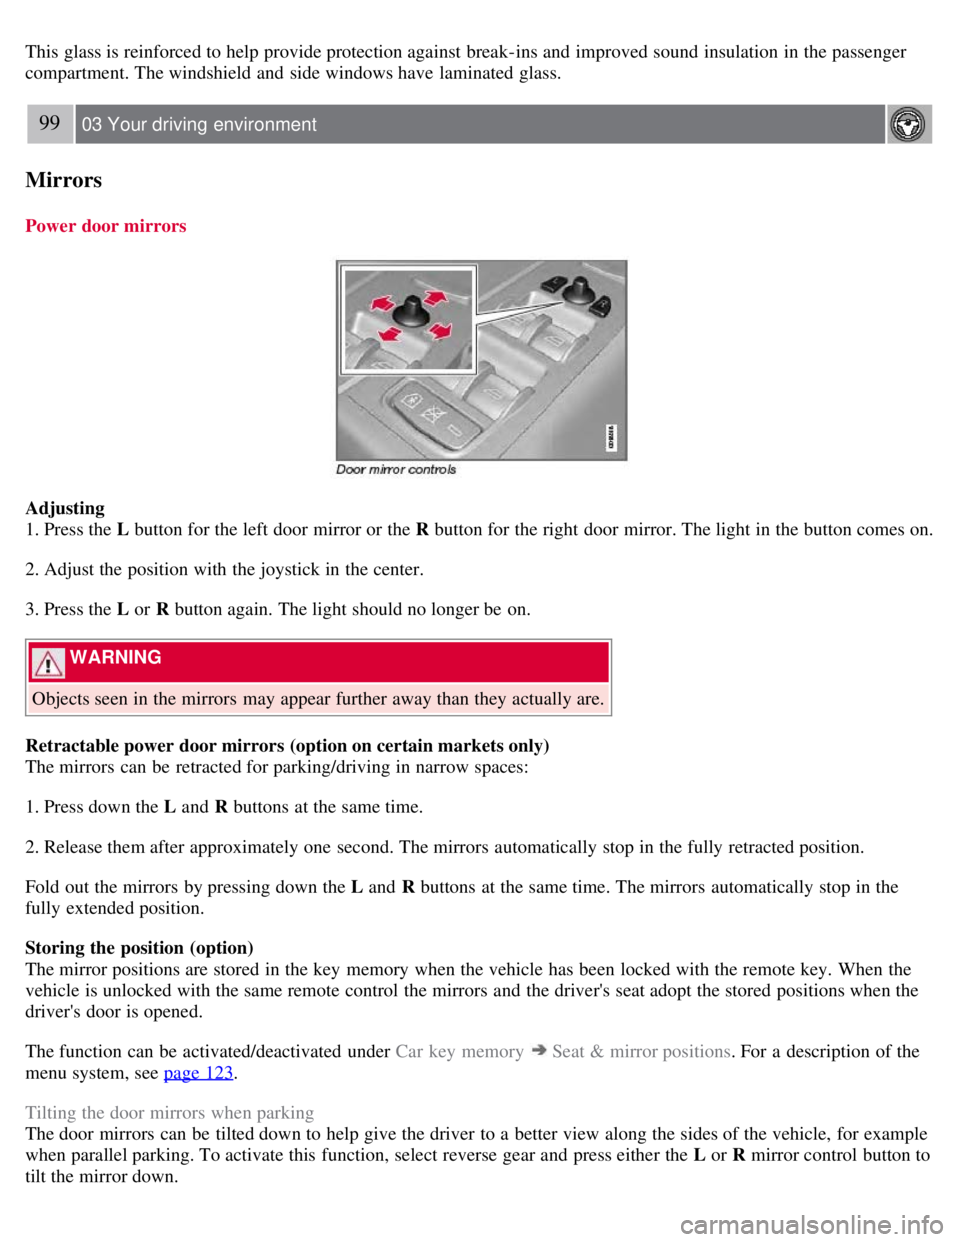
Power door mirrors
Adjusting
1. Press the L button for the left door mirror or the R button for the right door mirror. The light in the button comes on.
2. Adjust the position with the joystick in the center.
3. Press the L or R button again. The light should no longer be on.
WARNING
Objects seen in the mirrors may appear further away than they actually are.
Retractable power door mirrors (option on certain markets only)
The mirrors can be retracted for parking/driving in narrow spaces:
1. Press down the L and R buttons at the same time.
2. Release them after approximately one second. The mirrors automatically stop in the fully retracted position.
Fold out the mirrors by pressing down the L and R buttons at the same time. The mirrors automatically stop in the
fully extended position.
Storing the position (option)
The mirror positions are stored in the key memory when the vehicle has been locked with the remote key. When the
vehicle is unlocked with the same remote control the mirrors and the driver's seat adopt the stored positions when the
driver's door is opened.
The function can be activated/deactivated under Car key memory
Seat & mirror positions . For a description of the
menu system, see page 123
.
Tilting the door mirrors when parking
The door mirrors can be tilted down to help give the driver to a better view along the sides of the vehicle, for example
when parallel parking. To activate this function, select reverse gear and press either the L or R mirror control button to
tilt the mirror down.
Page 98 of 275

The door mirror will reset to its normal position:
after 10 seconds when reverse is disengaged and the car remains stopped.
immediately when reverse is disengaged and the vehicle's forward speed exceeds approximately 6 mph (10 km/h).
immediately if you press the corresponding L or R button again.
when the engine is turned off.
when the side mirrors are folded in.
NOTE
Only one mirror can be tilted down at a time.
Automatic retraction when locking
When the vehicle is locked/unlocked with the remote key the door mirrors are automatically retracted/extended.
The function can be activated/deactivated under Car settings
Retract mirrors
100 03 Your driving environment
Mirrors
when locking. For a description of the menu system, see page 123.
Resetting to neutral
Mirrors that have been moved out of position by an external force must be electrically reset to the neutral position for
electric retracting/extending to work.
Retract the mirrors with the L and R buttons.
Fold them out again with the L and R buttons.
The mirrors are now reset in neutral position.
Home safe and approach lighting
The light on the door mirrors comes on when approach lighting or home safe lighting is selected, see page 94
.
Rear window and door mirror defrosters
Use the defroster to quickly remove misting and ice from the rear window and the door mirrors.
Press the button once to start simultaneous rear window and door mirror defrosting. The light in the button indicates
that the function is active. Defrosting is deactivated automatically and its duration is controlled by the outside
Page 105 of 275

107 03 Your driving environment
Starting the engine
Starting the engine
Ignition switch with remote key inserted (see page 80
for more information)
1. Fasten the seat belt.
WARNING
Before starting the engine, check that the seat, steering wheel and mirrors are adjusted properly. Make sure the brake
pedal can be depressed completely. Adjust the seat if necessary.
2. Insert the remote key into the ignition slot. Press the key until it is drawn into the slot
1.
NOTE
The remote key should be inserted into the ignition slot with the key blade end of the remote pointing out and the
key pad facing up. See the illustration on page 80
.
3. Depress the brake pedal
2.
WARNING
An extra mat on the driver's floor can cause the accelerator and/or brake pedal to catch. Check that the movement of
these pedals is not impeded. Not more than one protective floor covering may be used at one time.
4. Press and release the START/STOP ENGINE button. The autostart function will operate the starter motor until the
engine starts.
The starter motor operates for a maximum of 10 seconds. If the engine has not started, repeat the procedure.
1On vehicles with the optional keyless drive, it is only necessary to have a remote control in the passenger's compartment.
2 If the vehicle is moving, it is only necessary to press the START/STOP ENGINE button to start the vehicle.
WARNING
Always remove the remote key from the ignition slot when leaving the vehicle, especially if there are children in
Page 106 of 275

the vehicle.
Never remove the remote key from the ignition slot while driving or when the vehicle is being towed. The
steering lock could otherwise be activated, making it impossible to steer the vehicle. Never remove the remote key
with keyless drive function (option) from the vehicle while driving or during towing.
Always place the gear selector in Park and apply the parking brake before leaving the vehicle. Never leave the
vehicle unattended with the engine running.
Always open garage doors fully before starting the engine inside a garage to ensure adequate ventilation. The
exhaust gases contain carbon monoxide, which is invisible and odorless but very poisonous.
108 03 Your driving environment
Starting the engine
NOTE
The idling speed can be noticeably higher than normal during cold starts. This is to enable emission control system
can reach normal operating temperature as quickly as possible, which helps reduce exhaust emissions
1.
Keylock: Your vehicle is equipped with a keylock system. When the engine is switched off, the gear selector must
be in the Park position before the key can be removed
2 from the ignition slot.
1If the gear selector is in the D or R positions and the car is not moving, engine speed (rpm) will be lower and it will take longer for the engine to
reach normal operating temperature.
2Does not apply to vehicles with the optional keyless drive.
CAUTION
When starting in cold weather, the automatic transmission may shift up at slightly higher engine speeds than
normal until the automatic transmission fluid reaches normal operating temperature.
Do not race a cold engine immediately after starting. Oil flow may not reach some lubrication points fast enough
to prevent engine damage.
The engine should be idling when you move the gear selector. Never accelerate until after you feel the
transmission engage. Accelerating immediately after selecting a gear will cause harsh engagement and premature
transmission wear.
Selecting P or N when idling at a standstill for prolonged periods of time will help prevent overheating of the
automatic transmission fluid.
Keyless drive (option)
Follow steps 3-4 for starting the engine.
NOTE
For the vehicle to start, one of the vehicle's remote keys must be in the passenger compartment.
Steering wheel lock
The steering wheel lock is deactivated when the remote key is inserted into the ignition slot
1 and activated when the
remote key is removed from the ignition slot.
Always take the remote key or keyless drive remote when leaving the vehicle to help reduce the risk of theft.
1 On vehicles with the optional keyless drive, the steering lock is deactivated when the start button is pressed for the first time (assuming that a
Page 108 of 275

Do not connect the jumper cable to any part of the fuel system or to any moving parts. Avoid touching hot
manifolds.
Batteries generate hydrogen gas, which is flammable and explosive.
Battery fluid contains sulfuric acid. Do not allow battery fluid to contact eyes, skin, fabrics or painted surfaces. If
contact occurs, flush the affected area immediately with water. Obtain medical help immediately if eyes are affected.
Never expose the battery to open flame or electric spark.
Do not smoke near the battery.
Failure to follow the instructions for jump starting can lead to injury.
110 03 Your driving environment
Transmission
Automatic transmission
Depress the button on the front of the gear selector knob to move the gear selector between the R , N, D, and P
positions.
The gear selector can be moved freely between the Geartronic (manual shifting) and Drive ( D) positions while driving.
Park position (P)
Select the P position when starting or parking.
1The information display (see page 74) shows the gear selector's position or the selected gear by displaying the following: P, R, N, D, 1, 2, 3, 4, 5,
or 6.
Keylock
To remove the remote key from the ignition slot, the gear selector must be in the P position. The remote key is locked
in the slot in all other positions.
Shiftlock
When P has been selected, the transmission is mechanically blocked in this position. The brake pedal must be
depressed before the gear lever can be moved from the P position.
Always apply the parking brake when the vehicle is parked, see page 116
. If the vehicle is equipped with the optional
electric parking brake, press the control to apply the brake, see page 116
.
CAUTION