2008 VOLVO S80 engine
[x] Cancel search: enginePage 80 of 275
Adjust the backrest to an upright position.
Lift the catches on the rear of the backrest.
Without releasing the catches, push the backrest forward.
Move the seat as far forward as possible so that the head restraint slides under the glove compartment.
WARNING
Cover sharp edges on the load to help prevent injury to occupants. Secure the load to help prevent shifting during
sudden stops.
83 03 Your driving environment
Seats
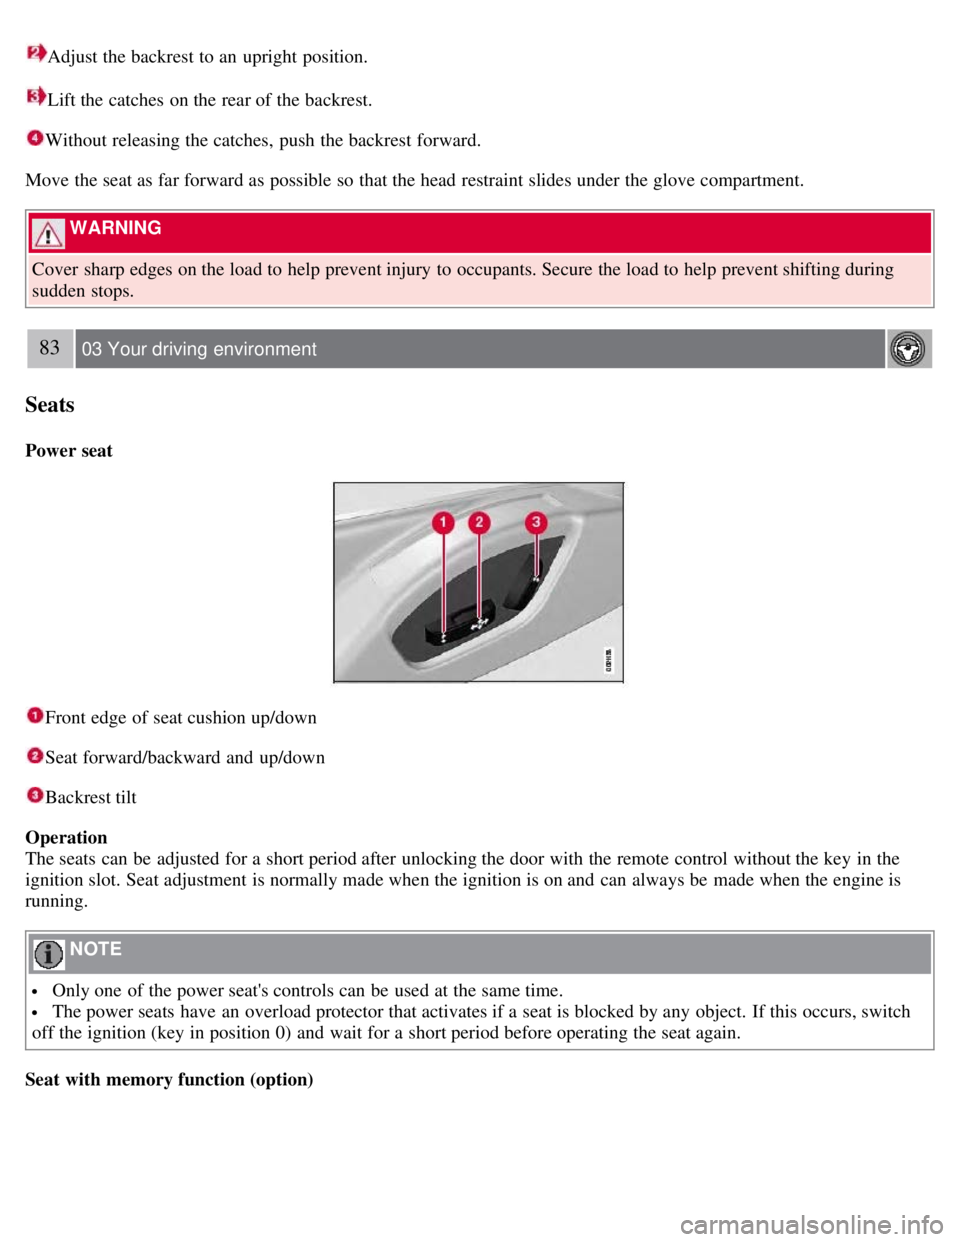
Power seat
Front edge of seat cushion up/down
Seat forward/backward and up/down
Backrest tilt
Operation
The seats can be adjusted for a short period after unlocking the door with the remote control without the key in the
ignition slot. Seat adjustment is normally made when the ignition is on and can always be made when the engine is
running.
NOTE
Only one of the power seat's controls can be used at the same time.
The power seats have an overload protector that activates if a seat is blocked by any object. If this occurs, switch
off the ignition (key in position 0) and wait for a short period before operating the seat again.
Seat with memory function (option)
Page 83 of 275
1. Pull the release control handle(s).
2. Fold the backrest forward. Adjust the center seat head restraint if necessary.
NOTE
The outboard head restraints must be folded up (in the upright position) before lowering the backrests.
WARNING
Keep vehicle doors and the trunk locked and keep keys out of a child's reach. Unsupervised children could lock
themselves in an open trunk and risk injury. Children should be taught not to play in vehicles.
On hot days, the temperature in the trunk or vehicle interior can rise very quickly. Exposure of people to these
high temperatures for even a short period of time can cause heat-related injury or death. Small children are
particularly at risk.
WARNING
When the backrest is returned to the upright position, check that it is properly locked in place. Return the head
restraints to the upright position.
Long loads should always be securely anchored to help avoid injury in the event of a sudden stop.
Always turn the engine off and apply the parking brake when loading/unloading the vehicle.
Place the transmission in the Park ( P) position to help prevent inadvertent movement of the gear selector.
The vehicle features a 60/40 split fold-down rear seat. The backrest(s) can be folded down by pulling the release
control handles inside the trunk.
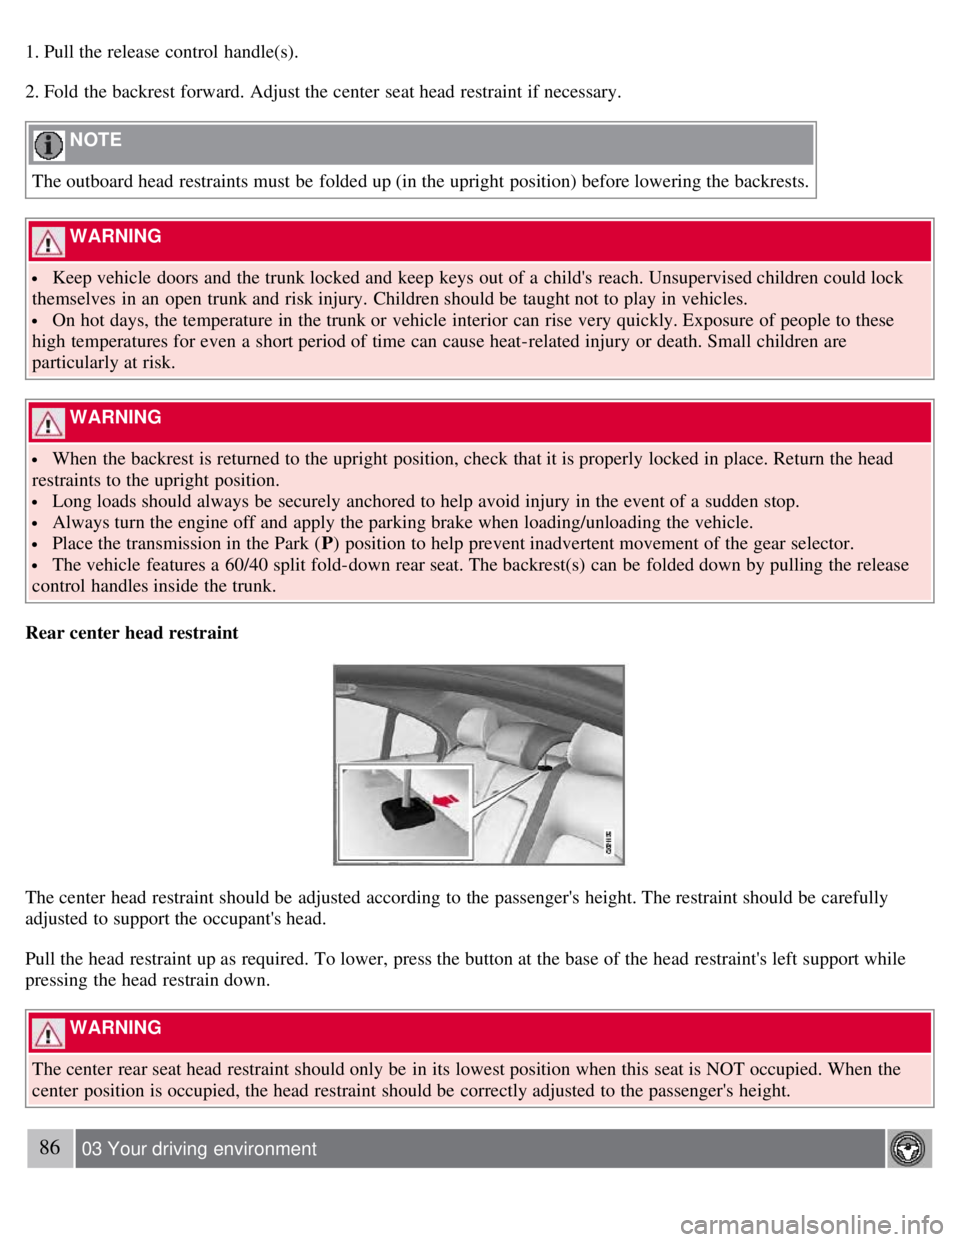
Rear center head restraint
The center head restraint should be adjusted according to the passenger's height. The restraint should be carefully
adjusted to support the occupant's head.
Pull the head restraint up as required. To lower, press the button at the base of the head restraint's left support while
pressing the head restrain down.
WARNING
The center rear seat head restraint should only be in its lowest position when this seat is NOT occupied. When the
center position is occupied, the head restraint should be correctly adjusted to the passenger's height.
86 03 Your driving environment
Page 86 of 275
Lighting
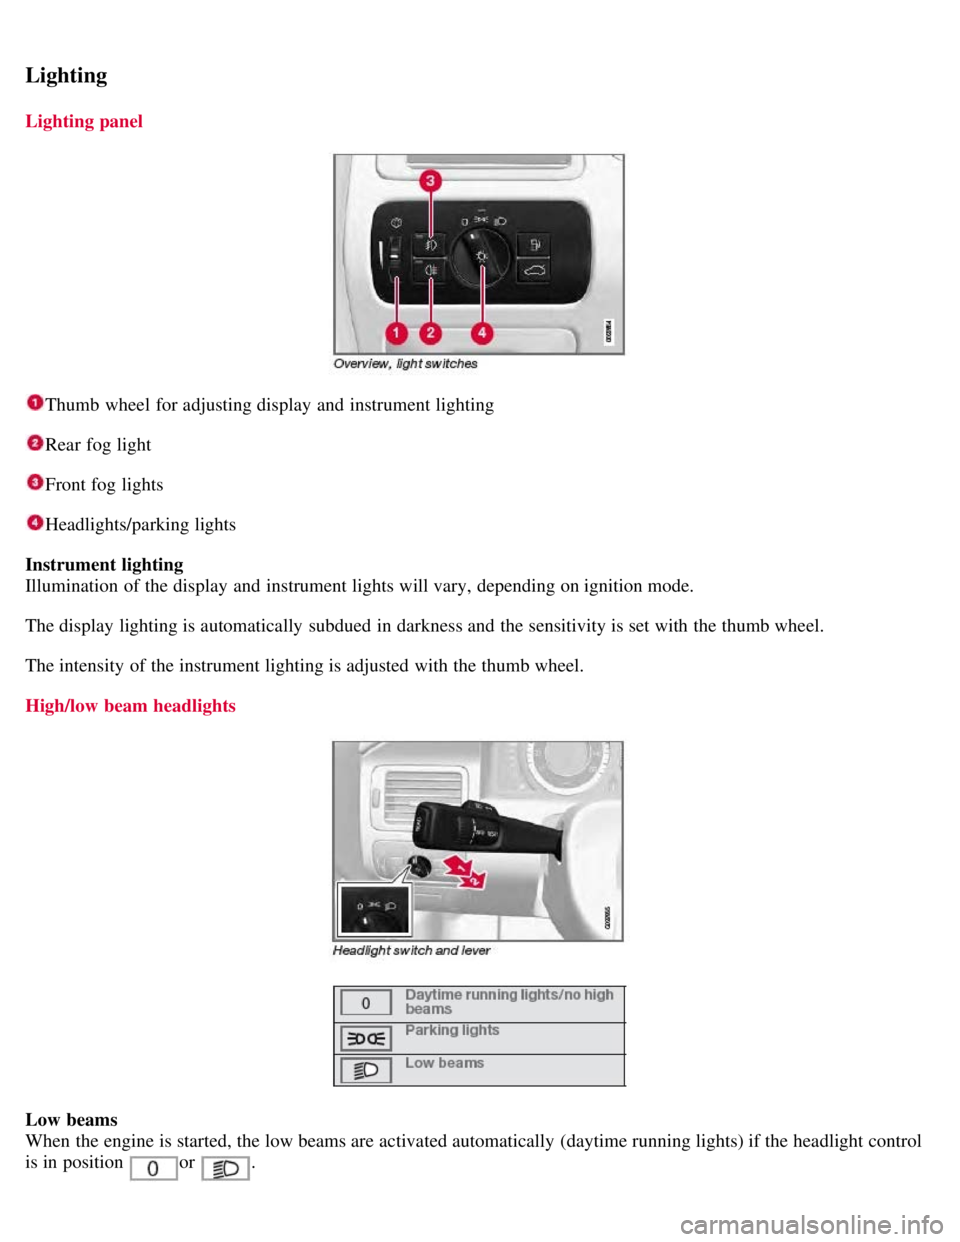
Lighting panel
Thumb wheel for adjusting display and instrument lighting
Rear fog light
Front fog lights
Headlights/parking lights
Instrument lighting
Illumination of the display and instrument lights will vary, depending on ignition mode.
The display lighting is automatically subdued in darkness and the sensitivity is set with the thumb wheel.
The intensity of the instrument lighting is adjusted with the thumb wheel.
High/low beam headlights
Low beams
When the engine is started, the low beams are activated automatically (daytime running lights) if the headlight control
is in position
or .
Page 87 of 275
Daytime running lights can be deactivated by an authorized Volvo workshop.
NOTE
The use of daytime running lights is mandatory in Canada.
Continuous high beams cannot be activated when the headlight switch is in position or . High beam
flash will function in these positions.
High beam flash
Move the lever toward the steering wheel to position
. The high beams come on until the lever is released.
High/low beam headlights
Continuous high beams
Set the ignition to mode II.
With the light switch in position
, pull the turn signal lever toward the steering wheel to position to toggle
between high and low beams (this also applies on models equipped with the optional Active Bi -Xenon® headlights).
The
symbol illuminates in the instrument panel to indicate that the high beams are on.
90 03 Your driving environment
Lighting
Active Bi -Xenon® Lights (ABL)-option
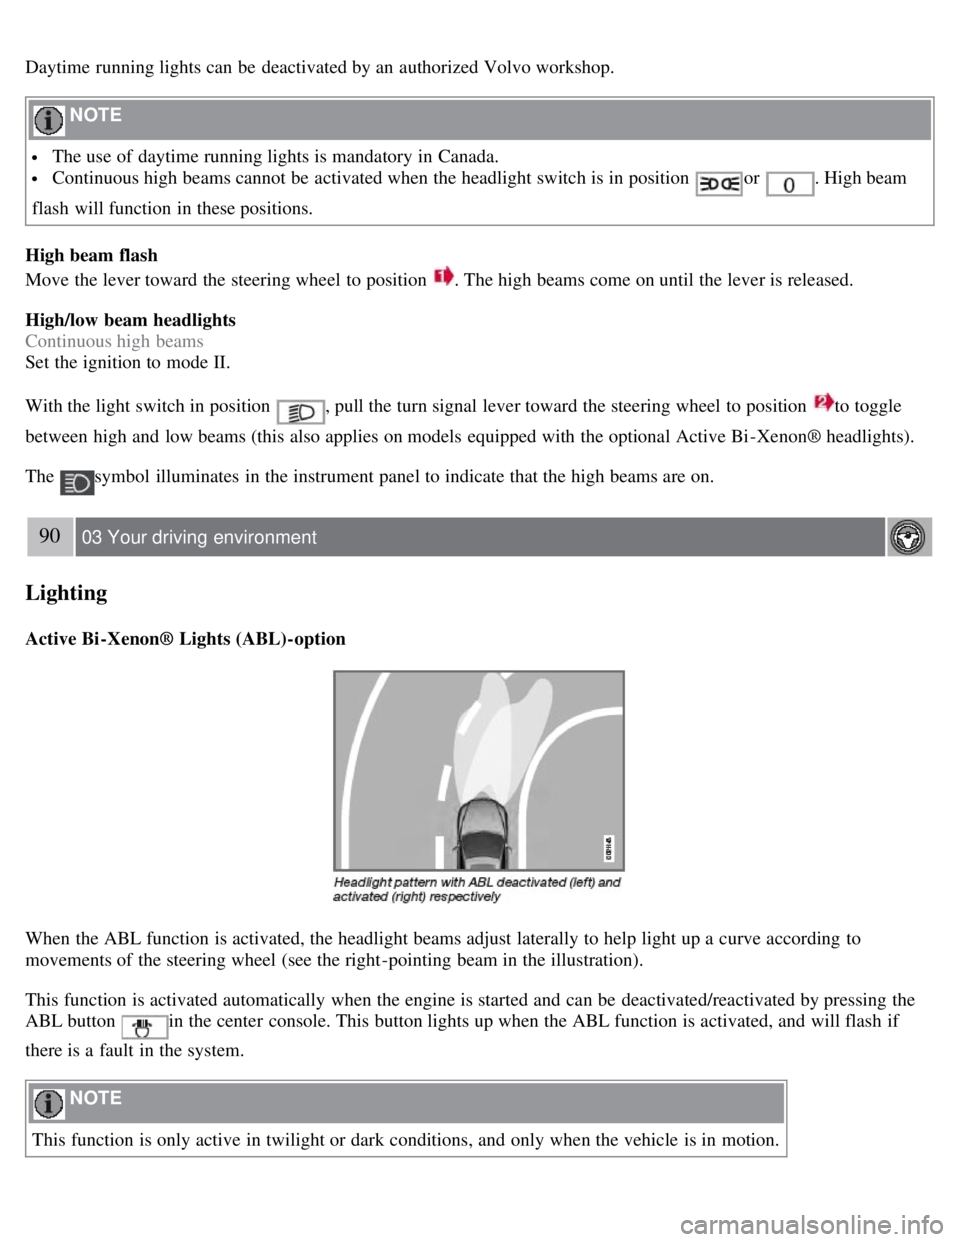
When the ABL function is activated, the headlight beams adjust laterally to help light up a curve according to
movements of the steering wheel (see the right-pointing beam in the illustration).
This function is activated automatically when the engine is started and can be deactivated/reactivated by pressing the
ABL button
in the center console. This button lights up when the ABL function is activated, and will flash if
there is a fault in the system.
NOTE
This function is only active in twilight or dark conditions, and only when the vehicle is in motion.
Page 91 of 275
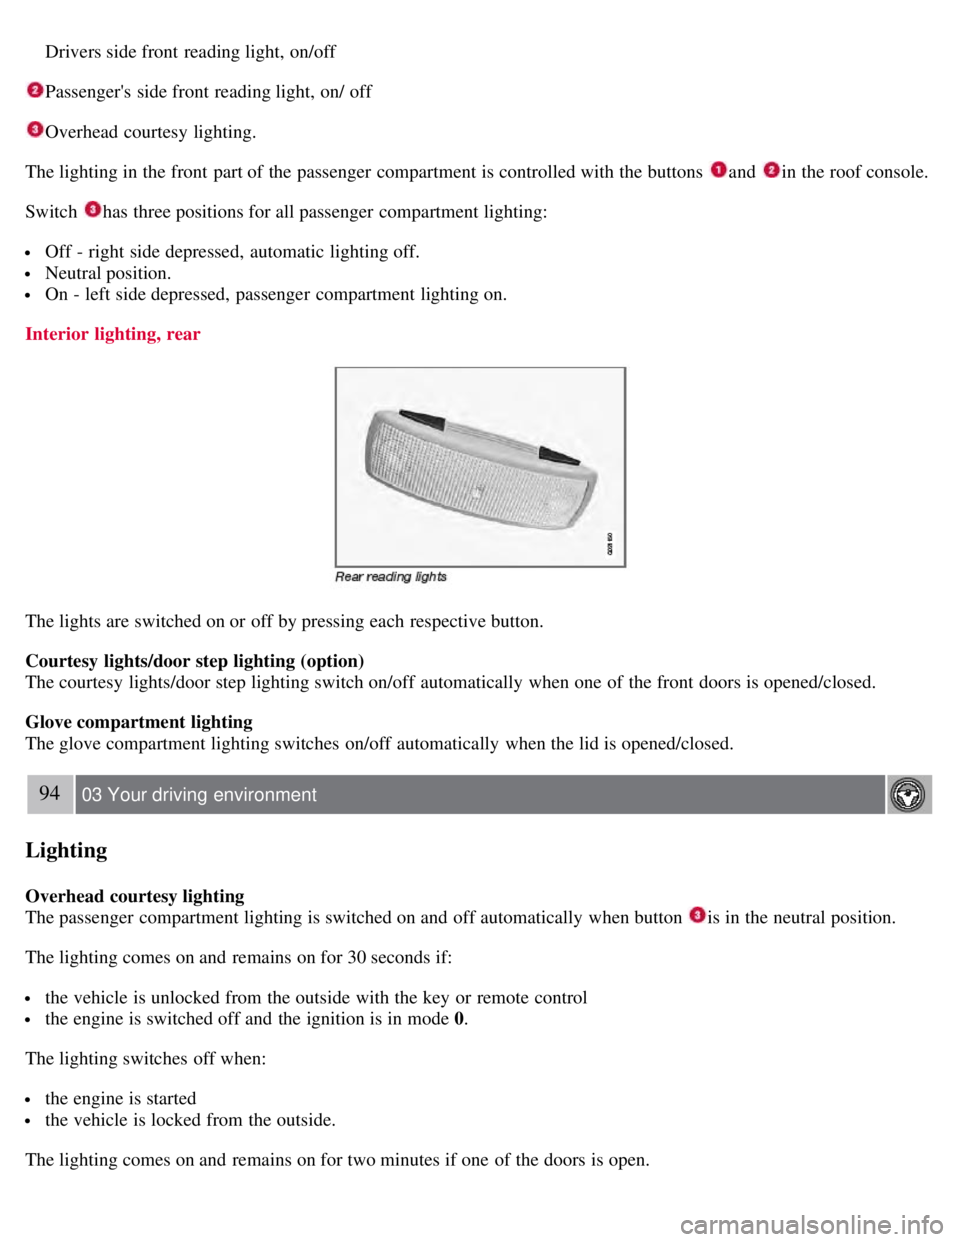
Drivers side front reading light, on/off
Passenger's side front reading light, on/ off
Overhead courtesy lighting.
The lighting in the front part of the passenger compartment is controlled with the buttons
and in the roof console.
Switch
has three positions for all passenger compartment lighting:
Off - right side depressed, automatic lighting off.
Neutral position.
On - left side depressed, passenger compartment lighting on.
Interior lighting, rear
The lights are switched on or off by pressing each respective button.
Courtesy lights/door step lighting (option)
The courtesy lights/door step lighting switch on/off automatically when one of the front doors is opened/closed.
Glove compartment lighting
The glove compartment lighting switches on/off automatically when the lid is opened/closed.
94 03 Your driving environment
Lighting
Overhead courtesy lighting
The passenger compartment lighting is switched on and off automatically when button
is in the neutral position.
The lighting comes on and remains on for 30 seconds if:
the vehicle is unlocked from the outside with the key or remote control
the engine is switched off and the ignition is in mode 0.
The lighting switches off when:
the engine is started
the vehicle is locked from the outside.
The lighting comes on and remains on for two minutes if one of the doors is open.
Page 98 of 275

The door mirror will reset to its normal position:
after 10 seconds when reverse is disengaged and the car remains stopped.
immediately when reverse is disengaged and the vehicle's forward speed exceeds approximately 6 mph (10 km/h).
immediately if you press the corresponding L or R button again.
when the engine is turned off.
when the side mirrors are folded in.
NOTE
Only one mirror can be tilted down at a time.
Automatic retraction when locking
When the vehicle is locked/unlocked with the remote key the door mirrors are automatically retracted/extended.
The function can be activated/deactivated under Car settings
Retract mirrors
100 03 Your driving environment
Mirrors
when locking. For a description of the menu system, see page 123.
Resetting to neutral
Mirrors that have been moved out of position by an external force must be electrically reset to the neutral position for
electric retracting/extending to work.
Retract the mirrors with the L and R buttons.
Fold them out again with the L and R buttons.
The mirrors are now reset in neutral position.
Home safe and approach lighting
The light on the door mirrors comes on when approach lighting or home safe lighting is selected, see page 94
.
Rear window and door mirror defrosters
Use the defroster to quickly remove misting and ice from the rear window and the door mirrors.
Press the button once to start simultaneous rear window and door mirror defrosting. The light in the button indicates
that the function is active. Defrosting is deactivated automatically and its duration is controlled by the outside
Page 105 of 275

107 03 Your driving environment
Starting the engine
Starting the engine
Ignition switch with remote key inserted (see page 80
for more information)
1. Fasten the seat belt.
WARNING
Before starting the engine, check that the seat, steering wheel and mirrors are adjusted properly. Make sure the brake
pedal can be depressed completely. Adjust the seat if necessary.
2. Insert the remote key into the ignition slot. Press the key until it is drawn into the slot
1.
NOTE
The remote key should be inserted into the ignition slot with the key blade end of the remote pointing out and the
key pad facing up. See the illustration on page 80
.
3. Depress the brake pedal
2.
WARNING
An extra mat on the driver's floor can cause the accelerator and/or brake pedal to catch. Check that the movement of
these pedals is not impeded. Not more than one protective floor covering may be used at one time.
4. Press and release the START/STOP ENGINE button. The autostart function will operate the starter motor until the
engine starts.
The starter motor operates for a maximum of 10 seconds. If the engine has not started, repeat the procedure.
1On vehicles with the optional keyless drive, it is only necessary to have a remote control in the passenger's compartment.
2 If the vehicle is moving, it is only necessary to press the START/STOP ENGINE button to start the vehicle.
WARNING
Always remove the remote key from the ignition slot when leaving the vehicle, especially if there are children in
Page 106 of 275
the vehicle.
Never remove the remote key from the ignition slot while driving or when the vehicle is being towed. The
steering lock could otherwise be activated, making it impossible to steer the vehicle. Never remove the remote key
with keyless drive function (option) from the vehicle while driving or during towing.
Always place the gear selector in Park and apply the parking brake before leaving the vehicle. Never leave the
vehicle unattended with the engine running.
Always open garage doors fully before starting the engine inside a garage to ensure adequate ventilation. The
exhaust gases contain carbon monoxide, which is invisible and odorless but very poisonous.
108 03 Your driving environment
Starting the engine
NOTE
The idling speed can be noticeably higher than normal during cold starts. This is to enable emission control system
can reach normal operating temperature as quickly as possible, which helps reduce exhaust emissions
1.
Keylock: Your vehicle is equipped with a keylock system. When the engine is switched off, the gear selector must
be in the Park position before the key can be removed
2 from the ignition slot.
1If the gear selector is in the D or R positions and the car is not moving, engine speed (rpm) will be lower and it will take longer for the engine to
reach normal operating temperature.
2Does not apply to vehicles with the optional keyless drive.
CAUTION
When starting in cold weather, the automatic transmission may shift up at slightly higher engine speeds than
normal until the automatic transmission fluid reaches normal operating temperature.
Do not race a cold engine immediately after starting. Oil flow may not reach some lubrication points fast enough
to prevent engine damage.
The engine should be idling when you move the gear selector. Never accelerate until after you feel the
transmission engage. Accelerating immediately after selecting a gear will cause harsh engagement and premature
transmission wear.
Selecting P or N when idling at a standstill for prolonged periods of time will help prevent overheating of the
automatic transmission fluid.
Keyless drive (option)
Follow steps 3-4 for starting the engine.
NOTE
For the vehicle to start, one of the vehicle's remote keys must be in the passenger compartment.
Steering wheel lock
The steering wheel lock is deactivated when the remote key is inserted into the ignition slot
1 and activated when the
remote key is removed from the ignition slot.
Always take the remote key or keyless drive remote when leaving the vehicle to help reduce the risk of theft.
1 On vehicles with the optional keyless drive, the steering lock is deactivated when the start button is pressed for the first time (assuming that a