Page 17 of 226
BASIC FUNCTIONS
35 �
To display building information
Information is available only for buildings for
which information is recorded on the map
disc.
1. Touch “Info.” while the foot print map
is displayed.
If the map is displayed by a split screen, the
map turned into a single map display.
2. Using an eight�direction arrow, move
the cursor to the position of the building to
display building information.
3. Touch “Building Info.”.Details of POIs in some buildings may be dis-
played.
For detailed POI information, touch the build-
ing name. You can see details of the selected
POIs.
Page 19 of 226
BASIC FUNCTIONS
37
2. Touch “POI Name”.
INFORMATION
There are 13 different methods to search
destinations. (See “Destination search”
on page 42.)
3. Enter the name of the destination.
Every touch on a letter key narrows the selec-
tion.
Letters that cannot be selected in the data-
base are dimmed out.
When there are four or fewer database items,
these items are displayed in a list.
Even if the entered name is incomplete,
touching “List” displays the list.4. Select the destination from the dis-
played list.
Page 20 of 226
BASIC FUNCTIONS
38
5. Touch “Enter”.
The system starts route search and displays
recommended routes.6. Touch “Guide”.
Route guidance starts.
Guidance is done by both the screen and
voice. (See “Route guidance screen” and
“Typical voice guidance prompts” on pages
66 and 68.)
INFORMATION
It is possible to change the route. (See
“Starting route guidance” on page 61.)
— Registering home
The home button on the “Destination” screen
can be used if your home has been regis-
tered. (See “ — Destination search by Home”
on page 45.)
1. Push the “MENU” button.
2. Touch “My Places”.
Page 21 of 226
BASIC FUNCTIONS
39
3. Touch “Register”.
4. Touch “Address”.
5. Enter the house number.6. Enter the street name.
Every touch on a letter key narrows the selec-
tion.
Letters that cannot be selected in the data-
base are dimmed out.
When there are four or fewer database items,
these items are displayed in a list.
Even if the entered name is incomplete,
touching “List” displays the list.
Page 22 of 226
BASIC FUNCTIONS
40
7. Select the street name from the dis-
played list.8. Touch “Enter”.
Registration of home is complete and the
“Memory Point” screen is displayed.Registered “Home” information will be
displayed.
The icon, quick access, name, location, and
phone number can be changed. (See “ —
Editing memory points” on page 90.)
Page 24 of 226
DESTINATION SEARCH
42
Destination search —
Push the “DEST” button.
You can use one of 13 different methods to
search your destination. (See pages 45
through 61.)
INFORMATION
When searching the destination, the re-
sponse to the touch screen button may
be slow.
— Selecting the search area
SELECTING THE SEARCH AREA ON THE
DESTINATION SCREEN
1. Push the “DEST” button.
2. Touch “Change” on the “Destination”
screen to display a map of the United
States and Canada divided into 12 areas.
(For map database information and updates,
see “Map database information and updates”
on page 224.)
Page 25 of 226
DESTINATION SEARCH
43
3. Touch one of “US1” through “CAN” to
select a search area.
4. Touch “OK” and the “Destination”
screen returns.SELECTING THE SEARCH AREA ON THE
INPUT SCREEN
Change the search area in order to set a des-
tination from a different area by using “Ad-
dress”, “POI Name”, “Freeway Ent./Exit”, or
“Intersection”.
1. Touch the search area button like
“US9” on the input screen to display a
map of the United States and Canada di-
vided into 12 areas. (For map database in-
formation and updates, see “Map database
information and updates” on page 224.)
2. Touch one of “US1” through “CAN” to
select a search area.
3. Touch “OK” and the previous screen
returns.
Page 27 of 226

DESTINATION SEARCH
45
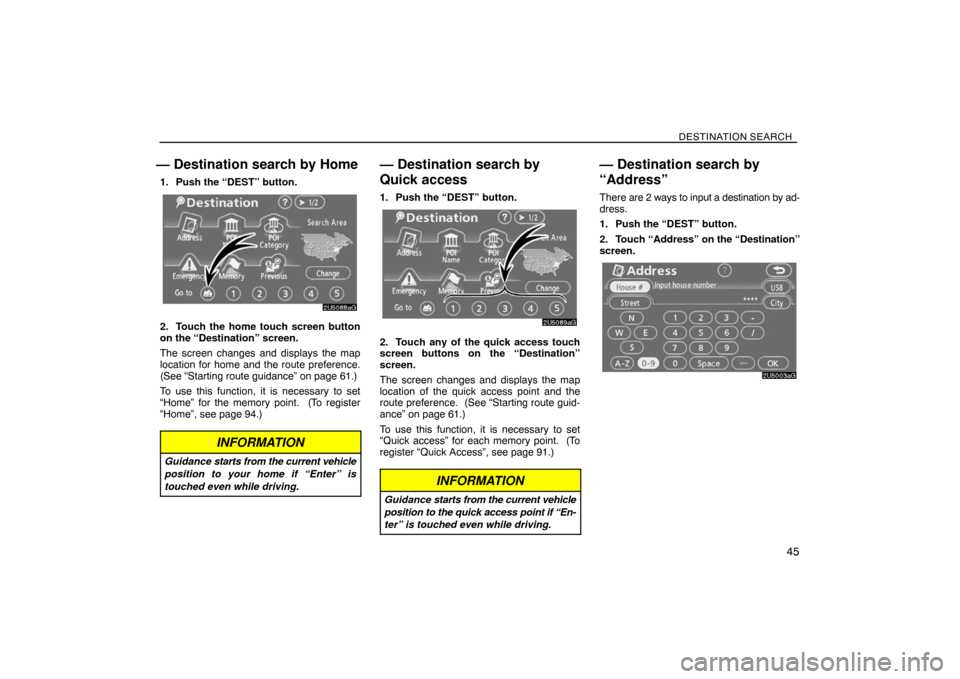
— Destination search by Home
1. Push the “DEST” button.
2. Touch the home touch screen button
on the “Destination” screen.
The screen changes and displays the map
location for home and the route preference.
(See “Starting route guidance” on page 61.)
To use this function, it is necessary to set
“Home” for the memory point. (To register
“Home”, see page 94.)
INFORMATION
Guidance starts from the current vehicle
position to your home if “Enter” is
touched even while driving.
— Destination search by
Quick access
1. Push the “DEST” button.
2. Touch any of the quick access touch
screen buttons on the “Destination”
screen.
The screen changes and displays the map
location of the quick access point and the
route preference. (See “Starting route guid-
ance” on page 61.)
To use this function, it is necessary to set
“Quick access” for each memory point. (To
register “Quick Access”, see page 91.)
INFORMATION
Guidance starts from the current vehicle
position to the quick access point if “En-
ter” is touched even while driving.
— Destination search by
“Address”
There are 2 ways to input a destination by ad-
dress.
1. Push the “DEST” button.
2. Touch “Address” on the “Destination”
screen.