2008 SUZUKI SX4 light
[x] Cancel search: lightPage 148 of 278
5-11OTHER CONTROLS AND EQUIPMENT
80J21-03E
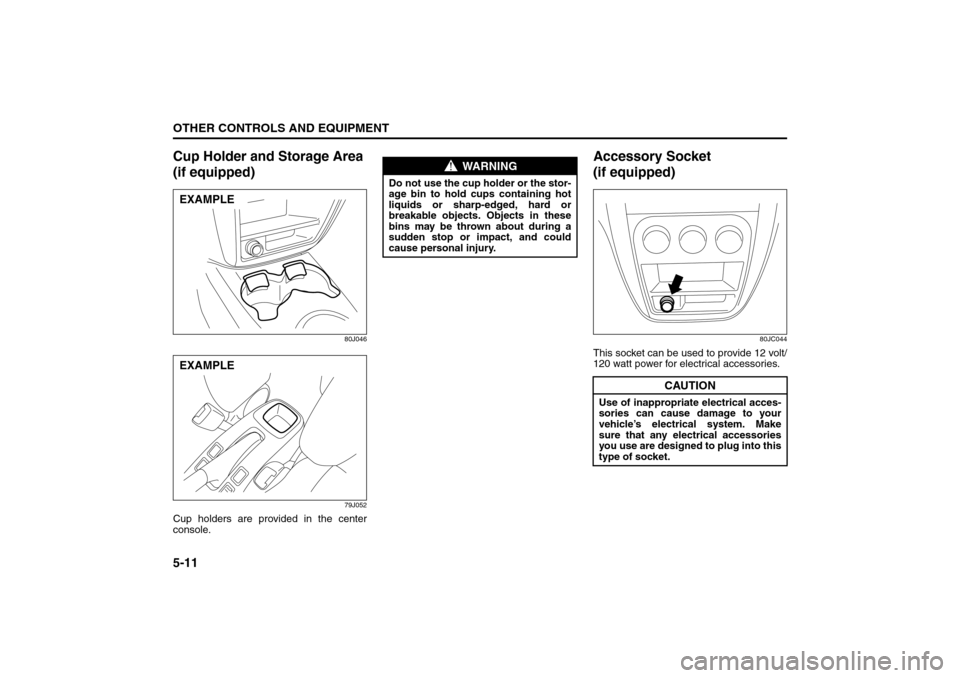
Cup Holder and Storage Area
(if equipped)
80J046
79J052
Cup holders are provided in the center
console.
Accessory Socket
(if equipped)
80JC044
This socket can be used to provide 12 volt/
120 watt power for electrical accessories.
EXAMPLEEXAMPLE
WARNING
Do not use the cup holder or the stor-
age bin to hold cups containing hot
liquids or sharp-edged, hard or
breakable objects. Objects in these
bins may be thrown about during a
sudden stop or impact, and could
cause personal injury.
CAUTION
Use of inappropriate electrical acces-
sories can cause damage to your
vehicle’s electrical system. Make
sure that any electrical accessories
you use are designed to plug into this
type of socket.
Spot Light: 7
Assist Grips: 3
Coat Hooks:
Page 152 of 278
5-15OTHER CONTROLS AND EQUIPMENT
80J21-03E
Luggage or other cargo placed in the lug-
gage compartment can be hidden from
view by a luggage compartment cover.
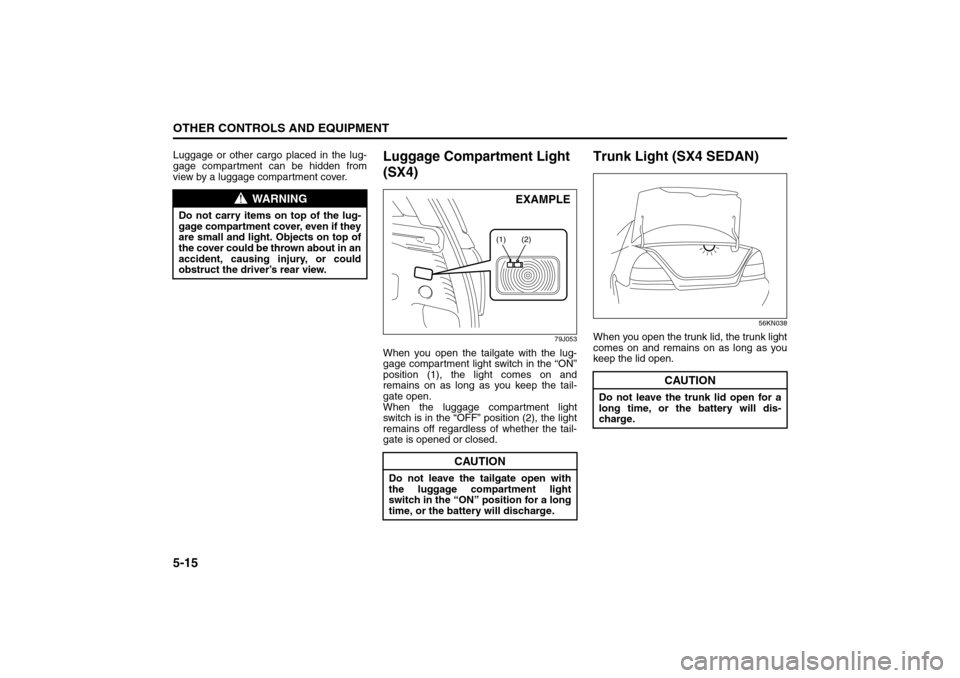
Luggage Compartment Light
(SX4)
79J053
When you open the tailgate with the lug-
gage compartment light switch in the “ON”
position (1), the light comes on and
remains on as long as you keep the tail-
gate open.
When the luggage compartment light
switch is in the “OFF” position (2), the light
remains off regardless of whether the tail-
gate is opened or closed.
Trunk Light (SX4 SEDAN)
56KN038
When you open the trunk lid, the trunk light
comes on and remains on as long as you
keep the lid open.
WARNING
Do not carry items on top of the lug-
gage compartment cover, even if they
are small and light. Objects on top of
the cover could be thrown about in an
accident, causing injury, or could
obstruct the driver’s rear view.
CAUTION
Do not leave the tailgate open with
the luggage compartment light
switch in the “ON” position for a long
time, or the battery will discharge.
(1) (2)
EXAMPLE
CAUTION
Do not leave the trunk lid open for a
long time, or the battery will dis-
charge.
Frame Hooks: 5, 6
Page 153 of 278
5-16
OTHER CONTROLS AND EQUIPMENT
80J21-03E
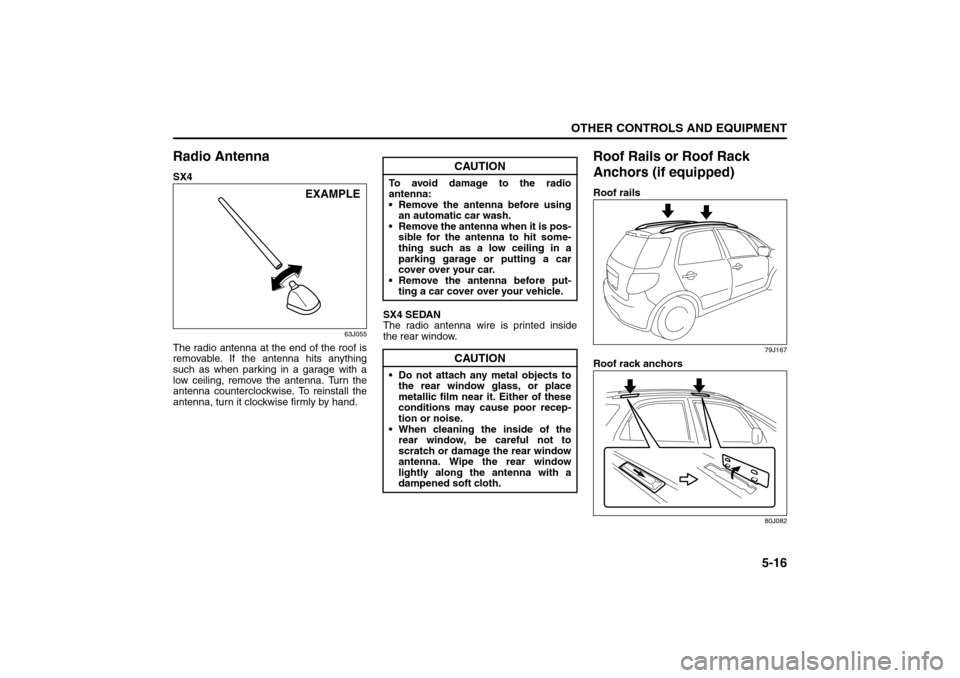
Radio AntennaSX4
63J055
The radio antenna at the end of the roof is
removable. If the antenna hits anything
such as when parking in a garage with a
low ceiling, remove the antenna. Turn the
antenna counterclockwise. To reinstall the
antenna, turn it clockwise firmly by hand.SX4 SEDAN
The radio antenna wire is printed inside
the rear window.
Roof Rails or Roof Rack
Anchors (if equipped)Roof rails
79J167
Roof rack anchors
80J082
EXAMPLE
CAUTION
To avoid damage to the radio
antenna:
Remove the antenna before using
an automatic car wash.
Remove the antenna when it is pos-
sible for the antenna to hit some-
thing such as a low ceiling in a
parking garage or putting a car
cover over your car.
Remove the antenna before put-
ting a car cover over your vehicle.
CAUTION
Do not attach any metal objects to
the rear window glass, or place
metallic film near it. Either of these
conditions may cause poor recep-
tion or noise.
When cleaning the inside of the
rear window, be careful not to
scratch or damage the rear window
antenna. Wipe the rear window
lightly along the antenna with a
dampened soft cloth.
Page 156 of 278
6-1OPERATING YOUR VEHICLE
80J21-03E
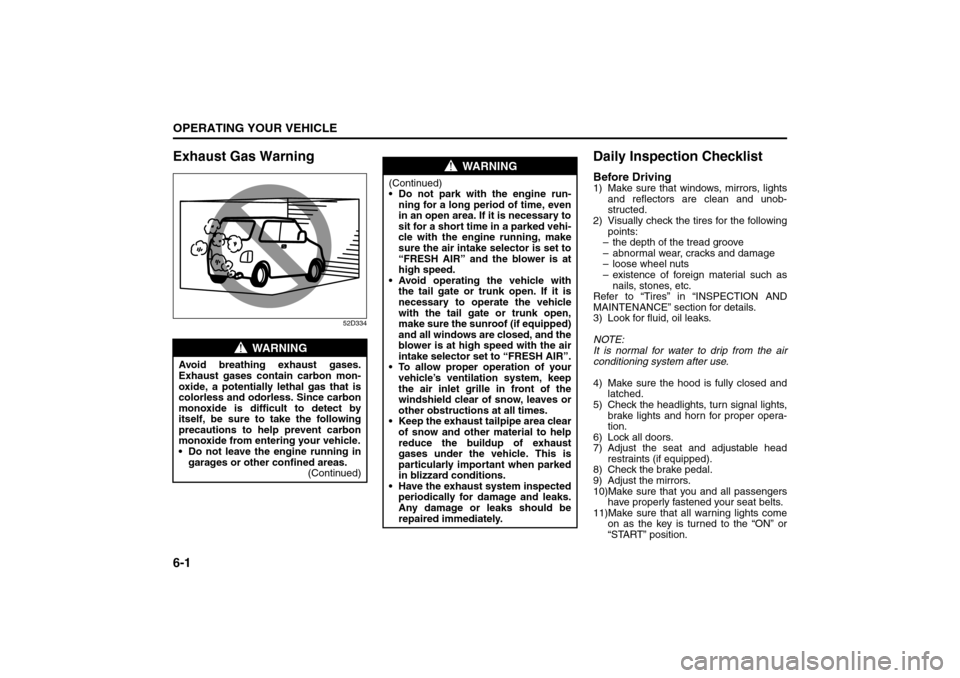
Exhaust Gas Warning
52D334
Daily Inspection ChecklistBefore Driving1) Make sure that windows, mirrors, lights
and reflectors are clean and unob-
structed.
2) Visually check the tires for the following
points:
– the depth of the tread groove
– abnormal wear, cracks and damage
– loose wheel nuts
– existence of foreign material such as
nails, stones, etc.
Refer to “Tires” in “INSPECTION AND
MAINTENANCE” section for details.
3) Look for fluid, oil leaks.
NOTE:
It is normal for water to drip from the air
conditioning system after use.
4) Make sure the hood is fully closed and
latched.
5) Check the headlights, turn signal lights,
brake lights and horn for proper opera-
tion.
6) Lock all doors.
7) Adjust the seat and adjustable head
restraints (if equipped).
8) Check the brake pedal.
9) Adjust the mirrors.
10)Make sure that you and all passengers
have properly fastened your seat belts.
11)Make sure that all warning lights come
on as the key is turned to the “ON” or
“START” position.
WARNING
Avoid breathing exhaust gases.
Exhaust gases contain carbon mon-
oxide, a potentially lethal gas that is
colorless and odorless. Since carbon
monoxide is difficult to detect by
itself, be sure to take the following
precautions to help prevent carbon
monoxide from entering your vehicle.
Do not leave the engine running in
garages or other confined areas.
(Continued)
WARNING
(Continued)
Do not park with the engine run-
ning for a long period of time, even
in an open area. If it is necessary to
sit for a short time in a parked vehi-
cle with the engine running, make
sure the air intake selector is set to
“FRESH AIR” and the blower is at
high speed.
Avoid operating the vehicle with
the tail gate or trunk open. If it is
necessary to operate the vehicle
with the tail gate or trunk open,
make sure the sunroof (if equipped)
and all windows are closed, and the
blower is at high speed with the air
intake selector set to “FRESH AIR”.
To allow proper operation of your
vehicle’s ventilation system, keep
the air inlet grille in front of the
windshield clear of snow, leaves or
other obstructions at all times.
Keep the exhaust tailpipe area clear
of snow and other material to help
reduce the buildup of exhaust
gases under the vehicle. This is
particularly important when parked
in blizzard conditions.
Have the exhaust system inspected
periodically for damage and leaks.
Any damage or leaks should be
repaired immediately.
Exhaust Gas Warning: NO
Daily Inspection Checklist: NO
Page 157 of 278

6-2
OPERATING YOUR VEHICLE
80J21-03E
12)Check all gauges.
13)Make sure that the BRAKE light turns
off when the parking brake is released.
Once a week, or each time you fill your fuel
tank, perform the following under-hood
checks:
1) Engine oil level
2) Coolant level
3) Brake fluid level
4) Power steering (if equipped) fluid level
5) Windshield washer fluid level
6) Hood latch operation
Pull the hood release handle inside the
vehicle. Make sure that you cannot
open the hood all the way without
releasing the secondary latch. Be sure
to close the hood securely after check-
ing for proper latch operation. See the
item “All latches, hinges and locks” of
“CHASSIS AND BODY” in the “Periodic
Maintenance Schedule” section in the
“INSPECTION AND MAINTENANCE”
section for lubrication schedule.
Starting the EngineBefore Starting the Engine1) Make sure the parking brake is set fully.
2) Manual Transaxle – Shift into “N” (Neu-
tral) and depress the clutch pedal all
the way to the floor.
Hold the clutch pedal while starting the
engine.
Automatic Transaxle – If the gearshift
lever is not in “P” (Park) position, shift
into “P”. (If you need to re-start the
engine while the vehicle is moving, shift
into “N”.)
NOTE:
The engine of manual transaxle vehicle will
not start unless the clutch pedal is
depressed.
NOTE:
Automatic transaxle vehicles have a starter
interlock device which is designed to keep
the starter from operating if the transaxle is
in any of the drive positions.
Starting a Cold EngineWith your foot off the accelerator pedal,
crank the engine by turning the ignition key
to “START”. Release the key when the
engine starts.
If the engine does not start after 15 sec-
onds of cranking, wait about 15 seconds,
then press down the accelerator pedal to
1/3 of its travel and try cranking the engine
again. Release the key and accelerator
pedal when the engine starts.
If the engine still does not start, try holding
the accelerator pedal all the way to the
floor while cranking. This should clear the
engine if it is flooded.
If you are unable to start the engine using
this procedure, consult your SUZUKI
dealer.Starting a Warm EngineUse the same procedure as for “Starting a
Cold Engine”.
WARNING
Make sure the hood is fully closed
and latched before driving. If it is not,
it can fly up unexpectedly during
driving, obstructing your view and
resulting in an accident.
WARNING
Make sure that the parking brake is
set fully and the transaxle is in Neu-
tral (or Park for vehicles with an auto-
matic transaxle) before attempting to
start the engine.
CAUTION
Stop turning the starter immedi-
ately after the engine has started or
the starter system can be dam-
aged.
Do not crank the engine for more
than 15 seconds at a time. If the
engine doesn’t start on the first try,
wait about 15 seconds before try-
ing again.
Daily Inspection Checklist: NO
Starting the Engine: 1
Page 158 of 278
6-3OPERATING YOUR VEHICLE
80J21-03E
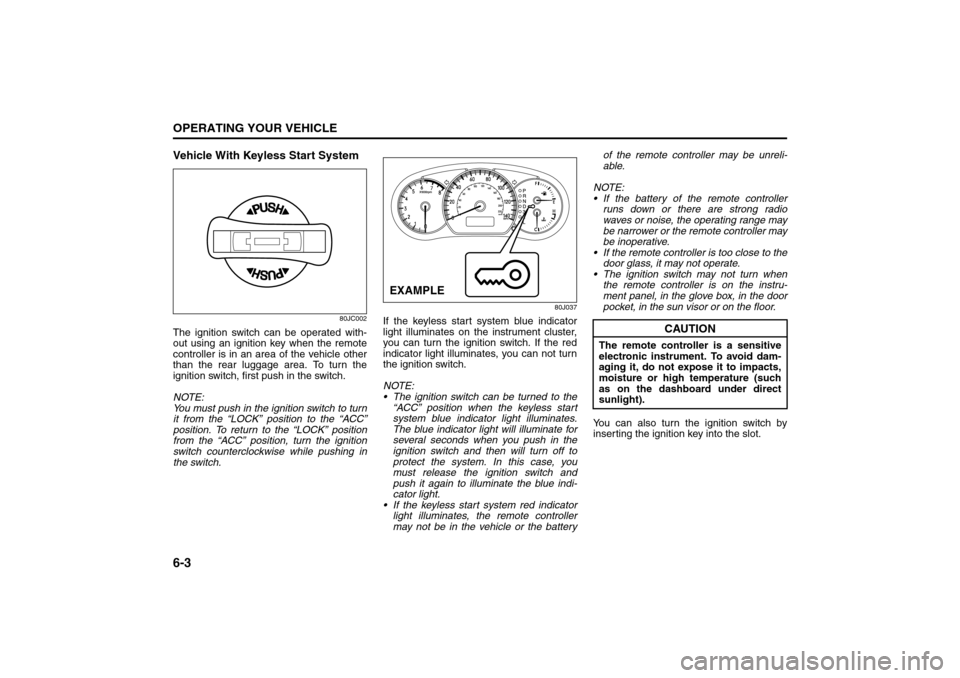
Vehicle With Keyless Start System
80JC002
The ignition switch can be operated with-
out using an ignition key when the remote
controller is in an area of the vehicle other
than the rear luggage area. To turn the
ignition switch, first push in the switch.
NOTE:
You must push in the ignition switch to turn
it from the “LOCK” position to the “ACC”
position. To return to the “LOCK” position
from the “ACC” position, turn the ignition
switch counterclockwise while pushing in
the switch.
80J037
If the keyless start system blue indicator
light illuminates on the instrument cluster,
you can turn the ignition switch. If the red
indicator light illuminates, you can not turn
the ignition switch.
NOTE:
The ignition switch can be turned to the
“ACC” position when the keyless start
system blue indicator light illuminates.
The blue indicator light will illuminate for
several seconds when you push in the
ignition switch and then will turn off to
protect the system. In this case, you
must release the ignition switch and
push it again to illuminate the blue indi-
cator light.
If the keyless start system red indicator
light illuminates, the remote controller
may not be in the vehicle or the batteryof the remote controller may be unreli-
able.
NOTE:
If the battery of the remote controller
runs down or there are strong radio
waves or noise, the operating range may
be narrower or the remote controller may
be inoperative.
If the remote controller is too close to the
door glass, it may not operate.
The ignition switch may not turn when
the remote controller is on the instru-
ment panel, in the glove box, in the door
pocket, in the sun visor or on the floor.
You can also turn the ignition switch by
inserting the ignition key into the slot.EXAMPLE
CAUTION
The remote controller is a sensitive
electronic instrument. To avoid dam-
aging it, do not expose it to impacts,
moisture or high temperature (such
as on the dashboard under direct
sunlight).
Engine Block Heater: 1
Page 163 of 278
6-8
OPERATING YOUR VEHICLE
80J21-03E
From i-AWD AUTO to i-AWD LOCK
Push the “i-AWD LOCK” switch for a few
seconds until the “i-AWD LOCK” indicator
will come on.
79J100
From i-AWD LOCK to i-AWD AUTO
Push the “i-AWD LOCK” switch, and the “i-
AWD AUTO” indicator will come on.
From i-AWD AUTO or LOCK to 2WD
Push the “2WD” switch, and the “i-AWD
AUTO” or “i-AWD LOCK” indicator will turn
off.
NOTE:
The 2WD/i-AWD switch can be operated
when the vehicle is either stopped or
moving.
Make sure that the front wheels are in
the straight ahead position when operat-
ing the 2WD/i-AWD switch.
While making turns or accelerating and
decelerating, operating the 2WD/i-AWD
switch or turning off the key switch in the
“i-AWD AUTO” or “i-AWD LOCK” mode
may cause a shock, but this is not a sys-
tem malfunction.
While driving in the “i-AWD LOCK”
mode, as the vehicle speed increases,the driving mode changes to the “i-AWD
AUTO” mode automatically. Even when
the vehicle speed reduces, on the other
hand, the driving mode does not return
to the “i-AWD LOCK” mode automati-
cally. You should press the “i-AWD
LOCK” switch according to the driving
conditions.
Any forcible operation while driving off-
road in the sand or water or when a
wheel has run off the road, the difference
of the revolution between front wheels
and rear wheels increases (wheels run
idle). If this state continues, the oil tem-
perature of the driving system parts
rises.
In such case, the “i-AWD AUTO” indica-
tor light blinks and the driving mode
changes to the 2WD mode to protect the
driving system parts.
When you operate your vehicle in the i-
AWD mode continuously, park the vehi-
cle at a safe place and run the engine
idle. After some time, the “i-AWD AUTO”
indicator light turns on again and the
driving mode returns to the “i-AWD
AUTO” mode.
CAUTION
Never use the “i-AWD LOCK” mode
when driving on dry paved roads.
Avoid using the “i-AWD LOCK”
mode when driving on wet paved
roads as much as possible. Use of
the “i-AWD LOCK” mode in above
conditions will apply excessive
force to the driving system and
may cause a critical failure. Also,
the tires may wear faster and fuel
consumption may be affected
adversely.
Note that i-AWD vehicles are not
all-around vehicles. Be sure to
observe following instructions
when driving your vehicle.
– Do not drive through water like
crossing a river.
– Do not drive continuously where
front wheels tend to race in
places such as sand and mud.
– When any wheel is in the air for
such reason as running off the
road, do not race it needlessly.
If the “i-AWD AUTO” and the “i-
AWD LOCK” indicator lights stay
on and come on simultaneously
when driving, there may be some-
thing wrong the i-AWD system.
Have the system inspected by an
authorized SUZUKI dealer.
Braking: 6
Page 165 of 278
6-10
OPERATING YOUR VEHICLE
80J21-03E
Brake Assist SystemWhen you slam the brakes on, the brake
assist system judges as an emergency
stop and provides more powerful braking
for a driver who cannot hold down the
brake pedal firmly.
NOTE:
If you depress the brakes forcefully, you
may hear a clicking sound in the brake
pedal. This is normal and indicates that the
brake assist system is activated properly.
Anti-Lock Brake System (ABS)
(if equipped)ABS will help you avoid skidding by elec-
tronically controlling braking pressure. It
will also help you maintain steering control
when braking on slippery surfaces or when
braking hard.
The ABS works automatically, so you do
not need any special braking technique.
Just push the brake pedal down without
pumping. The ABS will operate whenever it
senses that the wheels are locking up.
You may feel the brake pedal pulsate while
the ABS is operating.
NOTE:
The ABS will not work if vehicle speed is
under 5 – 6 km/h (3 – 4 mph).
WARNING
Even without reserve power in the
brake system, you can still stop the
vehicle by pressing the brake pedal
harder than normally required. How-
ever, the stopping distance may be
longer.
WARNING
On some types of loose surfaces
(such as gravel, snow-covered
roads, etc.), the stopping distance
required for an ABS-equipped vehi-
cle may be slightly greater than for
a comparable vehicle with a con-
ventional brake system. With a
conventional brake system, skid-
ding tires are able to “plow” the
gravel or snow layer, shortening
the stopping distance. ABS mini-
mizes this resistance effect. Allow
for extra stopping distance when
driving on loose surfaces.
On regular paved roads, some driv-
ers may be able to obtain slightly
shorter stopping distances with
conventional brake systems than
with ABS.
In both of the above conditions,
ABS will still offer the advantage of
helping you maintain directional
control. However, remember that
ABS will not compensate for bad
road or weather conditions or poor
driver judgment. Use good judg-
ment and do not drive faster than
conditions will safely allow.
Catalytic Converter: NO
Improving Fuel Economy: NO