Page 85 of 278
4-8
INSTRUMENT PANEL
80J21-03E
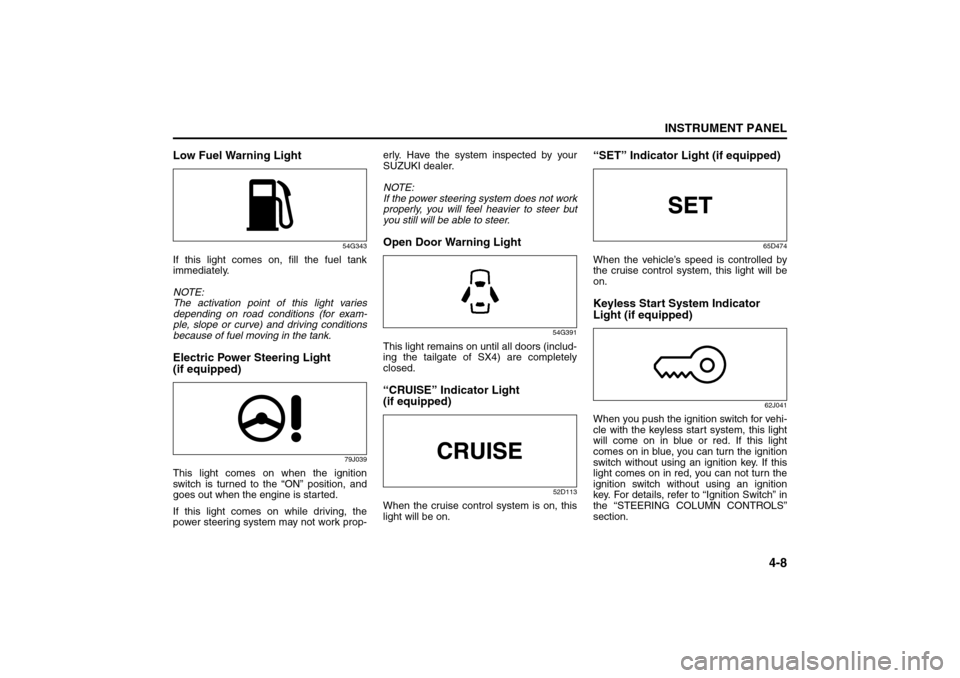
Low Fuel Warning Light
54G343
If this light comes on, fill the fuel tank
immediately.
NOTE:
The activation point of this light varies
depending on road conditions (for exam-
ple, slope or curve) and driving conditions
because of fuel moving in the tank.Electric Power Steering Light
(if equipped)
79J039
This light comes on when the ignition
switch is turned to the “ON” position, and
goes out when the engine is started.
If this light comes on while driving, the
power steering system may not work prop-erly. Have the system inspected by your
SUZUKI dealer.
NOTE:
If the power steering system does not work
properly, you will feel heavier to steer but
you still will be able to steer.
Open Door Warning Light
54G391
This light remains on until all doors (includ-
ing the tailgate of SX4) are completely
closed.“CRUISE” Indicator Light
(if equipped)
52D113
When the cruise control system is on, this
light will be on.
“SET” Indicator Light (if equipped)
65D474
When the vehicle’s speed is controlled by
the cruise control system, this light will be
on.Keyless Start System Indicator
Light (if equipped)
62J041
When you push the ignition switch for vehi-
cle with the keyless start system, this light
will come on in blue or red. If this light
comes on in blue, you can turn the ignition
switch without using an ignition key. If this
light comes on in red, you can not turn the
ignition switch without using an ignition
key. For details, refer to “Ignition Switch” in
the “STEERING COLUMN CONTROLS”
section.
Speedometer/Odometer/Trip meter: 8
Meter Illumination Control:
Page 86 of 278
4-9INSTRUMENT PANEL
80J21-03E
If this light blinks in red, it reminds you that
the remote controller is not in the vehicle.
For details, refer to “Keyless Start System
Remote Controller/Keyless Entry System
Transmitter” in the “BEFORE DRIVING”
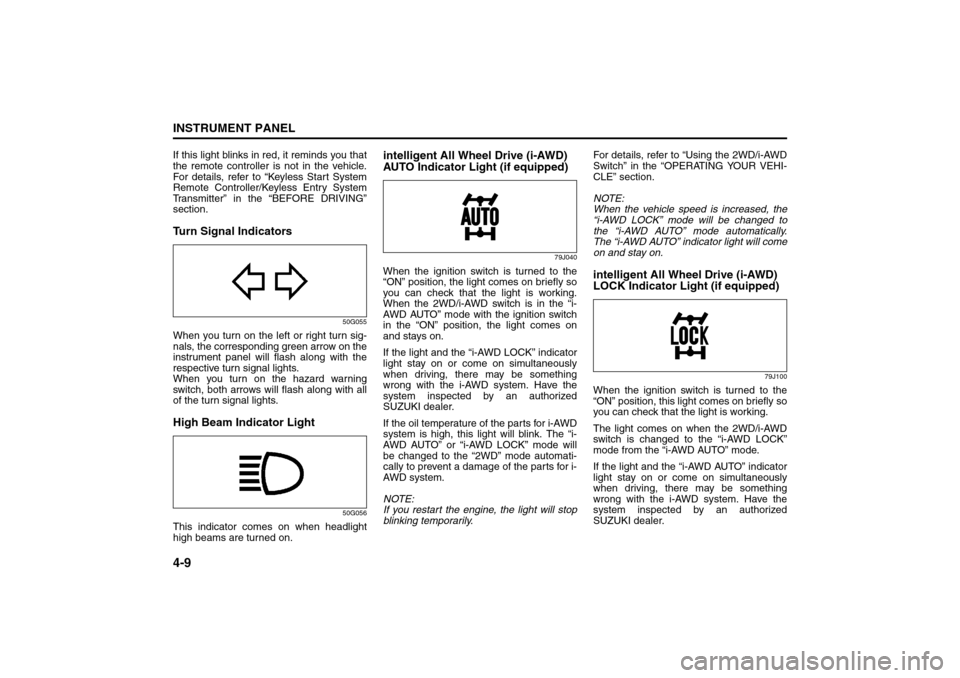
section.Turn Signal Indicators
50G055
When you turn on the left or right turn sig-
nals, the corresponding green arrow on the
instrument panel will flash along with the
respective turn signal lights.
When you turn on the hazard warning
switch, both arrows will flash along with all
of the turn signal lights.High Beam Indicator Light
50G056
This indicator comes on when headlight
high beams are turned on.
intelligent All Wheel Drive (i-AWD)
AUTO Indicator Light (if equipped)
79J040
When the ignition switch is turned to the
“ON” position, the light comes on briefly so
you can check that the light is working.
When the 2WD/i-AWD switch is in the “i-
AWD AUTO” mode with the ignition switch
in the “ON” position, the light comes on
and stays on.
If the light and the “i-AWD LOCK” indicator
light stay on or come on simultaneously
when driving, there may be something
wrong with the i-AWD system. Have the
system inspected by an authorized
SUZUKI dealer.
If the oil temperature of the parts for i-AWD
system is high, this light will blink. The “i-
AWD AUTO” or “i-AWD LOCK” mode will
be changed to the “2WD” mode automati-
cally to prevent a damage of the parts for i-
AWD system.
NOTE:
If you restart the engine, the light will stop
blinking temporarily.For details, refer to “Using the 2WD/i-AWD
Switch” in the “OPERATING YOUR VEHI-
CLE” section.
NOTE:
When the vehicle speed is increased, the
“i-AWD LOCK” mode will be changed to
the “i-AWD AUTO” mode automatically.
The “i-AWD AUTO” indicator light will come
on and stay on.
intelligent All Wheel Drive (i-AWD)
LOCK Indicator Light (if equipped)
79J100
When the ignition switch is turned to the
“ON” position, this light comes on briefly so
you can check that the light is working.
The light comes on when the 2WD/i-AWD
switch is changed to the “i-AWD LOCK”
mode from the “i-AWD AUTO” mode.
If the light and the “i-AWD AUTO” indicator
light stay on or come on simultaneously
when driving, there may be something
wrong with the i-AWD system. Have the
system inspected by an authorized
SUZUKI dealer.
Tachometer:
Fuel Gauge:
Page 87 of 278
4-10
INSTRUMENT PANEL
80J21-03E
NOTE:
When the vehicle speed is increased,
the “i-AWD LOCK” mode will be changed
to the “i-AWD AUTO” mode automati-
cally. The “i-AWD AUTO” indicator light
will come on and stay on.
When the ignition switch is turned to the
“OFF” position, the “i-AWD LOCK” mode
is canceled.
For details of the “i-AWD LOCK” mode,
refer to “Using the 2WD/i-AWD Switch” in
the “OPERATING YOUR VEHICLE” sec-
tion.
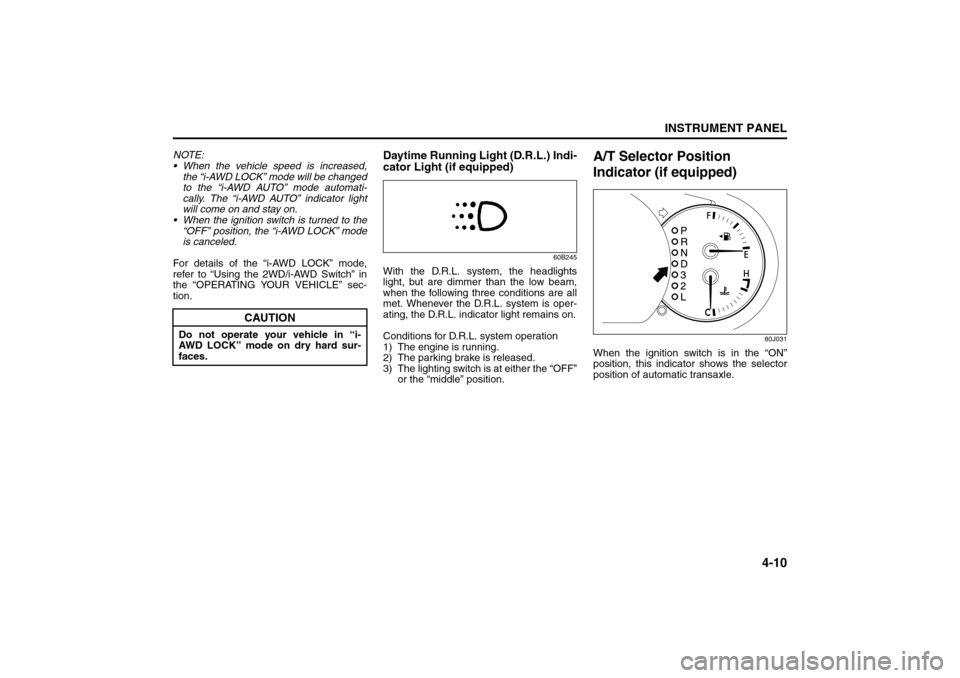
Daytime Running Light (D.R.L.) Indi-
cator Light (if equipped)
60B245
With the D.R.L. system, the headlights
light, but are dimmer than the low beam,
when the following three conditions are all
met. Whenever the D.R.L. system is oper-
ating, the D.R.L. indicator light remains on.
Conditions for D.R.L. system operation
1) The engine is running.
2) The parking brake is released.
3) The lighting switch is at either the “OFF”
or the “middle” position.
A/T Selector Position
Indicator (if equipped)
80J031
When the ignition switch is in the “ON”
position, this indicator shows the selector
position of automatic transaxle.
CAUTION
Do not operate your vehicle in “i-
AWD LOCK” mode on dry hard sur-
faces.
Temperature Gauge: 8
Hazard Warning Switch: 8
Rear Window Defroster Switch:
Page 88 of 278

4-11INSTRUMENT PANEL
80J21-03E
Speedometer/Odometer/Trip
meter
80J032
(1) Speedometer
(2) Odometer/Trip meter
(3) Indication selector knob
Speedometer
The speedometer indicates vehicle speed
in MPH.
Odometer/Trip meter
When the ignition switch is turned to “ON”,
the display shows the odometer or trip
meter. The odometer records the total dis-
tance the vehicle has been driven. The trip
meter can be used to measure the dis-
tance traveled on short trips or between
fuel stops.
65D603
When the ignition switch is turned to “ON”
with the lighting switch is in the “OFF” posi-
tion, the display shows three types of indi-
cation; odometer (A), trip meter A (B) and
trip meter B (C). Push the selector knob (3)
quickly to switch the indication among the
three.
You can use the two trip meters (A and B)
independently.
80J057
Hold in the selector knob for about 2 sec-
onds to reset the trip meter to zero.
(2)
(3)
(1)
EXAMPLE
CAUTION
Keep track of your odometer reading
and check the maintenance schedule
regularly for required services.
Increased wear or damage to certain
parts can result from failure to per-
form required services at the proper
mileage intervals.
(3) (A) (B)
(C)
About 2 seconds
(3)
Outside Rearview Mirrors Defroster Switch:
Fog Light Switch: 8
Cigarette Lighter and Ashtray: 3, 8
Page 89 of 278
4-12
INSTRUMENT PANEL
80J21-03E
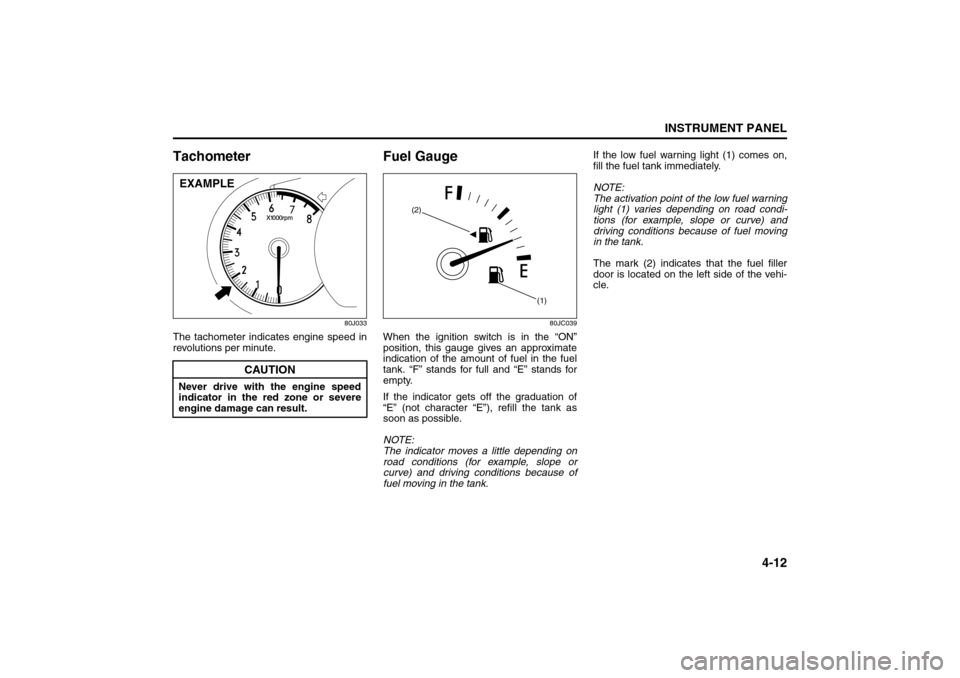
Tachometer
80J033
The tachometer indicates engine speed in
revolutions per minute.
Fuel Gauge
80JC039
When the ignition switch is in the “ON”
position, this gauge gives an approximate
indication of the amount of fuel in the fuel
tank. “F” stands for full and “E” stands for
empty.
If the indicator gets off the graduation of
“E” (not character “E”), refill the tank as
soon as possible.
NOTE:
The indicator moves a little depending on
road conditions (for example, slope or
curve) and driving conditions because of
fuel moving in the tank.If the low fuel warning light (1) comes on,
fill the fuel tank immediately.
NOTE:
The activation point of the low fuel warning
light (1) varies depending on road condi-
tions (for example, slope or curve) and
driving conditions because of fuel moving
in the tank.
The mark (2) indicates that the fuel filler
door is located on the left side of the vehi-
cle.
CAUTION
Never drive with the engine speed
indicator in the red zone or severe
engine damage can result.EXAMPLE
(1) (2)
Cigarette Lighter and Ashtray: 3, 8
Information Display:
Page 90 of 278
4-13INSTRUMENT PANEL
80J21-03E
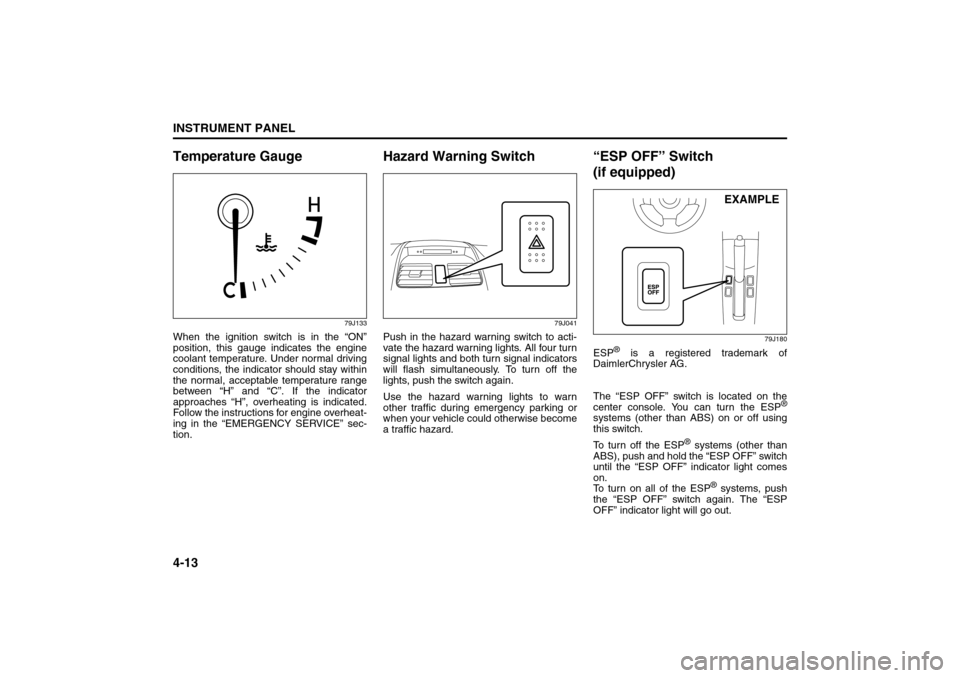
Temperature Gauge
79J133
When the ignition switch is in the “ON”
position, this gauge indicates the engine
coolant temperature. Under normal driving
conditions, the indicator should stay within
the normal, acceptable temperature range
between “H” and “C”. If the indicator
approaches “H”, overheating is indicated.
Follow the instructions for engine overheat-
ing in the “EMERGENCY SERVICE” sec-
tion.
Hazard Warning Switch
79J041
Push in the hazard warning switch to acti-
vate the hazard warning lights. All four turn
signal lights and both turn signal indicators
will flash simultaneously. To turn off the
lights, push the switch again.
Use the hazard warning lights to warn
other traffic during emergency parking or
when your vehicle could otherwise become
a traffic hazard.
“ESP OFF” Switch
(if equipped)
79J180
ESP
® is a registered trademark of
DaimlerChrysler AG.
The “ESP OFF” switch is located on the
center console. You can turn the ESP
®
systems (other than ABS) on or off using
this switch.
To turn off the ESP
® systems (other than
ABS), push and hold the “ESP OFF” switch
until the “ESP OFF” indicator light comes
on.
To turn on all of the ESP
® systems, push
the “ESP OFF” switch again. The “ESP
OFF” indicator light will go out.EXAMPLE
Information Display:
Page 91 of 278
4-14
INSTRUMENT PANEL
80J21-03E
For details of the ESP
® systems, refer to
“Electronic Stability Program (ESP
®)” in
the “OPERATING YOUR VEHICLE” sec-
tion.
Instrument Light Brightness
Control
66J038
Your vehicle has a system to automatically
dim the instrument panel lights when the
ignition switch is in the “ON” position and
the lighting switch is turned to either the
second or third position. The level of
brightness depends on the position of the
brightness control thumbwheel.
To cancel the automatic dimming feature
and maintain full brightness of lights other
than the audio display, turn the instrument
brightness control thumbwheel upward
until click is heard. To activate the auto-
matic dimming feature, turn the brightness
control thumbwheel downward. When the
thumbwheel is in the minimum brightness
position, the instrument panel lights,
except for the meter lights, are turned off.
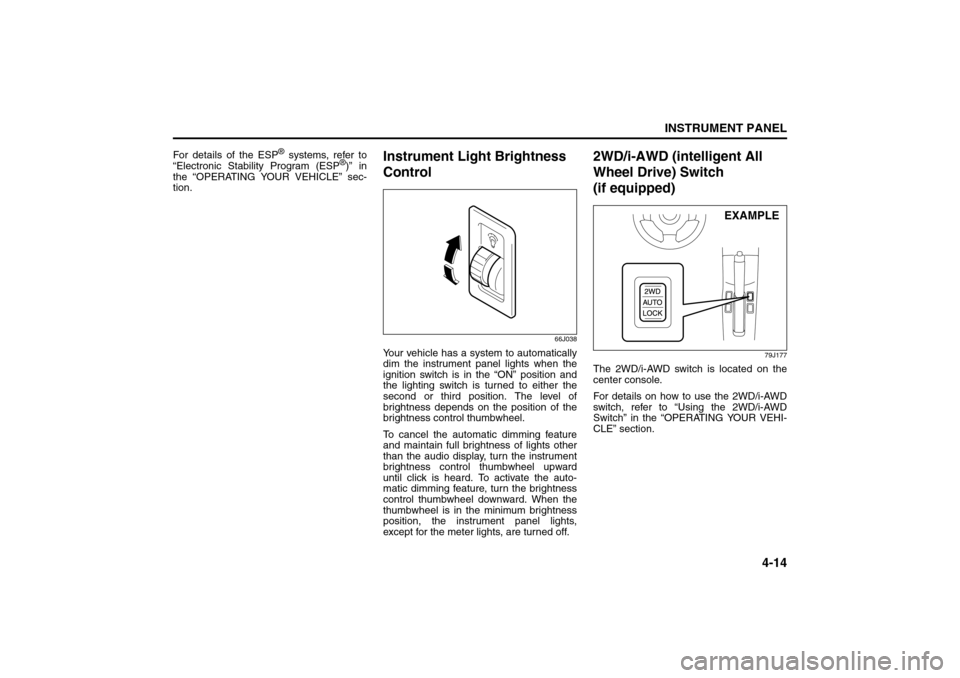
2WD/i-AWD (intelligent All
Wheel Drive) Switch
(if equipped)
79J177
The 2WD/i-AWD switch is located on the
center console.
For details on how to use the 2WD/i-AWD
switch, refer to “Using the 2WD/i-AWD
Switch” in the “OPERATING YOUR VEHI-
CLE” section.
EXAMPLE
Information Display:
Glove Box: 3
Page 92 of 278
4-15INSTRUMENT PANEL
80J21-03E
Heated Rear Window and
Heated Outside Rearview
Mirrors (if equipped) SwitchTy p e 1
79J043
Ty p e 2
79J119
When the rear window is misted, push this
switch (1) to clear the window.
80JC040
If the driver’s outside rearview mirror has
the mark (2), it is also equipped with the
heated outside rearview mirrors. When you
push the switch (1), both the heated out-
side rearview mirrors and the heated rear
window will operate simultaneously.
An indicator light will be lit when the defog-
ger is on. The defogger will work only
when the engine is running. To turn off the
defogger, push the switch again.
(1)(1)
(2)
CAUTION
The heated rear window and the
heated outside rearview mirrors (if
equipped) use a large amount of elec-
tricity. Be sure to turn off after the
window and mirrors have become
clear.
Heating and Air Conditioning System: 4