2008 SUBARU TRIBECA turn signal
[x] Cancel search: turn signalPage 293 of 409
create a traffic safety hazard.
For safety, always connect the towing
vehicle and trailer with trailer safety
chains. Pass the chains crossing each
other under the trailer tongue to prevent
the trailer from dropping onto the ground
in case the trailer tongue should discon-
nect from the hitch ball. Allow sufficient
slack in the chains taking tight-turn situa-
tions into account; however, be careful not
to let them drag on the ground.
For more information about the safety
chain connection, refer to the instructions
for your hitch and trailer.
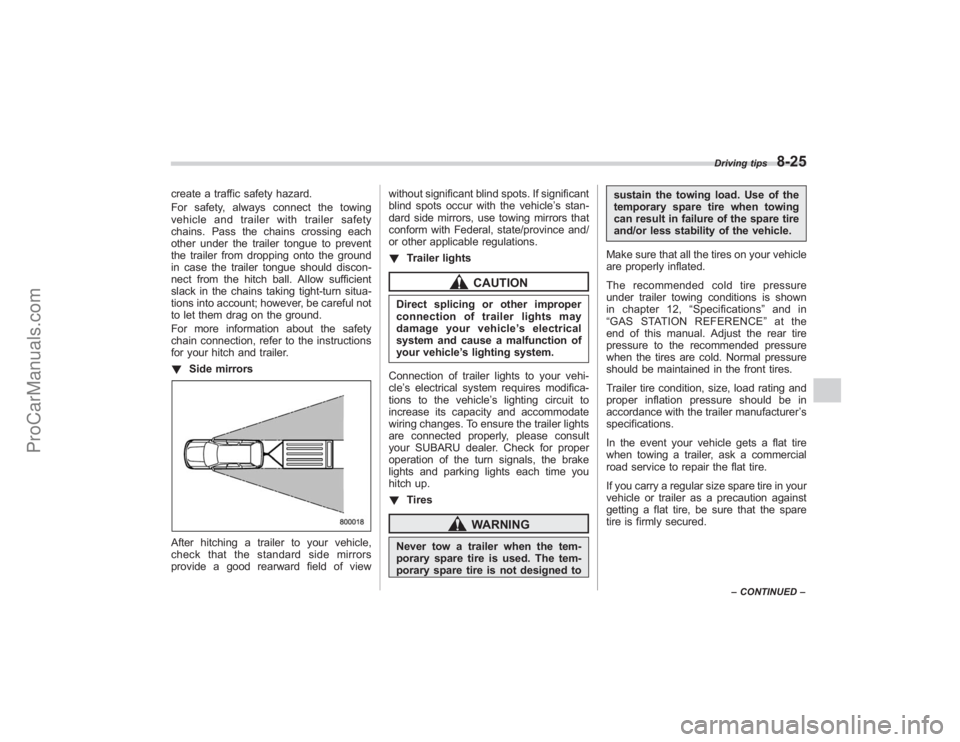
!Side mirrorsAfter hitching a trailer to your vehicle,
check that the standard side mirrors
provide a good rearward field of view without significant blind spots. If significant
blind spots occur with the vehicle’
s stan-
dard side mirrors, use towing mirrors that
conform with Federal, state/province and/
or other applicable regulations.
! Trailer lights
CAUTION
Direct splicing or other improper
connection of trailer lights may
damage your vehicle’ s electrical
system and cause a malfunction of
your vehicle ’s lighting system.
Connection of trailer lights to your vehi-
cle ’s electrical system requires modifica-
tions to the vehicle ’s lighting circuit to
increase its capacity and accommodate
wiring changes. To ensure the trailer lights
are connected properly, please consult
your SUBARU dealer. Check for proper
operation of the turn signals, the brake
lights and parking lights each time you
hitch up.
! Tires
WARNING
Never tow a trailer when the tem-
porary spare tire is used. The tem-
porary spare tire is not designed to sustain the towing load. Use of the
temporary spare tire when towing
can result in failure of the spare tire
and/or less stability of the vehicle.
Make sure that all the tires on your vehicle
are properly inflated.
The recommended cold tire pressure
under trailer towing conditions is shown
in chapter 12, “Specifications ”and in
“ GAS STATION REFERENCE ”at the
end of this manual. Adjust the rear tire
pressure to the recommended pressure
when the tires are cold. Normal pressure
should be maintained in the front tires.
Trailer tire condition, size, load rating and
proper inflation pressure should be in
accordance with the trailer manufacturer ’s
specifications.
In the event your vehicle gets a flat tire
when towing a trailer, ask a commercial
road service to repair the flat tire.
If you carry a regular size spare tire in your
vehicle or trailer as a precaution against
getting a flat tire, be sure that the spare
tire is firmly secured.
Driving tips
8-25
– CONTINUED –
ProCarManuals.com
Page 294 of 409
8-26
Driving tips
&Trailer towing tips
CAUTION
. Never exceed 45 mph (72 km/h)
when towing a trailer in hilly
country on hot days.
. When towing a trailer, steering,
stability, stopping distance and
braking performance will be dif-
ferent from normal operation. For
safety’ s sake, you should employ
extra caution when towing a
trailer and you should never
speed. You should also keep the
following tips in mind:
! Before starting out on a trip
. Check that the vehicle and vehicle-to-
hitch mounting are in good condition. If
any problems are apparent, do not tow the
trailer.
. Check that the vehicle sits horizontally
with the trailer attached. If the vehicle is
tipped sharply up at the front and down at
the rear, check the total trailer weight,
GVW, GAWs and tongue load again, then
confirm that the load and its distribution
are acceptable.
. Check that the tire pressures are
correct. .
Check that the vehicle and trailer are
connected properly. Confirm that
–the trailer tongue is connected
properly to the hitch ball.
– the trailer lights connector is con-
nected properly and trailer ’sbrake
lights illuminate when the vehicle ’s
brake pedal is pressed, and that the
trailer ’s turn signal lights flash when
the vehicle’ s turn signal lever is oper-
ated.
– the safety chains are connected
properly.
– all cargo in the trailer is secured
safely in position.
– the side mirrors provide a good
rearward field of view without a sig-
nificant blind spot.
. Sufficient time should be taken to learn
the “feel ”of the vehicle/trailer combination
before starting out on a trip. In an area free
of traffic, practice turning, stopping and
backing up.
! Driving with a trailer
. You should allow for considerably more
stopping distance when towing a trailer.
Avoid sudden braking because it may
result in skidding or jackknifing and loss of
control.
. Avoid uneven steering, sharp turns and
rapid lane changes. .
Slow down before turning. Make a
longer than normal turning radius because
the trailer wheels will be closer than the
vehicle wheels to the inside of the turn. In
a tight turn, the trailer could hit your
vehicle.
. Crosswinds will adversely affect the
handling of your vehicle and trailer, caus-
ing sway. Crosswinds can be due to
weather conditions or the passing of large
trucks or buses. If swaying occurs, firmly
grip the steering wheel and slow down
immediately but gradually.
. When passing other vehicles, consid-
erable distance is required because of the
added weight and length caused by
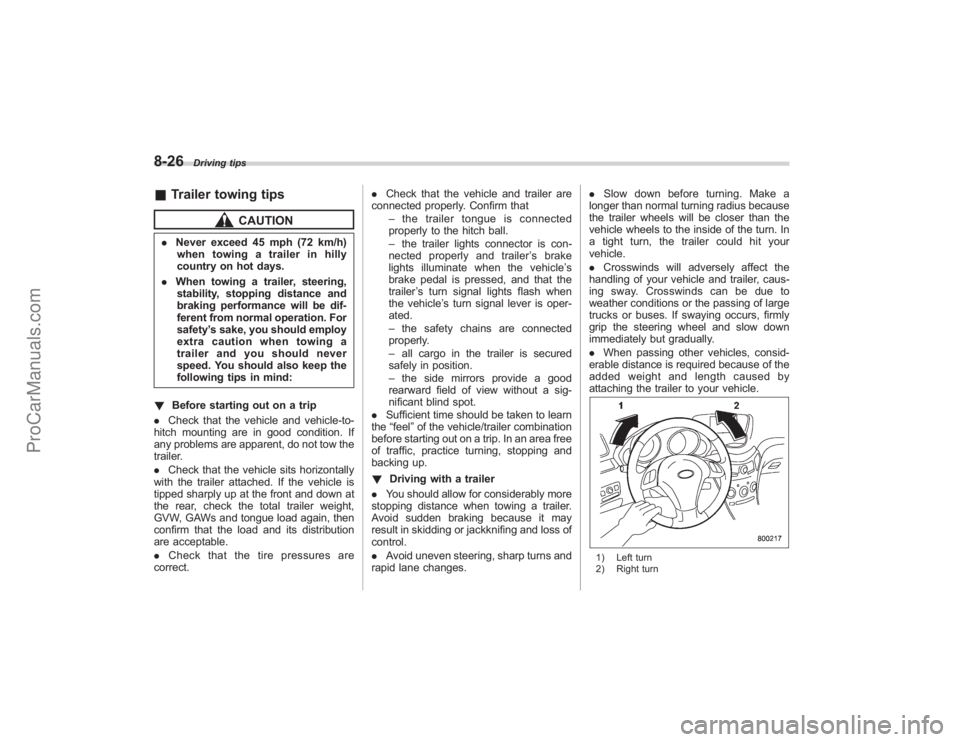
attaching the trailer to your vehicle.
1) Left turn
2) Right turn
ProCarManuals.com
Page 298 of 409
9-2
In case of emergency
If you park your vehicle in an
emergencyThe hazard warning flasher should be
used in day or night to warn other drivers
when you have to park your vehicle under
emergency conditions.
Avoid stopping on the road. It is best to
safely pull off the road if a problem occurs.
The hazard warning flasher can be acti-
vated regardless of the ignition switch
position.
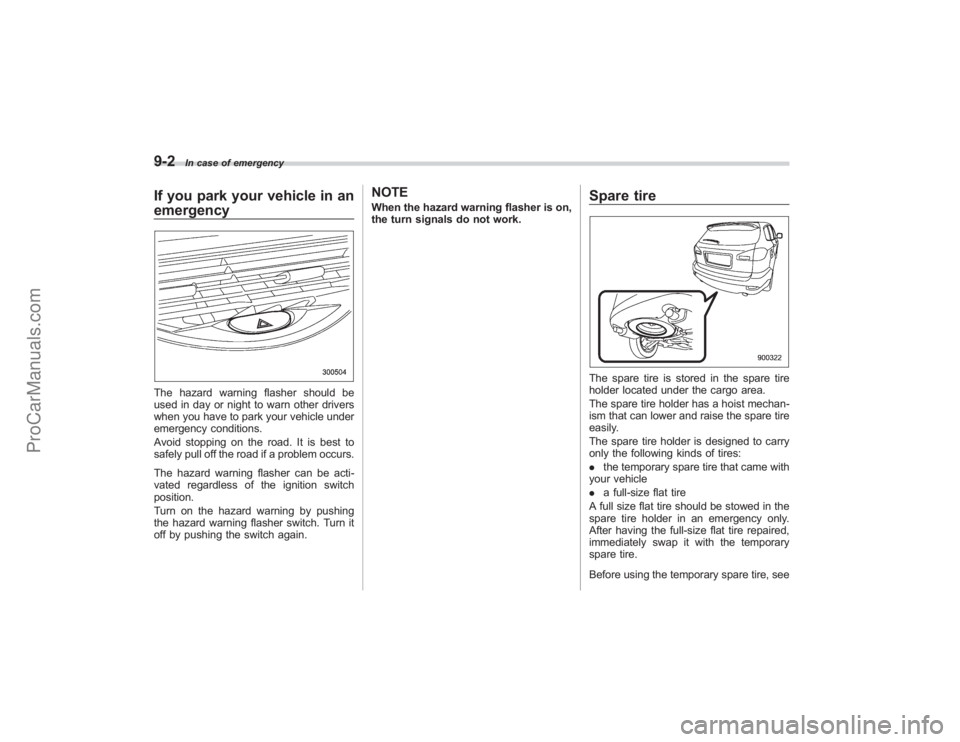
Turn on the hazard warning by pushing
the hazard warning flasher switch. Turn it
off by pushing the switch again.
NOTEWhen the hazard warning flasher is on,
the turn signals do not work.
Spare tireThe spare tire is stored in the spare tire
holder located under the cargo area.
The spare tire holder has a hoist mechan-
ism that can lower and raise the spare tire
easily.
The spare tire holder is designed to carry
only the following kinds of tires:
.the temporary spare tire that came with
your vehicle
. a full-size flat tire
A full size flat tire should be stowed in the
spare tire holder in an emergency only.
After having the full-size flat tire repaired,
immediately swap it with the temporary
spare tire.
Before using the temporary spare tire, see
ProCarManuals.com
Page 306 of 409
9-10
In case of emergency
Approximately 73 to 87 lbs (33 to 38 kg)
Never use your foot on the wheel nut
wrench or a pipe extension on the wrench
because you may exceed the specified
torque. Have the wheel nut torque
checked at the nearest automotive service
facility.
WARNING
Do not use the extension when
turning the wheel nuts. If you did,
you would not be able to achieve
sufficient tightening torque. The
wheel nuts could then come loose,
resulting in a serious accident.
18. Store the flat tire in the spare tire
holder. Refer to the sections
“Spare tire ”in this
chapter for its location, instructions and
precautions.
CAUTION
. When stowing a flat tire in the
spare tire holder, turn the hoist
shaft end only slowly. If it is
turned quickly, the wheel disc of
the flat tire could be damaged.
. A full-size flat tire should be
stowed in the spare tire holder
in an emergency only. After hav-
ing the flat tire repaired, immedi-
ately swap it with the temporary
spare tire.
. Remember that the tread width of
a flat tire is wider than that of the
temporary spare tire. When car-
rying a flat tire stowed in the
spare tire holder, make sure the
tire does not touch any obsta-
cles.
WARNING
Never place a tire or tire changing
tools in the passenger compartment
after changing wheels. In a sudden
stop or collisions, loose equipment could strike occupants and cause
injury. Store the tire and all tools in
the proper place.
&
Tire pressure monitoring
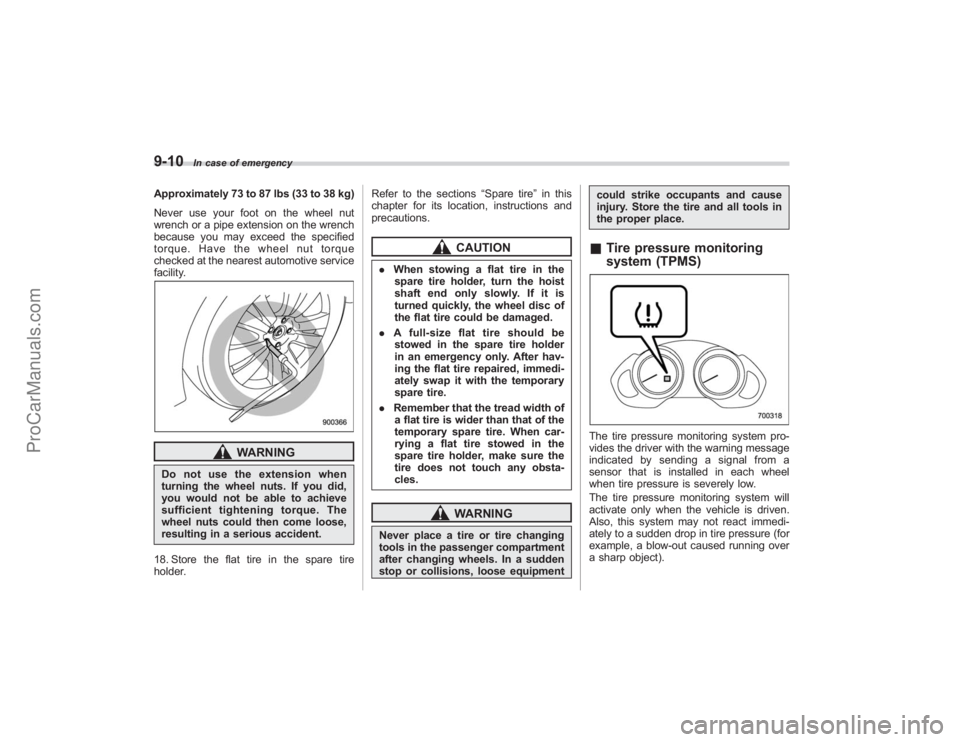
system (TPMS)The tire pressure monitoring system pro-
vides the driver with the warning message
indicated by sending a signal from a
sensor that is installed in each wheel
when tire pressure is severely low.
The tire pressure monitoring system will
activate only when the vehicle is driven.
Also, this system may not react immedi-
ately to a sudden drop in tire pressure (for
example, a blow-out caused running over
a sharp object).
ProCarManuals.com
Page 324 of 409
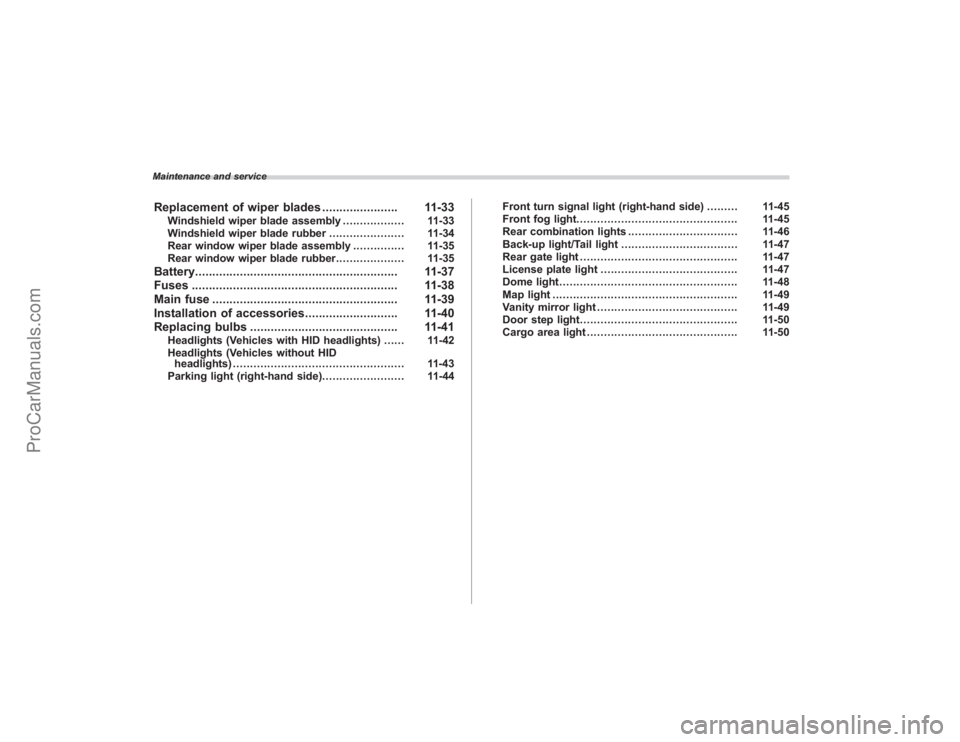
Maintenance and serviceReplacement of wiper blades...................... 11-33
Windshield wiper blade assembly .................. 11-33
Windshield wiper blade rubber ...................... 11-34
Rear window wiper blade assembly ............... 11-35
Rear window wiper blade rubber .................... 11-35
Battery........................................................... 11-37
Fuses ............................................................ 11-38
Main fuse ...................................................... 11-39
Installation of accessories ........................... 11-40
Replacing bulbs ........................................... 11-41
Headlights (Vehicles with HID headlights) ...... 11-42
Headlights (Vehicles without HID headlights) .................................................. 11-43
Parking light (right-hand side) ........................ 11-44 Front turn signal light (right-hand side)
......... 11-45
Front fog light ............................................... 11-45
Rear combination lights ................................ 11-46
Back-up light/Tail light .................................. 11-47
Rear gate light .............................................. 11-47
License plate light ........................................ 11-47
Dome light .................................................... 11-48
Map light ...................................................... 11-49
Vanity mirror light ......................................... 11-49
Door step light .............................................. 11-50
Cargo area light ............................................ 11-50
ProCarManuals.com
Page 364 of 409
11-42
Maintenance and service
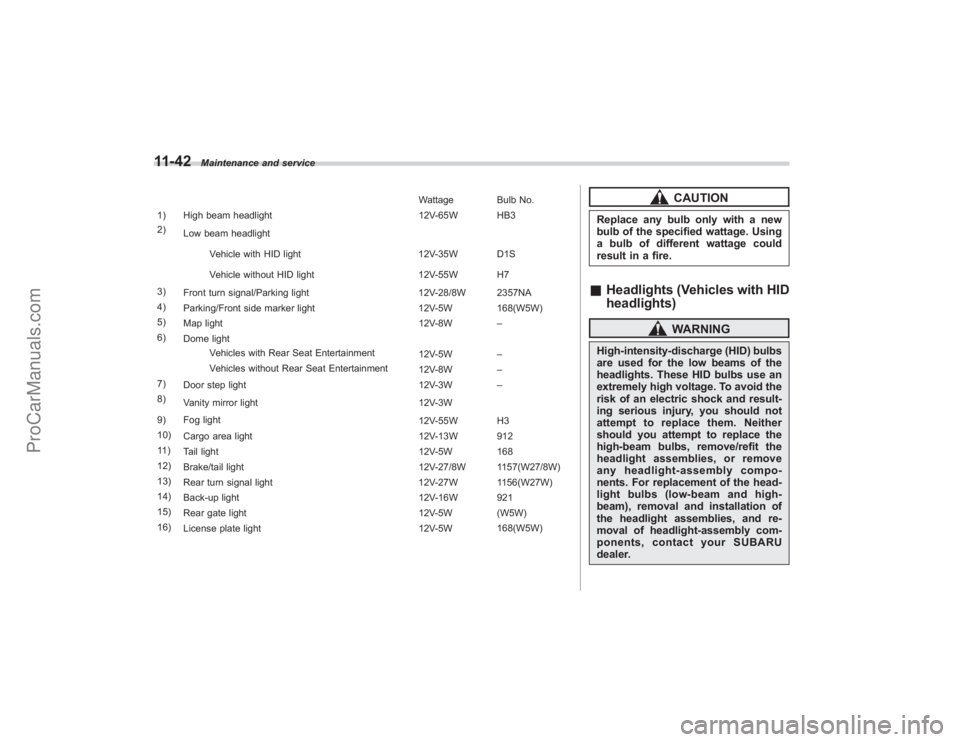
Wattage Bulb No.
1) High beam headlight 12V-65W HB3
2) Low beam headlight
Vehicle with HID light 12V-35W D1S
Vehicle without HID light 12V-55W H7
3) Front turn signal/Parking light 12V-28/8W 2357NA
4) Parking/Front side marker light 12V-5W 168(W5W)
5) Map light 12V-8W –
6) Dome light
Vehicles with Rear Seat Entertainment 12V-5W–
Vehicles without Rear Seat Entertainment 12V-8W–
7) Door step light 12V-3W –
8) Vanity mirror light 12V-3W
9) Fog light 12V-55W H3
10) Cargo area light 12V-13W 912
11 ) Tail light 12V-5W 168
12) Brake/tail light 12V-27/8W 1157(W27/8W)
13) Rear turn signal light 12V-27W 1156(W27W)
14) Back-up light 12V-16W 921
15) Rear gate light 12V-5W (W5W)
16) License plate light 12V-5W 168(W5W)
CAUTION
Replace any bulb only with a new
bulb of the specified wattage. Using
a bulb of different wattage could
result in a fire.&
Headlights (Vehicles with HID
headlights)
WARNING
High-intensity-discharge (HID) bulbs
are used for the low beams of the
headlights. These HID bulbs use an
extremely high voltage. To avoid the
risk of an electric shock and result-
ing serious injury, you should not
attempt to replace them. Neither
should you attempt to replace the
high-beam bulbs, remove/refit the
headlight assemblies, or remove
any headlight-assembly compo-
nents. For replacement of the head-
light bulbs (low-beam and high-
beam), removal and installation of
the headlight assemblies, and re-
moval of headlight-assembly com-
ponents, contact your SUBARU
dealer.
ProCarManuals.com
Page 367 of 409
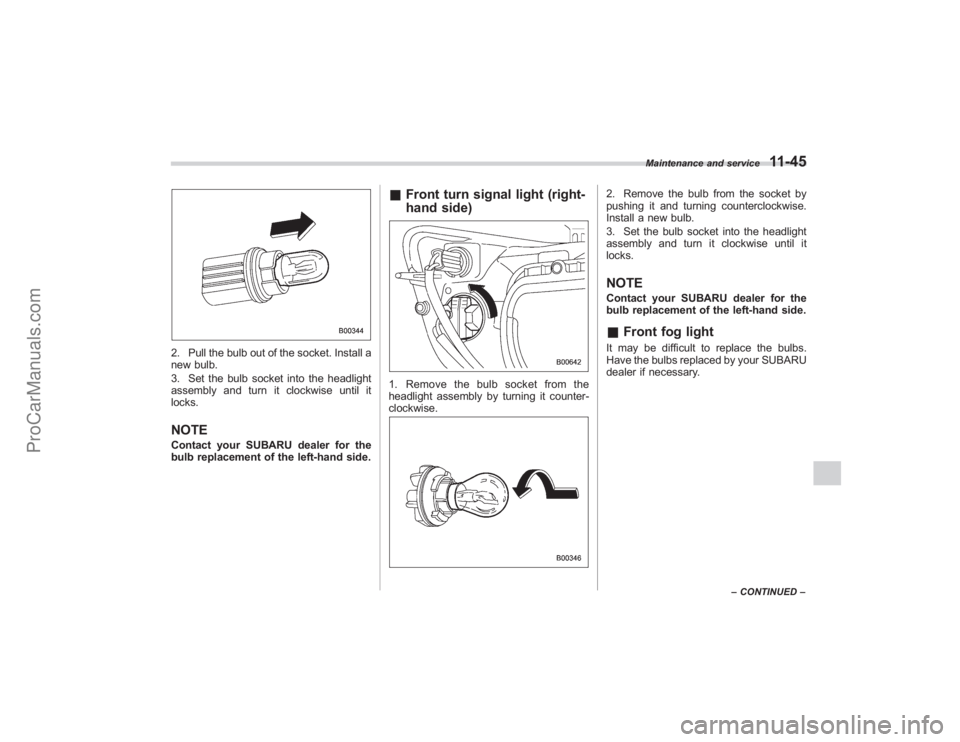
2. Pull the bulb out of the socket. Install a
new bulb.
3. Set the bulb socket into the headlight
assembly and turn it clockwise until it
locks.NOTEContact your SUBARU dealer for the
bulb replacement of the left-hand side.
&Front turn signal light (right-
hand side)1. Remove the bulb socket from the
headlight assembly by turning it counter-
clockwise.
2. Remove the bulb from the socket by
pushing it and turning counterclockwise.
Install a new bulb.
3. Set the bulb socket into the headlight
assembly and turn it clockwise until it
locks.NOTEContact your SUBARU dealer for the
bulb replacement of the left-hand side.&Front fog lightIt may be difficult to replace the bulbs.
Have the bulbs replaced by your SUBARU
dealer if necessary.
Maintenance and service
11-45
–CONTINUED –
ProCarManuals.com
Page 368 of 409
11-46
Maintenance and service
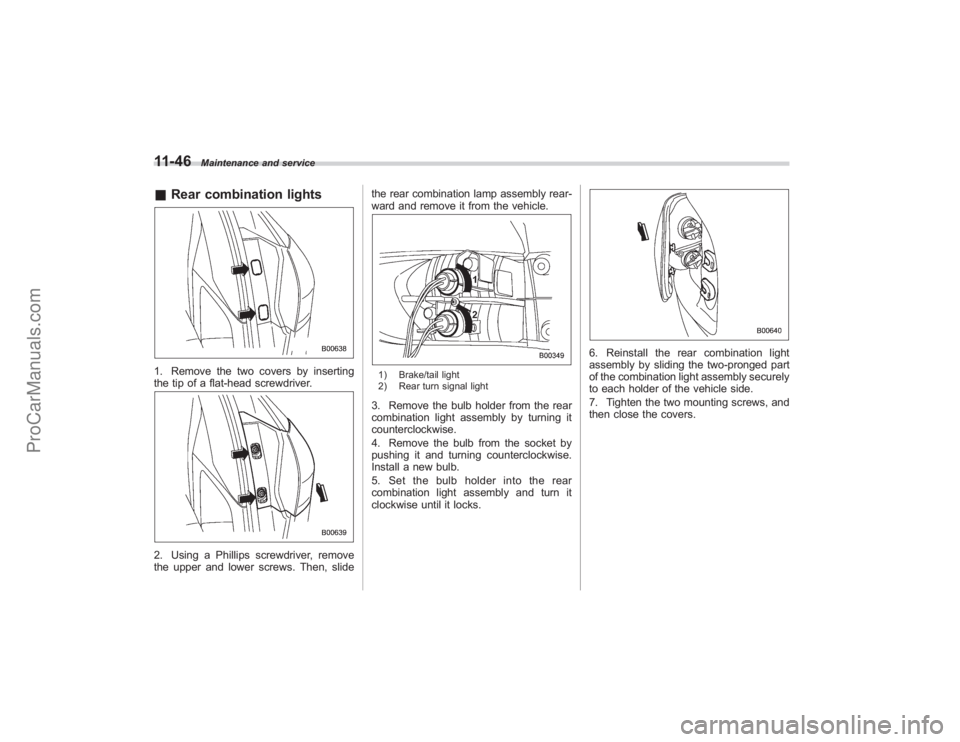
&Rear combination lights1. Remove the two covers by inserting
the tip of a flat-head screwdriver.2. Using a Phillips screwdriver, remove
the upper and lower screws. Then, slide the rear combination lamp assembly rear-
ward and remove it from the vehicle.
1) Brake/tail light
2) Rear turn signal light3. Remove the bulb holder from the rear
combination light assembly by turning it
counterclockwise.
4. Remove the bulb from the socket by
pushing it and turning counterclockwise.
Install a new bulb.
5. Set the bulb holder into the rear
combination light assembly and turn it
clockwise until it locks.
6. Reinstall the rear combination light
assembly by sliding the two-pronged part
of the combination light assembly securely
to each holder of the vehicle side.
7. Tighten the two mounting screws, and
then close the covers.
ProCarManuals.com