2008 SUBARU TRIBECA battery
[x] Cancel search: batteryPage 213 of 409
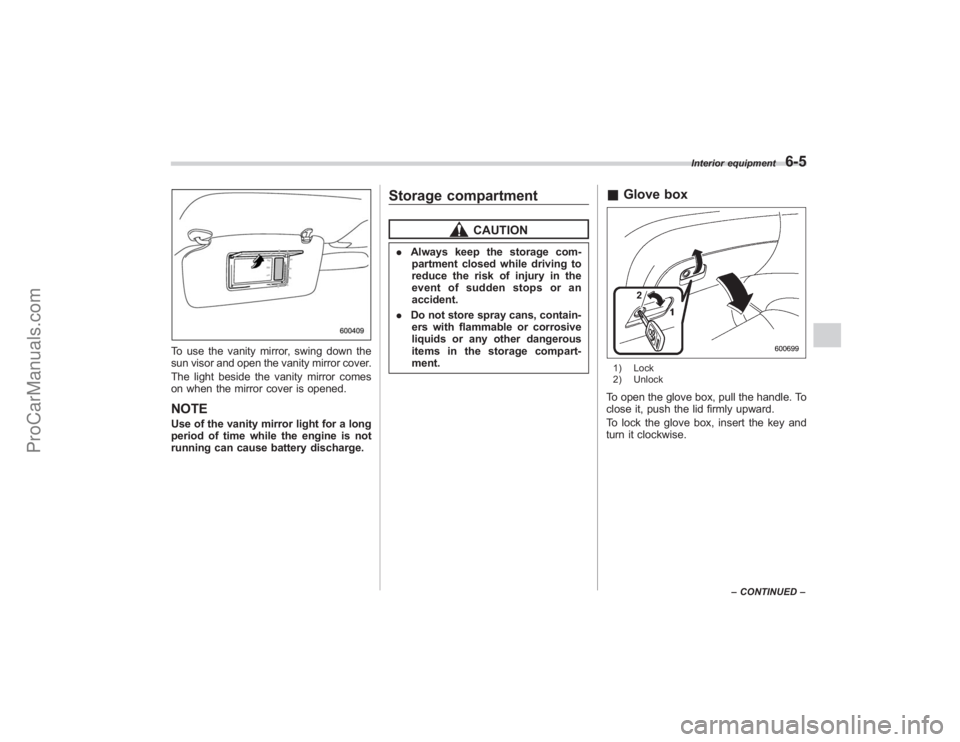
To use the vanity mirror, swing down the
sun visor and open the vanity mirror cover.
The light beside the vanity mirror comes
on when the mirror cover is opened.NOTEUse of the vanity mirror light for a long
period of time while the engine is not
running can cause battery discharge.
Storage compartment
CAUTION
.Always keep the storage com-
partment closed while driving to
reduce the risk of injury in the
event of sudden stops or an
accident.
. Do not store spray cans, contain-
ers with flammable or corrosive
liquids or any other dangerous
items in the storage compart-
ment.
& Glove box1) Lock
2) UnlockTo open the glove box, pull the handle. To
close it, push the lid firmly upward.
To lock the glove box, insert the key and
turn it clockwise.
Interior equipment
6-5
–CONTINUED –
ProCarManuals.com
Page 218 of 409
6-10
Interior equipment
Electrical power (12V DC) from the battery
is available at any of the outlets when the
ignition switch is either in the“Acc”or “ON ”
position.
You can use an in-vehicle use electrical
appliance by connecting it to an outlet.
When both outlets are used at the same
time, the total power consumption of the
electric appliances must be 120W or less.
CAUTION
. Do not attempt to use a cigarette
lighter in the accessory power
outlet.
. Do not place any foreign objects,
especially metal ones such as
coins or aluminum foil, into the
accessory power outlet. That
could cause a short circuit. Al-
ways put the cap on the acces-
sory power outlet when it is not
in use.
. Use only electrical appliances
which are designed for 12V DC
and which consume less than
120W. Overloading the accessory
power outlet can cause a short
circuit. Do not use double adap-
ters or more than one electrical
appliance.
. If the plug on your electric appli- ance is either too loose or too
tight for the accessory power
outlet, this can result in a poor
contact or cause the plug to get
stuck. Only use plugs that fit
properly.
. Use of an electric appliance in the
accessory power outlet for a long
period of time while the engine is
not running can cause battery
discharge.
. Before driving your vehicle, make
sure that the plug and the cord
on your electrical appliance will
not interfere with your shifting
gears and operating the accel-
erator and brake pedals. If they
do, do not use the electrical
appliance while driving.
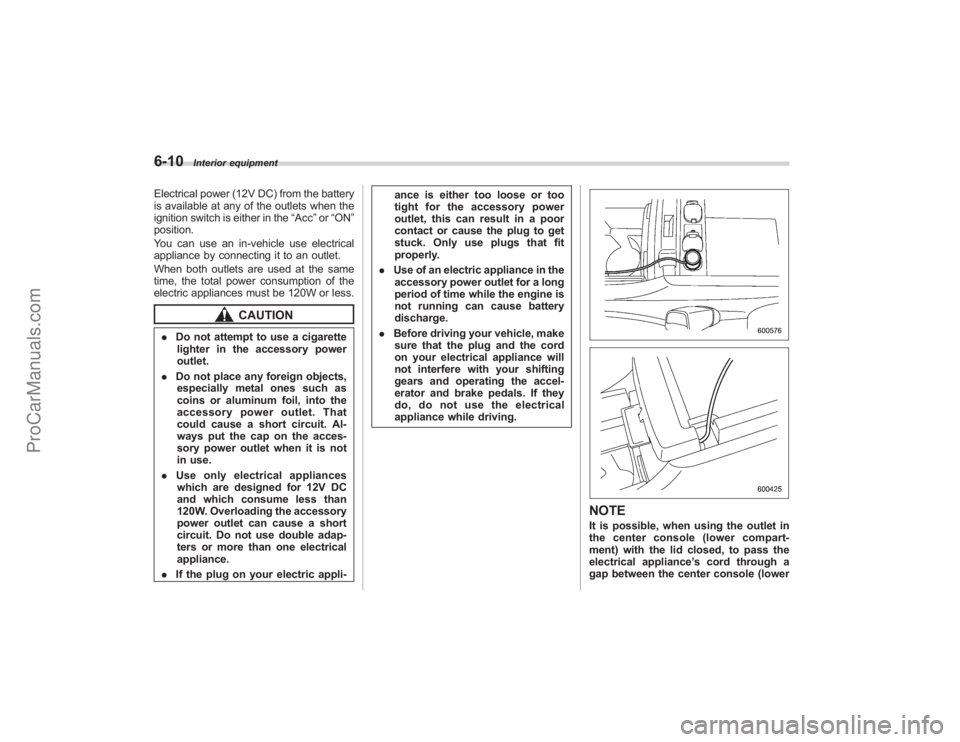
NOTEIt is possible, when using the outlet in
the center console (lower compart-
ment) with the lid closed, to pass the
electrical appliance ’s cord through a
gap between the center console (lower
ProCarManuals.com
Page 225 of 409
garage door opener or other
device. Make sure that people
and objects are out of the way
of the garage door opener or
other device to prevent potential
harm or damage.
. Do not use the HomeLink ®Wire-
less Control System with any
garage door opener that lacks
the safety stop and reverse fea-
ture as required by applicable
safety standards. A garage door
opener which cannot detect an
object, signaling the door to stop
and reverse, does not meet these
safety standards. Using a garage
door opener without these fea-
tures increases risk of serious
injury or death. For more infor-
mation, consult the HomeLink
website at www.homelink.com
or call 1-800-355-3515.
CAUTION
When programming the HomeLink ®
Wireless Control System to operate
a garage door opener or an entrance
gate, unplug the device ’s motor
from the outlet during programming
to prevent motor burnout.
NOTE. After programming your HomeLink ®
Wireless Control System for the de-
sired devices, retain the hand-held
transmitters for further programming
or device testing in the event of a
problem.
. It is recommended that you insert a
new battery in the hand-held transmit-
ter of a device to ensure correct
programming.& Garage door opener pro-
gramming in the U.S.A.
NOTEWhen programming the HomeLink ®
Wireless Control System for a garage
door opener, it is suggested that you
park the vehicle outside the garage.
1. Unplug the motor of the garage door
opener from the outlet.
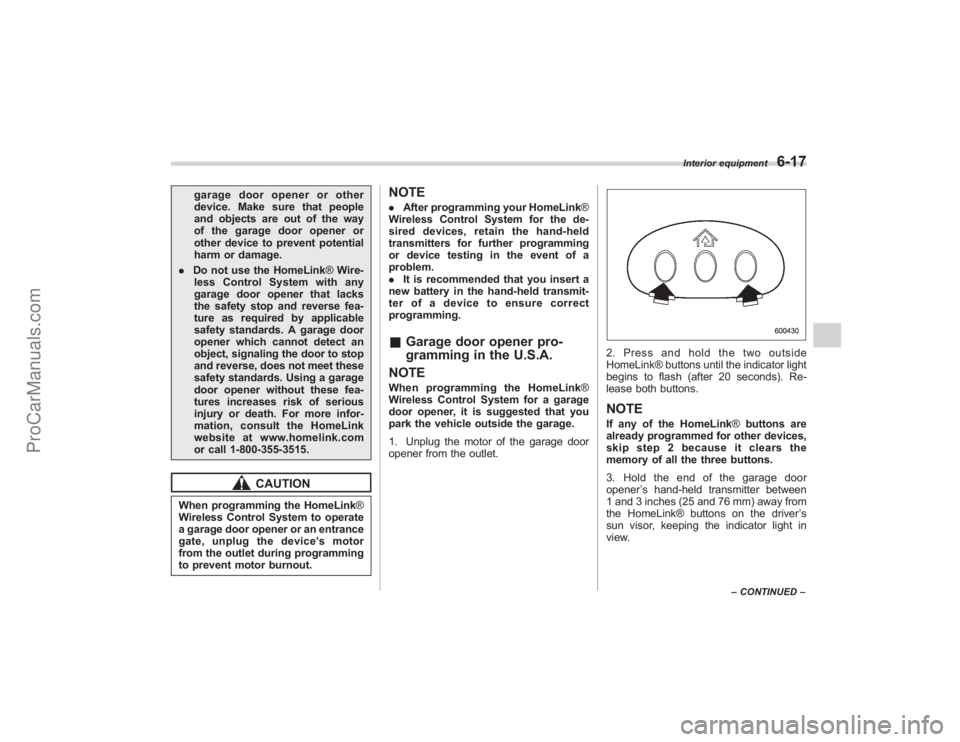
2. Press and hold the two outside
HomeLink® buttons until the indicator light
begins to flash (after 20 seconds). Re-
lease both buttons.NOTEIf any of the HomeLink ®buttons are
already programmed for other devices,
skip step 2 because it clears the
memory of all the three buttons.
3. Hold the end of the garage door
opener ’s hand-held transmitter between
1 and 3 inches (25 and 76 mm) away from
the HomeLink® buttons on the driver ’s
sun visor, keeping the indicator light in
view.
Interior equipment
6-17
– CONTINUED –
ProCarManuals.com
Page 229 of 409
Rear view camera (if
equipped)When the ignition switch is“ON”and the
selector lever is set to “R”, the rear view
camera automatically displays the rear
view image from the vehicle.
WARNING
. Since the rear view camera uses
a wide-angle lens, the image on
the monitor is different from the
actual view in terms of distance.
. Since the range of the image on
the monitor is limited, you should
always check the rear view with
your eyes and move backward at
a slow speed.
. Do not disassemble or modify the
camera, switch or wiring. If
smoke comes out or you smell
a strange odor, stop using the
rear view camera immediately.
Contact your Subaru dealer for
an inspection. Continued use
may result in accident, fire or
electric shock.
CAUTION
. If your vehicle is washed with a
high-pressure washer, do not
allow water to contact the camera
directly. Entry of water in the
camera lens may result in con-
densation, malfunction, fire or
electric shock.
. Since the camera is a precision
device, do not subject it to strong
impacts. Otherwise, malfunction,
fire or electric shock may occur.
. If mud or snow sticks to or is
frozen on the camera, you must
be very careful removing it.
Otherwise, damage done to the
camera may cause a fire or
electric shock. Pour lukewarm
water over the camera to remove
mud or ice.
. Do not put a flame close to the
camera or wiring. Otherwise, da-
mage or fire may occur.
. When replacing the fuse, be sure
to use a fuse with the specified
rating. Use of a fuse with a
different rating may result in a
malfunction.
. If the rear view camera is used for
a long time while the engine is not operated, the battery may
become completely discharged.
NOTE.
Do not wipe the camera with alcohol,
benzine or paint thinner. Otherwise,
discoloration may occur. To remove
contamination, wipe the camera with a
cloth moistened with a diluted neutral
detergent and then wipe it with a dry
cloth.
. When waxing the vehicle, be careful
not to apply the wax to the camera. If it
comes in contact with the camera,
moisten a clean cloth with a diluted
neutral detergent to remove the wax.
. The camera lens has hard coating to
help prevent scratches. However, when
washing the vehicle or cleaning the
camera lens, be careful not to scratch
the camera lens. Do not use a washing
brush directly on the camera lens. The
monitor screen may be adversely af-
fected.
. Strong light shined on the camera
lens may develop white light stripes
around the light source. This is not a
malfunction.
Interior equipment
6-21
– CONTINUED –
ProCarManuals.com
Page 245 of 409
feature ON or OFF each time.
7. To exit the remote transmitter and
feature programming mode, turn the igni-
tion switch to the“LOCK”position, remove
the key from the ignition switch and test
operation of the remote transmitter(s) and
horn confirmation feature.& System maintenance! Changing the remote control bat-
teries
The two 3-volt lithium batteries (model
CR-1220) supplied in your remote control
should last approximately three years,
depending on usage. When the batteries
begin to weaken, you will notice a
decrease in range (distance from the
vehicle that your remote control operates).
Follow the instructions below to change
the remote control batteries.
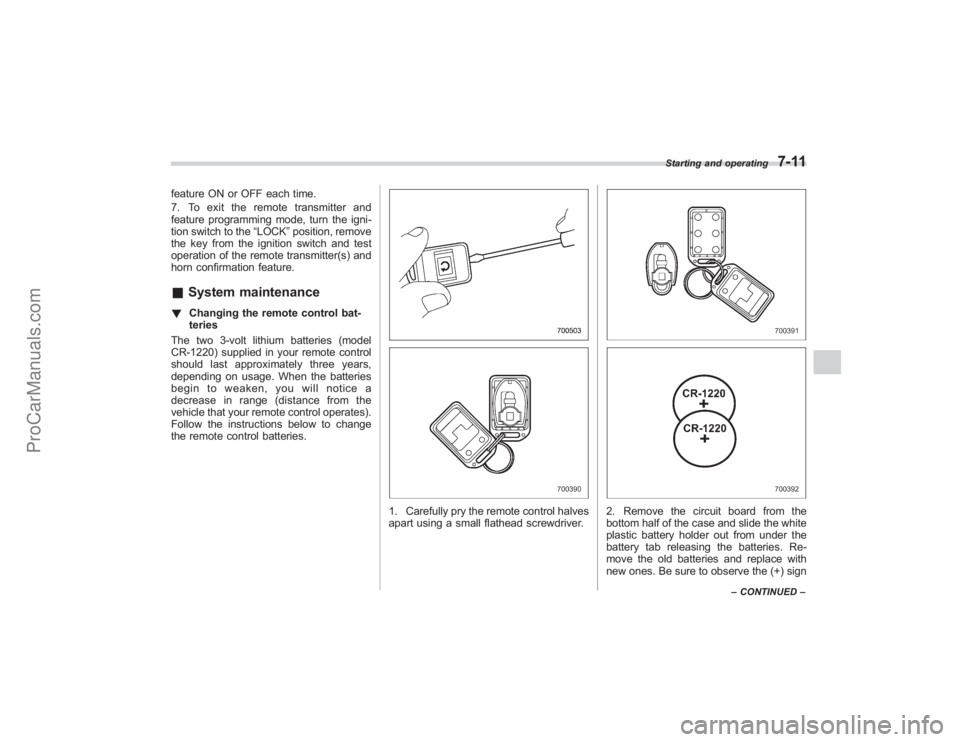
1. Carefully pry the remote control halves
apart using a small flathead screwdriver.
2. Remove the circuit board from the
bottom half of the case and slide the white
plastic battery holder out from under the
battery tab releasing the batteries. Re-
move the old batteries and replace with
new ones. Be sure to observe the (+) sign
Starting and operating
7-11
– CONTINUED –
ProCarManuals.com
Page 246 of 409

7-12
Starting and operating
on the old batteries before removing them
to ensure that the new batteries are
inserted properly (battery“+”should be
pointed away from the transmitter circuit
board on both batteries).
3. Carefully snap the case halves back
together, then test the remote control.NOTEThis device complies with Part 15 of
the FCC Rules and with RSS-210 of
Industry Canada. Operation is subject
to the following two conditions: (1) This
device may not cause harmful inter-
ference, and (2) this device must
accept any interference received, in-
cluding interference that may cause
undesired operation.
Changes or modifications not ex-
pressly approved by the party respon-
sible for compliance could void the
user ’s authority to operate the equip-
ment.
Automatic transmissionThe automatic transmission is electroni-
cally controlled and provides 5 forward
speeds and 1 reverse speed. Also, it has a
manual mode and a SPORT mode.
WARNING
Do not shift from the “P ” or “N ”
position into the “D ” or “R ” position
while depressing the accelerator
pedal. This may cause the vehicle
to jump forward or backward.
CAUTION
. Shift into the “P ” or “R ” position
only after the vehicle is comple-
tely stopped. Shifting while the
vehicle is moving may cause
damage to the transmission.
. Do not race the engine for more
than 5 seconds in any position
except the “N ” or “P ” position
when the brake is set or when
chocks are used in the wheels.
This may cause the automatic
transmission fluid to overheat.
. Avoid shifting from one of the
forward driving positions into the “
R ” position or vice versa until
the vehicle has completely
stopped. Such shifting may
cause damage to the transmis-
sion.
. When parking the vehicle, first
securely apply the parking brake
and then place the selector lever
in the “P ” position. Avoid parking
for a long time with the selector
lever in any other position as
doing so could result in a dead
battery.
NOTE. When the engine coolant tempera-
ture is still low, your vehicle ’s auto-
matic transmission will up-shift at high-
er engine speeds than when the cool-
ant temperature is sufficiently high in
order to shorten the warm-up time and
improve driveability. The gearshift tim-
ing will automatically shift to the nor-
mal timing after the engine has warmed
up.
. Immediately after ATF (automatic
transmission fluid) is replaced, you
may feel that the automatic transmis-
sion operation is somewhat unusual.
This results from invalidation of data
which the on-board computer has
ProCarManuals.com
Page 255 of 409
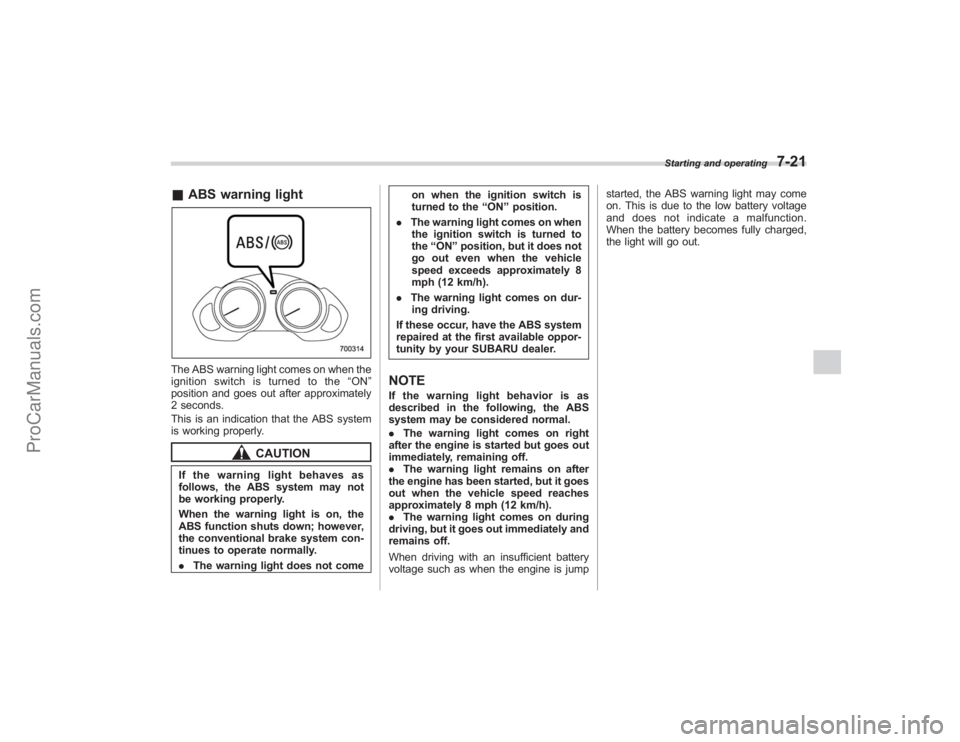
&ABS warning lightThe ABS warning light comes on when the
ignition switch is turned to the “ON ”
position and goes out after approximately
2 seconds.
This is an indication that the ABS system
is working properly.
CAUTION
If the warning light behaves as
follows, the ABS system may not
be working properly.
When the warning light is on, the
ABS function shuts down; however,
the conventional brake system con-
tinues to operate normally.
. The warning light does not come on when the ignition switch is
turned to the
“ON ”position.
. The warning light comes on when
the ignition switch is turned to
the “ON ”position, but it does not
go out even when the vehicle
speed exceeds approximately 8
mph (12 km/h).
. The warning light comes on dur-
ing driving.
If these occur, have the ABS system
repaired at the first available oppor-
tunity by your SUBARU dealer.
NOTEIf the warning light behavior is as
described in the following, the ABS
system may be considered normal.
. The warning light comes on right
after the engine is started but goes out
immediately, remaining off.
. The warning light remains on after
the engine has been started, but it goes
out when the vehicle speed reaches
approximately 8 mph (12 km/h).
. The warning light comes on during
driving, but it goes out immediately and
remains off.
When driving with an insufficient battery
voltage such as when the engine is jump started, the ABS warning light may come
on. This is due to the low battery voltage
and does not indicate a malfunction.
When the battery becomes fully charged,
the light will go out.
Starting and operating
7-21
ProCarManuals.com
Page 275 of 409
underbody. Clear off any such matter from
the underbody. If the vehicle is used with
these materials trapped or adhering to the
underbody, a mechanical breakdown or
fire could occur.
.Secure all cargo carried inside the
vehicle and make certain that it is not
piled higher than the seatbacks. During
sudden stops or jolts, unsecured cargo
could be thrown around in the vehicle and
cause injury. Do not pile heavy loads on
the roof. Those loads raise the vehicle ’s
center of gravity and make it more prone
to tip over.
. If you must rock the vehicle to free it
from sand or mud, depress the accelerator
pedal slightly and move the selector lever
back and forth between “D ” and “R ”
repeatedly. Do not race the engine. For
the best possible traction, avoid spinning
the wheels when trying to free the vehicle.
. When the road surface is extremely
slippery, you can obtain better traction by
starting the vehicle with the transmission
in 2nd than 1st.
. Never equip your vehicle with tires
larger than those specified in this manual.
. Wash the vehicle ’s underbody after off-
road driving. Suspension components are
particularly prone to dirt buildup, so they
need to be washed thoroughly.
. Frequent driving of an AWD vehicle under hard-driving conditions such as
rough roads or off roads will necessitate
more frequent replacement of engine oil,
brake fluid and transmission oil than that
specified in the maintenance schedule
described in the
“Warranty and Mainte-
nance Booklet ”.
Remember that damage done to your
SUBARU while operating it off-road and
not using common sense precautions
such as those listed above is not eligible
for warranty coverage.
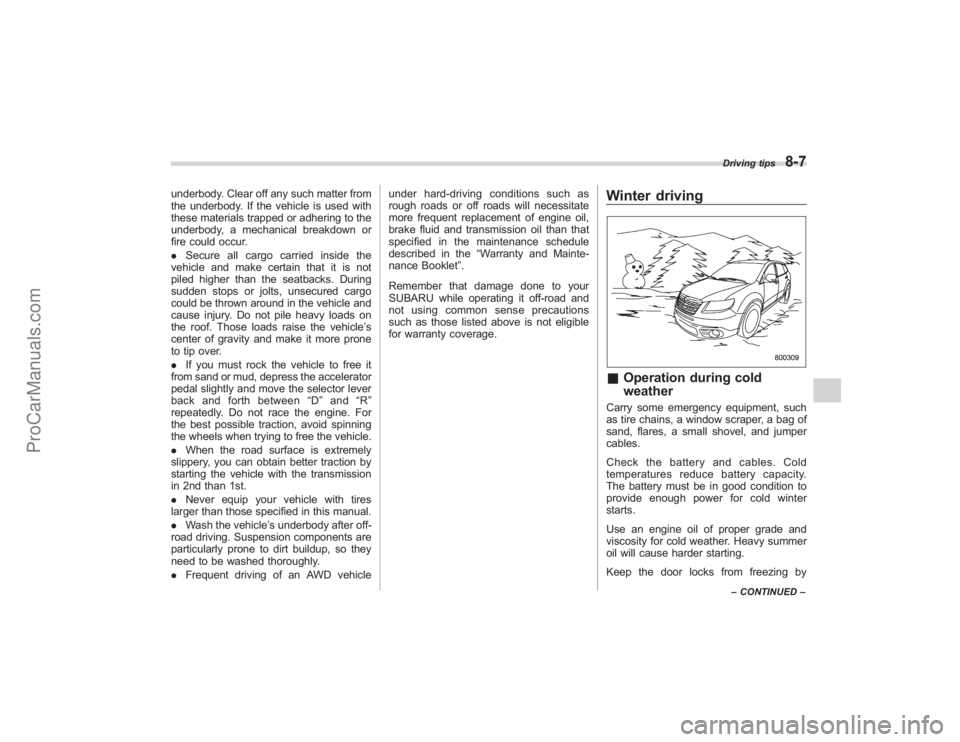
Winter driving& Operation during cold
weatherCarry some emergency equipment, such
as tire chains, a window scraper, a bag of
sand, flares, a small shovel, and jumper
cables.
Check the battery and cables. Cold
temperatures reduce battery capacity.
The battery must be in good condition to
provide enough power for cold winter
starts.
Use an engine oil of proper grade and
viscosity for cold weather. Heavy summer
oil will cause harder starting.
Keep the door locks from freezing by
Driving tips
8-7
–CONTINUED –
ProCarManuals.com