2008 SUBARU TRIBECA check oil
[x] Cancel search: check oilPage 333 of 409

Cooling system
WARNING
Never attempt to remove the radia-
tor cap until the engine has been
shut off and has cooled down
completely. Since the coolant is
under pressure, you may suffer
serious burns from a spray of boil-
ing hot coolant when the cap is
removed.
CAUTION
.The cooling system has been
filled at the factory with a high
quality, corrosion-inhibiting,
year-around coolant which pro-
vides protection against freezing
down to −33 8F( −36 8C).
Subaru engines use aluminum
components that require the
anti-corrosive and anti-freeze
properties of Subaru Genuine
Coolant, which is specifically
formulated for the Subaru cool-
ing system. Failure to use Subaru
Genuine Coolant along with
Subaru Cooling System Condi-
tioner at the recommended main- tenance intervals may result in
problems, including, but not lim-
ited to shortened life of engine
components and cooling system
clogging, coolant leaks and en-
gine damage from overheating.
Problems caused by the failure to
use Subaru Genuine Coolant and
Subaru Cooling System Condi-
tioner at recommended intervals
are not covered under the
Subaru Limited Warranty.
While there may be other generic
products that may provide the
required protection, they have
not been tested for compatibility
with Subaru engines and cooling
system components, and there-
fore not recommended.
. Do not splash the engine coolant
over painted parts. The alcohol
contained in the engine coolant
may damage the paint surface.
& Hose and connectionsYour vehicle employs an electric cooling
fan which is thermostatically controlled to
operate when the engine coolant reaches
a specific temperature.
If the radiator cooling fan does not operate even when the engine coolant tempera-
ture gauge exceeds the normal operating
range, the cooling fan circuit may be
defective. Check the fuse and replace it
if necessary. If the fuse is not blown, have
the cooling system checked by your
SUBARU dealer.
If frequent addition of coolant is neces-
sary, there may be a leak in the engine
cooling system. It is recommended that
the cooling system and connections be
checked for leaks, damage, or looseness.
&
Engine coolant! Checking the coolant levelCheck the coolant level at each fuel stop.
1. Check the coolant level on the outside
of the reservoir while the engine is cool.
Maintenance and service
11-11
–CONTINUED –
ProCarManuals.com
Page 334 of 409
11-12
Maintenance and service
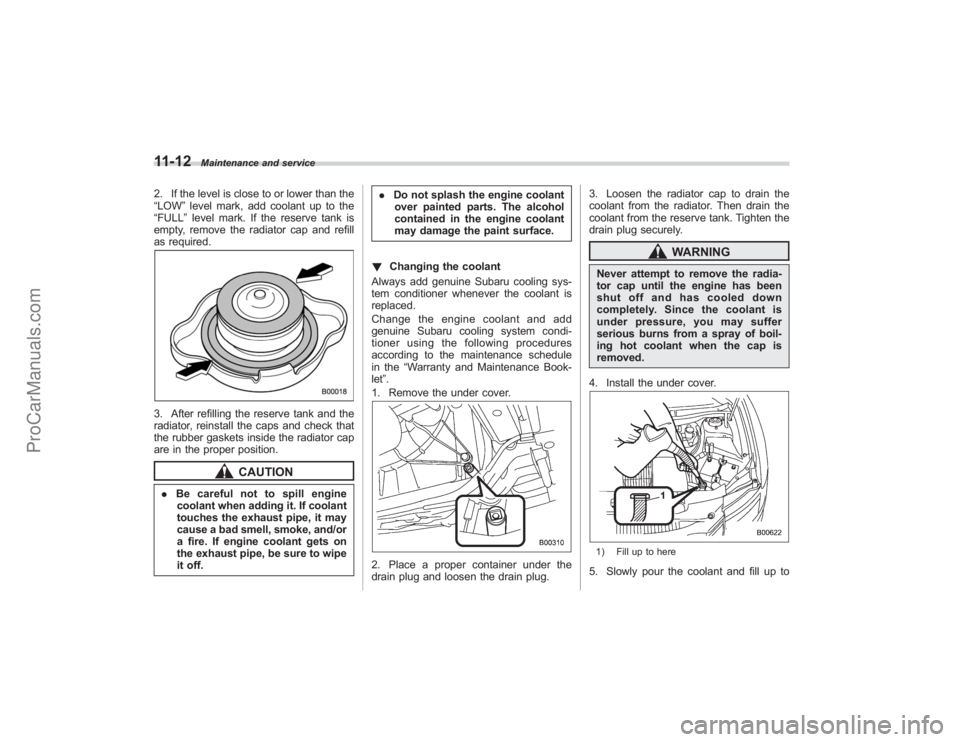
2. If the level is close to or lower than the
“LOW”level mark, add coolant up to the
“FULL ”level mark. If the reserve tank is
empty, remove the radiator cap and refill
as required.3. After refilling the reserve tank and the
radiator, reinstall the caps and check that
the rubber gaskets inside the radiator cap
are in the proper position.
CAUTION
. Be careful not to spill engine
coolant when adding it. If coolant
touches the exhaust pipe, it may
cause a bad smell, smoke, and/or
a fire. If engine coolant gets on
the exhaust pipe, be sure to wipe
it off. .
Do not splash the engine coolant
over painted parts. The alcohol
contained in the engine coolant
may damage the paint surface.
! Changing the coolant
Always add genuine Subaru cooling sys-
tem conditioner whenever the coolant is
replaced.
Change the engine coolant and add
genuine Subaru cooling system condi-
tioner using the following procedures
according to the maintenance schedule
in the “Warranty and Maintenance Book-
let ”.
1. Remove the under cover.
2. Place a proper container under the
drain plug and loosen the drain plug. 3. Loosen the radiator cap to drain the
coolant from the radiator. Then drain the
coolant from the reserve tank. Tighten the
drain plug securely.
WARNING
Never attempt to remove the radia-
tor cap until the engine has been
shut off and has cooled down
completely. Since the coolant is
under pressure, you may suffer
serious burns from a spray of boil-
ing hot coolant when the cap is
removed.
4. Install the under cover.1) Fill up to here5. Slowly pour the coolant and fill up to
ProCarManuals.com
Page 339 of 409
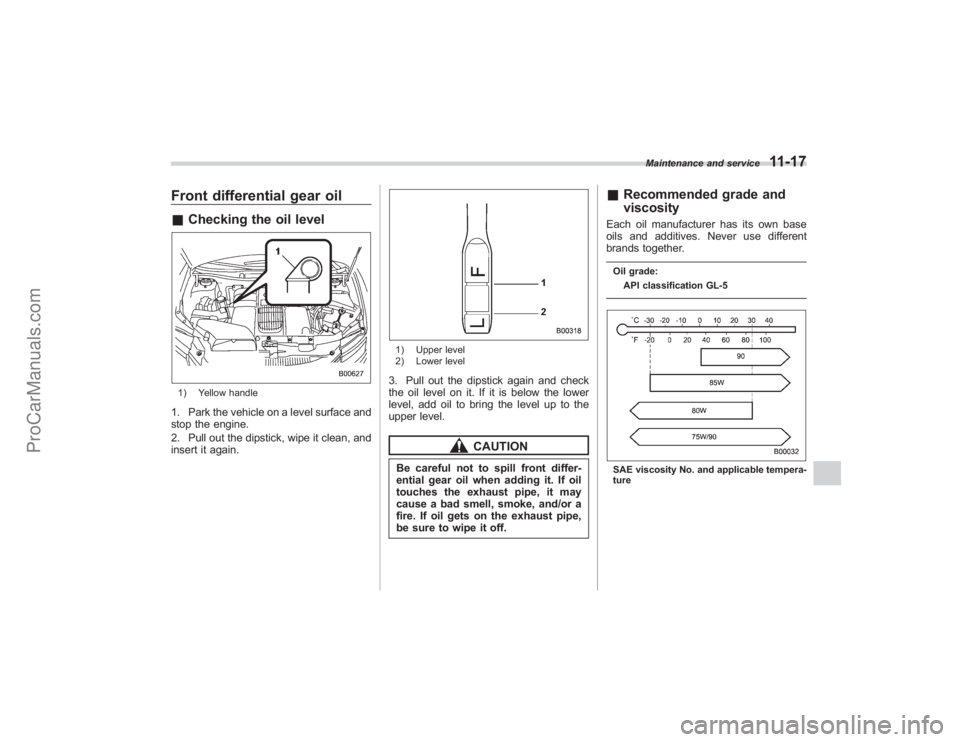
Front differential gear oil&Checking the oil level1) Yellow handle1. Park the vehicle on a level surface and
stop the engine.
2. Pull out the dipstick, wipe it clean, and
insert it again.
1) Upper level
2) Lower level3. Pull out the dipstick again and check
the oil level on it. If it is below the lower
level, add oil to bring the level up to the
upper level.
CAUTION
Be careful not to spill front differ-
ential gear oil when adding it. If oil
touches the exhaust pipe, it may
cause a bad smell, smoke, and/or a
fire. If oil gets on the exhaust pipe,
be sure to wipe it off.
&Recommended grade and
viscosityEach oil manufacturer has its own base
oils and additives. Never use different
brands together.Oil grade:
API classification GL-5SAE viscosity No. and applicable tempera-
ture Maintenance and service
11-17
ProCarManuals.com
Page 340 of 409
11-18
Maintenance and service
Rear differential gear oil&Checking the gear oil levelYour vehicle may be equipped with a rear
differential protector. The differential pro-
tector provides protection to the rear
differential assembly during off-road use.
Removal of the rear differential protector is
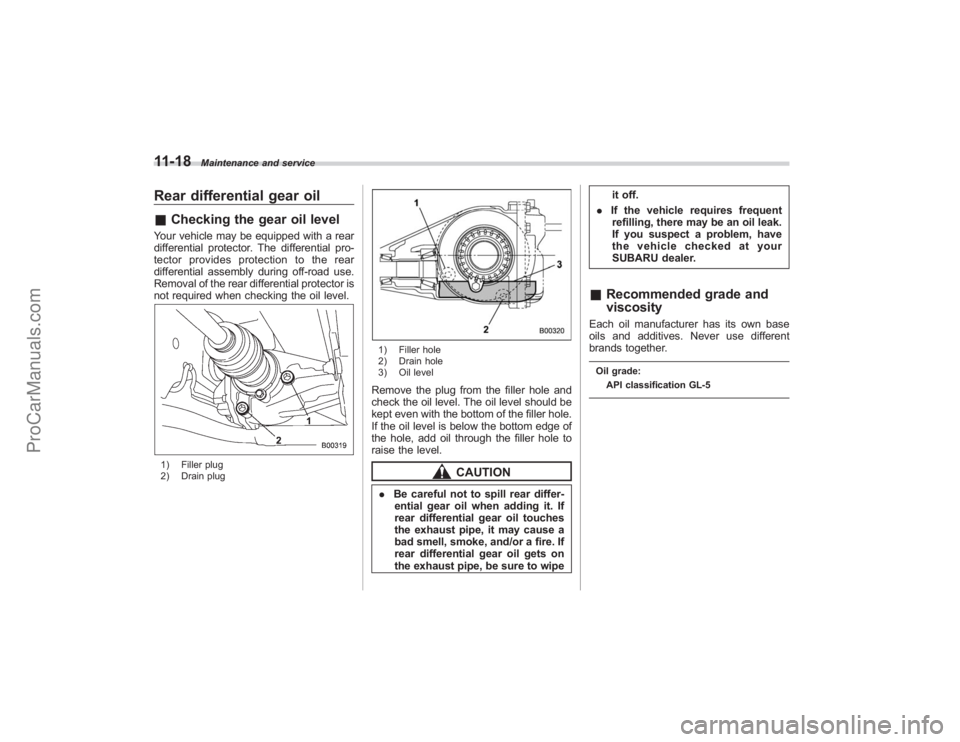
not required when checking the oil level.1) Filler plug
2) Drain plug
1) Filler hole
2) Drain hole
3) Oil levelRemove the plug from the filler hole and
check the oil level. The oil level should be
kept even with the bottom of the filler hole.
If the oil level is below the bottom edge of
the hole, add oil through the filler hole to
raise the level.
CAUTION
. Be careful not to spill rear differ-
ential gear oil when adding it. If
rear differential gear oil touches
the exhaust pipe, it may cause a
bad smell, smoke, and/or a fire. If
rear differential gear oil gets on
the exhaust pipe, be sure to wipe it off.
. If the vehicle requires frequent
refilling, there may be an oil leak.
If you suspect a problem, have
the vehicle checked at your
SUBARU dealer.
& Recommended grade and
viscosityEach oil manufacturer has its own base
oils and additives. Never use different
brands together.Oil grade:
API classification GL-5
ProCarManuals.com
Page 341 of 409
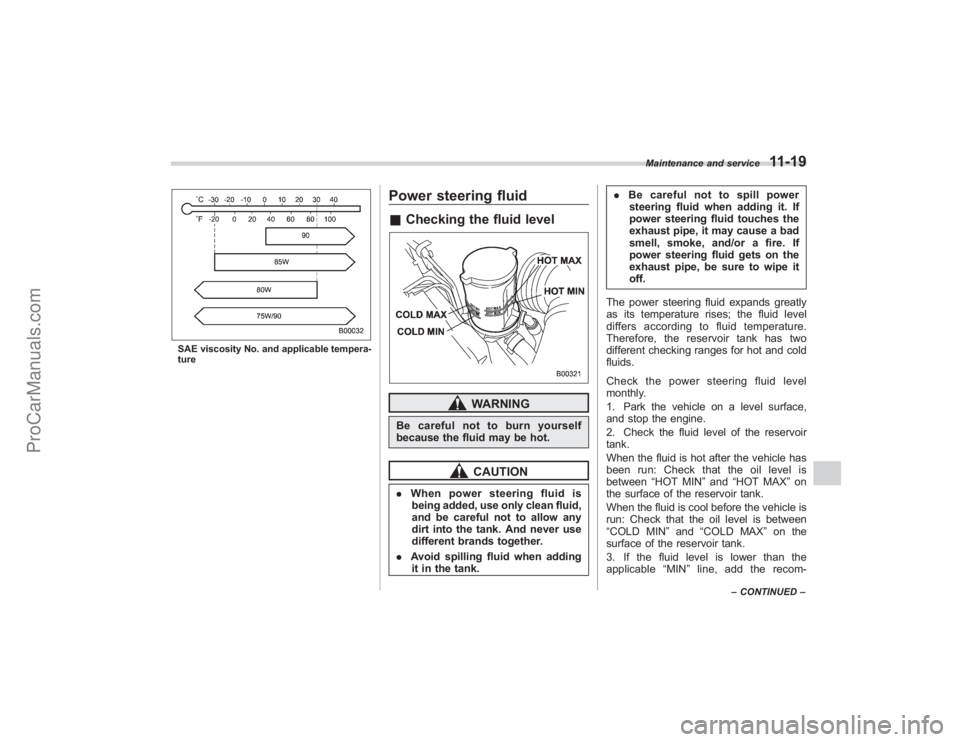
SAE viscosity No. and applicable tempera-
ture
Power steering fluid&Checking the fluid level
WARNING
Be careful not to burn yourself
because the fluid may be hot.
CAUTION
. When power steering fluid is
being added, use only clean fluid,
and be careful not to allow any
dirt into the tank. And never use
different brands together.
. Avoid spilling fluid when adding
it in the tank. .
Be careful not to spill power
steering fluid when adding it. If
power steering fluid touches the
exhaust pipe, it may cause a bad
smell, smoke, and/or a fire. If
power steering fluid gets on the
exhaust pipe, be sure to wipe it
off.
The power steering fluid expands greatly
as its temperature rises; the fluid level
differs according to fluid temperature.
Therefore, the reservoir tank has two
different checking ranges for hot and cold
fluids.
Check the power steering fluid level
monthly.
1. Park the vehicle on a level surface,
and stop the engine.
2. Check the fluid level of the reservoir
tank.
When the fluid is hot after the vehicle has
been run: Check that the oil level is
between “HOT MIN ”and “HOT MAX ”on
the surface of the reservoir tank.
When the fluid is cool before the vehicle is
run: Check that the oil level is between
“COLD MIN ”and “COLD MAX ”on the
surface of the reservoir tank.
3. If the fluid level is lower than the
applicable “MIN ”line, add the recom-
Maintenance and service
11-19
–CONTINUED –
ProCarManuals.com
Page 352 of 409
11-30
Maintenance and service
WARNING
Use only those wheels that are
specified for your vehicle. Wheels
not meeting specifications could
interfere with brake caliper opera-
tion and may cause the tires to rub
against the wheel well housing dur-
ing turns. The resulting loss of
vehicle control could lead to an
accident.
Aluminum wheels.Aluminum wheels can be scratched
and damaged easily. Handle them care-
fully to maintain their appearance, perfor-
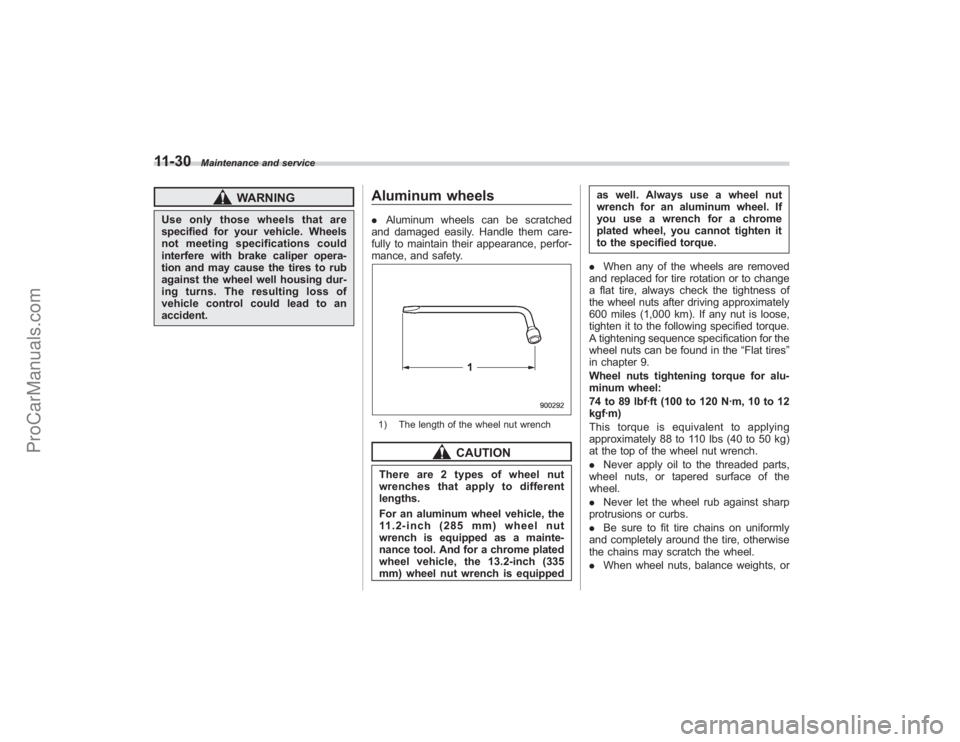
mance, and safety.1) The length of the wheel nut wrench
CAUTION
There are 2 types of wheel nut
wrenches that apply to different
lengths.
For an aluminum wheel vehicle, the
11.2-inch (285 mm) wheel nut
wrench is equipped as a mainte-
nance tool. And for a chrome plated
wheel vehicle, the 13.2-inch (335
mm) wheel nut wrench is equipped as well. Always use a wheel nut
wrench for an aluminum wheel. If
youuseawrenchforachrome
plated wheel, you cannot tighten it
to the specified torque.
. When any of the wheels are removed
and replaced for tire rotation or to change
a flat tire, always check the tightness of
the wheel nuts after driving approximately
600 miles (1,000 km). If any nut is loose,
tighten it to the following specified torque.
A tightening sequence specification for the
wheel nuts can be found in the “Flat tires”
in chapter 9.
Wheel nuts tightening torque for alu-
minum wheel:
74 to 89 lbf·ft (100 to 120 N·m, 10 to 12
kgf·m)
This torque is equivalent to applying
approximately 88 to 110 lbs (40 to 50 kg)
at the top of the wheel nut wrench.
. Never apply oil to the threaded parts,
wheel nuts, or tapered surface of the
wheel.
. Never let the wheel rub against sharp
protrusions or curbs.
. Be sure to fit tire chains on uniformly
and completely around the tire, otherwise
the chains may scratch the wheel.
. When wheel nuts, balance weights, or
ProCarManuals.com
Page 353 of 409
the center cap is replaced, be sure to
replace them with genuine SUBARU parts
designed for aluminum wheels.
Chrome plated wheels (if
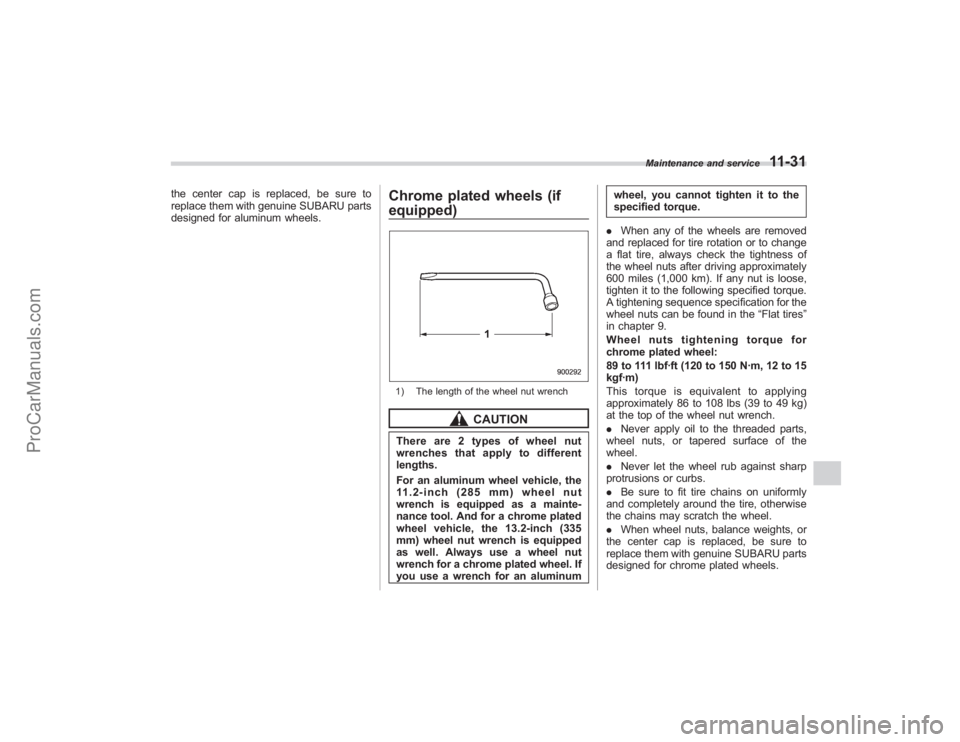
equipped)1) The length of the wheel nut wrench
CAUTION
There are 2 types of wheel nut
wrenches that apply to different
lengths.
For an aluminum wheel vehicle, the
11.2-inch (285 mm) wheel nut
wrench is equipped as a mainte-
nance tool. And for a chrome plated
wheel vehicle, the 13.2-inch (335
mm) wheel nut wrench is equipped
as well. Always use a wheel nut
wrench for a chrome plated wheel. If
you use a wrench for an aluminumwheel, you cannot tighten it to the
specified torque.
. When any of the wheels are removed
and replaced for tire rotation or to change
a flat tire, always check the tightness of
the wheel nuts after driving approximately
600 miles (1,000 km). If any nut is loose,
tighten it to the following specified torque.
A tightening sequence specification for the
wheel nuts can be found in the “Flat tires”
in chapter 9.
Wheel nuts tightening torque for
chrome plated wheel:
89 to 111 lbf·ft (120 to 150 N·m, 12 to 15
kgf·m)
This torque is equivalent to applying
approximately 86 to 108 lbs (39 to 49 kg)
at the top of the wheel nut wrench.
. Never apply oil to the threaded parts,
wheel nuts, or tapered surface of the
wheel.
. Never let the wheel rub against sharp
protrusions or curbs.
. Be sure to fit tire chains on uniformly
and completely around the tire, otherwise
the chains may scratch the wheel.
. When wheel nuts, balance weights, or
the center cap is replaced, be sure to
replace them with genuine SUBARU parts
designed for chrome plated wheels.
Maintenance and service
11-31
ProCarManuals.com
Page 389 of 409
whitewall, bears white lettering
or bears manufacturer, brand,
and/or model name molding that
is higher or deeper than the
same molding on the other side-
wall of the tire, or(2)
The outward facing sidewall
of an asymmetrical tire that has
a particular side that must al-
ways face outward when mount-
ing on a vehicle.
.
Accessory weight
The combined weight (in excess of
those standard items which may be
replaced) of floor mats, leather
seats and cross bars to the extent
that these items are available as
factory-installed equipment
(whether installed or not)..
Curb weight
The weight of a motor vehicle with
standard equipment including the
maximum capacity of fuel, oil, and
coolant and air conditioning..
Maximum loaded vehicle weight
The sum of curb weight, accessory
weight, vehicle capacity weight and production options weight.
.
Normal occupant weight
150 lbs (68 kg) times the number of
occupants (3 occupants)..
Occupant distribution
Distribution of occupants in a vehi-
cle, 2 in front, 1 in rear seat..
Production options weight
The combined weight of those
installed regular production options
weighing over 5.1 lbs (2.3 kg) in
excess of those standards items
which they replace, not previously
considered in curb weight or acces-
sory weight..
Vehicle capacity weight
The total weight of cargo, luggage
and occupants that can be added to
the vehicle..
Vehicle maximum load on a tire
Load on an individual tire that is
determined by distributing to each
axle its share of the maximum
loaded vehicle weight and dividing
by two..
Vehicle normal load on a tire
Load on an individual tire that isdetermined by distributing to each
axle its share of the curb weight,
accessory weight, and normal oc-
cupant weight and dividing by two.
&
Tire care –maintenance and
safety practices.
Check on a daily basis that the
tires are free from serious damage,
nails, and stones. At the same time,
check the tires for abnormal wear.
.
Inspect the tire tread regularly
and replace the tires before their
tread wear indicators become visi-
ble. When a tire ’s tread wear
indicator becomes visible, the tire
is worn beyond the acceptable limit
and must be replaced immediately.
With a tire in this condition, driving
at even low speeds in wet weather
can cause the vehicle to hydro-
plane. Possible resulting loss of
vehicle control can lead to an
accident.
.
To maximize the life of each tire
and ensure that the tires wear
uniformly, it is best to rotate the
Consumer information and Reporting safety defects
13-7
– CONTINUED –
ProCarManuals.com