2008 SKODA OCTAVIA navigation system
[x] Cancel search: navigation systemPage 12 of 75
General information
10
– After a four-digit order has been entered, the group of digits will turn grey (inactive) and no further digits can be accepted in the entry line.
– Press on the touch-screen to erase the digits in the entry line from right to left and thereby corr ect your input, if necessary.
– If the correct code number is displayed in the entry line, press .Code number
The code number can only be called up “onl ine” via the Škoda system, as this guar-
antees even more effective anti-theft protection. Please contact your Škoda dealer
if necessary.
Incorrect code number
If an incorrect code is confirmed afte r input, the procedure can be repeated one
more time . The number of possible attempts is shown in the second line on the
touch-screen.
If the code number is entered incorrectl y for the second time, the unit will be
blocked for approx. one hour. It is possible to enter again the safety code after one
hour has expired, when the unit and the ignition have been switched on.
If two invalid attempts are then made agai n, the navigation system will be blocked
again for an hour.
The cycle - two attempts, blocked for an hour - will continue to apply.
Note
The code is normally stored in the instrument cluster. This ensures that it is auto-
matically decoded (convenience coding). Ma nual input of the code is normally not
necessary.
OK
s2u4.6.book Page 10 Wednesday, August 13, 2008 7:57 AM
Page 13 of 75
Range selector key TONE11
Range selector key TONESound settings By pressing the button , you can select the following parameters:•
- Setting of height, middle and depth;
•
- Volume ratio (left and right = balance), (front and rear = fader);
•
- , , ,
and * - Swi tch on v olume , volume of traffic announce-
ments, telephone calls and the parking aid;
•
- Speed dependent volume adaptation;
•
- switching on or off the confirmation tone when operating
the screen;
•
* - Activating the external DVD source;
•
* - Selecting the program type (lin ear, language, rock, classical,
dance);
•
* - setting of the surround-sound.
GALA function
Your radio increases automatically its volu me with the increasing vehicle speed. A
higher setting value results in a stronger volume increase.
Volume decrease for park distance control (PDC) *
If your vehicle is equipped with “parki ng aid”, the volume is automatically
decreased to a pre-defined value, wh en the “parking aid” is active.
Navigation announcements – audible driving recommendations from the navigation system are played
during the audio operation at a pre-set volume.
– audible driving recommendations are only provided when you have left
the calculated route, for example on the basis of announced traffic problems. This
setting is recommended if audible drive recommendations are normally no longer
needed for a daily driven route and navigati on is only used as dynamic navigation.
If an audible driving recommendation is transmitted again on the basis of a change in route, navigation announcements mu
st be switched on again (Display:
).
– no audible driving recommendations of the navigation system will be
transmitted.
TO NE
Treble-Mid-BassBalance FaderVo lume
Startup volume
Traffic announcements
Navigation
Te l e p h o n e v o l u m e
PDC level
GALAConfirmation toneAV outputEQ settingsSurround
OnDynamic
Nav. announcements
On
Off
s2u4.6.book Page 11 Wednesday, August 13, 2008 7:57 AM
Page 14 of 75
Selector key SETUP
12Selector key SETUPMain menu set-ups (Setup)– Press the selector key to open the main menu Set-ups.Overview of the set-up menus
– When in the radio mode, carry out set-ups for the function of the arrow
keys , for the displayed memory keys, the memory list and the TMC traffic reports
⇒ page 12, “Radio set-ups”.
– Carry out set-ups for the map display and select symbols for the display in
the map ⇒page 13, “Map set-ups”.
– Select preferred TMC station and determine the area for TMC
announcements ⇒page 13, “Traffic station set-ups”.
– Adjust the brightness of the touc h-screen, day/night design of the map
display and select/deselect the confirmation tone for the key depression stroke
⇒ page 14, “Touch-screen set-ups”.
– Determine the set-ups for the play and display of MP3 data and activate
or deactivate the external connections ⇒page 14, “Media set-ups”.
– Determine the set-ups for receiving driving recommendations, define
or change an address to a home address and start a virtual demonstration drive
with a manually set starting point ⇒page 15, “Navigation set-ups”.
– Change the system set-ups such as voice response and time and take
back or erase stored set-ups in individual areas ⇒page 15, “System set-ups”.
– Carry out set-ups for voice response with an inserted Video DVD and
adjust the aspect ratio of the touch-screen. It is also possible to adjust the audio
video standard ⇒page 16, “Video set-ups”when operating an external media
source as well as carrying out the set-ups for the TV operation.
– Update the phone book in the unit, erase all call lists and modify the
assignment of the shortcut keys ⇒page 16, “Phone set-ups”.
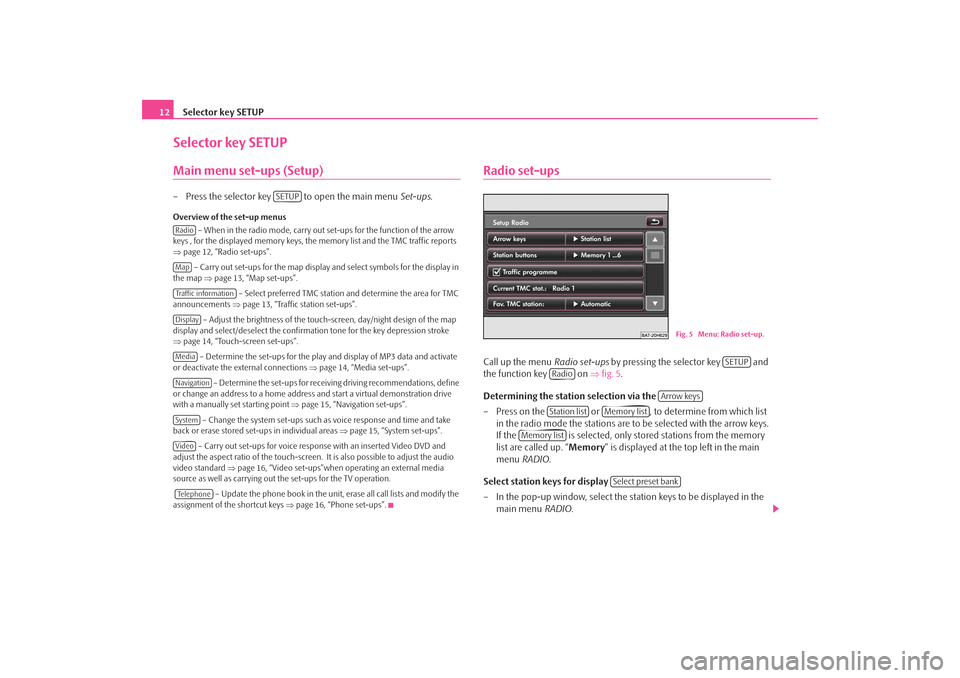
Radio set-upsCall up the menu Radio set-ups by pressing the selector key and
the function key on ⇒fig. 5 .
Determining the station selection via the
– Press on the or , to determine from which list in the radio mode the stations are to be selected with the arrow keys.
If the is selected, only stor ed stations from the memory
list are called up. “ Memory” is displayed at the top left in the main
menu RADIO .
Select station keys for display
– In the pop-up window, select the st ation keys to be displayed in the
main menu RADIO.
SETUP
RadioMapTraffic informationDisplayMediaNavigationSystemVideoTe l e p h o n e
Fig. 5 Menu: Radio set-up.
SETUP
Radio
Arrow keys
Station list
Memory list
Memory list
Select preset bank
s2u4.6.book Page 12 Wednesday, August 13, 2008 7:57 AM
Page 17 of 75
Selector key SETUP15
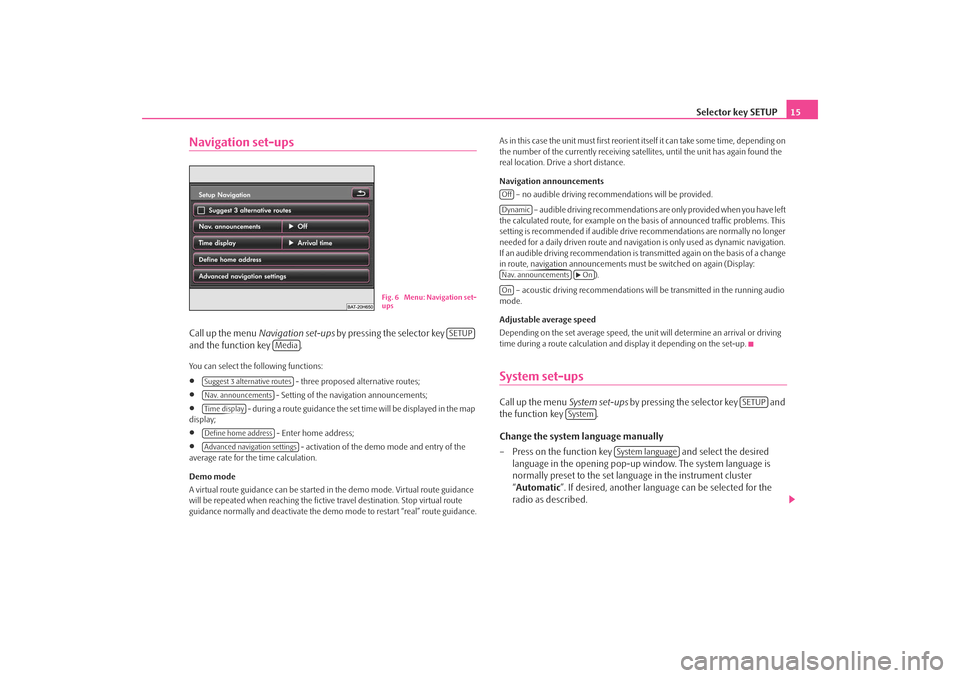
Navigation set-upsCall up the menu Navigation set-ups by pressing the selector key
and the function key .You can select the following functions:•
- three proposed alternative routes;
•
- Setting of the navigation announcements;
•
- during a route guidance the set time will be displayed in the map
display;
•
- Enter home address;
•
- activation of the demo mode and entry of the
average rate for the time calculation.
Demo mode
A virtual route guidance can be started in the demo mode. Virtual route guidance
will be repeated when reaching the fictiv e travel destination. Stop virtual route
guidance normally and deactivate the demo mode to restart “real” route guidance. As in this case the unit must first reorient itself it can take some time, depending on
the number of the currently receiving satellites, until the unit has again found the
real location. Drive a short distance.
Navigation announcements
– no audible driving recomme ndations will be provided.
– audible driving recommendations are only provided when you have left
the calculated route, for example on the basis of announced traffic problems. This
setting is recommended if audible drive recommendations are normally no longer
needed for a daily driven route and navigati on is only used as dynamic navigation.
If an audible driving recommendation is transmitted again on the basis of a change
in route, navigation announcements mu st be switched on again (Display:
).
– acoustic driving recommendations wi ll be transmitted in the running audio
mode.
Adjustable average speed
Depending on the set average speed, the unit will determine an arrival or driving
time during a route calculation and display it depending on the set-up.
System set-upsCall up the menu System set-ups by pressing the selector key and
the function key .
Change the system language manually
– Press on the function key and select the desired
language in the opening pop-up window. The system language is
normally preset to the set language in the instrument cluster
“ Automatic ”. If desired, another langua ge can be selected for the
radio as described.
Fig. 6 Menu: Navigation set-
ups
SETUP
Media
Suggest 3 alternative routesNav. announcementsTime displayDefine home addressAdvanced navigation settings
OffDynamicNav. announcements
On
On
SETUP
System
System language
s2u4.6.book Page 15 Wednesday, August 13, 2008 7:57 AM
Page 36 of 75
Selector key MEDIA
34
– If you repeatedly press the free part of the touch-screen, the TV menu
will fade out again.The TV picture will be displayed on the touch-screen of the radio navigation system.
Sound reproduction is via the vehicle loudspeakers.
Unit keys (Hard keys) in TV mode
or – change to the next TV stations on the station list.
Set button – turn to manually adjust a TV channel or digital TV station.
Function keys in the TV menu o r – c h a n g e to t h e n e x t T V s t a t i o n s o n the station list, analog to the arrow keys
at the unit.
– changes to the Audio menu and plays the last selected video source.
– opens the station list of the presently receivable analog TV stations as
well as the digital TV and radio stations.
– opens the memory list of the manually receivable analog TV stations as
well as the digital TV and radio stations.
– opens a pop-up window for calling up further functions.
Pop-up window – opens the video text page of the currently received station if video text is
available for the received TV station.
– inserts the menu for changing the display set-up.
– opens the overview of the electronic program guide (Electronic Program
Guide) if digital TV stations can be received at the location via DVB-T.
– changes to manual set-up of a TV channel via the arrow keys on the unit
or in the touch-screen of the TV main menu.
Selectable video sources in the Video DVD menu
– changes over to an optionally connected external video source*.
– changes to the TV mode*. – changes over to a Video-DVD
⇒page 31 inserted into the internal CD/DVD
drive.
Displays in TV mode
Some television stations of fer bilingual programs in “d ual channel tone”. In this
case you can use the Video set-up to choose which language channel as well as
which language is to be displayed. In this case “channel A” or “channel B ” will be
displayed at the top left on the touch-screen.
A program in stereo will also be indicated by the symbol “
” on the right on the
touch-screen under the function key . A program in dual channel tone will be
indicated by the symbol “
” ⇒ page 33, fig. 14 . You can choose the audio channel
in the TV set-ups.
If a TV station also transmits Video text, “VT ” will be displayed at the top right on
the touch-screen. If video text is not availa ble for the current station, the video text
function “
” will be indicated after call up.
If the set digital TV station supports the electronical program guide it will be indi-
cated accordingly by “ EPG” (Electronic Program Guide) at the top right in the touch-
screen. If EPG is not generally av ailable at the location, only “
” will be displayed
after call-up of the EPG function via the function key .
Choosing a TV stationTV station “relay”
– You change to the previous or following TV station by pressing the arrow keys on the unit or .
– When changing the station, the TV menu will be inserted together with
information of the currently selected station.
– When in the TV menu, you can change the TV station by pressing the
arrow keys on the touchscreen or .
AudioStation listMemoryExtras
Extras
V-TextDisplayEPGManualAVTV
DVD
Extras
s2u4.6.book Page 34 Wednesday, August 13, 2008 7:57 AM
Page 40 of 75
Selector key NAV (Navigation)
38Selector key NAV (Navigation)OverviewSafety information regarding the use of the navigation systemThe route is recalculated each time if you ignore driving recommendations or
change the route. This process takes only a few seconds. Driving recommendations
can only then be re-transmitted.
Incomplete navigation data
The navigation system cannot receive any da ta from GPS satellites if you drive for
longer periods under thick forest canopy or when your vehicle is in a garage, under-
pass or tunnel. In this case, th e navigation system orientates itself solely with the
help of the vehicle sensors.
In regions not at all or only partially digitalised and stored as such on the navigation
DVD, the navigation system will try to provide guidance to the destination. Please
note that under these circumstances the guidance to the destination may not be
completely correct if, for example, one-wa y streets and road categories (motorway,
country road etc.) are not at all or only partially included in the navigation data
used.
WARNING
Always concentrate fully on your drivin g. Inattention by the driver can lead
to accidents and injuries.•
Do not allow yourself to be distracted or loose your concentration, pay
attention to the traffic situation and do not carry out settings or use the radio
navigation system.
•
Only use the radio navigation system if road, weather and traffic situa-
tions permit this and you are not distracted.
•
The various volume settings must be selected in such a way that audible
signals from the outside, such as e.g. a Martins horn from police cars and fire
brigade, can be heard at all times.
WARNING
Please observe the legal requirements for road traffic when following the
driving recommendations provided by your radio navigation system.•
The driving recommendations provided may vary from current situa-
tions, e.g. due to road works or out of date navigation data. In such a case,
always observe the traffic regulations and ignore the driving recommenda-
tions.
•
Traffic signs and traffice regulations al ways have priority over the driving
recommendations provided by the navigation system.
•
Route guidance is subject to constant changes, particularly to informa-
tion relating to one-way streets, pedestrian zones etc. stored on the naviga-
tion DVD. Information on traffic lights, stop and right of way signs, parking
and stopping restrictions as well as lane constrictions and speed restrictions
is not included in the radio navigation system.
•
Adjust your speed to suit weather, road and traffic conditions. Do not
allow the navigation system to make yu drive faster in fog – risk of
accident!
Navigation data and the navigation DVDStoring navigation data in the unit
– Push a navigation DVD with as far as possible into the CD/DVD case
with the written side facing up until it is automatically drawn in. The
unit will compare the data on the navigation DVD with the data in the
navigation system memory. No message will appear if the data in the
navigation system memory of the unit is identical to the data on the
navigation DVD.
– Press the function key , to find out that the storing process has
been completed.
Notify
s2u4.6.book Page 38 Wednesday, August 13, 2008 7:57 AM
Page 41 of 75
Selector key NAV (Navigation)39
– If the corresponding message appears, press the key or press the function key and take out the navigation DVD. Active route guid-
ance is interrupted and must be restarted.
Updating navigation data in the unit
– If the data of the navigation DVD is not identical to that stored in the
navigation memory of the unit, a corresponding message will be
displayed.
– Press on the function key to ov erwrite the data in the navigation
system memory of the unit with the data from the navigation DVD.
Using the data of a navigation DVD for a short period of time
– If you leave the stored area map in the navigation memory of the unit
for only a short period of time, insert the navigation DVD for the area
to be driven.
– Press on the function key and leave the navigation DVD in the unit. The unit uses only the data from the navigation DVD for the
navigation.
– If you are again in the area of the ma p material stored in the navigation
memory, press the key to take out the navigation DVD.
Storing the navigation data can take up to one hour. Route guidance will start via
the navigation DVD while the navigation data is being stored. Please note that route
guidance will be interrupted if the navi gation DVD is taken out. Route guidance
must then be restarted with details suppl ied from the navigation system memory
of the unit.
Up to date navigation data and new navigation DVD
Road guidance is subject to constant chan ges (e.g. new streets, changes of street
names and house numbers). A navigation DVD is a huge data store, which unfortu-
nately will not be up to date after a cert ain time. This can lead to complaints during
route guidance. It is for this reason that you must regula
rly update the navigation data on your unit
with a current navigation DVD.
Input windows of the navigation systemSelecting a destination from the list
– If you press on the function key after opening the input mask, a list will open with all the destinations containing the relevant parameters
selectable from the navigation memory (e.g. and ).
– If need be, move the sliding regulator to the right edge of the touch- screen for all entries in the list to be displayed.
– Press the desired entry in the list to take it over for the address.
Limiting the destination and selecting from the list
– You can open a list of the selectable destinations any time by pressing the function key behind the entry line while making entries in the
entry line. Only destinations select able from the navigation memory
will be displayed and which corres pond to the requirements and the
character sequence in the entry line.
– The number of selectable destinatio ns will be displayed in the func-
tion key if fewer than one hundred destinations can be selected.
–If fewer than six destinations ar e selectable, the entry window will
close automatically and a list of possible destinations will be
displayed.
Eject
SaveTe m p o r a r y
State
City
**
**
s2u4.6.book Page 39 Wednesday, August 13, 2008 7:57 AM
Page 54 of 75
Selector key NAV (Navigation)
52
– Once you have reached the destin ation of a waypoint tour, the
waypoint mode will close automati cally and the “normal” main menu
Navigation will open again.When in the menu Waypoint navigation , the last active waypoint tour and its
current geo-position will be displayed. If no waypoint tour has been recorded or all
of them have been deleted, a correspond ing message will be inserted. In this case
the function keys for starting, loading or processing a waypoint tour are not active.
If a waypoint tour is disp layed, the waypoint tour ⇒page 53, “Driving a stored
waypoint tour” will be started by pressing the function key .
The following menus and sub-menus are operated analog to the already described
menus of the navigation system and will no longer be described here in detail:•
Pressing on a displayed entry or the function key will always open the
detailed display.
•
Pressing the function key opens a pop- up window for analog processing of
the accompanying input.
The function key
Pressing the function key will open a safety interrogation:
– switches back into the waypoint mode. – terminates the waypoint mode and opens the menu New
destination for selection of an “Onroad destinat ion” from the available navigation
data.
The function key
Pressing the function key will open a pop-up window:
– opens a list of the stored wayp oint tours. Press the corresponding
waypoint tour for selection.
– opens the waypoint tour memory. Stored waypoint
tours can be displayed, renamed or deleted.
The function key
Pressing the function key will open a pop-up window to display a
new waypoint tour or to process the displayed one. – starts after naming the waypoint tour, selecting an accept-
ance mode and displaying a new waypoint tour. A displayed waypoint tour is auto-
matically stored and can be ca lled up later from the via .
– opens a list with the waypoint s of the tour currently displayed
in the menu Waypoint navigation . The waypoints in the li st can be displayed,
deleted, moved or renamed in the map. Further waypoints can be added via the
selection from the map or the input of the GPS position. If a different waypoint tour
has to be processed instead of the one disp layed, it must first of all be called up
from the with .
Display a waypoint tour– Press on the function key in the menu Waypoint naviga-
tion .
– Press on the function key in the pop-up window.
– If a tour is already being displayed in the menu Waypoint navigation
you must select by pressing in the following menu whether you wish
to display the indicated or a .
Start
New dest.
New dest.
BackOnroad destination
Memory
Memory
Load tourEdit waypoint tour memory
Waypoint tour
Waypoint tour
Record waypoint tour
Memory
Load tour
Edit waypoint tour
Memory
Load tour
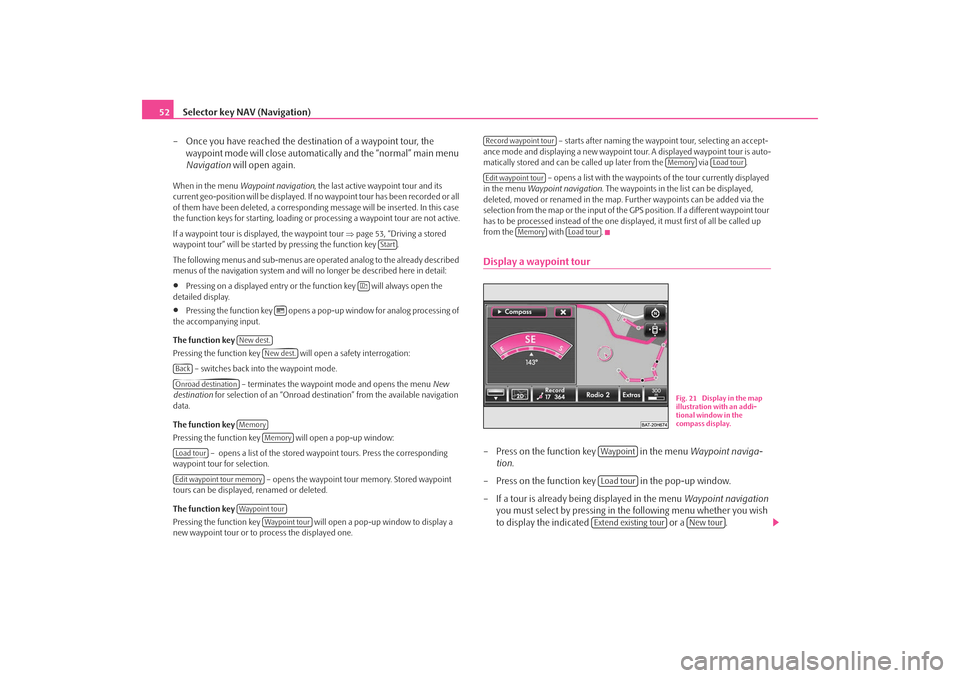
Fig. 21 Display in the map
illustration with an addi-
tional window in the
compass display.
WaypointLoad tourExtend existing tour
New tour
s2u4.6.book Page 52 Wednesday, August 13, 2008 7:57 AM