2008 Seat Ibiza 5D bulb
[x] Cancel search: bulbPage 6 of 260
Contents
4Your vehicle maintenance and cleaning
. . . .
General notes . . . . . . . . . . . . . . . . . . . . . . . . . . .
Vehicle exterior maintenance . . . . . . . . . . . . . . .
Vehicle interior maintenance . . . . . . . . . . . . . . .
Accessories, parts replacement and
modifications
. . . . . . . . . . . . . . . . . . . . . . . . . . . .
Accessories and spare parts . . . . . . . . . . . . . . . .
Technical modifications . . . . . . . . . . . . . . . . . . .
Roof aerial* . . . . . . . . . . . . . . . . . . . . . . . . . . . . .
Mobile telephones and two-way radios . . . . . . .
Fitting a towing bracket* . . . . . . . . . . . . . . . . . . .
Checking and refilling levels
. . . . . . . . . . . . . .
Refuelling . . . . . . . . . . . . . . . . . . . . . . . . . . . . . . .
Petrol . . . . . . . . . . . . . . . . . . . . . . . . . . . . . . . . . .
Diesel . . . . . . . . . . . . . . . . . . . . . . . . . . . . . . . . . .
Working in the engine compartment . . . . . . . . .
Engine oil . . . . . . . . . . . . . . . . . . . . . . . . . . . . . . .
Coolant . . . . . . . . . . . . . . . . . . . . . . . . . . . . . . . . .
Washer fluid and windscreen wiper blades . . . .
Brake fluid . . . . . . . . . . . . . . . . . . . . . . . . . . . . . .
Battery . . . . . . . . . . . . . . . . . . . . . . . . . . . . . . . . .
Wheels . . . . . . . . . . . . . . . . . . . . . . . . . . . . . . . . .
If and when
. . . . . . . . . . . . . . . . . . . . . . . . . . . . . .
Vehicle tools, spare wheel . . . . . . . . . . . . . . . . .
Wheel change . . . . . . . . . . . . . . . . . . . . . . . . . . .
Tyre repair kit (Tyre-Mobility-System)* . . . . . . . .
Fuses . . . . . . . . . . . . . . . . . . . . . . . . . . . . . . . . . .
Bulb change . . . . . . . . . . . . . . . . . . . . . . . . . . . . .
Jump-starting . . . . . . . . . . . . . . . . . . . . . . . . . . . .
Towing and tow-starting . . . . . . . . . . . . . . . . . . .
Te c h n i c a l D a t a
. . . . . . . . . . . . . . . . . . . . . . .
General notes on the technical data
. . . . . . .
Outstanding information . . . . . . . . . . . . . . . . . .
Data on fuel consumption . . . . . . . . . . . . . . . . . Towing a trailer . . . . . . . . . . . . . . . . . . . . . . . . . .
Wheels . . . . . . . . . . . . . . . . . . . . . . . . . . . . . . . . .
Techn ical Data
. . . . . . . . . . . . . . . . . . . . . . . . . . . .
Checking fluid levels . . . . . . . . . . . . . . . . . . . . . .
Petrol engine 1.2 51kW (70 CV) . . . . . . . . . . . . .
Petrol engine 1.4l 63 kW (85 bhp) . . . . . . . . . . .
Petrol engine 1.6l 77 kW (105 bhp) . . . . . . . . . .
Diesel engine 1.4 litre TDI 59 kW (80 bhp) . . . .
Diesel engine 1.9l TDI 66 kW (90 bhp) . . . . . . .
Diesel engine 1.9l TDI 77 kW (105 bhp) . . . . . .
Dimensions and capacities . . . . . . . . . . . . . . . .
Index
. . . . . . . . . . . . . . . . . . . . . . . . . . . . . . . . . .
164
164
165
171
173
173
173
174
174
176
178
178
179
180
181
184
188
190
193
195
197
203
203
204
209
211
218
226
229
233
233
233
235 236
236
238
238
239
240
241
243
244
245
247
249
Ibiza250_angles Seite 4 Dienstag, 5. August 2008 1:11 13
Page 60 of 260
Cockpit
58
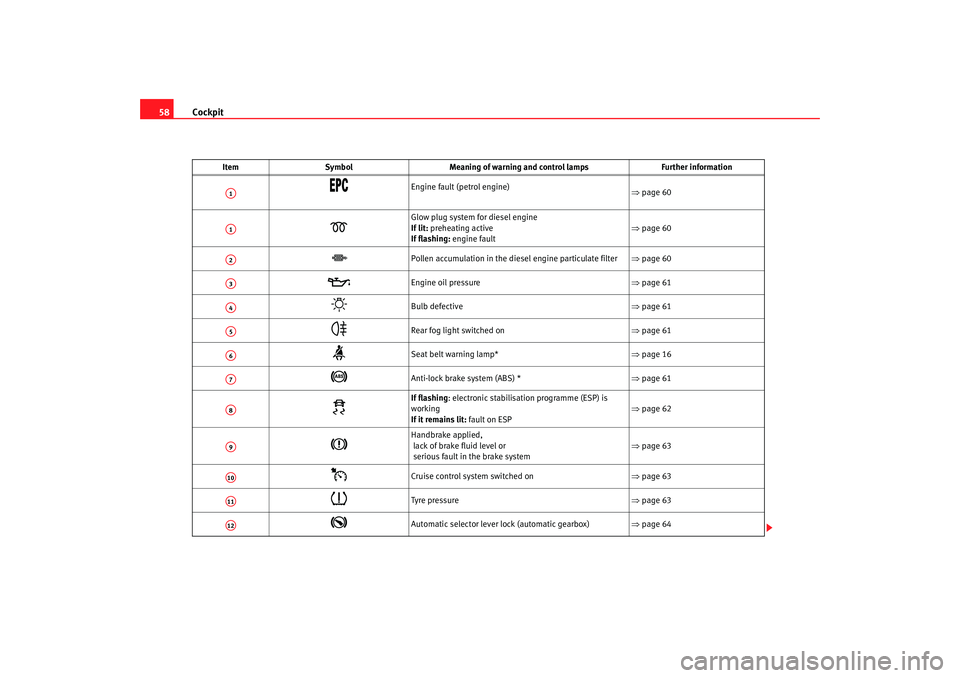
Item Symbol Meaning of warning and control lamps Further information
Engine fault (petrol engine)
⇒page 60
Glow plug system for diesel engine
If lit: preheating active
If flashing: engine fault ⇒
page 60
Pollen accumulation in the diesel engine particulate filter ⇒page 60
Engine oil pressure ⇒page 61
Bulb defective ⇒page 61
Rear fog light switched on ⇒page 61
Seat belt warning lamp* ⇒page 16
Anti-lock brake system (ABS) * ⇒page 61
If flashing : electronic stabilisation programme (ESP) is
working
If it remains lit: fault on ESP ⇒
page 62
Handbrake applied,
lack of brake fluid level or
serious fault in the brake system ⇒
page 63
Cruise control system switched on ⇒page 63
Tyre pressure ⇒page 63
Automatic selector lever lock (automatic gearbox) ⇒page 64
A1A1A2A3A4A5A6A7A8A9A10A11A12
Ibiza250_angles Seite 58 Dienstag, 5. August 2008 1:11 13
Page 63 of 260
Cockpit61
Safety First
Operating instructions
Practical tips
Te c h n i c a l D a t a
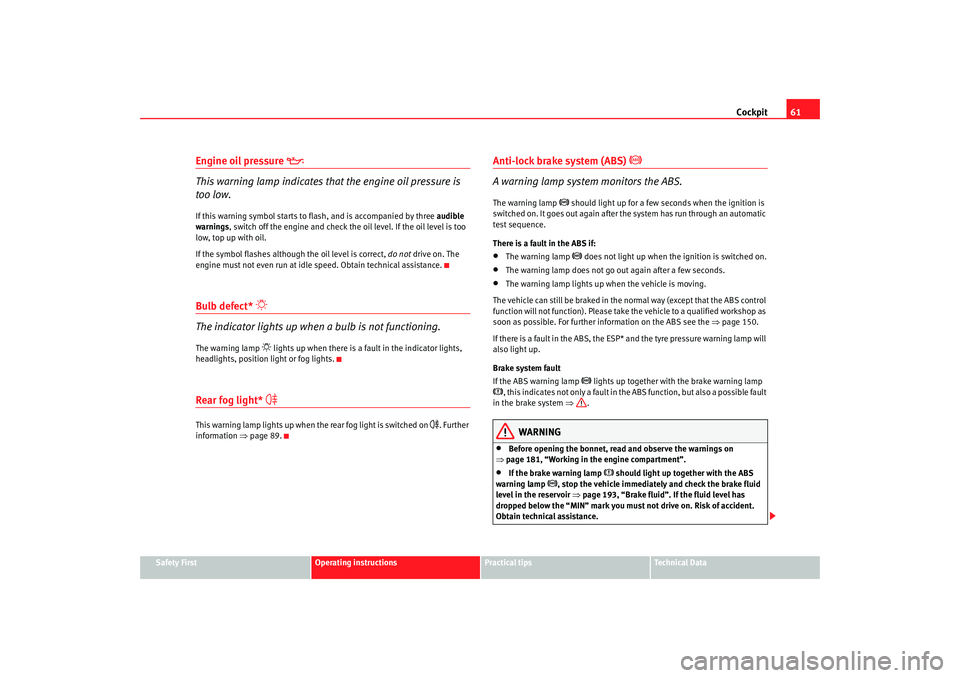
Engine oil pressure
This warning lamp indicates that the engine oil pressure is
too low.If this warning symbol starts to flash, and is accompanied by three audible
warnings , switch off the engine and check the oil level. If the oil level is too
low, top up with oil.
If the symbol flashes although the oil level is correct, do not drive on. The
engine must not even run at idle speed. Obtain technical assistance.Bulb defect*
The indicator lights up when a bulb is not functioning.The warning lamp
lights up when there is a fault in the indicator lights,
headlights, position light or fog lights.
Rear fog light*
This warning lamp lights up when the rear fog light is switched on
. Further
information ⇒page 89.
Anti-lock brake system (ABS)
A warning lamp system monitors the ABS.
The warning lamp
should light up for a few seconds when the ignition is
switched on. It goes out again after th e system has run through an automatic
test sequence.
There is a fault in the ABS if:
•
The warning lamp
does not light up when the ignition is switched on.
•
The warning lamp does not go out again after a few seconds.
•
The warning lamp lights up when the vehicle is moving.
The vehicle can still be braked in the normal way (except that the ABS control
function will not function). Please take the vehicle to a qualified workshop as
soon as possible. For further information on the ABS see the ⇒page 150.
If there is a fault in the ABS, the ESP* and the tyre pressure warning lamp will
also light up.
Brake system fault
If the ABS warning lamp
lights up together with the brake warning lamp
, this indicates not only a fault in the ABS function, but also a possible fault
in the brake system ⇒.
WARNING
•
Before opening the bonnet, read and observe the warnings on
⇒ page 181, “Working in the engine compartment”.
•
If the brake warning lamp
should light up together with the ABS
warning lamp
, stop the vehicle immediately and check the brake fluid
level in the reservoir ⇒page 193, “Brake fluid”. If the fluid level has
dropped below the “MIN” mark you must not drive on. Risk of accident.
Obtain technical assistance.
Ibiza250_angles Seite 61 Dienstag, 5. August 2008 1:11 13
Page 96 of 260
Lights and visibility
94Indicator and main beam headlight lever
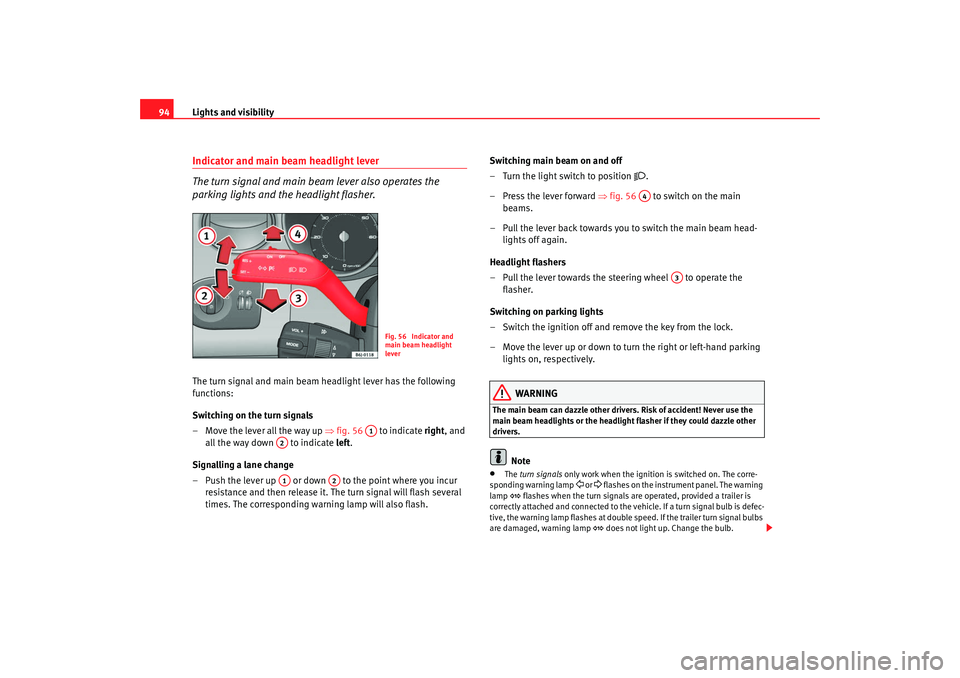
The turn signal and main beam lever also operates the
parking lights and the headlight flasher.The turn signal and main beam headlight lever has the following
functions:
Switching on the turn signals
– Move the lever all the way up ⇒fig. 56 to indicate right, and
all the way down to indicate left.
Signalling a lane change
– Push the lever up or down to the point where you incur resistance and then release it. The turn signal will flash several
times. The corresponding warning lamp will also flash. Switching main beam on and off
– Turn the light switch to position
.
–Press the lever forward ⇒ fig. 56 to switch on the main
beams.
– Pull the lever back towards you to switch the main beam head- lights off again.
Headlight flashers
– Pull the lever towards the steering wheel to operate the flasher.
Switching on parking lights
– Switch the ignition off and remove the key from the lock.
– Move the lever up or down to turn the right or left-hand parking lights on, respectively.
WARNING
The main beam can dazzle other driver s. Risk of accident! Never use the
main beam headlights or the headligh t flasher if they could dazzle other
drivers.
Note
•
The turn signals only work when the ignition is switched on. The corre-
sponding warning lamp
or flashes on the instrument panel. The warning
lamp
flashes when the turn signals are operated, provided a trailer is
correctly attached and connected to the vehicle. If a turn signal bulb is defec-
tive, the warning lamp flashes at double speed. If the trailer turn signal bulbs
are damaged, warning lamp
does not light up. Change the bulb.
Fig. 56 Indicator and
main beam headlight
lever
A1
A2A1
A2
A4
A3
Ibiza250_angles Seite 94 Dienstag, 5. August 2008 1:11 13
Page 117 of 260
Seats and stowage115
Safety First
Operating instructions
Practical tips
Te c h n i c a l D a t a
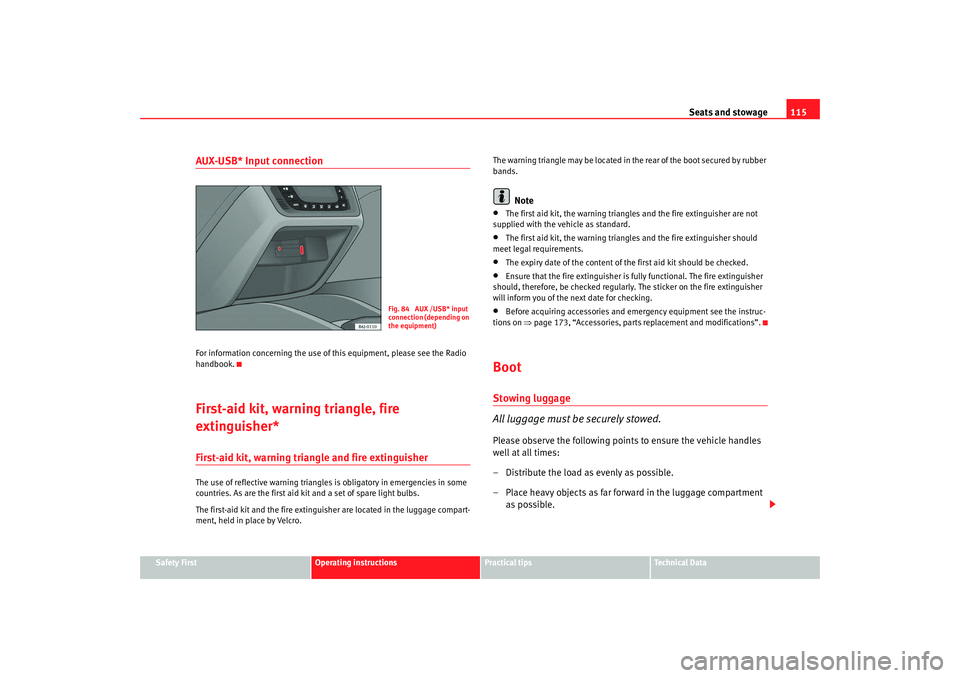
AUX-USB* Input connection For information concerning the use of this equipment, please see the Radio
handbook.First-aid kit, warning triangle, fire
extinguisher*First-aid kit, warning triangle and fire extinguisherThe use of reflective warning triangles is obligatory in emergencies in some
countries. As are the first aid kit and a set of spare light bulbs.
The first-aid kit and the fire extinguisher are located in the luggage compart-
ment, held in place by Velcro. The warning triangle may be located in th
e rear of the boot secured by rubber
bands.
Note
•
The first aid kit, the warning triangles and the fire extinguisher are not
supplied with the vehicle as standard.
•
The first aid kit, the warning triangles and the fire extinguisher should
meet legal requirements.
•
The expiry date of the content of the first aid kit should be checked.
•
Ensure that the fire extinguisher is fully functional. The fire extinguisher
should, therefore, be checked regularly. The sticker on the fire extinguisher
will inform you of the next date for checking.
•
Before acquiring accessories and em ergency equipment see the instruc-
tions on ⇒page 173, “Accessories, parts replacement and modifications”.
BootStowing luggage
All luggage must be securely stowed.Please observe the following points to ensure the vehicle handles
well at all times:
– Distribute the load as evenly as possible.
– Place heavy objects as far forward in the luggage compartment
as possible.
Fig. 84 AUX /USB* input
connection (depending on
the equipment)
Ibiza250_angles Seite 115 Dienstag, 5. August 2008 1:11 13
Page 197 of 260
Checking and refilling levels195
Safety First
Operating instructions
Practical tips
Te c h n i c a l D a t a
BatteryWarnings on handling the battery
WARNING
Always be aware of the danger of injury and chemical burns as well as the
risk of accident or fire when working on the battery and the electrical
system:•
Wear eye protection. Protect your eyes , skin and clothing from acid and
particles containing lead.
•
Battery acid is very corrosive and caustic. Wear protective gloves and
eye protection. Do not tilt the batteries. This could spill acid through the
vents. Rinse battery acid from eyes immediately for several minutes with
clear water. Then seek medical care immediately. Neutralize any acid
splashes on the skin or clothing with a soapy solution, and rinse off with
plenty of water. If acid is swallowed by mistake, consult a doctor immedi-
ately.
•
Fires, sparks, naked lights and smoking are prohibited. When handling
cables and electrical equipment, avoid causing sparks and electrostatic charge. Never short the battery terminals. High-energy sparks can cause
injury.
•
A highly explosive mixture of gases is released when the battery is
under charge. The batteries should be charged in a well-ventilated room
only.
•
Keep children away from acid and batteries.
•
Before working on the electrical system, you must switch off the
engine, the ignition and all consumers. The negative cable on the battery
must be disconnected. When a light bulb is changed, you need only switch
off the light.
•
Deactivate the anti-theft alarm by unlocking the vehicle before you
disconnect the battery! The alar m will otherwise be triggered.
•
When disconnecting the battery from the vehicle electrical system,
disconnect first the negative ca ble and then the positive cable.
•
Switch off all electrical consumers before reconnecting the battery.
Reconnect first the positive cable and then the negative cable. Never
reverse the polarity of the connections. This could cause an electrical fire.
•
Never charge a frozen battery, or one which has thawed. This could
result in explosions and chemical burns. Always replace a battery which
has frozen. A flat battery can freeze at temperatures around 0
°C.
•
Ensure that the vent hose is always connected to the battery.
•
Never use a defective battery. This may be fatally explosive. Replace a
damaged battery immediately.Caution
•
Never disconnect the battery if the ignition is switched on or if the engine
is running. This could damage the electrical system or electronic compo-
nents.
•
Do not expose the battery to direct sunlight over a long period of time, as
the intense ultraviolet radiation can damage the battery housing.
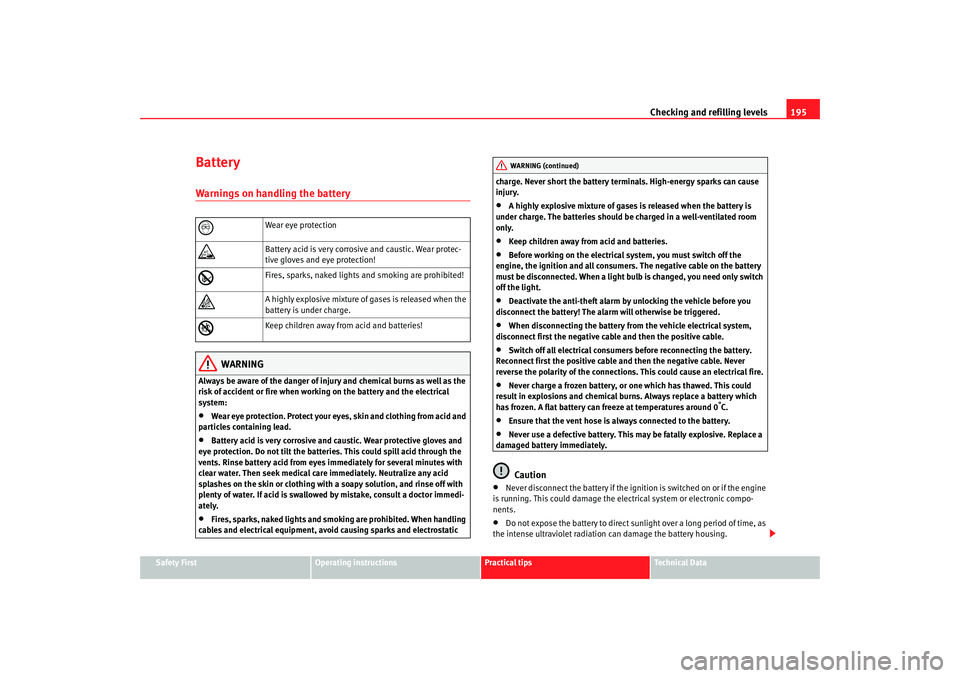
Wear eye protection
Battery acid is very corrosive and caustic. Wear protec-
tive gloves and eye protection!
Fires, sparks, naked lights and smoking are prohibited!
A highly explosive mixture of gases is released when the
battery is under charge.
Keep children away from acid and batteries!
WARNING (continued)
Ibiza250_angles Seite 195 Dienstag, 5. August 2008 1:11 13
Page 220 of 260
If and when
218Bulb changeGeneral notesBefore changing any bulb, first turn off the failed component.
Do not touch the bulb glass. Fingerprints vaporise in the heat, causing a
reduction in the bulb life and conden sation on the mirror surface, thus
reducing efficiency.
A bulb should only be replaced by one of the same type. The type is inscribed
on the bulb, either on the glass part or on the base.
It is highly recommended to keep a box of spare bulbs in the vehicle. At the
very least, the following spare bulbs, which are essential for road safety,
should be kept in the vehicle.
Double headlamps
Dipped beam - H7 Long Life
Main beam - H7
Position - 2 x W5W Long Life
Indicator -PY21W
Single headlamp
Dipped/Main H4 Long Life
Position W5W Long Life
Indicator PY 21W
Xenon headlights
13)/ self-adjusting*
Dipped and full beam - D1S
14)
Position W5W Blue Long Life DRL (day light) P21W Super Long Life
Indicators PY21W
Fog lights
Fog light/cornering - H11
Rear lights
Fog light - P21W
Reverse gear - R10W
Stop/position P21 /5W Long Life
Indicator -PY21W
Side indicator
Side indicator - W5W
Registration plate light
Registration plate light - W5W Long Life
Note
•
The following is a description of how to change the bulbs except for the
fog lights.
13)On this type of headlight, the bulb changes must be made by the SEAT dealer, given
that complex elements must be removed from the vehicle and a reset must be made
on the automatic control system incorporated.
14)The Xenon bulbs discharge 2.5 times the light flux and have an average lifespan of 5
times more than that of halogen bulbs, this means that, except due to unusual circum-
stances, there is no need to change the bulbs for the whole life of the vehicle.
Ibiza250_angles Seite 218 Dienstag, 5. August 2008 1:11 13
Page 221 of 260
If and when219
Safety First
Operating instructions
Practical tips
Te c h n i c a l D a t a
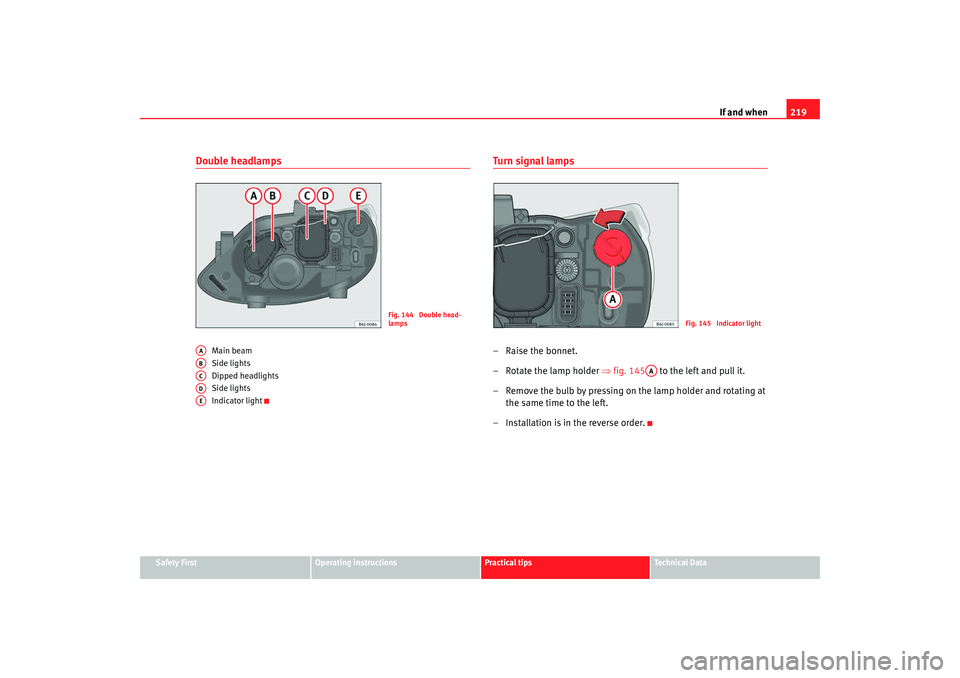
Double headlamps
Main beam
Side lights
Dipped headlights
Side lights
Indicator light
Tu r n si g nal la m ps– Raise the bonnet.
– Rotate the lamp holder ⇒ fig. 145 to the left and pull it.
– Remove the bulb by pressing on the lamp holder and rotating at the same time to the left.
– Installation is in the reverse order.
Fig. 144 Double head-
lamps
AAABACADAE
Fig. 145 Indicator light
AA
Ibiza250_angles Seite 219 Dienstag, 5. August 2008 1:11 13