2008 NISSAN TITAN ESP
[x] Cancel search: ESPPage 8 of 36
6
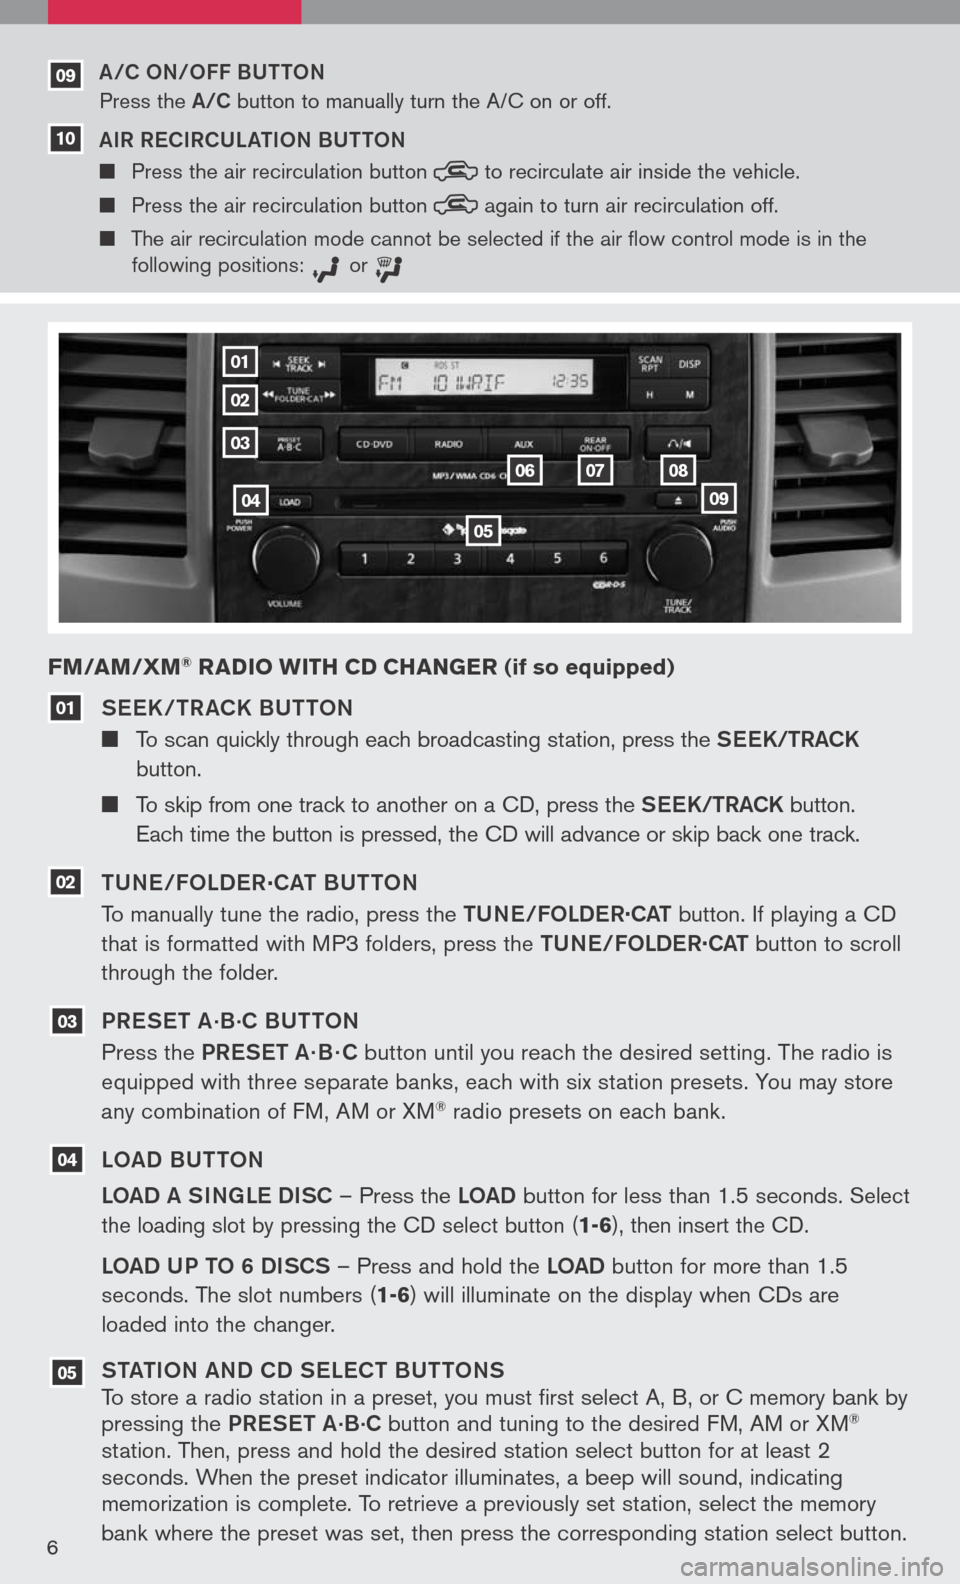
See K / TR aCK BUTTON
To scan quickly through each broadcasting station, press the S ee K/TR aCK
button.
To skip from one track to another on a CD, press the S ee K/TR aCK button.
Each time the button is pressed, the CD will advance or skip back one track.
TUN e/FOLD eR
.
C aT BUTTON
To manually tune the radio, press the TUN e/FOLDe R
.
C aT button. If playing a CD
that is formatted with MP3 folders, press the TUN e/FOLDe R
.
C aT button to scroll
through the folder.
PR eS eT a
.B.C BUTTON
Press the PR eS eT a· B · C button until you reach the desired setting. The radio is
equipped with three separate banks, each with six station presets. You may store
any combination of FM, AM or XM
® radio presets on each bank.
LO aD BUTTON
LO aD a SINg Le DISC – Press the LOaD button for less than 1.5 seconds.
Select
the loading slot by pressing the CD select button
(1-6), then insert the CD.
LOaD UP TO 6 DISCS – Press and hold the LOaD button for more than 1.5
seconds. The slot numbers (
1-6) will illuminate on the display when CDs are
loaded into the changer.
ST aTION aND CD S eLe CT BUTTONS
To store a radio station in a preset, you must first select A, B, or C memory bank by
pressing the PReS eT a
.B.C button and tuning to the desired FM, AM or XM®
station. Then, press and hold the desired station select button for at least 2
seconds. When the preset indicator illuminates, a beep will sound, indicating
memorization is complete. To retrieve a previously set station, select the memory
bank where the preset was set, then press the corresponding station select button.
FM/AM/ xM® RADIO wITH CD CHAN gER (if so equipped)
05
04
03
02
01
01
02
03
04
05
060708
09
a/C ON/OFF BUTTON
Press the a/C button to manually turn the A/C on or off.
a IR R eCIRCUL aTION BUTTON
Press the air recirculation button to
recirculate air inside the vehicle.
Press the air recirculation button again
to turn air recirculation off.
The air recirculation mode cannot be selected if the air
flow control mode is in the
following positions: or
09
10
Page 16 of 36
14
CARgO LI gHT sw ITCH
Push the switch down 01 to
turn on the cargo light.
The cargo light stays on for approximately 20 seconds when
the ignition is turned off unless the switch is pushed to the off
position.
01
REAR sONAR sY s TEM OFF swITCH (if so equipped)
When backing up, this system will beep to alert you to obstacles
within 6 ft. of the rear bumper. The system beeps faster as the
vehicle gets closer to the obstacle. A continuous tone sounds when
an obstacle is less than 10 inches away from the bumper. Turn the
system off by pushing the rear sonar system
OFF switch. Push the
switch again to enable the system. The system will automatically reset
the next time the ignition switch is turned on.
Refer to your Owner’s Manual for detailed information regarding the Rear Sonar Systems.
CHILD sAFETY REAR DOOR LOCK s (Crew Cab models only)
Child safety locks help prevent the rear doors from being opened
accidentally, especially when small children are in the vehicle. The
child safety lock levers are located on the edge of the rear doors.
When the lever is in the LOCK position, the door can be opened only
from the outside.
wIDE OPEN DOOR s (King Cab models
only)
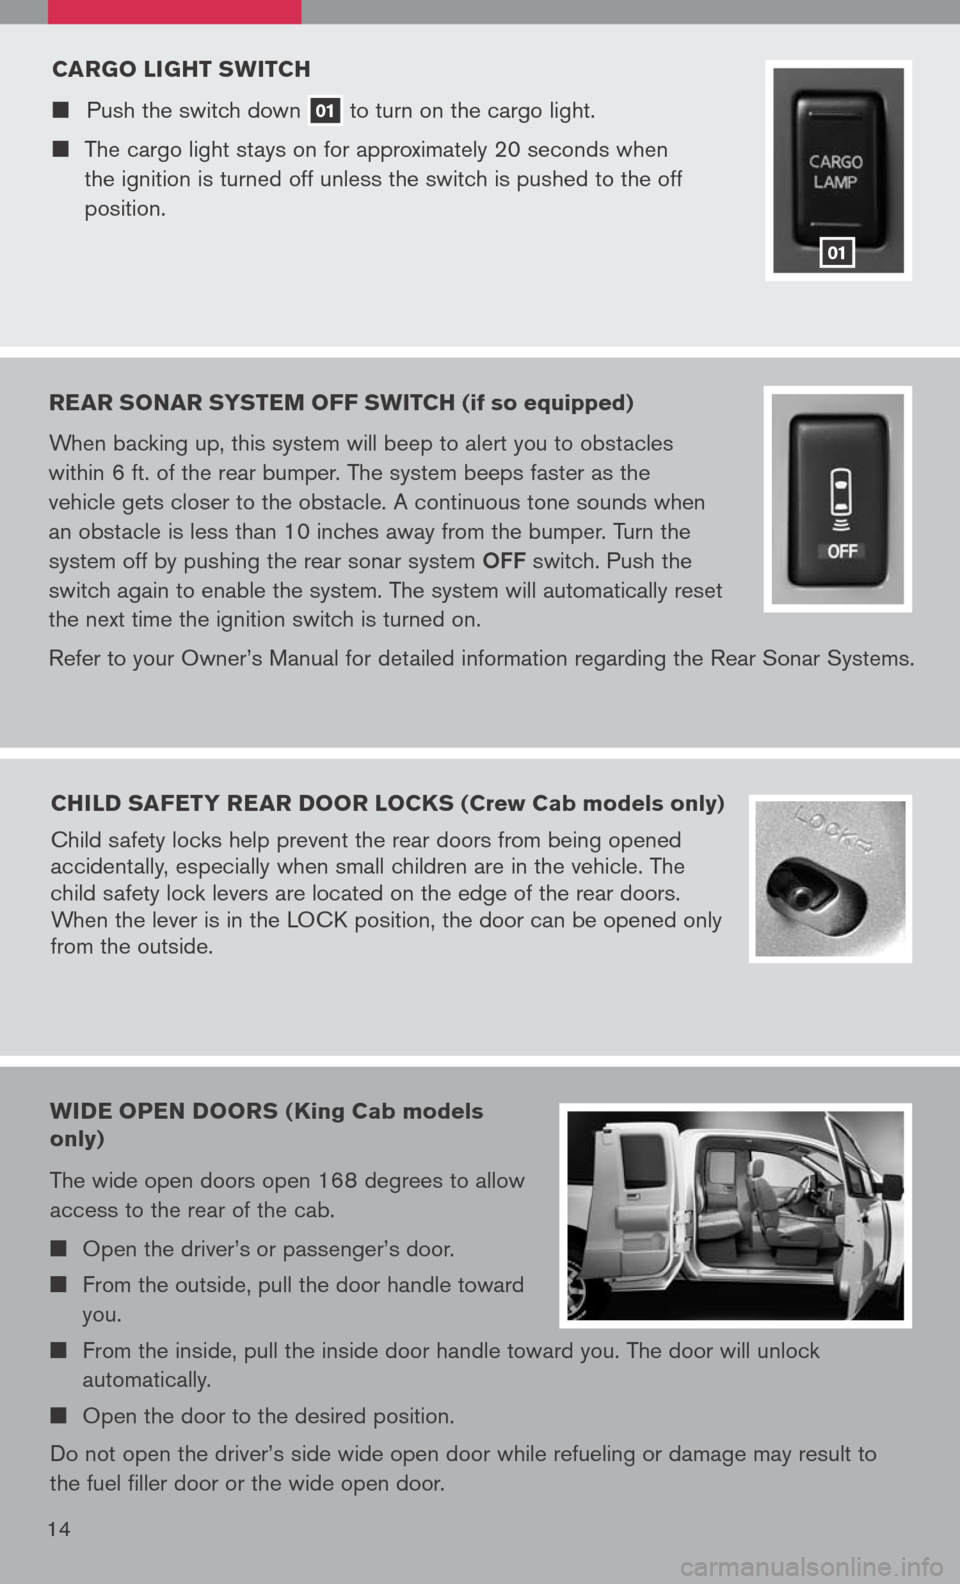
The wide open doors open 168 degrees to allow
access to the rear of the cab.
Open the driver’s or passenger’s door.
From the outside, pull the door handle toward
you.
From the inside, pull the inside door handle toward you. The door will unlock
automatically.
Open the door to the desired position.
Do not open the driver’s side wide open door while refueling or damage may result to
the fuel filler door or the wide open door.
Page 20 of 36
BLuETOOTH® HAND s-FREE PHONE sY s TEM (If so equipped)
With an overhead microphone and sound
transmitted through the audio system
speaker, the Bluetooth® Hands-Free Phone
System utilizes Bluetooth® wireless technology
and voice recognition to provide hands-free cellular
phone communication.
s Y s TEM OPERATIN g TIPs
Close all windows. Surrounding noises may interfere
with system operation.
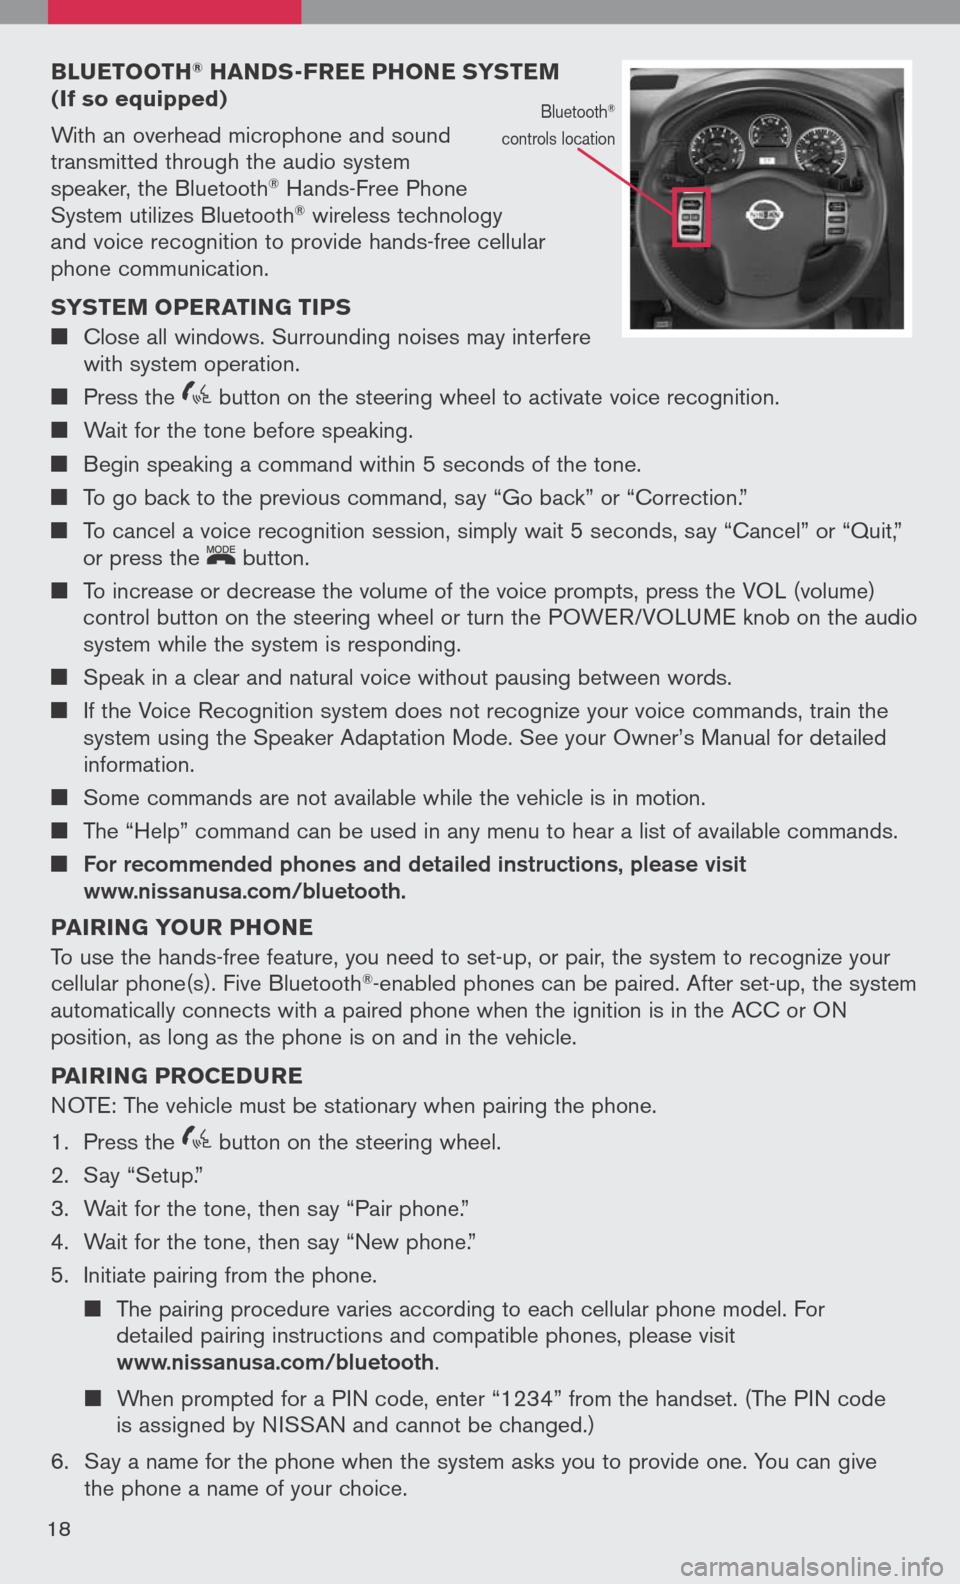
Press the
icon C button on the steering wheel to activate voice recognition.
Wait for the tone before speaking.
Begin speaking a command within 5 seconds of the tone.
To go back to the previous command, say “Go back” or “Correction.”
To cancel a voice recognition session, simply wait 5 seconds, say “Cancel” or “Quit,”
or press the
LCN0090
button.
To increase or decrease the volume of the voice prompts, press the VOL (volume)
control button on the steering wheel or turn the POWER/VOLUME knob on the audio
system while the system is responding.
Speak in a clear and natural voice without pausing between words.
If the Voice Recognition system does not recognize your voice commands, train the
system using the Speaker Adaptation Mode. See your Owner’s Manual for detailed
information.
Some commands are not available while the vehicle is in motion.
The “Help” command can be used in any menu to hear a list of available commands.
For recommended phones and detailed instructions, please visit www.nissanusa.com/bluetooth.
PAIRIN g YOuR PHONE
To use the hands-free feature, you need to set-up, or pair, the system to recognize your
cellular phone(s). Five Bluetooth
®-enabled phones can be paired. After set-up, the system
automatically connects with a paired phone when the ignition is in the ACC or ON
position, as long as the phone is on and in the vehicle.
PAIRIN g PROCED uRE
NOTE: The vehicle must be stationary when pairing the phone.
1. Press the
icon C button on the steering wheel.
2. Say “Setup.”
3. Wait for the tone, then say “Pair phone.”
4. Wait for the tone, then say “New phone.”
5. Initiate pairing from the phone.
The pairing procedure varies according to each cellular phone model. For
detailed pairing instructions and compatible phones, please visit
www.nissanusa.com/bluetooth.
When prompted for a PIN code, enter “1234” from the handset. (The PIN code
is assigned by NISSAN and cannot be changed.)
6. Say a name for the phone when the system asks you to provide one. You can give
the phone a name of your choice.
18
Bluetooth®
controls location
Page 21 of 36
7. Say a number between 1 and 5 when the system asks you for a priority level. The
priority level determines which phone interacts with the system when two or more
paired phones are active in the vehicle at the same time. Choose 1 if this is the only
phone or the primary phone.
8. Say “Yes” or “No” when the system asks if you would like to select a custom ring
tone. Follow the instructions provided by the system to choose a ring tone.
s ETTIN g uP YO uR PHONE BOOK - ADDIN g NEw ENTRIE s
Each paired phone has its own dedicated phone book. Each phone book can store up to
40 names. Each name can have up to 4 locations/numbers: Home, Office, Mobile, and
Other.
1. Press the
icon C button.
2. Say “Phone book.”
3. Wait for the tone, then say “New entry.”
4. When prompted, say the name for the new entry. For example, say “Michelle.” If the
name is too short or too long, or if it sounds too much like a name that is already
stored in the phone book, the system tells you and prompts you to say a name
again. Choose a new name.
5. Say “Yes” or “No” when the system asks you to confirm the name is correct.
6. Say a location (“Home,” “Office,” “Mobile” or “Other”) when the system asks you to
provide one. The system acknowledges the location.
7. When prompted, say a phone number for the location. For example, say “five five five
one two one two.” The system repeats the number and prompts you for the next command.
8. Say “Store” when you are finished entering numbers. The system confirms the
name, location, and number.
9. Say “Yes” or “No” when the system asks if you would like to store another location
for the same name. If you do not respond to the system prompt, the system ends
the New Entry session.
MAKIN g A PHONE CALL
1. Press the
icon C button.
2. After the tone, do one of the following:
Say “Call [name] [location].” For example, say “Call Michelle Home.”
Say “Call [number].” For example, say “Call 123-456-7891.”
Say “Redial” to redial the previous phone number called by the system.
RECEIVIN g/ENDIN g A PHONE CALL
When you receive a phone call, a ring tone sounds through the audio system.
To accept the call, press the icon C button. To reject the call, press the
LCN0090
button.
To hang up the phone at the end of a call or to disconnect during call placement,
press the
LCN0090
button.
HO w TO sAY N uMBER s
NISSAN voice recognition permits numbers to be spoken in a variety of ways.
Say “zero” or “oh” for “0.” Example: 1-800-662-6200 – Say “one eight zero zero six
six two six two oh oh.”
Say “pound” for “#”. Say “star” for “*”. Example: 1-555-1212*123 – Say “one five five
five one two one two star one two three.”
Please refer to the NISSAN Owner’s Manual and cellular phone manufacturer owner’s
manual for detailed information regarding the Bluetooth® Hands-Free Phone System.
19
Page 26 of 36
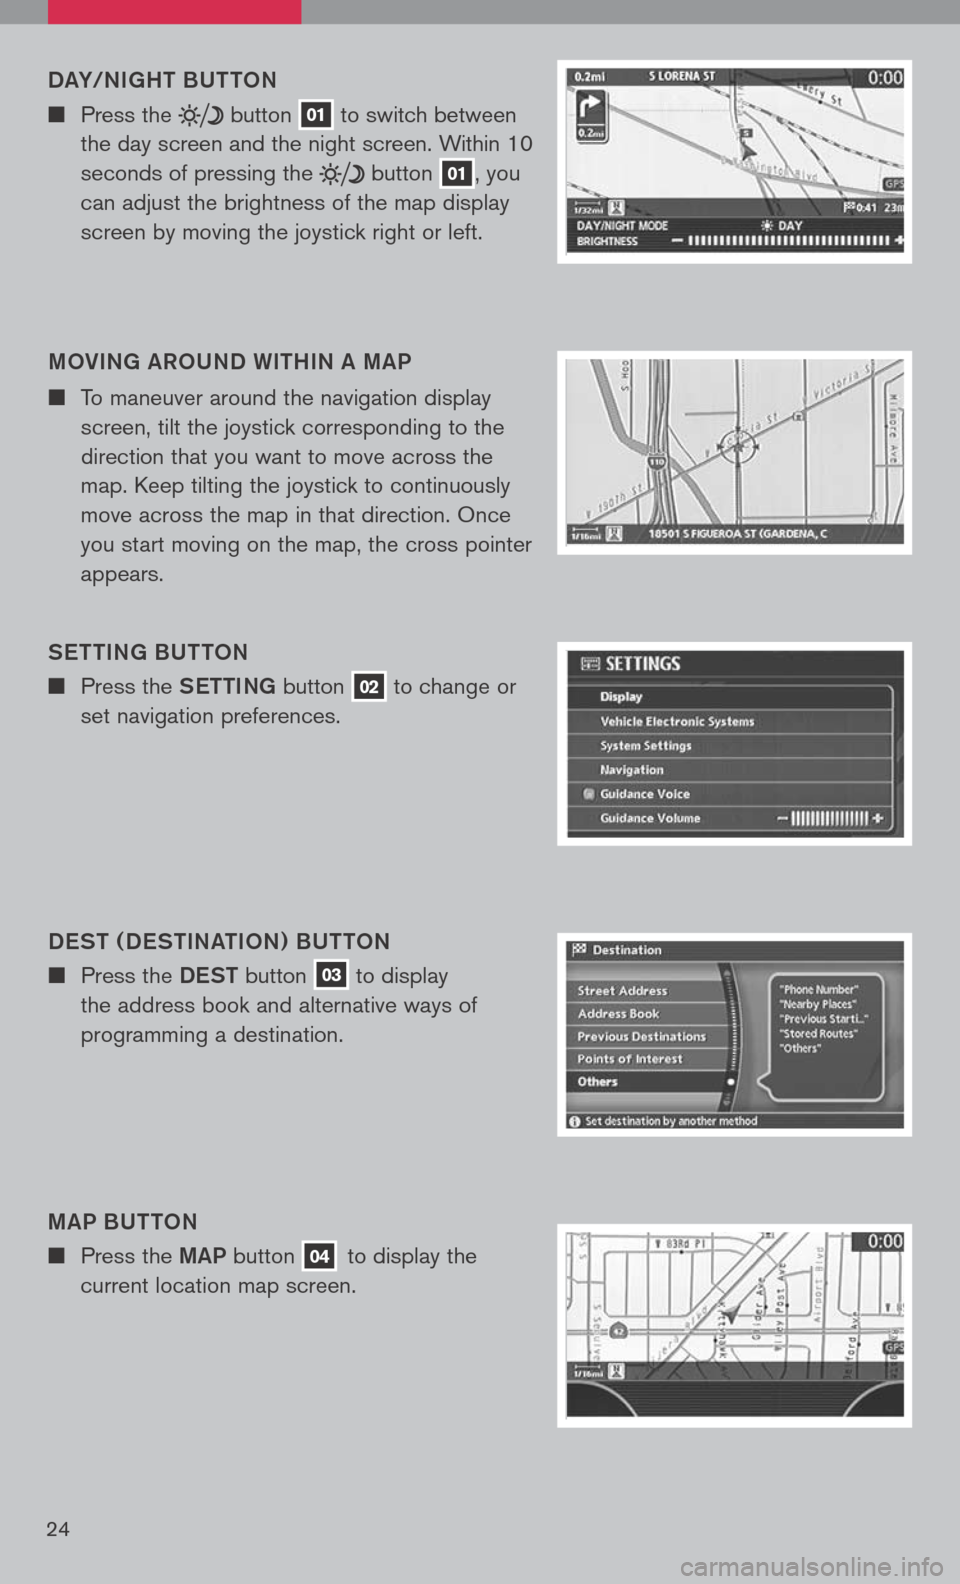
24
DaY/NI gHT BUTTON
n Press the button 01 to
switch between
the day screen and the night screen. Within 10
seconds of pressing the
button 01, you
can adjust the brightness of the map display
screen by moving the joystick right or left.
MOVIN g aROUND WITHIN a MaP
n To maneuver around the navigation display
screen, tilt the joystick corresponding to the
direction that you want to move across the
map. Keep tilting the joystick to continuously
move across the map in that direction. Once
you start moving on the map, the cross pointer
appears.
S eTTIN g BUTTON
n Press the SeTTINg button 02 to change or
set navigation preferences.
D eST ( D eSTIN aTION ) BUTTON
n Press the DeST button 03 to display
the address book and alternative ways of
programming a destination.
M aP BUTTON
n Press the MaP button 04 to display the
current location map screen.
Page 28 of 36
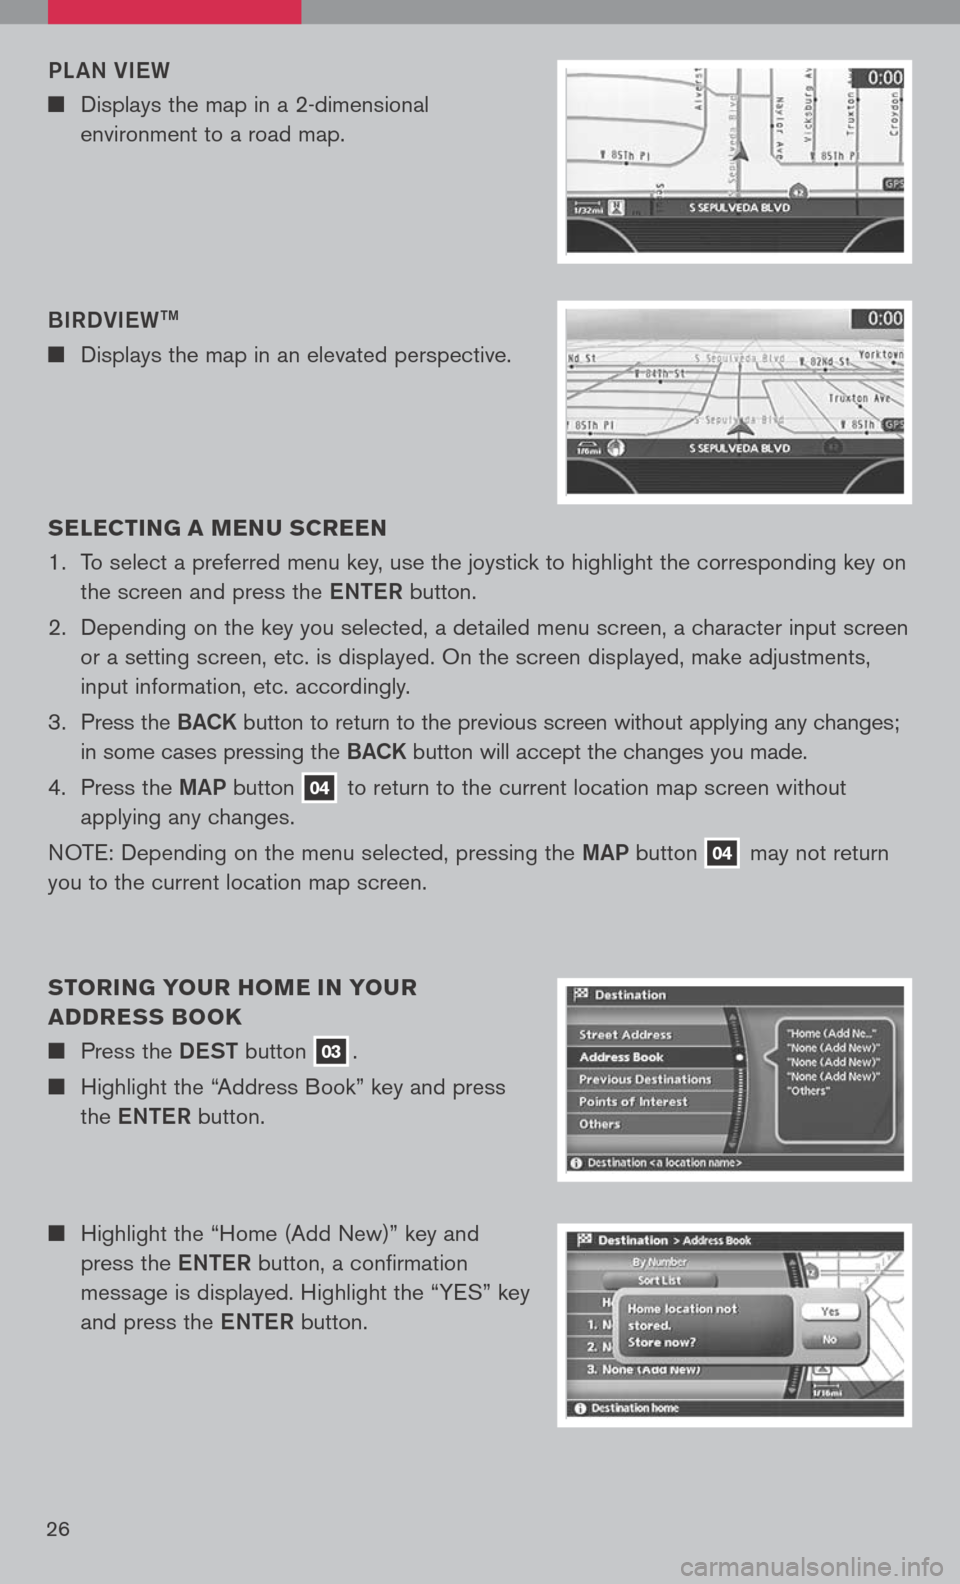
26
n Highlight the “Home (Add New)” key and
press the eNTe R button, a confirmation
message is displayed. Highlight the “YES” key
and press the eNTe R button.
s
ELEC TIN g A MEN u s CREEN
1. To select a preferred menu key, use the joystick to highlight the corresponding key on
the screen and press the eNTe R button.
2. Depending on the key you selected, a detailed menu screen, a character input screen
or a setting screen, etc. is displayed. On the screen displayed, make adjustments,
input information, etc. accordingly.
3. Press the B aCK button to return to the previous screen without applying any changes;
in some cases pressing the B aCK button will accept the changes you made.
4. Press the MaP button
04 to return to the current location map screen without
applying any changes.
NOTE: Depending on the menu selected, pressing the MaP button
04 may
not return
you to the current location map screen.
s TORIN g YO uR HOME IN YO uR
ADDRE ss BOOK
n Press the DeST button 03.
n Highlight the “Address Book” key and press
the eNTe R button.
BIRDVI
eW
TM
n Displays the map in an elevated perspective.
PL
aN VI eW
n Displays the map in a 2-dimensional
environment to a road map.