2008 NISSAN TITAN light
[x] Cancel search: lightPage 14 of 36
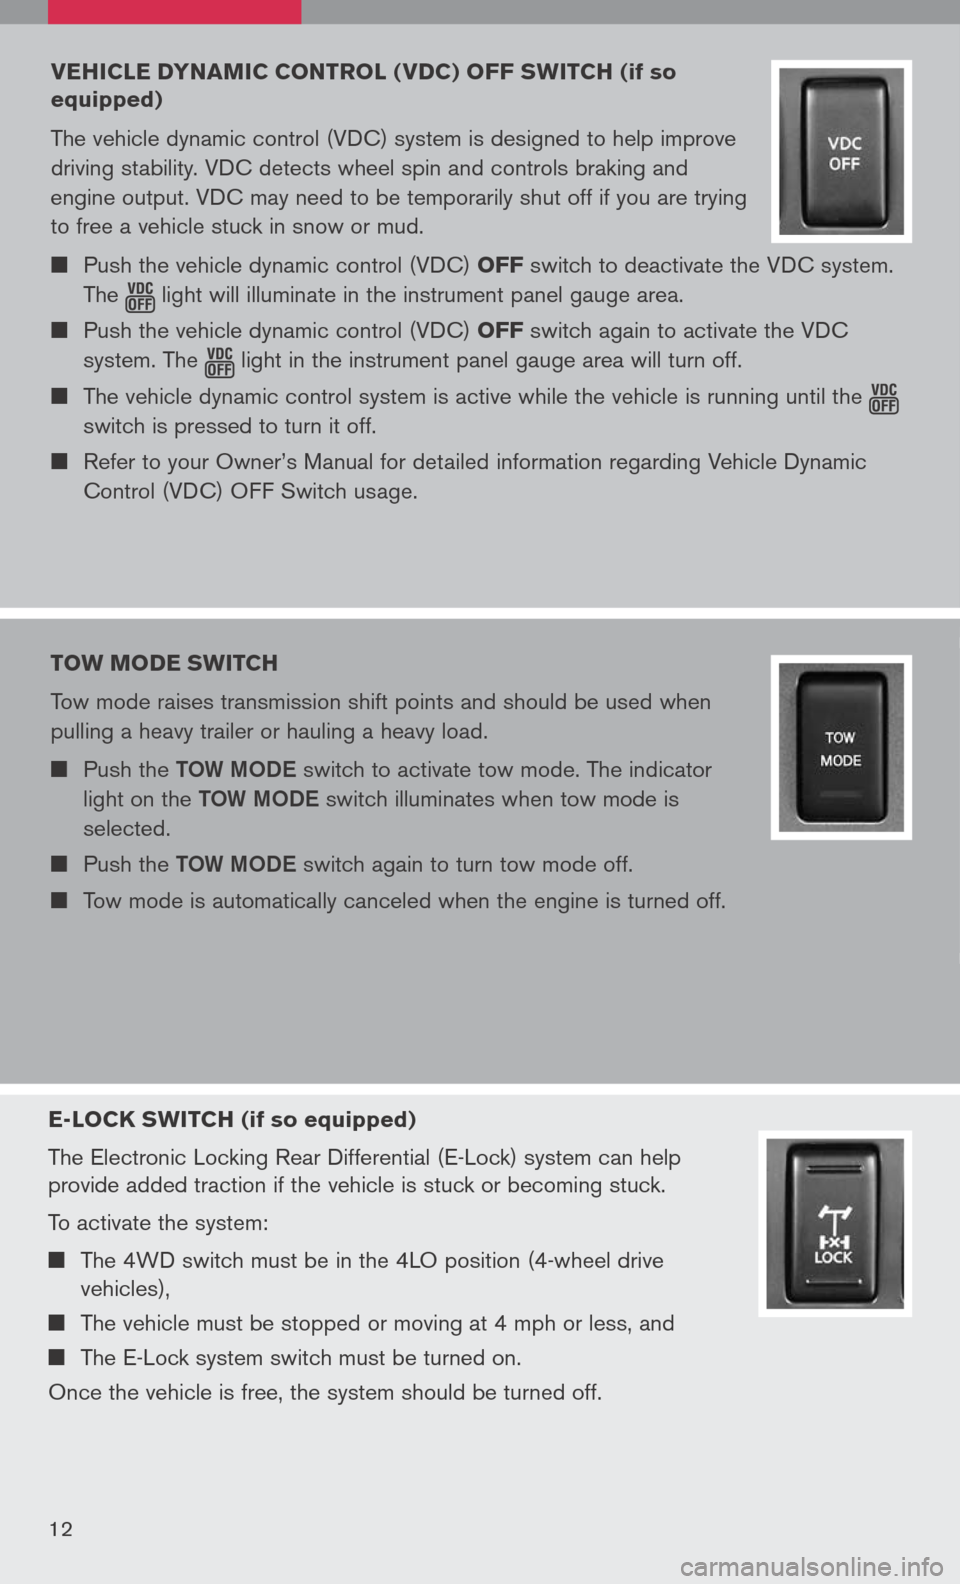
E-LOCK swITCH (if so equipped)
The Electronic Locking Rear Differential (E-Lock) system can help
provide added traction if the vehicle is stuck or becoming stuck.
To activate the system:
The 4WD switch must be in the 4LO position (4-wheel drive
vehicles),
The vehicle must be stopped or moving at 4 mph or less, and
The E-Lock system switch must be turned on.
Once the vehicle is free, the system should be turned off.
12
VEHICLE DYNAMIC CONTROL ( VDC) OFF sw ITCH (if so
equipped)
The vehicle dynamic control (VDC) system is designed to help improve
driving stability. VDC detects wheel spin and controls braking and
engine output. VDC may need to be temporarily shut off if you are trying
to free a vehicle stuck in snow or mud.
Push the vehicle dynamic control (VDC) OFF switch to deactivate the VDC system.
The light
will illuminate in the instrument panel gauge area. Push the vehicle dynamic control (VDC) OFF switch again to activate the VDC
system. The
light
in the instrument panel gauge area will turn off. The vehicle dynamic control system is active while the vehicle is running until the
switch is pressed to turn it off.
Refer to your Owner’s Manual for detailed information regarding Vehicle Dynamic
Control (VDC) OFF Switch usage.
TOw MODE swITCH
Tow mode raises transmission shift points and should be used when
pulling a heavy trailer or hauling a heavy load.
Push the TOW MODe switch to activate tow mode. The indicator
light on the TOW MODe switch illuminates when tow mode is
selected.
Push the TOW MODe switch again to turn tow mode off.
Tow mode is automatically canceled when the engine is turned off.
Page 15 of 36
13
FRONT-PAssEN gER AIR BA g sTAT us LI gHT
This vehicle is equipped with the Nissan Advanced Air Bag
system. Under some conditions, depending on the type of
occupant or object detected in the front passenger seat by the
occupant classification sensor, the front-passenger air bag is
designed to automatically turn
OFF. When the front-passenger air
bag is OFF, the front-passenger air bag status light will illuminate*.
For example:
When the system detects that the front-passenger’s seat is occupied by a small
adult, child or child restraint as outlined in the Owner’s Manual, the
2 will illuminate
to indicate that the front-passenger air bag is OFF and will not inflate in a crash.
When the front-passenger’s seat is occupied and the passenger meets the
conditions outlined in the Owner’s Manual, the
2 will not illuminate to indicate that
the front-passenger air bag is operational.
*When the system detects that the front-passenger’s seat is unoccupied, the passenger air bag status light will not illuminate even though the front-passenger air bag is OFF.
Refer to the Owner’s Manual for detailed information regarding the Nissan Advanced Air
Bag System.
TIRE PRE ssuRE MONITORIN g sY s TEM (TPM s)
This system monitors tire pressure. If the low tire pressure warning
light illuminates, check the tire pressure in all four tires.
Adjust the low tire pressure to the recommended COLD tire
pressure shown on the Tire and Loading Information label located
in the driver’s door opening. After tire pressure is adjusted, the
vehicle will need to be driven at speeds above 16 MPH (25 km/h)
to activate the TPMS and turn off the low tire pressure warning light.
sEAT BELT wARNIN g LIgHT AND CHIME
The light and chime remind you to fasten your seat belts. The
light illuminates whenever the ignition key is turned to the ON
or START position and remains illuminated until the driver’s
seat belt is fastened. At the same time, the chime sounds for
approximately 6 seconds unless the driver’s seat belt is securely
fastened.
The seat belt warning light may also illuminate if the front passenger’s seat belt is
not fastened when the front passenger’s seat is occupied. For 7 seconds after the
ignition switch is in the ON position, the system does not activate the warning light
for the front passenger.
Refer to the Owner’s Manual for detailed information regarding seat belt usage.
Page 16 of 36
14
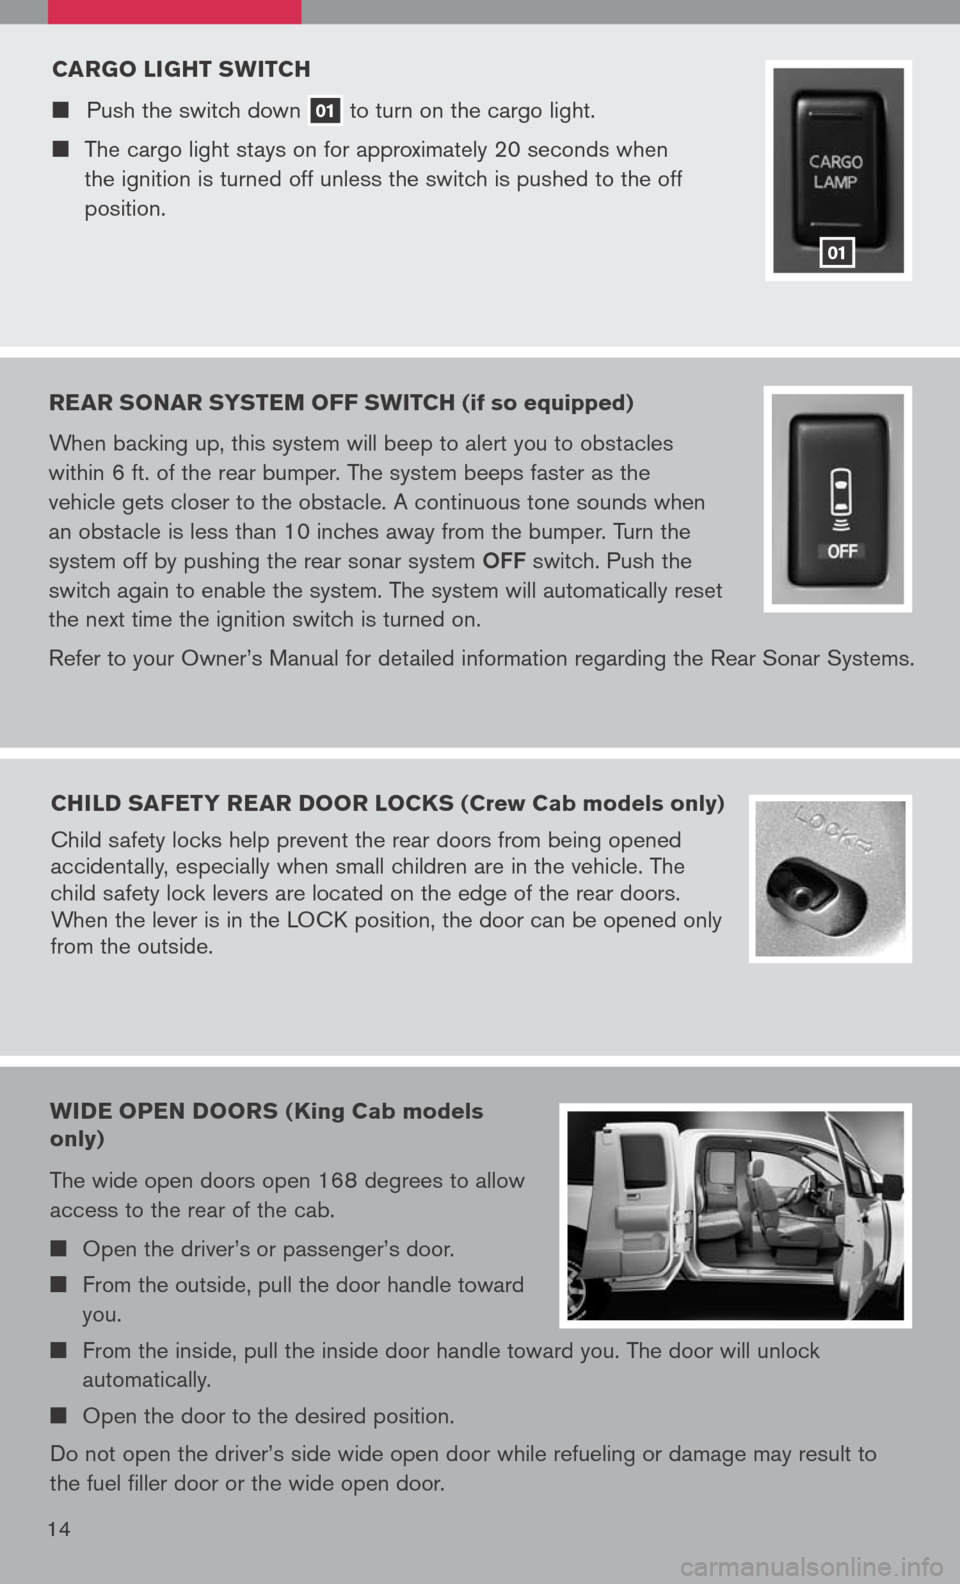
CARgO LI gHT sw ITCH
Push the switch down 01 to
turn on the cargo light.
The cargo light stays on for approximately 20 seconds when
the ignition is turned off unless the switch is pushed to the off
position.
01
REAR sONAR sY s TEM OFF swITCH (if so equipped)
When backing up, this system will beep to alert you to obstacles
within 6 ft. of the rear bumper. The system beeps faster as the
vehicle gets closer to the obstacle. A continuous tone sounds when
an obstacle is less than 10 inches away from the bumper. Turn the
system off by pushing the rear sonar system
OFF switch. Push the
switch again to enable the system. The system will automatically reset
the next time the ignition switch is turned on.
Refer to your Owner’s Manual for detailed information regarding the Rear Sonar Systems.
CHILD sAFETY REAR DOOR LOCK s (Crew Cab models only)
Child safety locks help prevent the rear doors from being opened
accidentally, especially when small children are in the vehicle. The
child safety lock levers are located on the edge of the rear doors.
When the lever is in the LOCK position, the door can be opened only
from the outside.
wIDE OPEN DOOR s (King Cab models
only)
The wide open doors open 168 degrees to allow
access to the rear of the cab.
Open the driver’s or passenger’s door.
From the outside, pull the door handle toward
you.
From the inside, pull the inside door handle toward you. The door will unlock
automatically.
Open the door to the desired position.
Do not open the driver’s side wide open door while refueling or damage may result to
the fuel filler door or the wide open door.
Page 19 of 36
To program your HomeLink® Transceiver to operate a garage door, gate, or entry door
opener, home or office lighting, you need to be at the same location as the device.
NOTe: garage door openers (manufactured after 1996) have “rolling code
protection”. To program a garage door opener equipped with “rolling code protection”, you will need to use a ladder to get up to the garage door opener motor to be able to access the “smart or learn” program button.
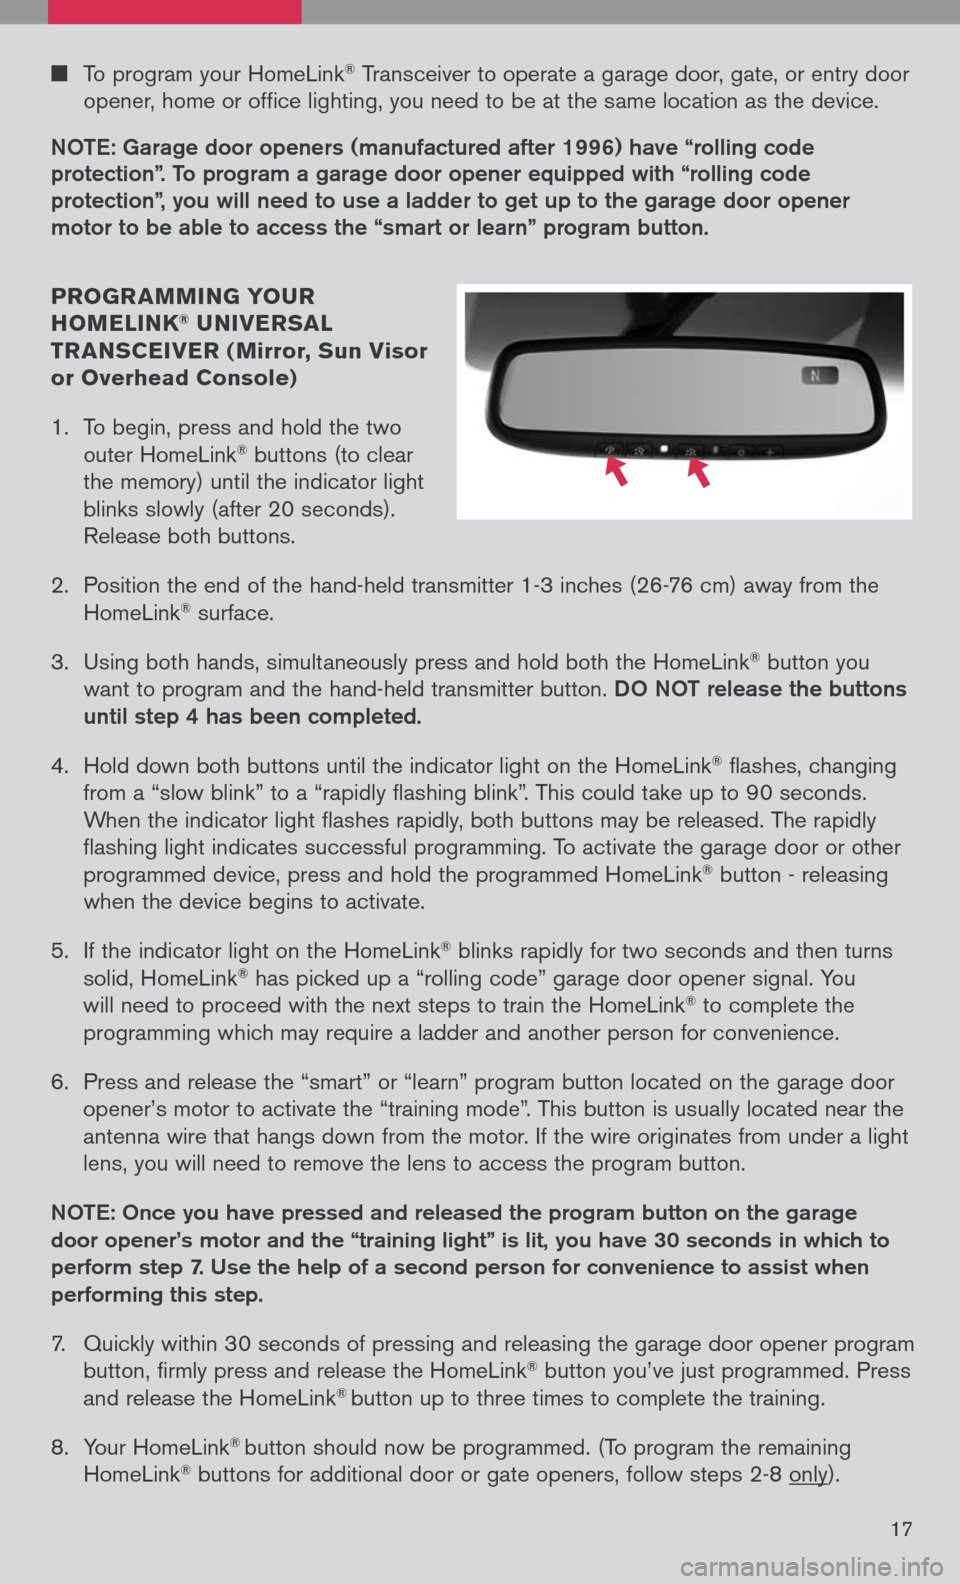
PROgR AMMIN g YO uR
HOMELINK® u NIVER sAL
TR AN sCEIVER ( Mirror, sun Visor
or Overhead Console)
1. To begin, press and hold the two
outer HomeLink
® buttons (to clear
the memory) until the indicator light
blinks slowly (after 20 seconds).
Release both buttons.
2. Position the end of the hand-held transmitter 1-3 inches (26-76 cm) away from the
HomeLink® surface.
3. Using both hands, simultaneously press and hold both the HomeLink
® button you
want to program and the hand-held transmitter button.
DO NOT release the buttons
until step 4 has been completed.
4. Hold down both buttons until the indicator light on the HomeLink
® flashes, changing
from a “slow blink” to a “rapidly flashing blink”. This could take up to 90 seconds.
When the indicator light flashes rapidly, both buttons may be released. The rapidly
flashing light indicates successful programming. To activate the garage door or other
programmed device, press and hold the programmed HomeLink
® button - releasing
when the device begins to activate.
5. If the indicator light on the HomeLink
® blinks rapidly for two seconds and then turns
solid, HomeLink® has picked up a “rolling code” garage door opener signal. You
will need to proceed with the next steps to train the HomeLink® to complete the
programming which may require a ladder and another person for convenience.
6. Press and release the “smart” or “learn” program button located on the garage door
opener’s motor to activate the “training mode”. This button is usually located near the
antenna wire that hangs down from the motor. If the wire originates from under a light
lens, you will need to remove the lens to access the program button.
NOTe: Once you have pressed and released the program button on the garage
door opener’s motor and the “training light” is lit, you have 30 seconds in which to
perform step 7. Use the help of a second person for convenience to assist when
performing this step.
7. Quickly within 30 seconds of pressing and releasing the garage door opener program
button, firmly press and release the HomeLink® button you’ve just programmed. Press
and release the HomeLink® button up to three times to complete the training.
8. Your HomeLink
® button should now be programmed. (To program the remaining
HomeLink® buttons for additional door or gate openers, follow steps 2-8 only).
17
Page 25 of 36
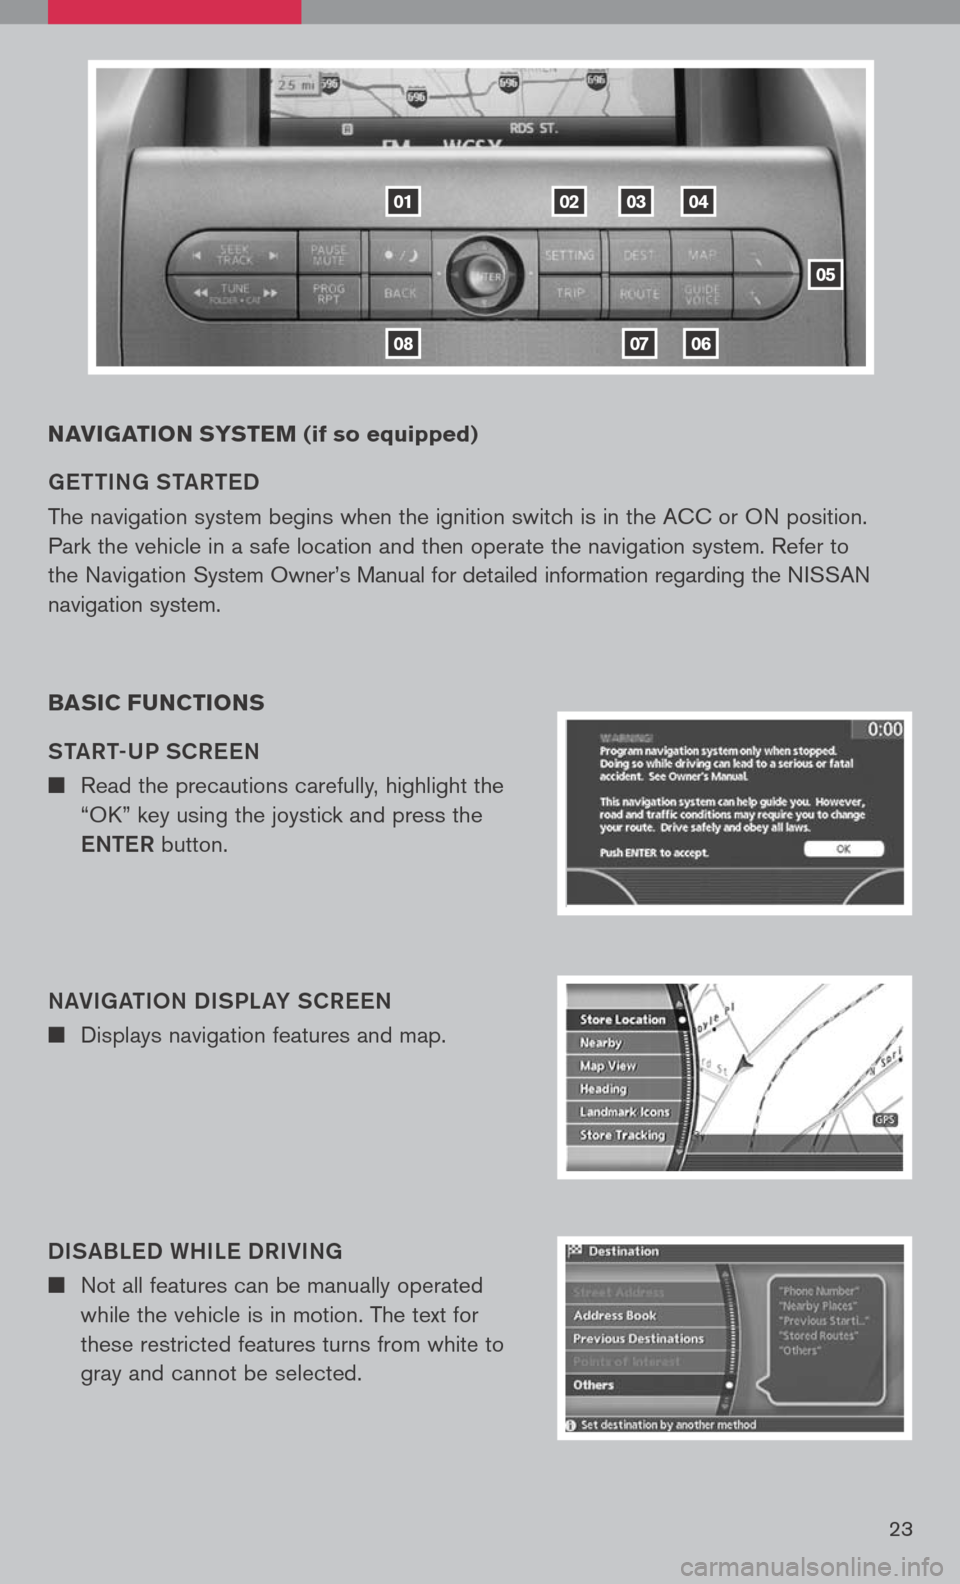
23
NAVIgATION sY s TEM (if so equipped)
ge TTIN g ST aRT eD
The navigation system begins when the ignition switch is in the ACC or ON position.
Park the vehicle in a safe location and then operate the navigation system. Refer to
the Navigation System Owner’s Manual for detailed information regarding the NISSAN
navigation system.
BA sIC F uNCTION s
ST aRT-UP SCR eeN
n Read the precautions carefully, highlight the
“OK” key using the joystick and press the
e NTe R button.
N aVI ga TION DISPL aY SCR eeN
n Displays navigation features and map.
DIS aBL eD WHIL e DRIVIN g
n Not all features can be manually operated
while the vehicle is in motion. The text for
these restricted features turns from white to
gray and cannot be selected.
01
0806
020304
05
07
Page 27 of 36
25
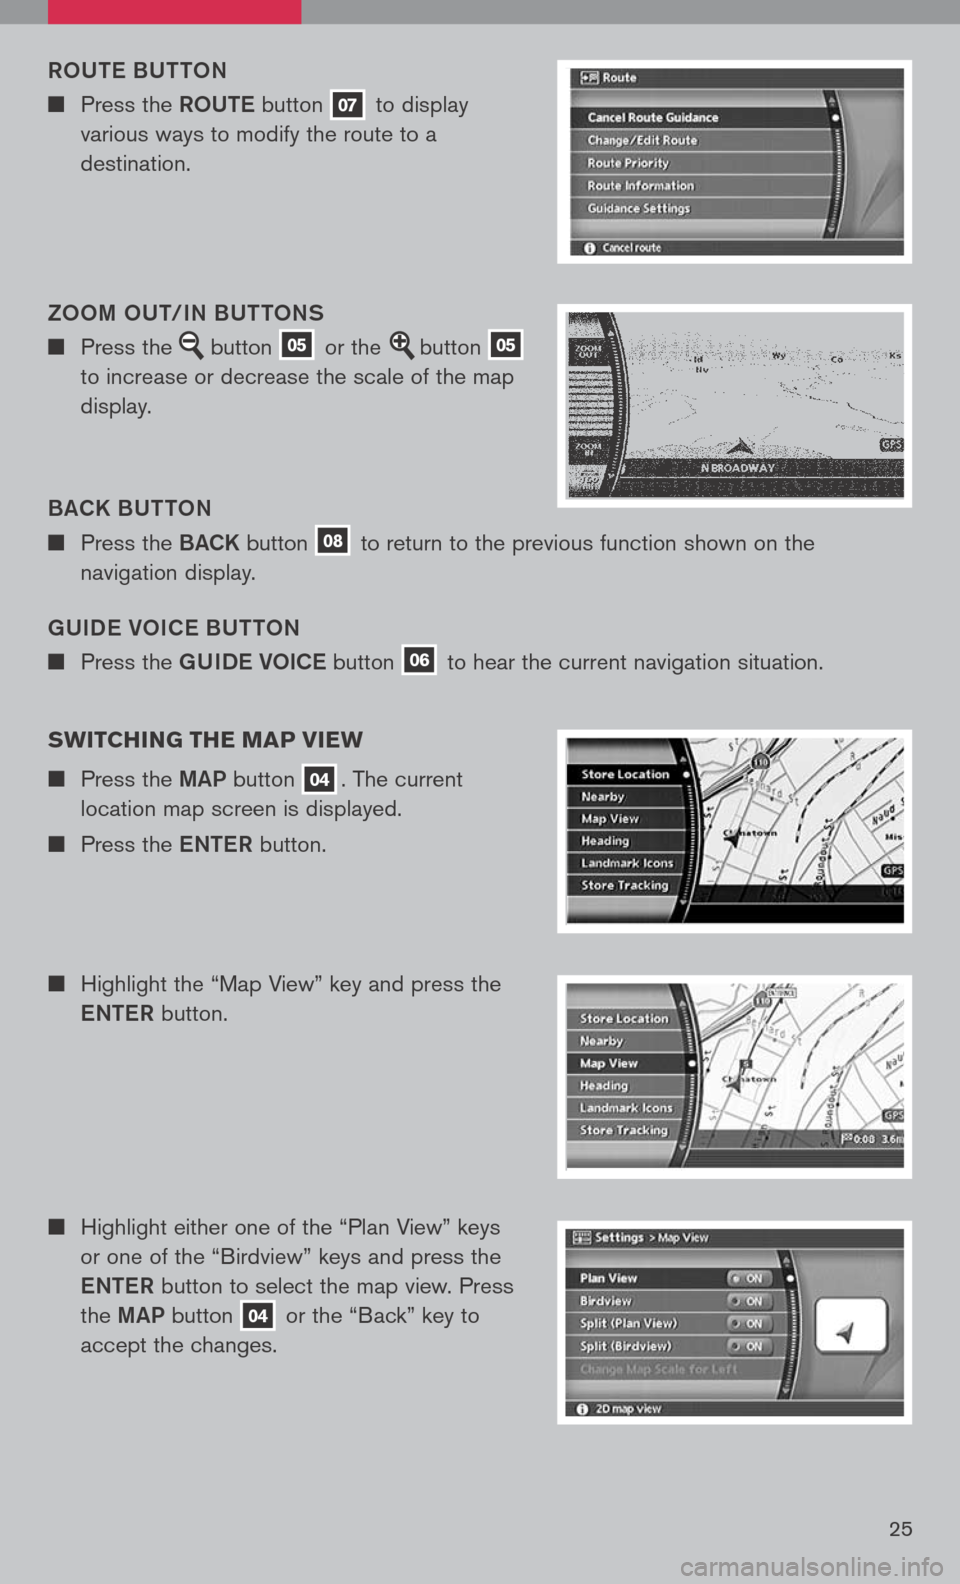
gUIDe VOIC e BUTTON
n Press the gUIDe VOICe button 06 to hear the current navigation situation.
ROUT
e B UTTON
n Press the ROUTe button 07 to display
various ways to modify the route to a
destination.
B aCK B UTTON
n Press the BaCK button 08 to return to the previous function shown on the
navigation display.
ZOOM OUT/IN BUTTONS
n Press the button 05 or the button 05
to increase or decrease the scale of the map
display.
sw ITCHIN g THE MAP VIEw
n Press the MaP button 04. The current
location map screen is displayed.
n Press the eNTe R button.
n Highlight the “Map View” key and press the
e NTe R button.
n Highlight either one of the “Plan View” keys
or one of the “Birdview” keys and press the
e NTe R button to select the map view. Press
the MaP button
04 or the “Back” key to
accept the changes.
Page 28 of 36
26
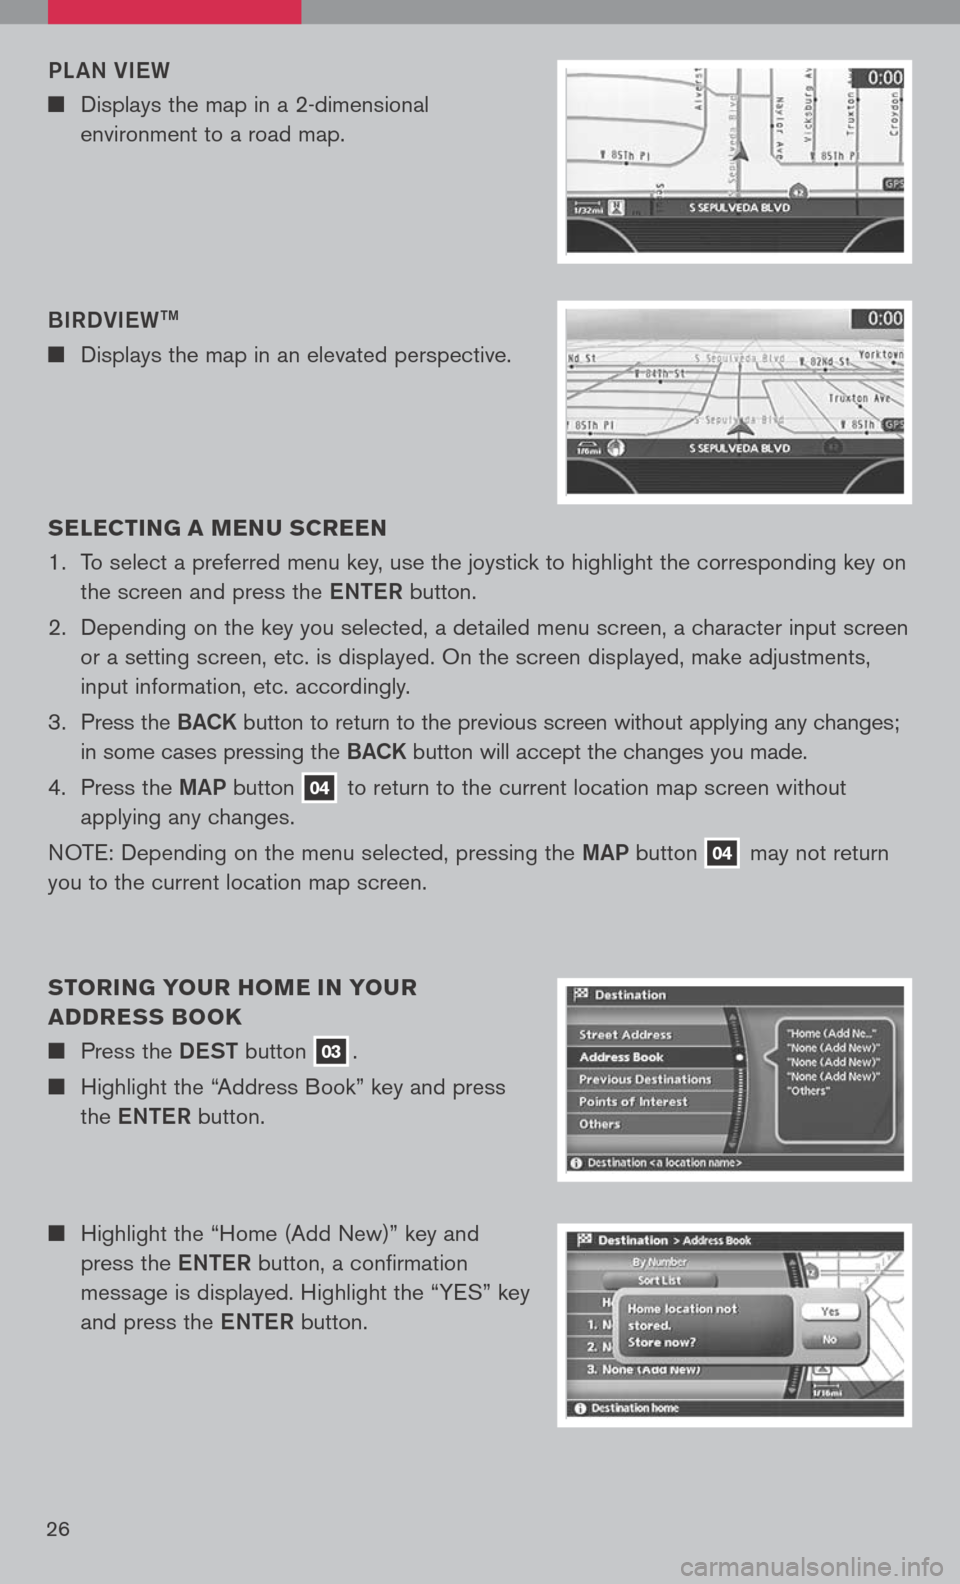
n Highlight the “Home (Add New)” key and
press the eNTe R button, a confirmation
message is displayed. Highlight the “YES” key
and press the eNTe R button.
s
ELEC TIN g A MEN u s CREEN
1. To select a preferred menu key, use the joystick to highlight the corresponding key on
the screen and press the eNTe R button.
2. Depending on the key you selected, a detailed menu screen, a character input screen
or a setting screen, etc. is displayed. On the screen displayed, make adjustments,
input information, etc. accordingly.
3. Press the B aCK button to return to the previous screen without applying any changes;
in some cases pressing the B aCK button will accept the changes you made.
4. Press the MaP button
04 to return to the current location map screen without
applying any changes.
NOTE: Depending on the menu selected, pressing the MaP button
04 may
not return
you to the current location map screen.
s TORIN g YO uR HOME IN YO uR
ADDRE ss BOOK
n Press the DeST button 03.
n Highlight the “Address Book” key and press
the eNTe R button.
BIRDVI
eW
TM
n Displays the map in an elevated perspective.
PL
aN VI eW
n Displays the map in a 2-dimensional
environment to a road map.
Page 29 of 36
27
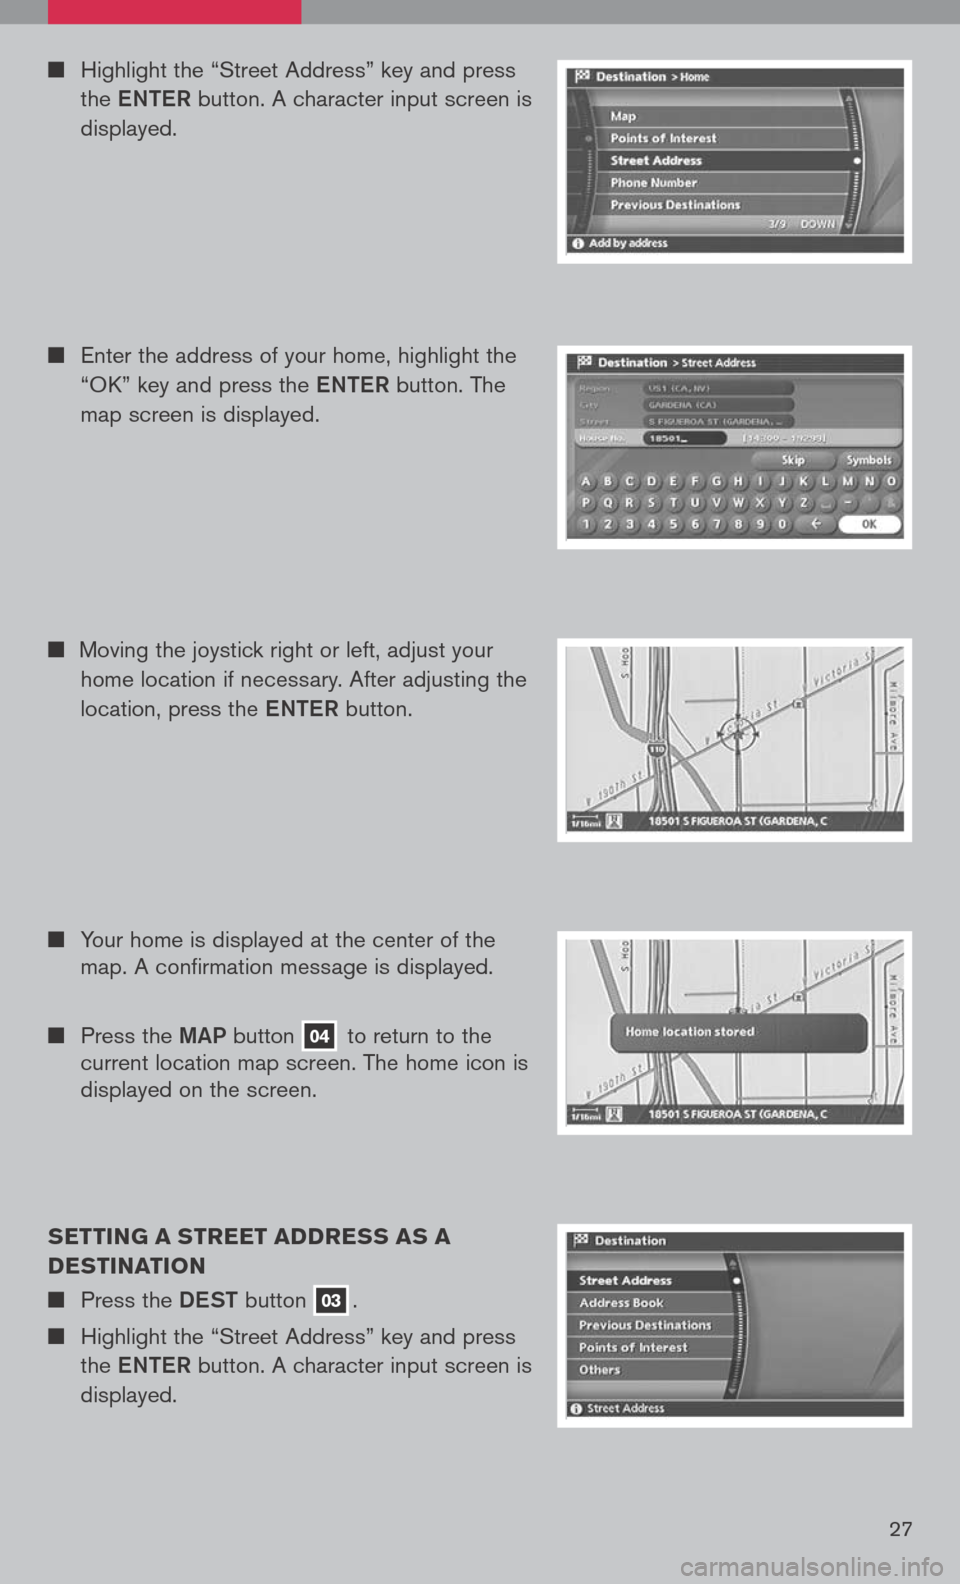
sETTIN g A sTREET ADDRE ss As A
DE sTINATION
n Press the DeST button 03.
n Highlight the “Street Address” key and press
the eNTe R button. A character input screen is
displayed.
n Highlight the “Street Address” key and press
the eNTe R button. A character input screen is
displayed.
n Enter the address of your home, highlight the
“OK” key and press the eNTe R button. The
map screen is displayed.
n Your home is displayed at the center of the
map. A confirmation message is displayed.
n Press the MaP button 04 to return to the
current location map screen. The home icon is
displayed on the screen.
n
Moving the joystick right or left, adjust your
home location if necessary. After adjusting the
location, press the eNTe R button.