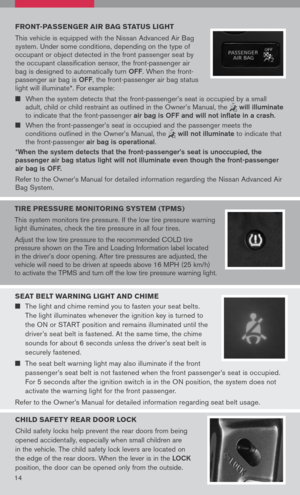
Page 25 of 36

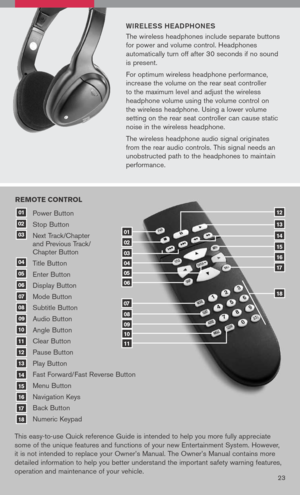
WiR eLe SS he a DPhON eS
The wireless headphones include separate buttons
for power and volume control. Headphones
automatically turn off after 30 seconds if no sound
is present.
For optimum wireless headphone performance,
increase the volume on the rear seat controller
to the maximum level and adjust the wireless
headphone volume using the volume control on
the wireless headphone. Using a lower volume
setting on the rear seat controller can cause static
noise in the wireless headphone.
The wireless headphone audio signal originates
from the rear audio controls. This signal needs an
unobstructed path to the headphones to maintain
performance.
23
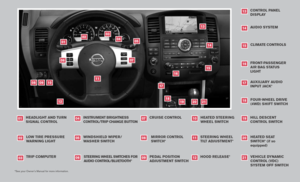
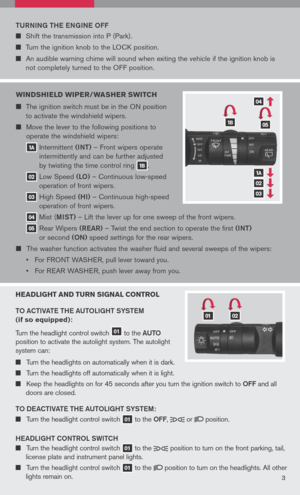
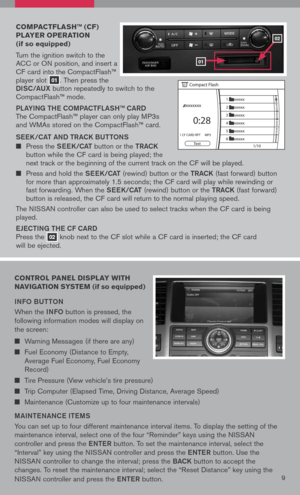
Power Button
Stop Button
Next Track/Chapter and Previous Track/ Chapter Button
Title Button
Enter Button
Display Button
Mode Button
Subtitle Button
Audio Button
Angle Button
Clear Button
Pause Button
Play Button
Fast Forward/Fast Reverse Button
Menu Button
Navigation Keys
Back Button
Numeric Keypad
10
09
01
08
18
17
07
16
03
02
04
05
06
07
15
14
08
13
12
09
1110
11
06
05
04
03
02
18
17
16
15
14
13
12
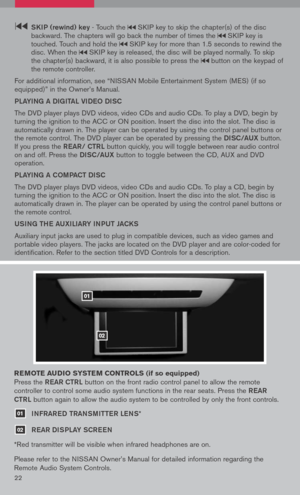
re Mote control
01
This easy-to-use Quick reference Guide is intended to help you more fully appreciate
some of the unique features and functions of your new Entertainment System. However,
it is not intended to replace your Owner’s Manual. The Owner’s Manual contains more
detailed information to help you better understand the important safety warning features,
operation and maintenance of your vehicle.
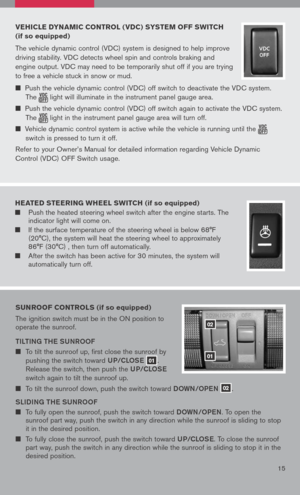
Page 26 of 36

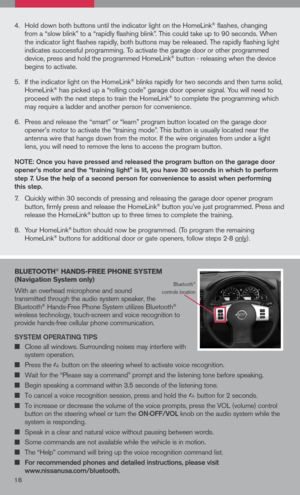
The NISSAN Voice Recognition system
allows hands-free operation of the systems
equipped on this vehicle, such as the
display, audio, cl")
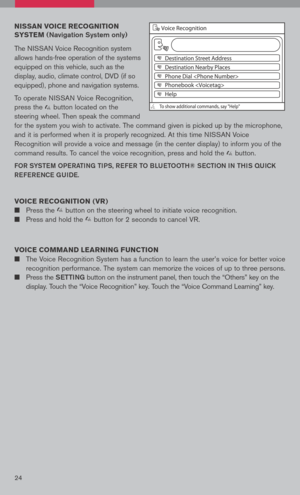
nissan voice recognition
syste M
(Navigation System only)
The NISSAN Voice Recognition system
allows hands-free operation of the systems
equipped on this vehicle, such as the
display, audio, climate control, DVD (if so
equipped), phone and navigation systems.
To operate NISSAN Voice Recognition,
press the button located on the
steering wheel. Then speak the command
for the system you wish to activate. The command given is picked up by the microphone,
and it is performed when it is properly recognized. At this time NISSAN Voice
Recognition will provide a voice and message (in the center display) to inform you of the
command results. To cancel the voice recognition, press and hold the button.
FOR SYStem OPeRati Ng ti PS, ReFe R t O BLU etOO th® SeC tiON i N thiS qUiCK
Re Fe R eNCe gUiDe.
voice recognition ( vr)
Press the button on the steering wheel to initiate voice recognition.
Press and hold the button for 2 seconds to cancel VR.
voice coMM and learning F unction
The Voice Recognition System has a function to learn the user’s voice for better voice
recognition performance. The system can memorize the voices of up to three persons.
Press the Setti Ng button on the instrument panel, then touch the “Others” key on the
display. Touch the “Voice Recognition” key. Touch the “Voice Command Learning” key.
24
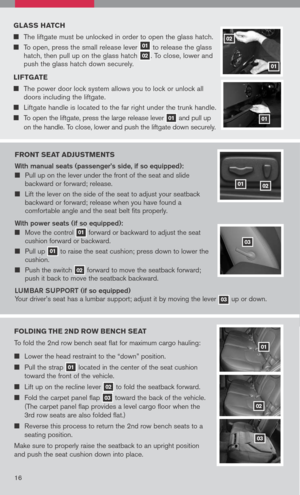
Page 27 of 36

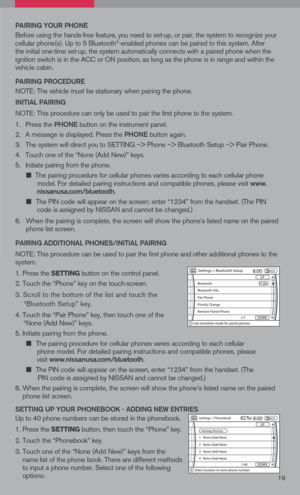
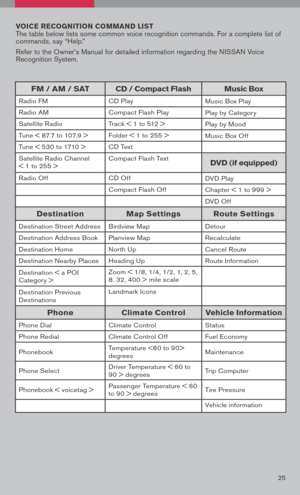
voice r ecognition co MM and list The table below lists some common voice recognition commands. For a complete list of commands, say “Help.”
Refer to the Owner’s Manual for detailed information regarding the NISSAN Voice Recognition System.
25
FM / aM / sat cd / compact Flash Music box
Radio FMCD PlayMusic Box Play
Radio AMCompact Flash PlayPlay by Category
Satellite RadioTrack < 1 to 512 > Play by Mood
Tune < 87.7 to 107.9 >Folder < 1 to 255 > Music Box Off
Tune < 530 to 1710 >CD Text
Satellite Radio Channel < 1 to 255 >Compact Flash Textdvd (if equipped)
Radio OffCD OffDVD Play
Compact Flash OffChapter < 1 to 999 >
DVD Off
destination Map settings route settings
Destination Street AddressBirdview MapDetour
Destination Address BookPlanview MapRecalculate
Destination HomeNorth UpCancel Route
Destination Nearby PlacesHeading UpRoute Information
Destination < a POI Category >Zoom < 1/8, 1/4, 1/2, 1, 2, 5, 8. 32, 400 > mile scale
Destination Previous DestinationsLandmark Icons
phone climate control vehicle information
Phone DialClimate ControlStatus
Phone RedialClimate Control OffFuel Economy
PhonebookTemperature <60 to 90> degreesMaintenance
Phone SelectDriver Temperature < 60 to 90 > degreesTrip Computer
Phonebook < voicetag >Passenger Temperature < 60 to 90 > degreesTire Pressure
Vehicle information
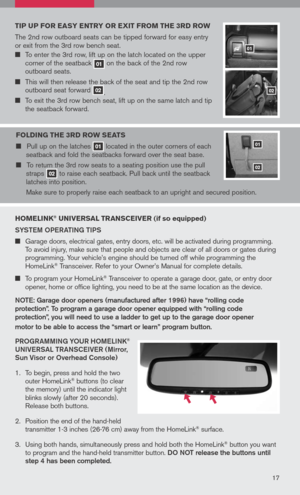
Page 28 of 36
26
navigation systeM
(if so equipped)
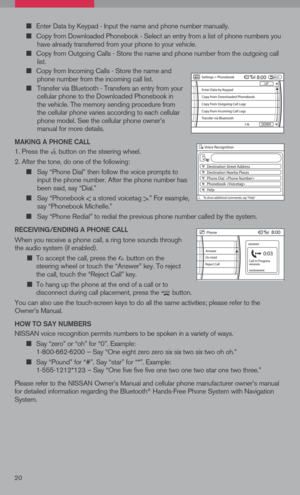
getti Ng S ta Rte D
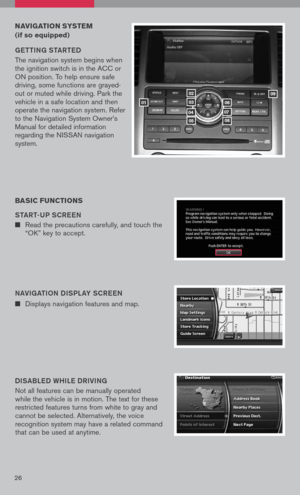
The navigation system begins when the ignition switch is in the ACC or ON position. To help ensure safe driving, some functions are grayed-out or muted while driving. Park the vehicle in a safe location and then operate the navigation system. Refer to the Navigation System Owner’s Manual for detailed information regarding the NISSAN navigation system.
NaVigati ON DiSPL aY SCR eeN
Displays navigation features and map.
D iS aBL eD W hiLe DR iV iN g
Not all features can be manually operated while the vehicle is in motion. The text for these restricted features turns from white to gray and cannot be selected. Alternatively, the voice recognition system may have a related command that can be used at anytime.
basic F unctions
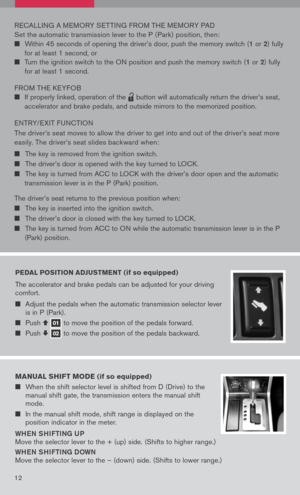
S ta Rt-UP SCR eeN
Read the precautions carefully, and touch the “OK” key to accept.
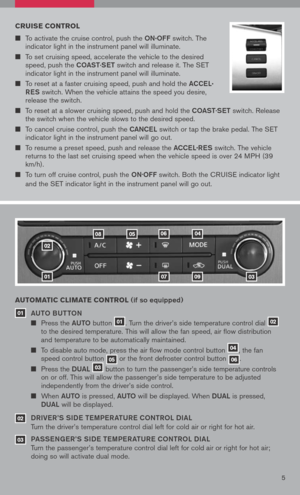
01
05
04
02
03
08
07
06
09
Page 29 of 36
27
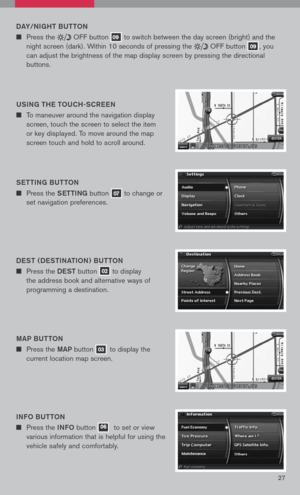
DaY/N ight BUttON
Press the OFF button 09 to switch between the day screen (bright) and the
night screen (dark). Within 10 seconds of pressing the OFF button 09, you
can adjust the brightness of the map display screen by pressing the directional
buttons.
US iN g the t OUC h-SCR eeN
To maneuver around the navigation display
screen, touch the screen to select the item
or key displayed. To move around the map
screen touch and hold to scroll around.
Setti Ng BU ttON
Press the Setti Ng button 07 to change or
set navigation preferences.
D eS t ( D eS ti Nati ON ) BU ttON
Press the DeSt button 02 to display
the address book and alternative ways of
programming a destination.
ma P BU ttON
Press the maP button 03 to display the
current location map screen.
i NFO BU ttON
Press the iNFO button 06 to set or view
various information that is helpful for using the
vehicle safely and comfortably.
Page 30 of 36
28
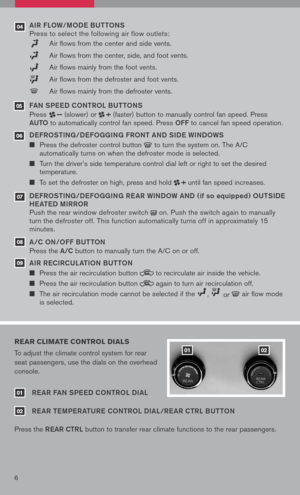
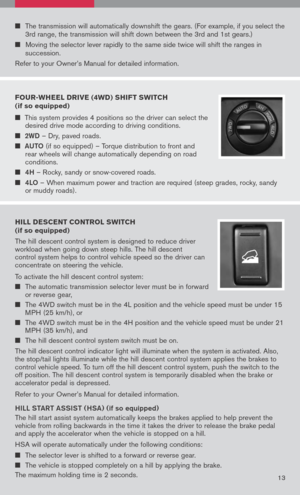
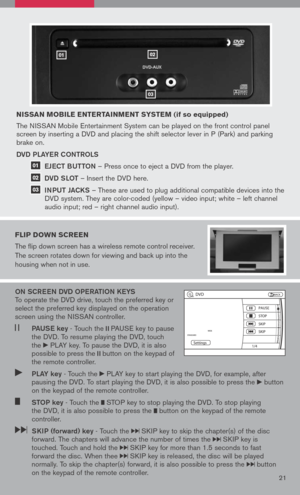
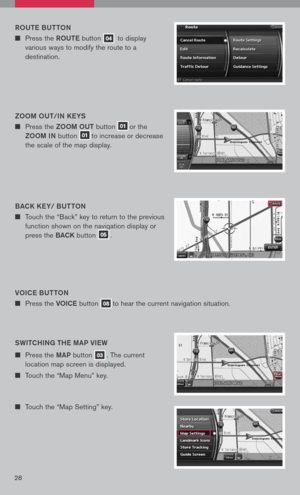
VOiC e B Utt ON
Press the VOiCe button 08to hear the current navigation situation.
ROU
te BUtt ON
Press the ROUte button 04 to display
various ways to modify the route to a
destination.
ZOO m OU t/iN K eYS
Press the ZOOm OUt button 01or the
ZOOm iN
button 01to increase or decrease
the scale of the map display.
B aCK K eY/ BU ttON
Touch the “Back” key to return to the previous
function shown on the navigation display or
press the BaCK button 05.
SW itChi Ng the ma P Vie W
Press the maP button 03. The current
location map screen is displayed.
Touch the “Map Menu” key.
Touch the “Map Setting” key.
Page 31 of 36

29
Touch either one of the “Plan View” keys or
one of the “Birdview” keys to select the map
view. Press the maP button 03 or the “Back”
key to accept the changes.
S eLe C ti Ng a me NU SCR eeN
1. To select a preferred menu key, touch the corresponding key on the screen.
2. Depending on the key you selected, a detailed menu screen, a character input screen
or a setting screen, etc. is displayed. On the screen displayed, make adjustments,
input information, etc. accordingly.
3. Touch the “Back” key to return to the previous screen without applying any changes;
in some cases pressing the “Back” key will accept the changes you made.
4. Press the maP
button 03 to return to the current location map screen without
applying any changes.
NOTE: Depending on the menu selected, pressing the maP button 03 may not return
you to the current location map screen.
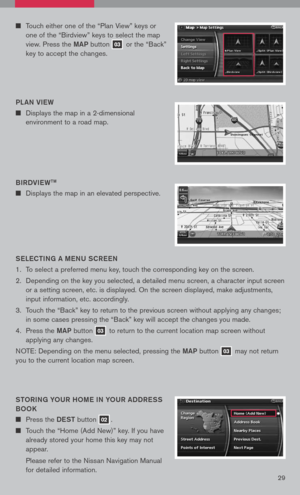
StOR iN g YOUR hO me i N YOUR aDDR eSS
BOOK
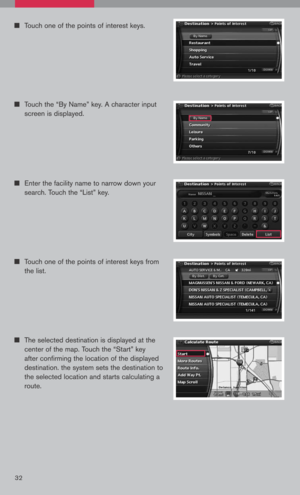
Press the DeSt button 02.
Touch the “Home (Add New)” key. If you have
already stored your home this key may not
appear.
Please refer to the Nissan Navigation Manual
for detailed information.
B
iRDV ieW
tm
Displays the map in an elevated perspective.
PL
aN V ieW
Displays the map in a 2-dimensional
environment to a road map.
Page 32 of 36
30
Your home is displayed at the center of the map. A confirmation message is displayed, and the system sets your home as the destination.
Press the maP button 03 to return to the current location map screen. The home icon is displayed on the screen.
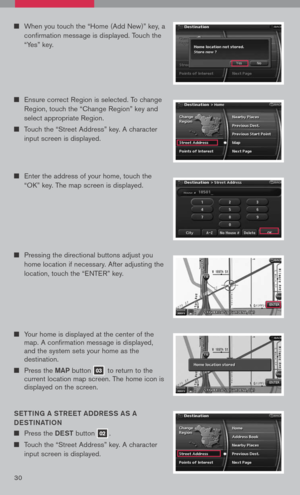
S etti Ng a S tR eet a DDR eSS aS a
D eS ti Nati ON
Press the DeSt button 02.
Touch the “Street Address” key. A character
input screen is displayed.
Pressing the directional buttons adjust you
home location if necessary. After adjusting the
location, touch the “ENTER” key.
Enter the address of your home, touch the
“OK” key. The map screen is displayed.
When you touch the “Home (Add New)” key, a
confirmation message is displayed. Touch the
“Yes” key.
Ensure correct Region is selected. To change
Region, touch the “Change Region” key and
select appropriate Region.
Touch the “Street Address” key. A character
input screen is displayed.


getti Ng S ta Rte D
The navigation system begins when the ignition switch is in the ACC or ON position. To help ensure safe driving, some functions are grayed")
 and the
night screen (dark). Within 10 seconds of pressing the OFF button 09, you
can adjust the brigh")

