Page 1422 of 2771
EC-348
< SERVICE INFORMATION >
DTC P0448 EVAP CANISTER VENT CONTROL VALVE
Diagnosis Procedure
INFOID:0000000001702856
1.CHECK RUBBER TUBE
1. Turn ignition switch OFF.
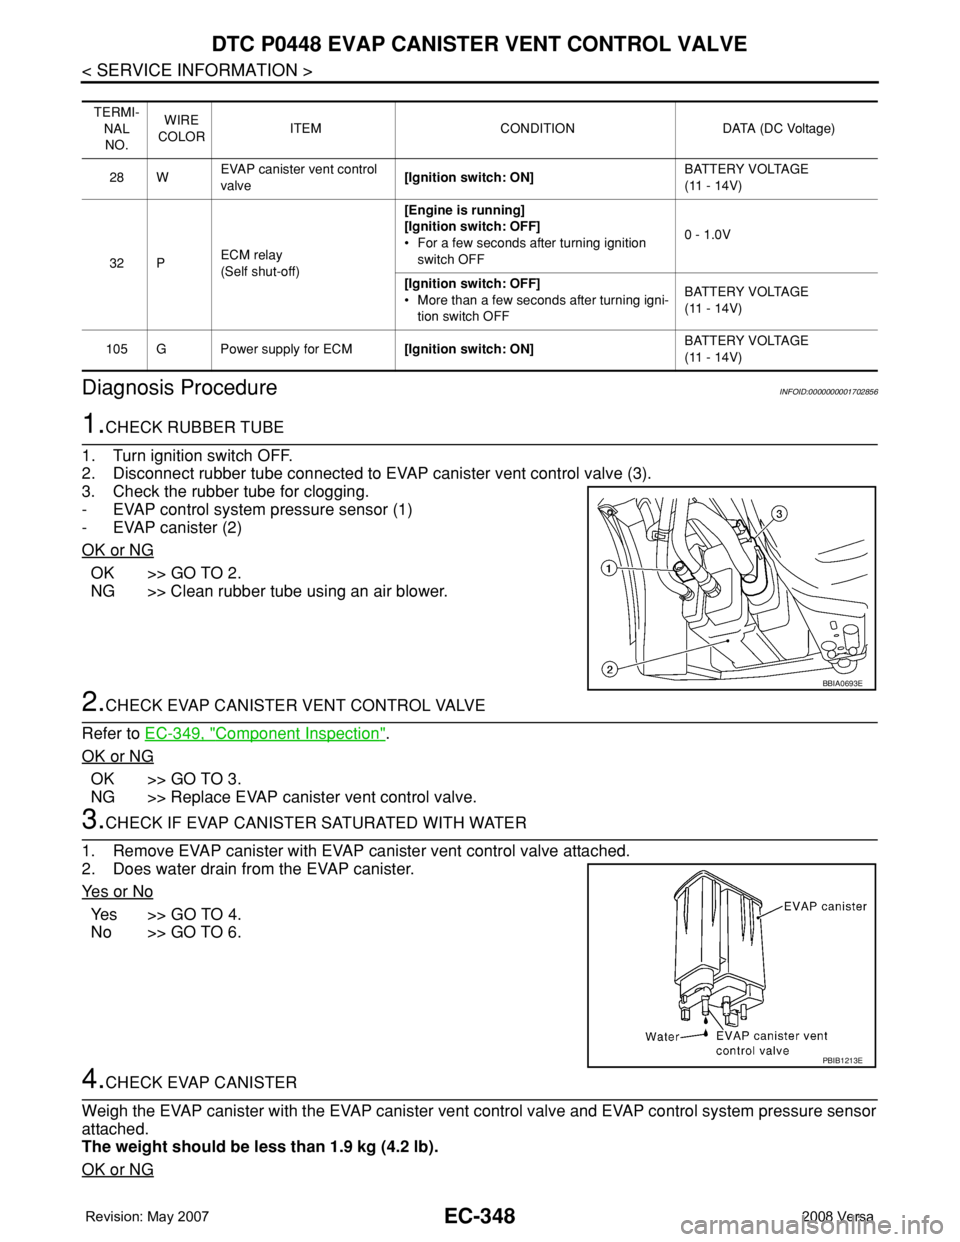
2. Disconnect rubber tube connected to EVAP canister vent control valve (3).
3. Check the rubber tube for clogging.
- EVAP control system pressure sensor (1)
- EVAP canister (2)
OK or NG
OK >> GO TO 2.
NG >> Clean rubber tube using an air blower.
2.CHECK EVAP CANISTER VENT CONTROL VALVE
Refer to EC-349, "
Component Inspection".
OK or NG
OK >> GO TO 3.
NG >> Replace EVAP canister vent control valve.
3.CHECK IF EVAP CANISTER SATURATED WITH WATER
1. Remove EVAP canister with EVAP canister vent control valve attached.
2. Does water drain from the EVAP canister.
Ye s o r N o
Ye s > > G O T O 4 .
No >> GO TO 6.
4.CHECK EVAP CANISTER
Weigh the EVAP canister with the EVAP canister vent control valve and EVAP control system pressure sensor
attached.
The weight should be less than 1.9 kg (4.2 lb).
OK or NG
TERMI-
NAL
NO.WIRE
COLORITEM CONDITION DATA (DC Voltage)
28 WEVAP canister vent control
valve[Ignition switch: ON]BATTERY VOLTAGE
(11 - 14V)
32 PECM relay
(Self shut-off)[Engine is running]
[Ignition switch: OFF]
• For a few seconds after turning ignition
switch OFF0 - 1.0V
[Ignition switch: OFF]
• More than a few seconds after turning igni-
tion switch OFFBATTERY VOLTAGE
(11 - 14V)
105 G Power supply for ECM[Ignition switch: ON]BATTERY VOLTAGE
(11 - 14V)
BBIA0693E
PBIB1213E
Page 1426 of 2771
EC-352
< SERVICE INFORMATION >
DTC P0451 EVAP CONTROL SYSTEM PRESSURE SENSOR
2. Turn ignition switch ON and select “DATA MONITOR” mode with
CONSULT-II.
3. Start engine and wait at least 40 seconds.
NOTE:
Do not depress accelerator pedal even slightly.
If 1st trip DTC is detected, go to EC-352, "
Diagnosis Procedure".
WITH GST
Follow the procedure “WITH CONSULT-II” above.
Diagnosis ProcedureINFOID:0000000001702862
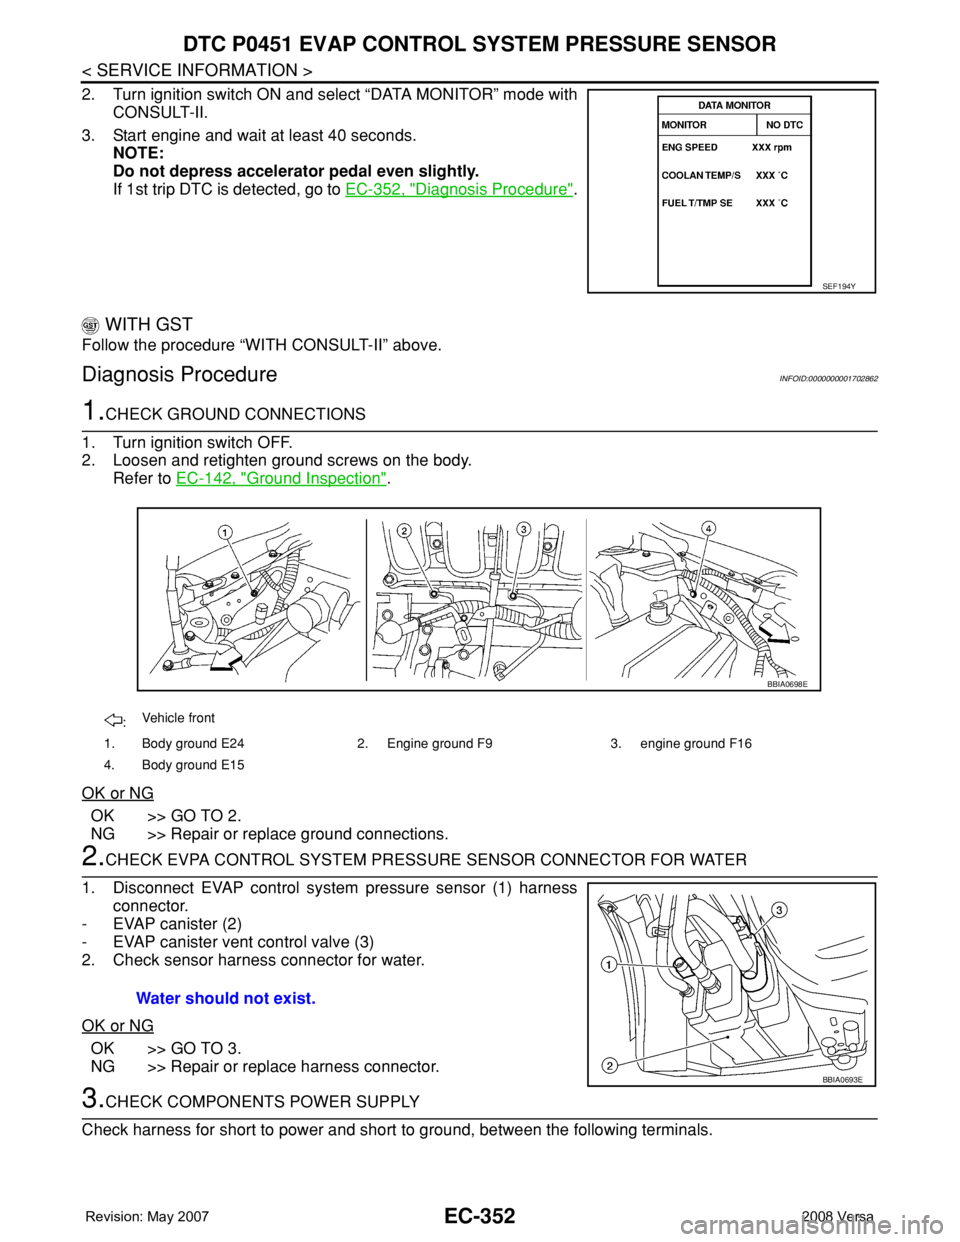
1.CHECK GROUND CONNECTIONS
1. Turn ignition switch OFF.
2. Loosen and retighten ground screws on the body.
Refer to EC-142, "
Ground Inspection".
OK or NG
OK >> GO TO 2.
NG >> Repair or replace ground connections.
2.CHECK EVPA CONTROL SYSTEM PRESSURE SENSOR CONNECTOR FOR WATER
1. Disconnect EVAP control system pressure sensor (1) harness
connector.
- EVAP canister (2)
- EVAP canister vent control valve (3)
2. Check sensor harness connector for water.
OK or NG
OK >> GO TO 3.
NG >> Repair or replace harness connector.
3.CHECK COMPONENTS POWER SUPPLY
Check harness for short to power and short to ground, between the following terminals.
SEF194Y
:Vehicle front
1. Body ground E24 2. Engine ground F9 3. engine ground F16
4. Body ground E15
BBIA0698E
Water should not exist.
BBIA0693E
Page 1430 of 2771
EC-356
< SERVICE INFORMATION >
DTC P0452 EVAP CONTROL SYSTEM PRESSURE SENSOR
WITH CONSULT-II
1. Start engine and warm it up to normal operating temperature.
2. Turn ignition switch OFF and wait at least 10 seconds.
3. Turn ignition switch ON.
4. Select “DATA MONITOR” mode with CONSULT-II.
5. Make sure that “FUEL T/TMP SE” is more than 0°C (32°F).
6. Start engine and wait at least 20 seconds.
If 1st trip DTC is detected, go to EC-358, "
Diagnosis Procedure".
WITH GST
1. Start engine and warm it up to normal operating temperature.
2. Check that voltage between ECM terminal 43 (Fuel tank temper-
ature sensor signal) and ground is less than 4.2V.
3. Turn ignition switch OFF and wait at least 10 seconds.
4. Start engine and wait at least 20 seconds.
5. Select Service $07 with GST.
If 1st trip DTC is detected, go to EC-358, "
Diagnosis Procedure".
SEF194Y
SEF113U
Page 1432 of 2771
EC-358
< SERVICE INFORMATION >
DTC P0452 EVAP CONTROL SYSTEM PRESSURE SENSOR
Diagnosis Procedure
INFOID:0000000001702869
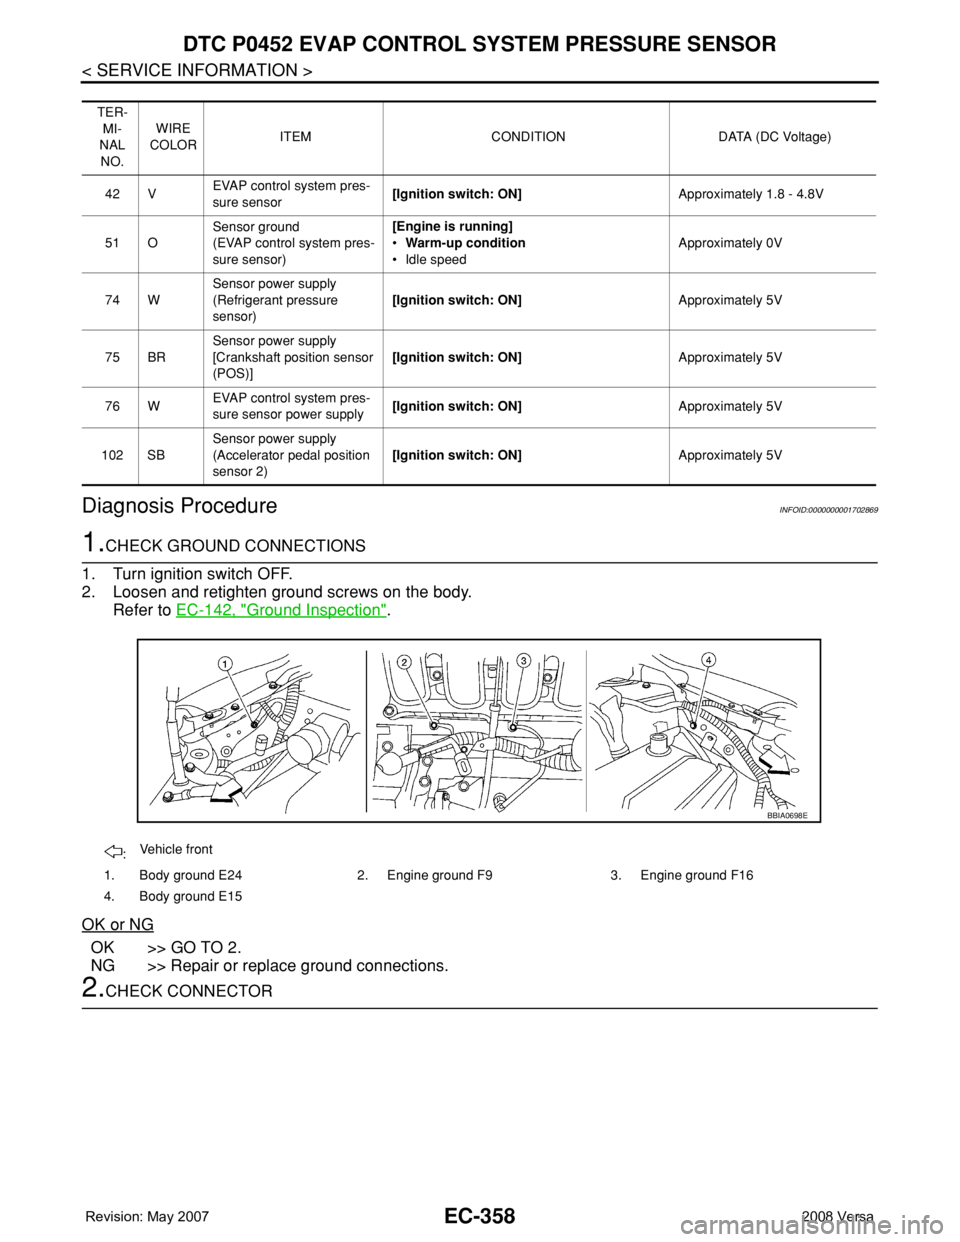
1.CHECK GROUND CONNECTIONS
1. Turn ignition switch OFF.
2. Loosen and retighten ground screws on the body.
Refer to EC-142, "
Ground Inspection".
OK or NG
OK >> GO TO 2.
NG >> Repair or replace ground connections.
2.CHECK CONNECTOR
TER-
MI-
NAL
NO.WIRE
COLORITEM CONDITION DATA (DC Voltage)
42 VEVAP control system pres-
sure sensor[Ignition switch: ON]Approximately 1.8 - 4.8V
51 OSensor ground
(EVAP control system pres-
sure sensor)[Engine is running]
•Warm-up condition
• Idle speedApproximately 0V
74 WSensor power supply
(Refrigerant pressure
sensor)[Ignition switch: ON]Approximately 5V
75 BRSensor power supply
[Crankshaft position sensor
(POS)][Ignition switch: ON]Approximately 5V
76 WEVAP control system pres-
sure sensor power supply[Ignition switch: ON]Approximately 5V
102 SBSensor power supply
(Accelerator pedal position
sensor 2)[Ignition switch: ON]Approximately 5V
:Vehicle front
1. Body ground E24 2. Engine ground F9 3. Engine ground F16
4. Body ground E15
BBIA0698E
Page 1437 of 2771
DTC P0453 EVAP CONTROL SYSTEM PRESSURE SENSOR
EC-363
< SERVICE INFORMATION >
C
D
E
F
G
H
I
J
K
L
MA
EC
N
P O
If DTC Confirmation Procedure has been previously conducted, always turn ignition switch OFF and wait at
least 10 seconds before conducting the next test.
TESTING CONDITION:
Always perform test at a temperature of 5°C (41°F) or more.
WITH CONSULT-II
1. Start engine and warm it up to normal operating temperature.
2. Turn ignition switch OFF and wait at least 10 seconds.
3. Turn ignition switch ON.
4. Select “DATA MONITOR” mode with CONSULT-II.
5. Make sure that “FUEL T/TMP SE” is more than 0°C (32°F).
6. Wait at least 10 seconds.
If 1st trip DTC is detected, go to EC-365, "
Diagnosis Procedure".
WITH GST
1. Start engine and warm it up to normal operating temperature.
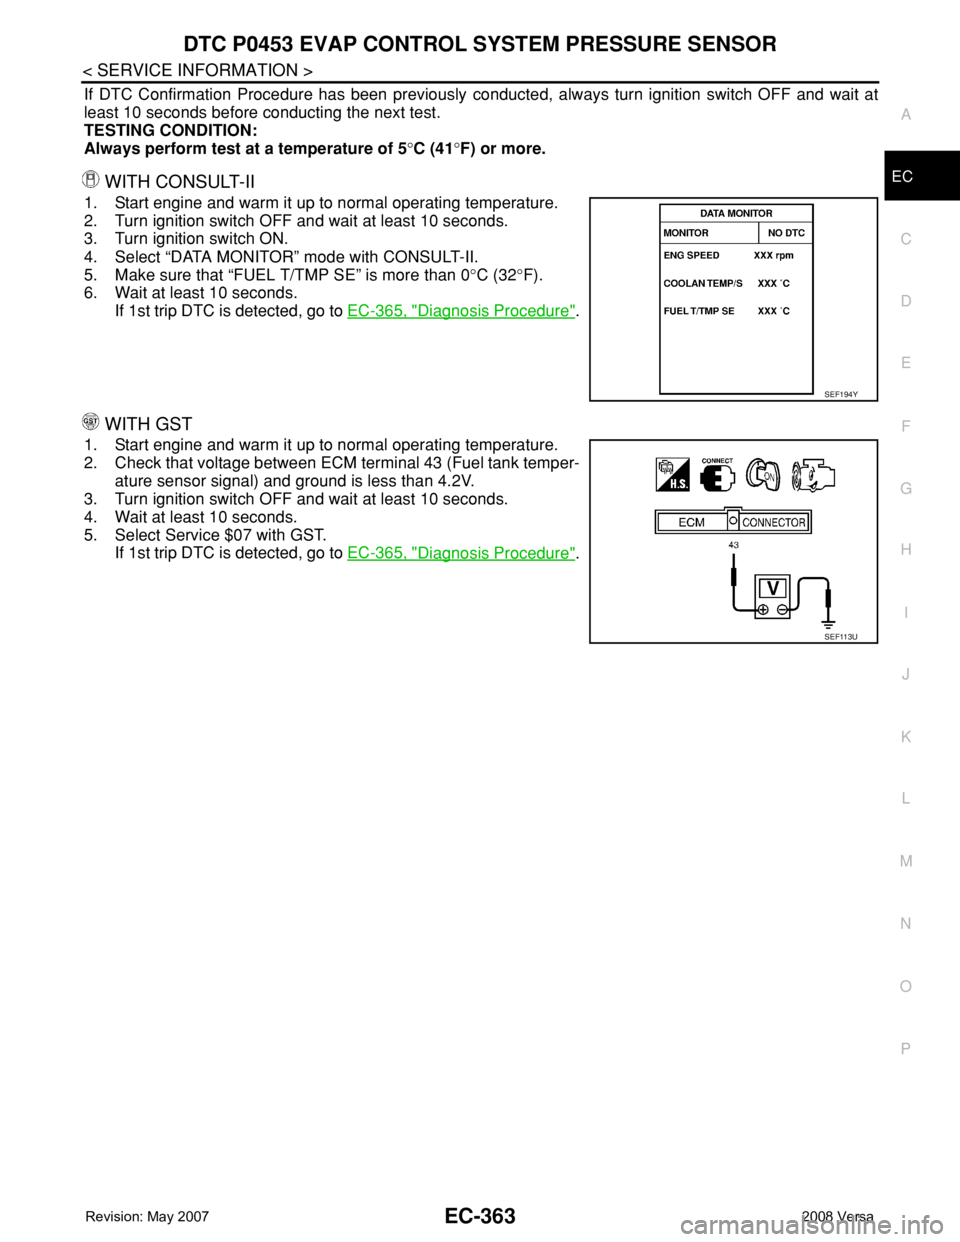
2. Check that voltage between ECM terminal 43 (Fuel tank temper-
ature sensor signal) and ground is less than 4.2V.
3. Turn ignition switch OFF and wait at least 10 seconds.
4. Wait at least 10 seconds.
5. Select Service $07 with GST.
If 1st trip DTC is detected, go to EC-365, "
Diagnosis Procedure".
SEF194Y
SEF113U
Page 1439 of 2771
DTC P0453 EVAP CONTROL SYSTEM PRESSURE SENSOR
EC-365
< SERVICE INFORMATION >
C
D
E
F
G
H
I
J
K
L
MA
EC
N
P O
Diagnosis ProcedureINFOID:0000000001702876
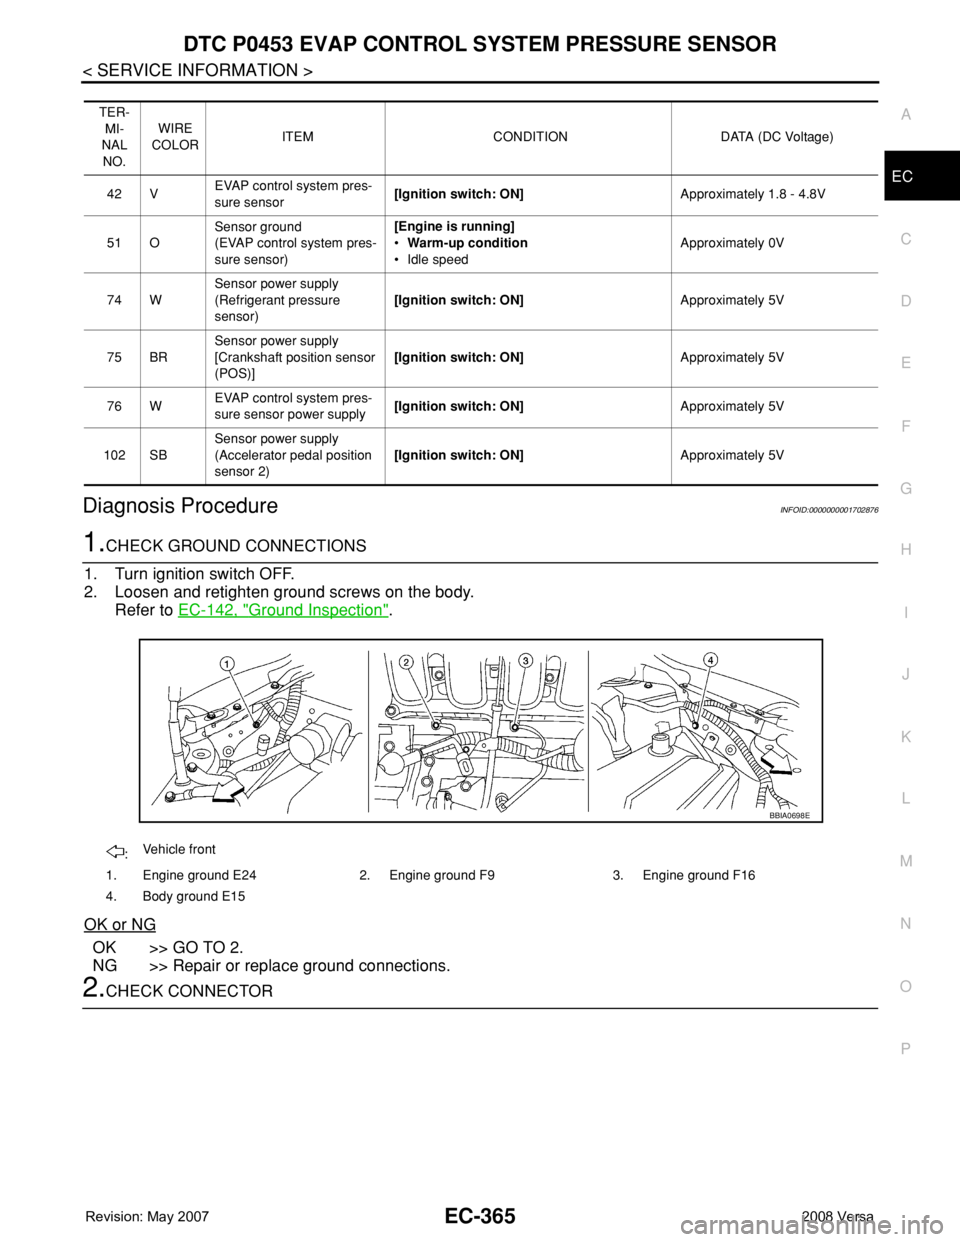
1.CHECK GROUND CONNECTIONS
1. Turn ignition switch OFF.
2. Loosen and retighten ground screws on the body.
Refer to EC-142, "
Ground Inspection".
OK or NG
OK >> GO TO 2.
NG >> Repair or replace ground connections.
2.CHECK CONNECTOR
TER-
MI-
NAL
NO.WIRE
COLORITEM CONDITION DATA (DC Voltage)
42 VEVAP control system pres-
sure sensor[Ignition switch: ON]Approximately 1.8 - 4.8V
51 OSensor ground
(EVAP control system pres-
sure sensor)[Engine is running]
•Warm-up condition
• Idle speedApproximately 0V
74 WSensor power supply
(Refrigerant pressure
sensor)[Ignition switch: ON]Approximately 5V
75 BRSensor power supply
[Crankshaft position sensor
(POS)][Ignition switch: ON]Approximately 5V
76 WEVAP control system pres-
sure sensor power supply[Ignition switch: ON]Approximately 5V
102 SBSensor power supply
(Accelerator pedal position
sensor 2)[Ignition switch: ON]Approximately 5V
:Vehicle front
1. Engine ground E24 2. Engine ground F9 3. Engine ground F16
4. Body ground E15
BBIA0698E
Page 1445 of 2771
DTC P0455 EVAP CONTROL SYSTEM
EC-371
< SERVICE INFORMATION >
C
D
E
F
G
H
I
J
K
L
MA
EC
N
P O
•Make sure that EVAP hose are connected to EVAP canister purge volume control solenoid valve
properly.
• If DTC Confirmation Procedure has been previously conducted, always turn ignition switch OFF and wait at
least 10 seconds before conducting the next test.
TESTING CONDITION:
•Perform “DTC WORK SUPPORT” when the fuel level is between 1/4 and 3/4 full, and vehicle is placed
on flat level surface.
•Open engine hood before conducting the following procedure.
WITH CONSULT-II
1. Tighten fuel filler cap securely until reteaching sound is heard.
2. Turn ignition switch ON.
3. Turn ignition switch OFF and wait at least 10 seconds.
4. Turn ignition switch ON and select “DATA MONITOR” mode with
CONSULT-II.
5. Make sure that the following conditions are met.
COOLAN TEMP/S: 0 - 70°C (32 - 158°F)
INT/A TEMP SE: 0 - 60°C (32 - 140°F)
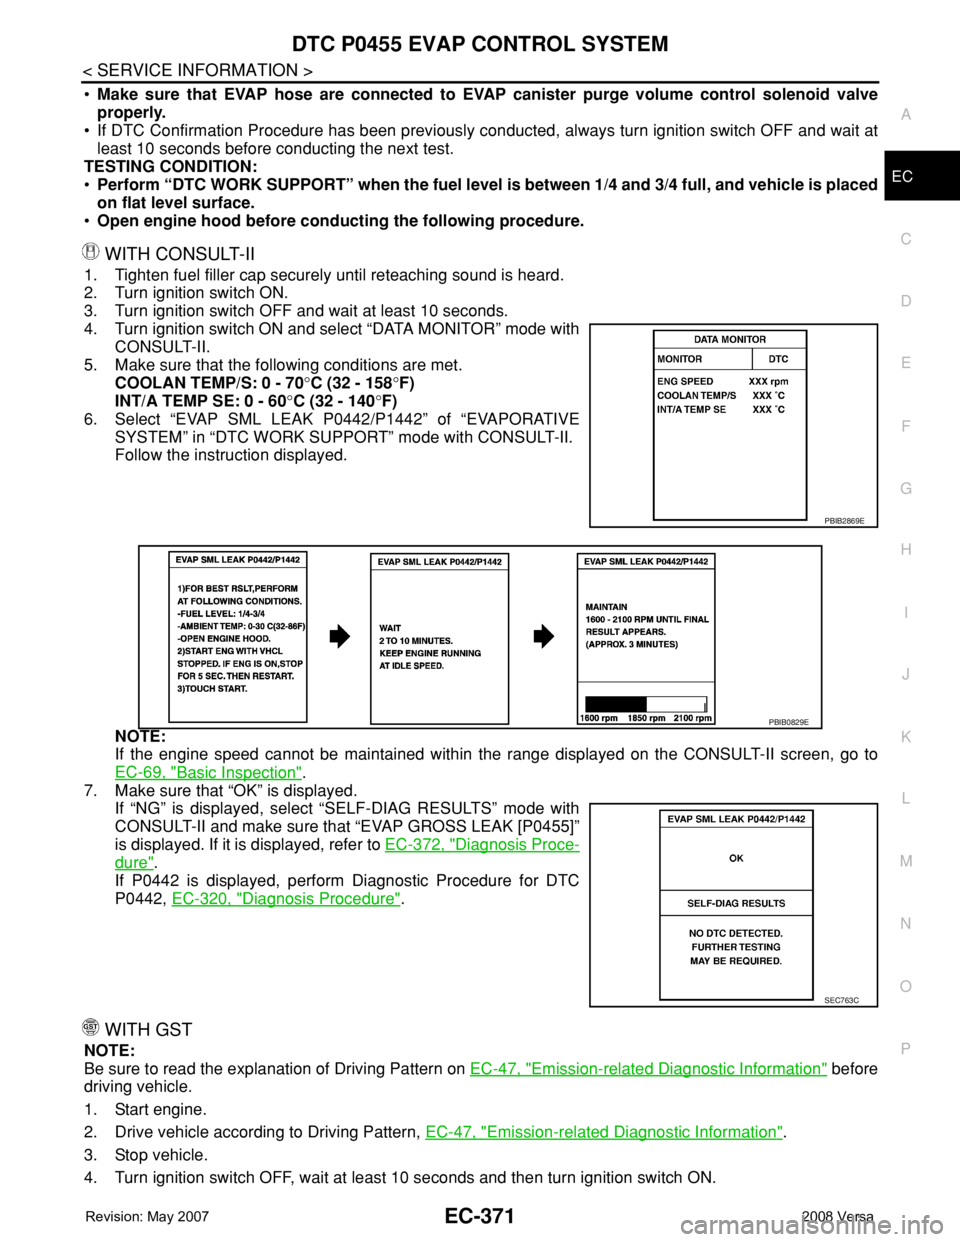
6. Select “EVAP SML LEAK P0442/P1442” of “EVAPORATIVE
SYSTEM” in “DTC WORK SUPPORT” mode with CONSULT-II.
Follow the instruction displayed.
NOTE:
If the engine speed cannot be maintained within the range displayed on the CONSULT-II screen, go to
EC-69, "
Basic Inspection".
7. Make sure that “OK” is displayed.
If “NG” is displayed, select “SELF-DIAG RESULTS” mode with
CONSULT-II and make sure that “EVAP GROSS LEAK [P0455]”
is displayed. If it is displayed, refer to EC-372, "
Diagnosis Proce-
dure".
If P0442 is displayed, perform Diagnostic Procedure for DTC
P0442, EC-320, "
Diagnosis Procedure".
WITH GST
NOTE:
Be sure to read the explanation of Driving Pattern on EC-47, "
Emission-related Diagnostic Information" before
driving vehicle.
1. Start engine.
2. Drive vehicle according to Driving Pattern, EC-47, "
Emission-related Diagnostic Information".
3. Stop vehicle.
4. Turn ignition switch OFF, wait at least 10 seconds and then turn ignition switch ON.
PBIB2869E
PBIB0829E
SEC763C
Page 1448 of 2771
EC-374
< SERVICE INFORMATION >
DTC P0455 EVAP CONTROL SYSTEM
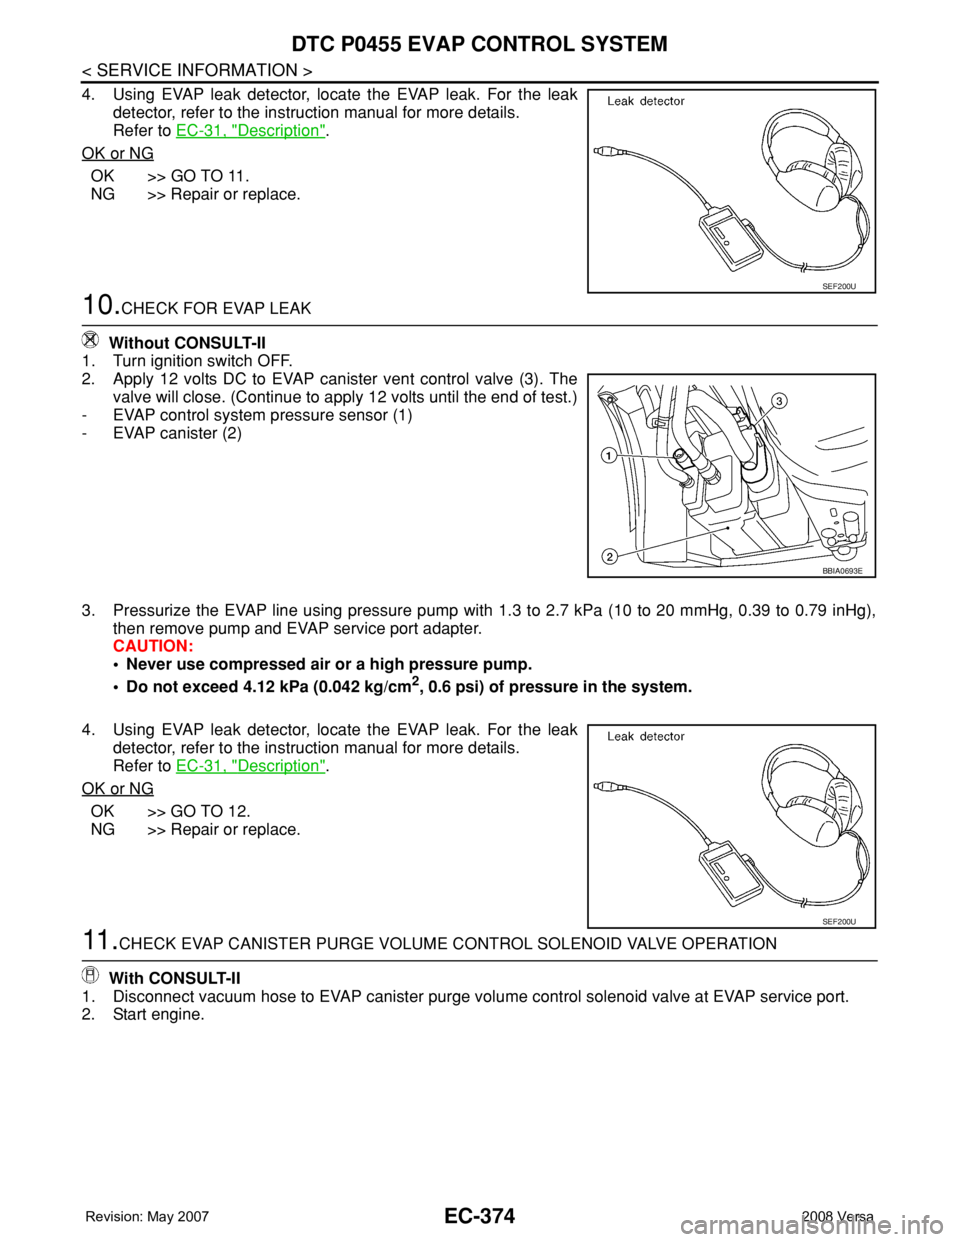
4. Using EVAP leak detector, locate the EVAP leak. For the leak
detector, refer to the instruction manual for more details.
Refer to EC-31, "
Description".
OK or NG
OK >> GO TO 11.
NG >> Repair or replace.
10.CHECK FOR EVAP LEAK
Without CONSULT-II
1. Turn ignition switch OFF.
2. Apply 12 volts DC to EVAP canister vent control valve (3). The
valve will close. (Continue to apply 12 volts until the end of test.)
- EVAP control system pressure sensor (1)
- EVAP canister (2)
3. Pressurize the EVAP line using pressure pump with 1.3 to 2.7 kPa (10 to 20 mmHg, 0.39 to 0.79 inHg),
then remove pump and EVAP service port adapter.
CAUTION:
• Never use compressed air or a high pressure pump.
• Do not exceed 4.12 kPa (0.042 kg/cm
2, 0.6 psi) of pressure in the system.
4. Using EVAP leak detector, locate the EVAP leak. For the leak
detector, refer to the instruction manual for more details.
Refer to EC-31, "
Description".
OK or NG
OK >> GO TO 12.
NG >> Repair or replace.
11 .CHECK EVAP CANISTER PURGE VOLUME CONTROL SOLENOID VALVE OPERATION
With CONSULT-II
1. Disconnect vacuum hose to EVAP canister purge volume control solenoid valve at EVAP service port.
2. Start engine.
SEF200U
BBIA0693E
SEF200U