2008 MERCEDES-BENZ SLK ROADSTER warning
[x] Cancel search: warningPage 74 of 273
Seat belts
711
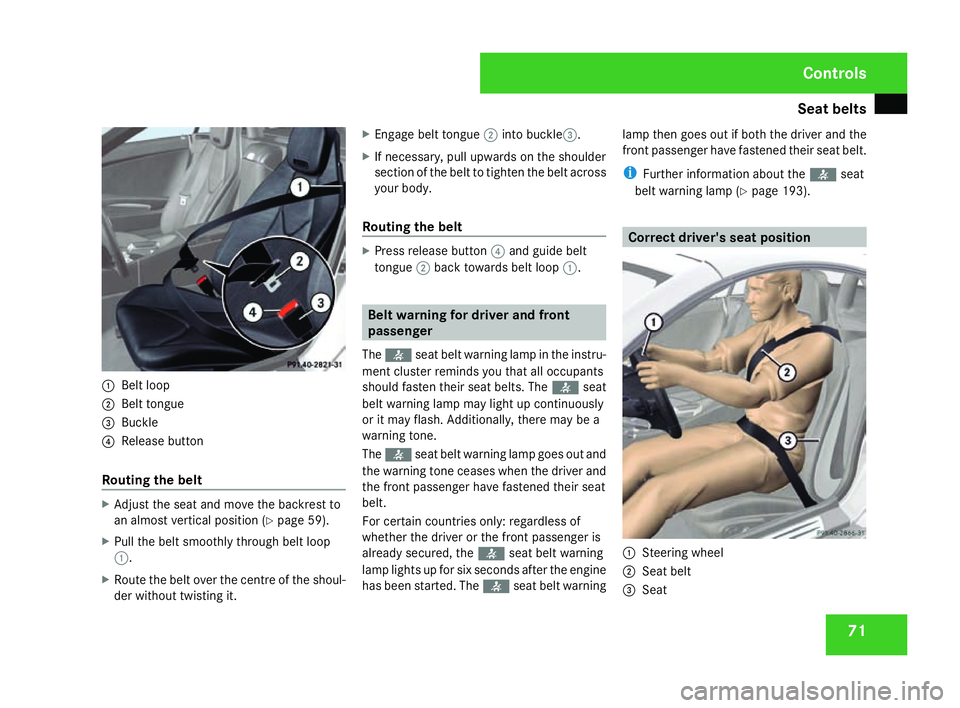
Belt loo p
2 Belt tongu e
3 Buckl e
4 Release butto n
Routing the belt X
Adjust the seat and move the backrest to
an almost vertical position (Y page 59).
X Pull the belt smoothly through belt loop
1 .
X Route the belt over the centre of the shoul-
der without twisting it . X
Engage belt tongue 2into buckle3 .
X If necessary, pull upwards on the shoulder
section of the belt to tighten the belt across
your body.
Routing the belt X
Press release button 4and guide belt
tongue 2back towards belt loop 1. Belt warning for driver and fron
t
passenge r
The < seat belt warning lamp in the instru-
ment cluster reminds you that all occupants
should fasten their seat belts. The
or it may flash. Additionally, there may be a
warning tone.
The < seat belt warning lamp goes out and
the warning tone ceases when the driver and
the front passenger have fastened their seat
belt.
For certain countries only: regardless of
whether the driver or the front passenger is
already secured, the
has been started. The
i
Further information about the
1
Steering wheel
2 Seat belt
3 Sea t Cont
rols
171_AKB; 3; 4, en-GB
vpfaff7,
2007-11-13T10:50:25+01:00 - Seite 71
Page 79 of 273
Light
s 76 Hazard warning lamps
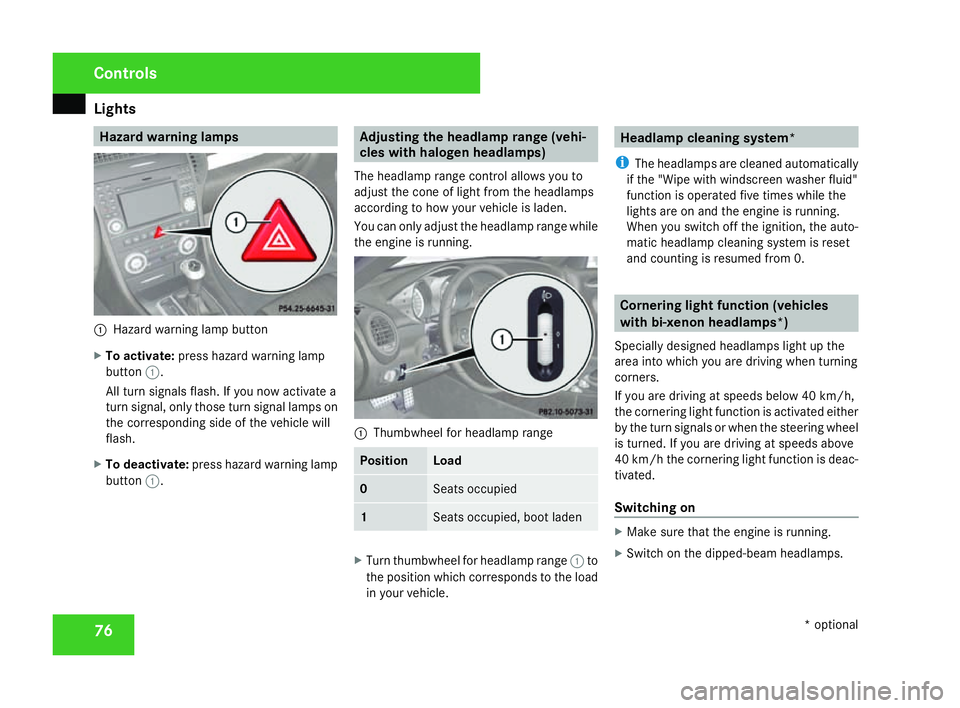
1
Hazard warning lamp button
X To activate :press hazard warning lamp
button 1.
All turn signals flash. If you now activate a
turn signal, only those turn signal lamps on
the corresponding side of the vehicle will
flash.
X To deactivate :press hazard warning lamp
button 1. Adjusting the headlamp range (vehi-
cles with halogen headlamps)
The headlamp range control allows you to
adjust the cone of light from the headlamps
according to how your vehicle is laden.
You can only adjust the headlamp range while
the engine is running. 1
Thumbwheel for headlamp range Position Load
0 Seats occupied
1 Seats occupied, boot lade
n X
Turn thumbwheel for headlamp range 1to
the position which corresponds to the load
in your vehicle. Headlamp cleaning system*
i The headlamps are cleaned automatically
if the "Wipe with windscreen washer fluid"
function is operated five times while the
lights are on and the engine is running.
When you switch off the ignition, the auto-
matic headlamp cleaning system is reset
and counting is resumed from 0. Cornering light function (vehicles
with bi-xenon headlamps*)
Specially designed headlamps light up the
area into which you are driving when turning
corners.
If you are driving at speeds below 40 km/h,
the cornering light function is activated either
by the turn signals or when the steering wheel
is turned. If you are driving at speeds above
40 km/h the cornering light function is deac-
tivated.
Switching on X
Make sure that the engine is running.
X Switch on the dipped-beam headlamps. Control
s
* optional
171_AKB; 3; 4, en-GB
vpfaff7,
2007-11-13T10:50:25+01:00 - Seite 76
Page 80 of 273
Light
s 77
X
Switch off the fog lights .
X Switch on the turn signal .
The cornering light on the same side as the
turn signal comes on, even if you turn the
steering wheel in the opposite direction
after indicating.
or
X Turn the steering wheel in the desired
direction .
When in a forwards gear: the cornering
lamp on the inside of the bend comes on.
When in reverse gear: the cornering light on
the outside of the bend comes on.
Switching off X
Switch off the turn signal .
i The cornering light is activated until you
turn the steering wheel back to the straight -
ahead position and the turn signal switches
off. The cornering light may remain lit for a
short time, but no more than three minutes.
It then goes out, even if the turn signal is
still switched on. Interior lighting
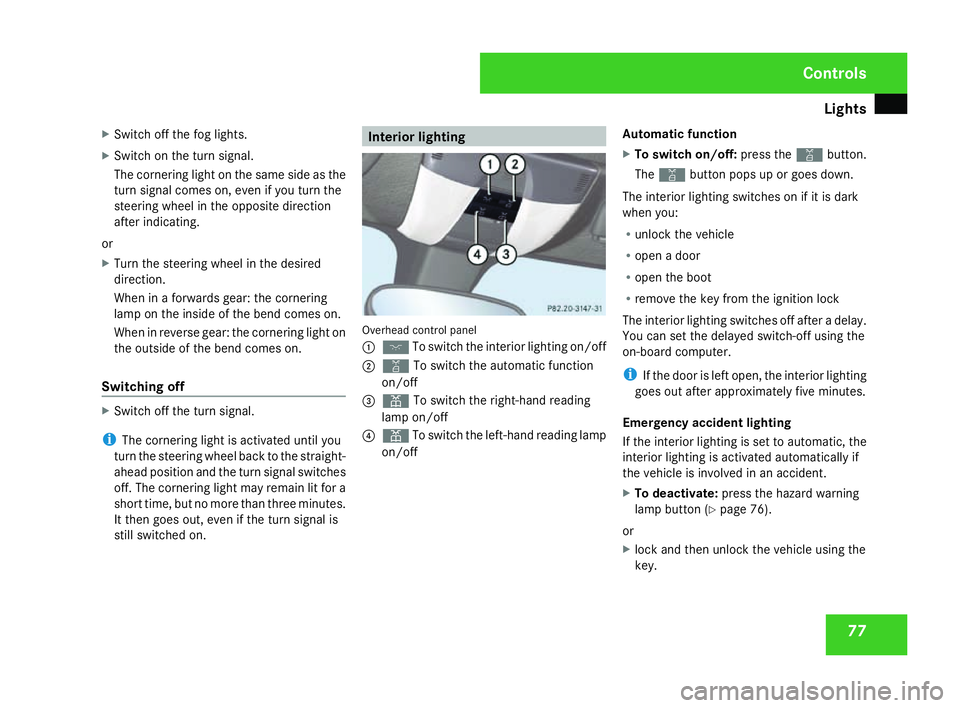
Overhead control panel
1
ð To switch the interior lighting on/of f
2 ¡ To switch the automatic function
on/of f
3 X To switch the right-hand reading
lamp on/of f
4 X To switch the left-hand reading lamp
on/of f Automatic function
X
To switch on/off: press the¡button.
The ¡ button pops up or goes down.
The interior lighting switches on if it is dark
when you:
R unlock the vehicl e
R open a door
R open the boot
R remove the key from the ignition lock
The interior lighting switches off after a delay.
You can set the delayed switch-off using the
on-board computer .
i If the door is left open, the interior lighting
goes out after approximately five minutes.
Emergency accident lighting
If the interior lighting is set to automatic, the
interior lighting is activated automatically if
the vehicle is involved in an accident.
X To deactivate: press the hazard warning
lamp button (Y page 76).
or
X lock and then unlock the vehicle using the
key. Controls
171_AKB; 3; 4, en-GB
vpfaff7,
2007-11-13T10:50:25+01:00 - Seite 77
Page 93 of 273
Instrument cluste
r90 Instrument cluster
Points to remember
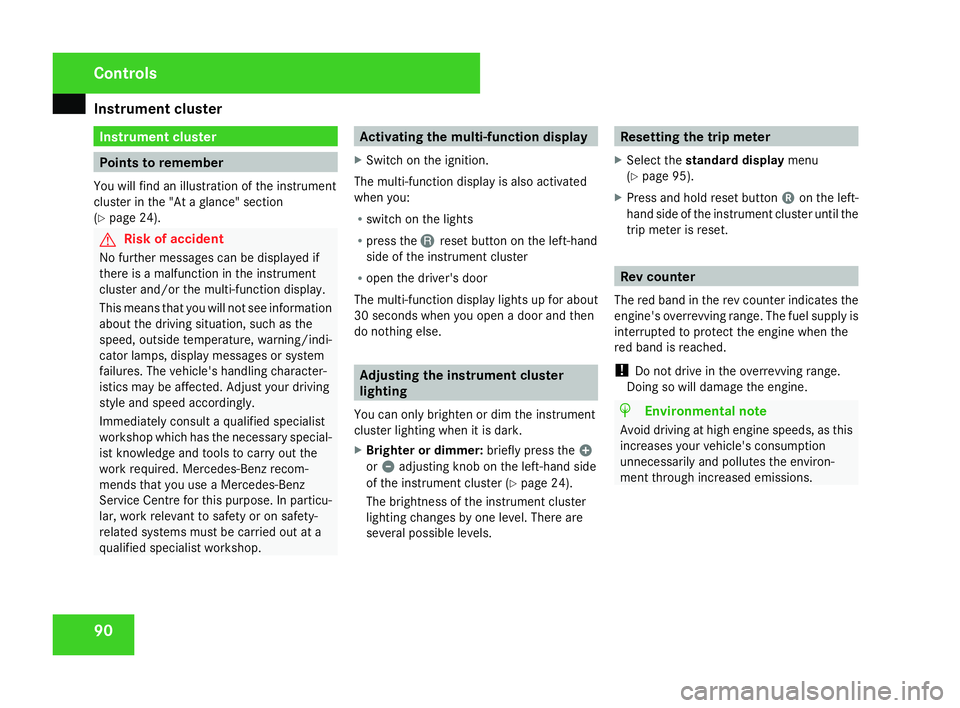
You will find an illustration of the instrumen t
cluster in the "At a glance" section
( Y page 24). G
Risk of accident
No further messages can be displayed if
there is a malfunction in the instrument
cluster and/or the multi-function display .
This means that you will not see information
about the driving situation, such as the
speed, outside temperature, warning/indi-
cator lamps, display messages or system
failures. The vehicle's handling character-
istics may be affected. Adjust your driving
style and speed accordingly.
Immediately consult a qualified specialist
workshop which has the necessary special-
ist knowledge and tools to carry out the
work required. Mercedes-Benz recom-
mends that you use a Mercedes-Benz
Service Centre for this purpose. In particu-
lar, work relevant to safety or on safety-
related systems must be carried out at a
qualified specialist workshop. Activating the multi-function displa
y
X Switch on the ignition.
The multi-function display is also activate d
when you:
R switch on the lights
R press the Jreset button on the left-hand
side of the instrument cluster
R open the driver's door
The multi-function display lights up for about
30 seconds when you open a door and then
do nothing else. Adjusting the instrument cluster
lighting
You can only brighten or dim the instrument
cluster lighting when it is dark.
X Brighter or dimmer: briefly press the,
or . adjusting knob on the left-hand side
of the instrument cluster (Y page 24).
The brightness of the instrument cluster
lighting changes by one level. There are
several possible levels. Resetting the trip meter
X Select the standard display menu
( Y page 95).
X Press and hold reset button 4on the left-
hand side of the instrument cluster until the
trip meter is reset. Rev counter
The red band in the rev counter indicates the
engine's overrevving range. The fuel supply is
interrupted to protect the engine when the
red band is reached.
! Do not drive in the overrevving range.
Doing so will damage the engine. H
Environmental not
e
Avoid driving at high engine speeds, as thi s
increases your vehicle's consumption
unnecessarily and pollutes the environ -
ment through increased emissions. Controls
171_AKB; 3; 4, en-GB
vpfaff7,
2007-11-13T10:50:25+01:00 - Seite 90
Page 98 of 273
On-board computer
95Function
1 Standard display
menu
( Y page 95)
R Total distance recorder
(Y page 95)
R Tyre pressure loss warning sys-
tem* (Y page 158 )
R Coolant temperature (Y page 96)
R Digital speedometer or outside tem-
perature (Y page 96)
R ASSYST PLUS service displa y
( Y page 165 )
R Engine oil level* (Y page 151 ) 2
AMG
* menu (Y page 96) 3
Audio*/DVD*
menu(Y page 98)
R Radio station (Y page 99)
R Audio drive or media**
(Y page 99)
R DVD video* (Y page 99) Function
4
Navigation
* menu (NAV)
( Y page 100 ) 5
Message memory
menu10
(fault and
warning messages) (Y page 100 ) 6 Settings
menu(Y page 101 )
R Resetting to factory setting s
( Y page 101 )
R Selecting a submenu (Y page 101 ) 7 Trip computer
menu(Y page 107 )
R Consumption statistics
(Y page 107 )
R Range (Y page 107 ) 8
Telephon
e* menu (Y page 108 ) This is what the displays look like when you
scroll through the menus.
The generic terms in the table overview are
intended to help you navigate through the
menus. The terms themselves are not alway
s
displayed in the multi-function display. Depending on the audio system fitted, the
Audio*,
Navigation* and Telephone*
menus are slightly different. The examples
given in this Owner's Manual apply to vehicles
equipped with COMAND APS*. Standard display menu
i Menu overview: see (Y page 94).
Use the buttons on the multi-function steer -
ing wheel.
X Press the èor· button to select the
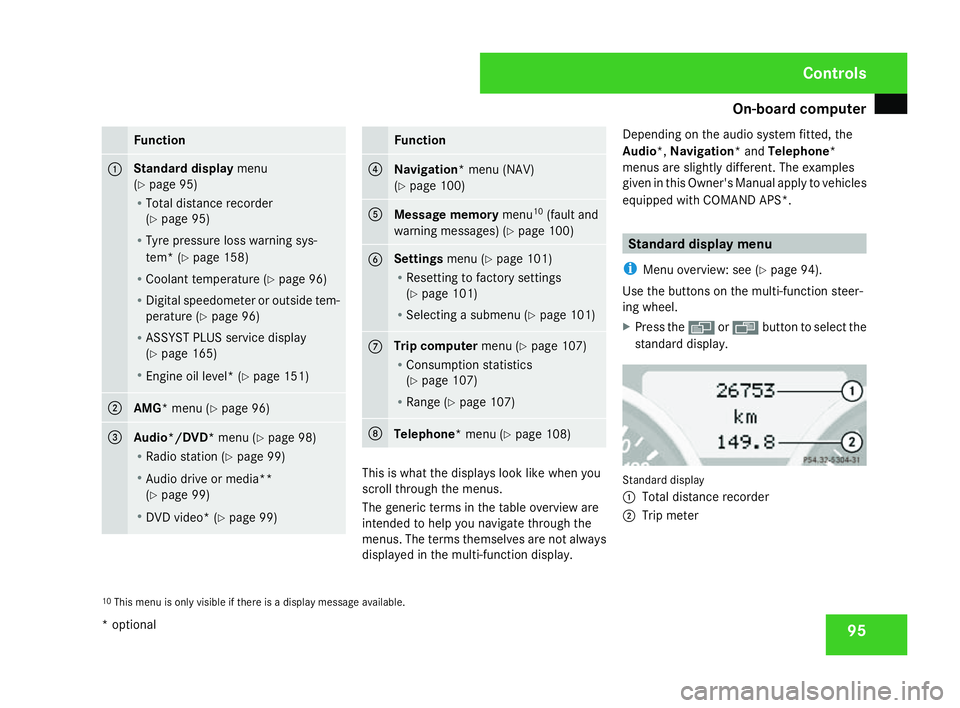
standard display. Standard display
1
Total distance recorder
2 Trip meter
10 This menu is only visible if there is a display message available. Controls
* optional
171_AKB; 3; 4, en-GB
vpfaff7,
2007-11-13T10:50:25+01:00 - Seite 95
Page 99 of 273
On-board computer
96
You can select the following functions in the
Basic display
menu by pressing the jor
k button:
R tyre pressure loss warning sys-
tem* (Y page 158 )
R coolant temperature
R digital speedometer or outside tempera-
ture
R ASSYST PLUS service displa y
( Y page 165 )
R engine oil level* (Y page 151 )
Displaying the coolant temperatur eX
Press the jork button to select the
coolant temperature. Under normal driving conditions, with the cor-
rect anti-corrosion and antifreeze additive concentration, the reading may rise to
120 †.
At high outside temperatures and when driv-
ing uphill, the coolant temperature may rise
to the end of the scale.
Displaying the digital speedometer or
outside temperatur
e If you have selected the digital speedometer
for the Status line
(Y page 103), you can
switch the display to the outside temperature
here 11
.
X Press the jork button to select the
digital speedometer or the outside temper -
ature. Example illustration showing the digital speedom
-
eter displayed AMG* menu
These functions are only available on AMG
vehicles.
i Menu overview: see (Y page 94).
Use the buttons on the multi-function steer -
ing wheel.
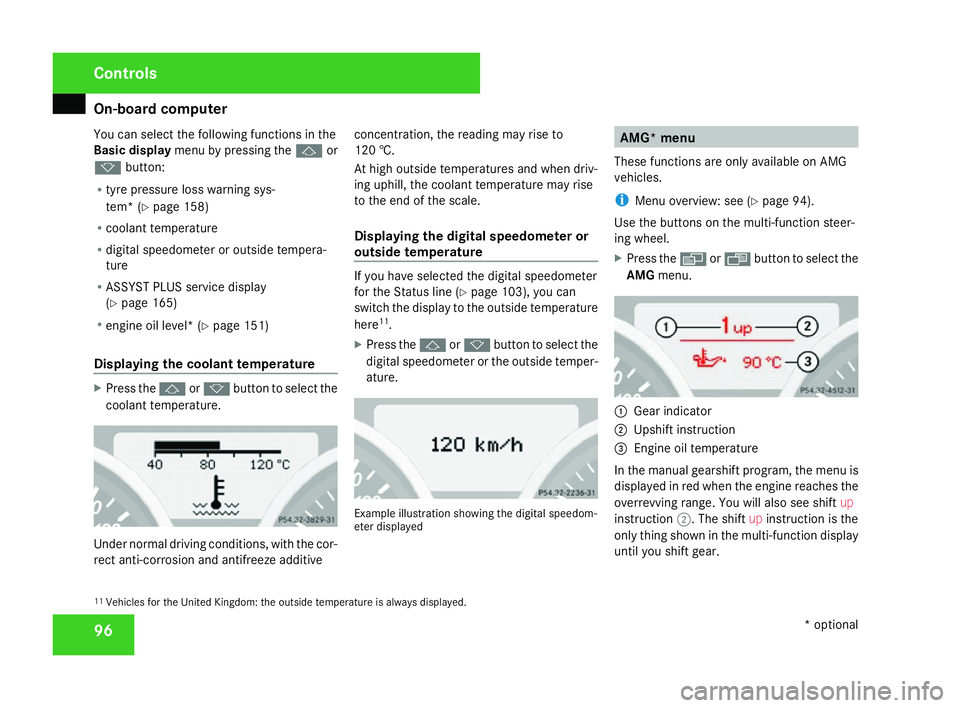
X Press the èor· button to select the
AMG menu. 1
Gear indicator
2 Upshift instruction
3 Engine oil temperatur e
In the manual gearshift program, the menu is
displayed in red when the engine reaches the
overrevving range. You will also see shift up
instruction 2. The shift upinstruction is the
only thing shown in the multi-function display
until you shift gear.
11 Vehicles for the United Kingdom: the outside temperature is always displayed. Control
s
* optional
171_AKB; 3; 4, en-GB
vpfaff7,
2007-11-13T10:50:25+01:00 - Seite 96
Page 103 of 273
On-board computer
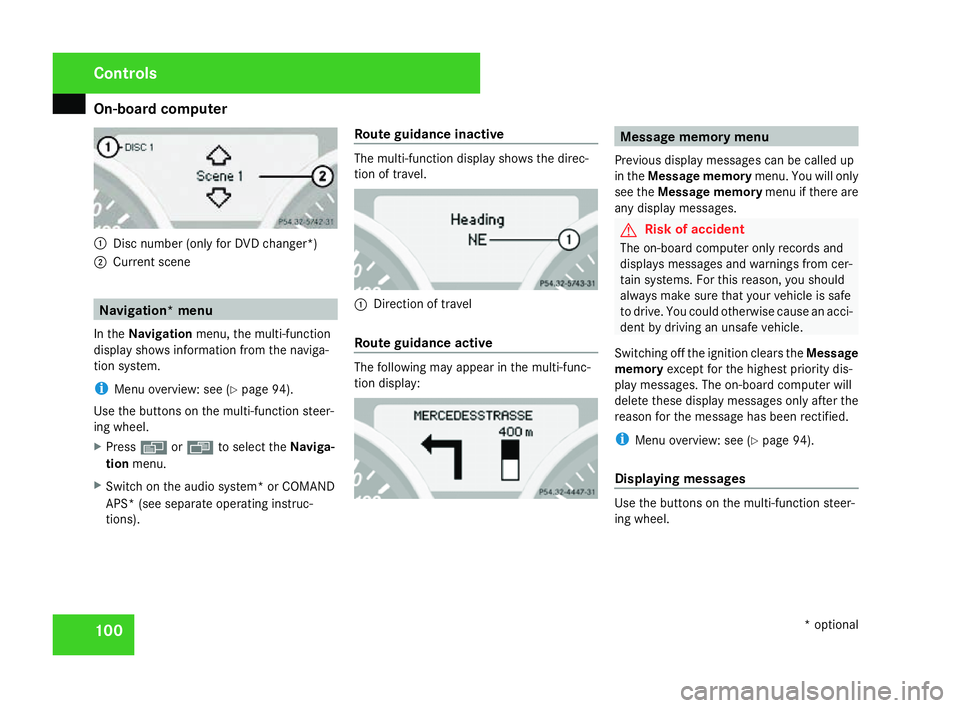
1001
Disc number (only for DVD changer* )
2 Current scene Navigation* menu
In the Navigation menu, the multi-functio n
display shows information from the naviga-
tion system.
i Menu overview: see (Y page 94).
Use the buttons on the multi-function steer-
ing wheel.
X Press èorÿ to select the Naviga-
tio nmenu.
X Switch on the audio system* or COMAND
APS* (see separate operating instruc-
tions) . Route guidance inactiv
e The multi-function display shows the direc-
tion of travel.
1
Direction of trave l
Route guidance activ e The following may appear in the multi-func-
tion display: Message memory menu
Previous display messages can be called up
in the Message memory menu. You will only
see the Message memory menu if there are
any display messages. G
Risk of acciden
t
The on-board computer only records and
displays messages and warnings from cer-
tain systems. For this reason, you should
always make sure that your vehicle is safe
to drive. You could otherwise cause an acci-
dent by driving an unsafe vehicle.
Switching off the ignition clears the Message
memory except for the highest priority dis-
play messages. The on-board computer will
delete these display messages only after the
reason for the message has been rectified.
i Menu overview: see (Y page 94).
Displaying messages Use the buttons on the multi-function steer-
ing wheel.Controls
* optional
171_AKB; 3; 4, en-GB
vpfaff7 , 2007-11-13T10:50:25+01:00 - Seite 100
Page 117 of 273
Driving sys
tems 11
4
Storing the current speed You can use the cruise control lever to limit
the speed to any speed above 30 km/hw
hile
the engine is running.
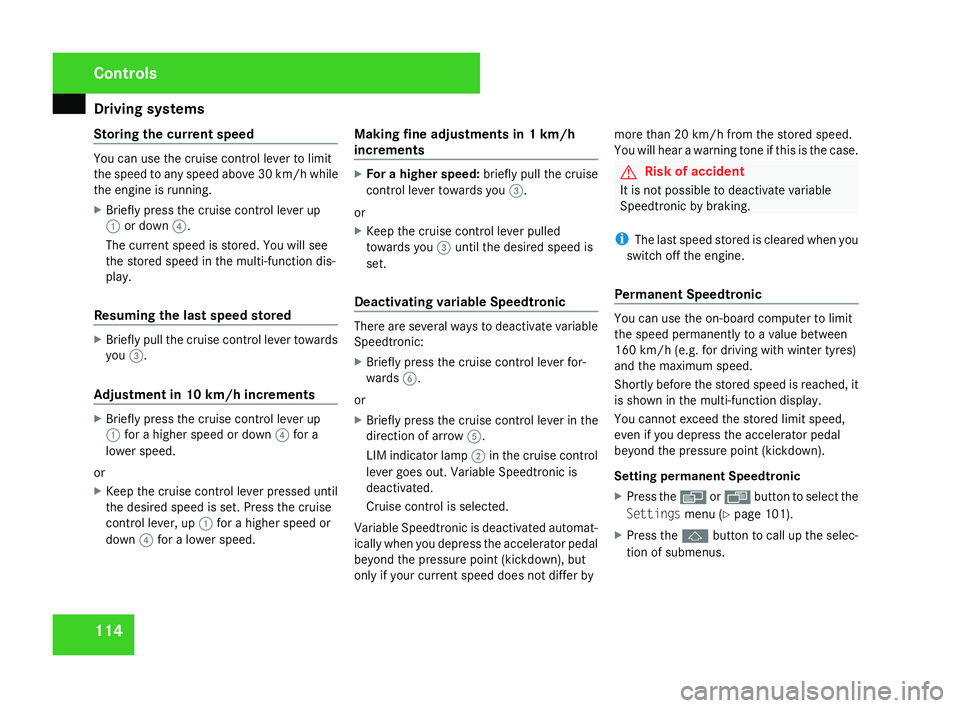
X Briefly press the cruise control lever up
1 or down 4.
The current speed is stored. You will see
the stored speed in the multi-function dis-
play.
Resuming the last speed stored X
Briefly pull the cruise control lever towards
you 3.
Adjustment in 10 km/h increment sX
Briefly press the cruise control lever up
1 for a higher speed or down 4for a
lower speed.
or
X Keep the cruise control lever pressed until
the desired speed is set. Press the cruise
control lever, up 1for a higher speed or
down 4for a lower speed. Making fine adjustments in 1 km/h
increments X
For a higher speed: briefly pull the cruise
control lever towards you 3.
or
X Keep the cruise control lever pulled
towards you 3until the desired speed is
set .
Deactivating variable Speedtronic There are several ways to deactivate variable
Speedtronic:
X
Briefly press the cruise control lever for-
wards 6.
or
X Briefly press the cruise control lever in the
direction of arrow 5.
LIM indicator lamp 2in the cruise control
lever goes out. Variable Speedtronic is
deactivated.
Cruise control is selected.
Variable Speedtronic is deactivated automat-
ically when you depress the accelerator pedal
beyond the pressure point (kickdown), but
only if your current speed does not differ by more than 20 km/h from the stored speed.
You will hear a warning tone if this is the case. G
Risk of accident
It is not possible to deactivate variabl e
Speedtronic by braking.
i The last speed stored is cleared when you
switch off the engine.
Permanent Speedtronic You can use the on-board computer to limit
the speed permanently to a value between
160 km/h (e.g. for driving with winter tyres)
and the maximum speed.
Shortly before the stored speed is reached, it
is shown in the multi-function display .
You cannot exceed the stored limit speed,
even if you depress the accelerator pedal
beyond the pressure point (kickdown).
Setting permanent Speedtronic
X Press the èor· button to select the
Settings menu(Y page 101).
X Press the jbutton to call up the selec-
tion of submenus. Controls
171_AKB; 3; 4, en-GB
vpfaff7,
2007-11-13T10:50:25+01:00 - Seite 114