2008 MERCEDES-BENZ SLK ROADSTER phone
[x] Cancel search: phonePage 146 of 273
Features
143
switched on for approximately ten minute
s
(run-on time). If you make a call during this
time, the mobile phone will be switched off
approximately ten minutes after you have
ended the call.
Run-on time :
You can change the run-on time by makin g
an additional phone book entry on the SI M
card. For the name, enter "Idletime" and for
the number, enter a figure between "1" and
"30" (minutes). If you have not entered a
number or have entered a different num -
ber, the run-on time of ten minutes will still
apply.
For information on how to create a phone
book entry, refer to the mobile phone oper-
ating instructions.
Own number sending:
The hands-free system does not recognise
whether own number sending is enabled or
disabled in the mobile phone. The phone
number is therefore always sent by default.
By creating an additional phone book entry
on the SIM card, you can switch the own
number sending function on and off. For
the name, enter "CALLID" and for the num-
ber, enter a "0" or a "1". Entering "0" will
prevent the telephone number from being
sent; entering "1" will allow it to be sent .For information on how to create a phone
book entry, refer to the mobile phone oper-
ating instructions.
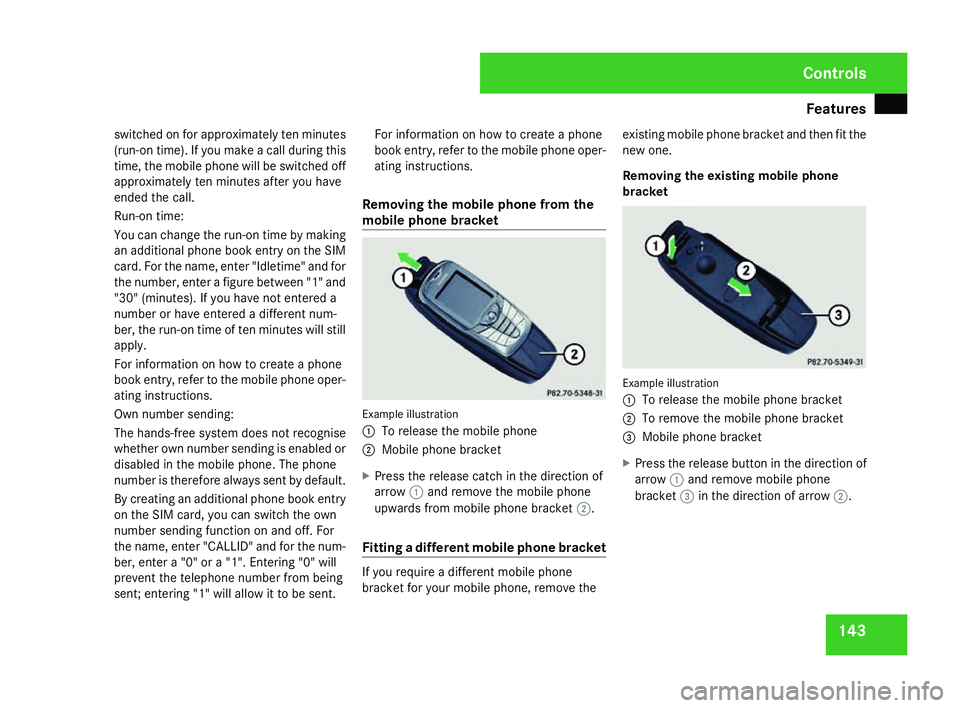
Removing the mobile phone from the
mobile phone bracket Example illustration
1
To release the mobile phone
2 Mobile phone bracket
X Press the release catch in the direction of
arrow 1and remove the mobile phon e
upwards from mobile phone bracket 2.
Fitting a different mobile phone bracket If you require a different mobile phon
e
bracket for your mobile phone, remove the existing mobile phone bracket and then fit the
new one.
Removing the existing mobile phone
bracket
Example illustration
1 To release the mobile phone bracket
2 To remove the mobile phone bracket
3 Mobile phone bracket
X Press the release button in the direction of
arrow 1and remove mobile phon e
bracket 3in the direction of arrow 2. Cont
rols
171_AKB; 3; 4, en-GB
vpfaff7,
2007-11-13T10:50:25+01:00 - Seite 143
Page 147 of 273
Features
144
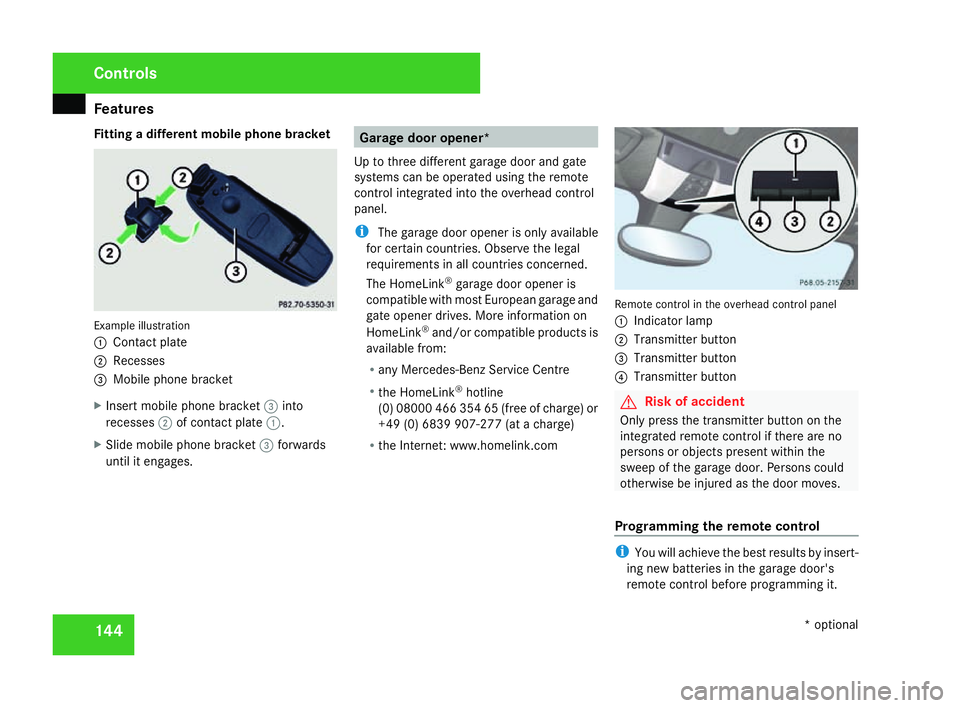
Fitting a different mobile phone bracket
Example illustration
1
Contact plate
2 Recesses
3 Mobile phone bracket
X Insert mobile phone bracket 3into
recesses 2of contact plate 1.
X Slide mobile phone bracket 3forward s
until it engages. Garage door opener
*
Up to three different garage door and gate
systems can be operated using the remote
control integrated into the overhead control
panel .
i The garage door opener is only available
for certain countries. Observe the legal
requirements in all countries concerned.
The HomeLink ®
garage door opener is
compatible with most European garage and
gate opener drives. More information on
HomeLink ®
and/or compatible products is
available from:
R any Mercedes-Benz Service Centre
R the HomeLink ®
hotline
(0) 08000 466 354 65 (free of charge) or
+49 (0) 6839 907-277 (at a charge)
R the Internet: www.homelink.co m Remote control in the overhead control panel
1
Indicator lamp
2 Transmitter button
3 Transmitter button
4 Transmitter button G
Risk of acciden
t
Only press the transmitter button on the
integrated remote control if there are no
persons or objects present within the
sweep of the garage door. Persons could
otherwise be injured as the door moves.
Programming the remote control i
You will achieve the best results by insert -
ing new batteries in the garage door's
remote control before programming it. Controls
* optional
171_AKB; 3; 4, en-GB
vpfaff7,
2007-11-13T10:50:25+01:00 - Seite 144
Page 155 of 273
Engine compartment
152
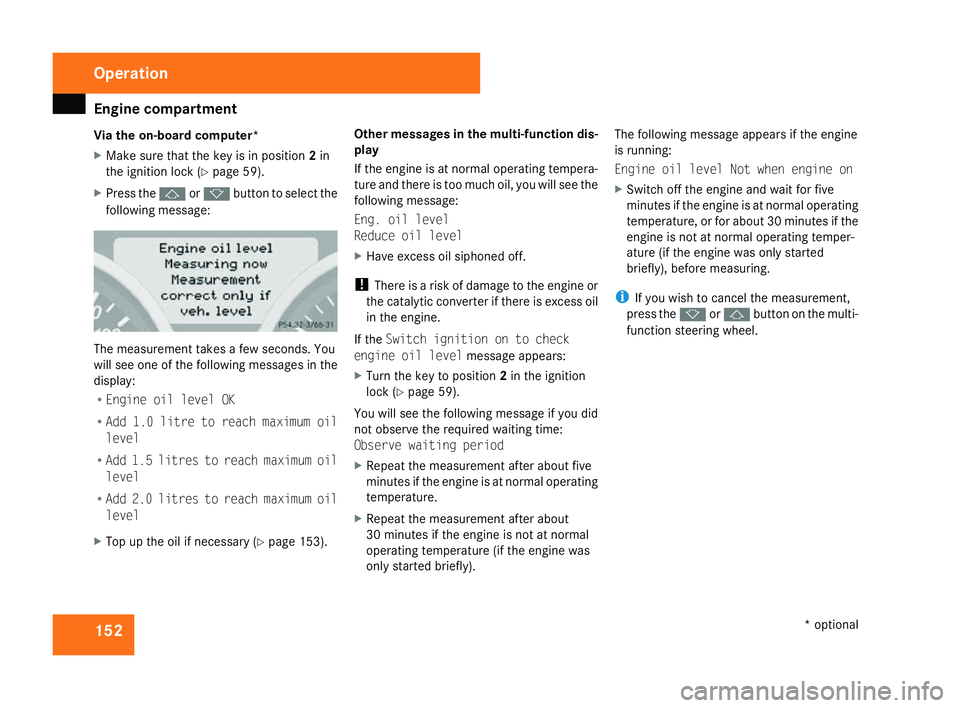
Via the on-board computer*
X
Make sure that the key is in position 2in
the ignition lock (Y page 59).
X Press the jork button to select the
following message: The measurement takes a few seconds. You
will see one of the following messages in the
display:
R Engine oil level OK
R Add 1.0 litre to reach maximum oil
level
R Add 1.5 litres to reach maximum oil
level
R Add 2.0 litres to reach maximum oil
level
X Top up the oil if necessary (Y page 153). Other messages in the multi-function dis-
play
If the engine is at normal operating tempera-
ture and there is too much oil, you will see the
following message:
Eng. oil level
Reduce oil level
X
Have excess oil siphoned off.
! There is a risk of damage to the engine or
the catalytic converter if there is excess oil
in the engine.
If the Switch ignition on to chec k
engine oil level message appears:
X Turn the key to position 2in the ignition
lock (Y page 59).
You will see the following message if you did
not observe the required waiting time:
Observe waiting period
X Repeat the measurement after about fiv e
minutes if the engine is at normal operating
temperature.
X Repeat the measurement after about
30 minutes if the engine is not at normal
operating temperature (if the engine was
only started briefly). The following message appears if the engin
e
is running:
Engine oil level Not when engine on
X Switch off the engine and wait for fiv e
minutes if the engine is at normal operating
temperature, or for about 30 minutes if the
engine is not at normal operating temper-
ature (if the engine was only started
briefly), before measuring.
i If you wish to cancel the measurement,
press the korj button on the multi-
function steering wheel. Operation
* optional
171_AKB; 3; 4, en-GB
vpfaff7
, 2007-11-13T10:50:25+01:00 - Seite 152
Page 170 of 273
Car
e 167
!
It is preferable that you use car washes
that do not use high-pressure cleaning.
With car washes that use high water pres-
sures, there is a danger that water may leak
into the vehicle.
! Do not use a touch-free automatic car
wash that uses chemical agents to wash
the vehicle.
If the vehicle is very dirty, prewash it before
cleaning it in an automatic car wash.
Vehicles with DAB radio only 25
:
X Remove the radio/telephone aerial.
! If you do not remove the radio/telephon e
aerial, the aerial or the vehicle may be dam-
aged by the automatic car wash.
! Make sure that the automatic car wash is
suitable for the size of the vehicle. Fold in
the exterior mirrors before the vehicle is
washed. There is otherwise a risk of dam-
age to the exterior mirrors.
! Make sure the side windows are com-
pletely closed, the ventilation/heater
blower is fully turned off and the wind -
screen wiper switch is set to 0. The rai n sensor may otherwise be activated, for
instance, leading to inadvertent wiper
sweeps being triggered. This could cause
damage to the vehicle.
After using an automatic car wash, wipe off
wax from the windscreen and the wiper
blades. This will prevent smears and reduce
wiping noises caused by residue on the wind-
screen.
High-pressure cleaners G
Risk of accident
Do not use high-pressure cleaners with cir-
cular-jet nozzles (dirt grinders) to clean
your vehicle or - especially - the tyres. Yo u
could otherwise damage the tyres and
cause an accident.
! Observe the instructions issued by the
equipment manufacturer concerning the
distance to be maintained between the
nozzle of the high-pressure cleaner and the
vehicle (at least 30 cm).
Move the high-pressure cleaner nozzle
around when cleaning your vehicle .
Do not aim directly at any of the following: R
Tyres
R Door joint
R Electrical components
R Battery
R Connectors
R Bulbs
R Seals
Damaged seals or electrical components
can lead to failures or leaks .
Cleaning the wiper blades and the out -
side of the windscreen G
Risk of injury
Turn the key to position 0in the ignition
lock before cleaning the windscreen or the
wiper blades. There is otherwise a risk of
the windscreen wipers being set in motion
and causing injury.
25 Only in certain countries. Operation
171_AKB; 3; 4, en-GB
vpfaff7,
2007-11-13T10:50:25+01:00 - Seite 167
Page 171 of 273
Car
e 168
X
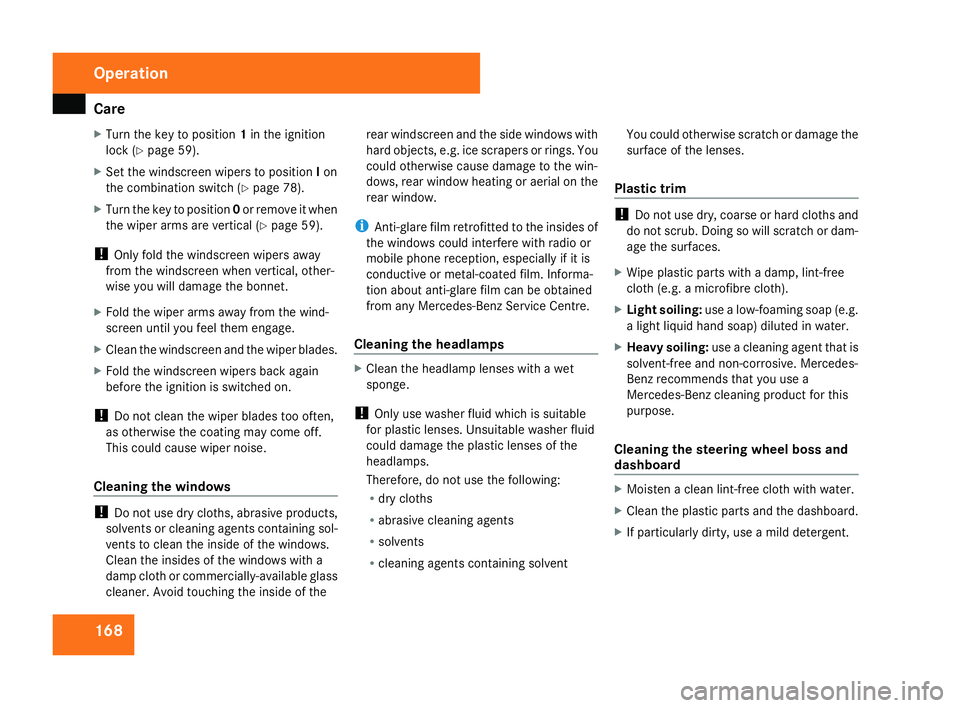
Turn the key to position 1in the ignition
lock (Y page 59).
X Set the windscreen wipers to position Ion
the combination switch (Y page 78).
X Turn the key to position 0or remove it when
the wiper arms are vertical (Y page 59).
! Only fold the windscreen wipers away
from the windscreen when vertical, other -
wise you will damage the bonnet .
X Fold the wiper arms away from the wind-
screen until you feel them engage.
X Clean the windscreen and the wiper blades .
X Fold the windscreen wipers back agai n
before the ignition is switched on.
! Do not clean the wiper blades too often,
as otherwise the coating may come off.
This could cause wiper noise.
Cleaning the windows !
Do not use dry cloths, abrasive products,
solvents or cleaning agents containing sol-
vents to clean the inside of the windows.
Clean the insides of the windows with a
damp cloth or commercially-available glass
cleaner. Avoid touching the inside of the rear windscreen and the side windows with
hard objects, e.g. ice scrapers or rings. You
could otherwise cause damage to the win-
dows, rear window heating or aerial on the
rear window.
i Anti-glare film retrofitted to the insides of
the windows could interfere with radio or
mobile phone reception, especially if it is
conductive or metal-coated film. Informa -
tion about anti-glare film can be obtained
from any Mercedes-Benz Service Centre.
Cleaning the headlamps X
Clean the headlamp lenses with a wet
sponge.
! Only use washer fluid which is suitable
for plastic lenses. Unsuitable washer fluid
could damage the plastic lenses of th e
headlamps.
Therefore, do not use the following:
R dry cloths
R abrasive cleaning agents
R solvents
R cleaning agents containing solvent You could otherwise scratch or damage the
surface of the lenses
.
Plastic trim !
Do not use dry, coarse or hard cloths and
do not scrub. Doing so will scratch or dam-
age the surfaces.
X Wipe plastic parts with a damp, lint-free
cloth (e.g. a microfibre cloth).
X Light soiling: use a low-foaming soap (e.g .
a light liquid hand soap) diluted in water.
X Heavy soiling: use a cleaning agent that is
solvent-free and non-corrosive. Mercedes-
Benz recommends that you use a
Mercedes-Benz cleaning product for this
purpose.
Cleaning the steering wheel boss and
dashboard X
Moisten a clean lint-free cloth with water.
X Clean the plastic parts and the dashboard.
X If particularly dirty, use a mild detergent. Operation
171_AKB; 3; 4, en-GB
vpfaff7,
2007-11-13T10:50:25+01:00 - Seite 168
Page 190 of 273
Display
messages 18
7 Display messages Possible cause/consequence Possible solution
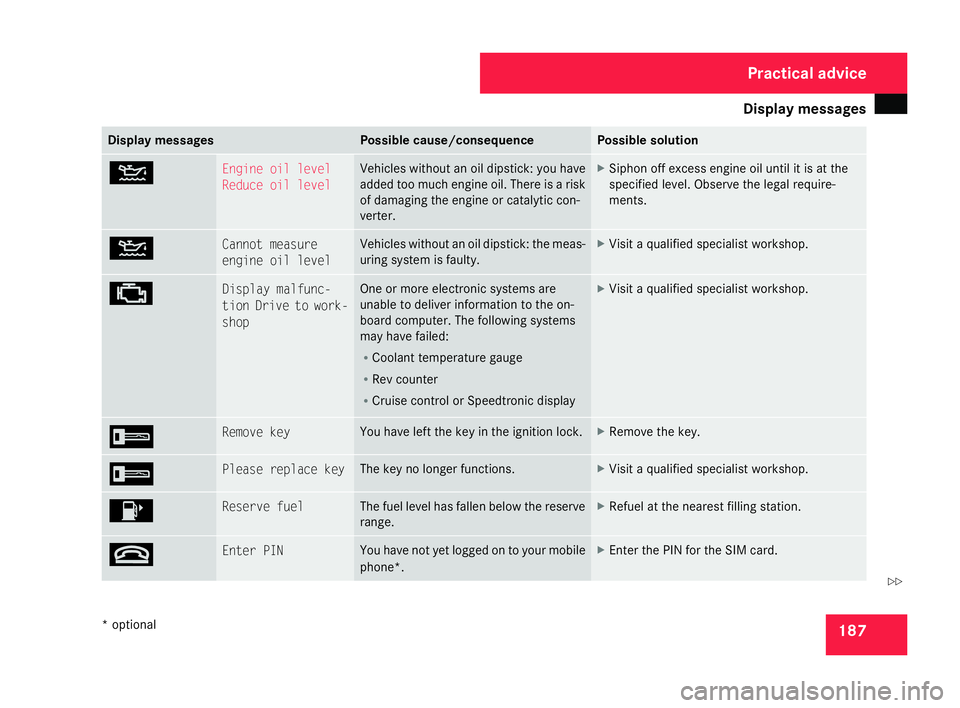
N Engine oil level
Reduce oil level Vehicles without an oil dipstick: you have
added too much engine oil. There is a risk
of damaging the engine or catalytic con-
verter. X
Siphon off excess engine oil until it is at the
specified level. Observe the legal require-
ments. N Cannot measure
engine oil level Vehicles without an oil dipstick: the meas-
uring system is faulty. X
Visit a qualified specialist workshop. ± Display malfunc-
tion Drive to work-
shop One or more electronic systems are
unable to deliver information to the on-
board computer. The following systems
may have failed:
R
Coolant temperature gauge
R Rev counter
R Cruise control or Speedtronic display X
Visit a qualified specialist workshop. I Remove key You have left the key in the ignition lock. X
Remove the key. I Please replace key The key no longer functions. X
Visit a qualified specialist workshop. 4 Reserve fuel The fuel level has fallen below the reserve
range. X
Refuel at the nearest filling station .t Enter PIN You have not yet logged on to your mobile
phone*. X
Enter the PIN for the SIM card. Practical advice
* optional
171_AKB; 3; 4, en-G
B
vpfaff7, 2007-11-13T10:50:25+01:00 - Seite 187 Z
Page 191 of 273
Display
messages 18
8 Display messages Possible cause/consequence Possible solution
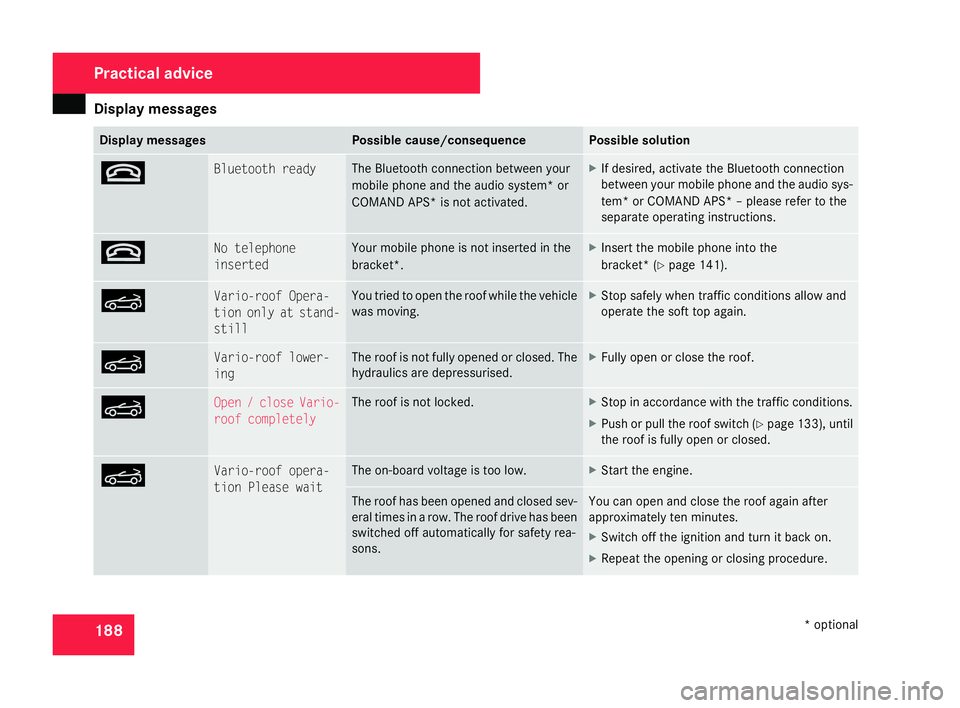
t Bluetooth ready The Bluetooth connection between your
mobile phone and the audio system* or
COMAND APS* is not activated. X
If desired, activate the Bluetooth connection
between your mobile phone and the audio sys-
tem* or COMAND APS* – please refer to the
separate operating instructions. t No telephone
inserted Your mobile phone is not inserted in the
bracket*. X
Insert the mobile phone into the
bracket* (Y page 141). K Vario-roof Opera-
tion only at stand-
still You tried to open the roof while the vehicle
was moving. X
Stop safely when traffic conditions allow and
operate the soft top again. K Vario-roof lower-
ing The roof is not fully opened or closed. The
hydraulics are depressurised. X
Fully open or close the roof .K Open / close Vario-
roof completely The roof is not locked. X
Stop in accordance with the traffic conditions .
X Push or pull the roof switch (Y page 133), until
the roof is fully open or closed. K Vario-roof opera-
tion Please wait The on-board voltage is too low. X
Start the engine. The roof has been opened and closed sev
-
eral times in a row. The roof drive has been
switched off automatically for safety rea-
sons. You can open and close the roof again after
approximately ten minutes.
X
Switch off the ignition and turn it back on.
X Repeat the opening or closing procedure .Practical advice
* optional
171_AKB; 3; 4, en-GB
vpfaff7,
2007-11-13T10:50:25+01:00 - Seite 188
Page 195 of 273
Troubleshooting
19
2 Problem Possible cause/consequence Suggested solutions
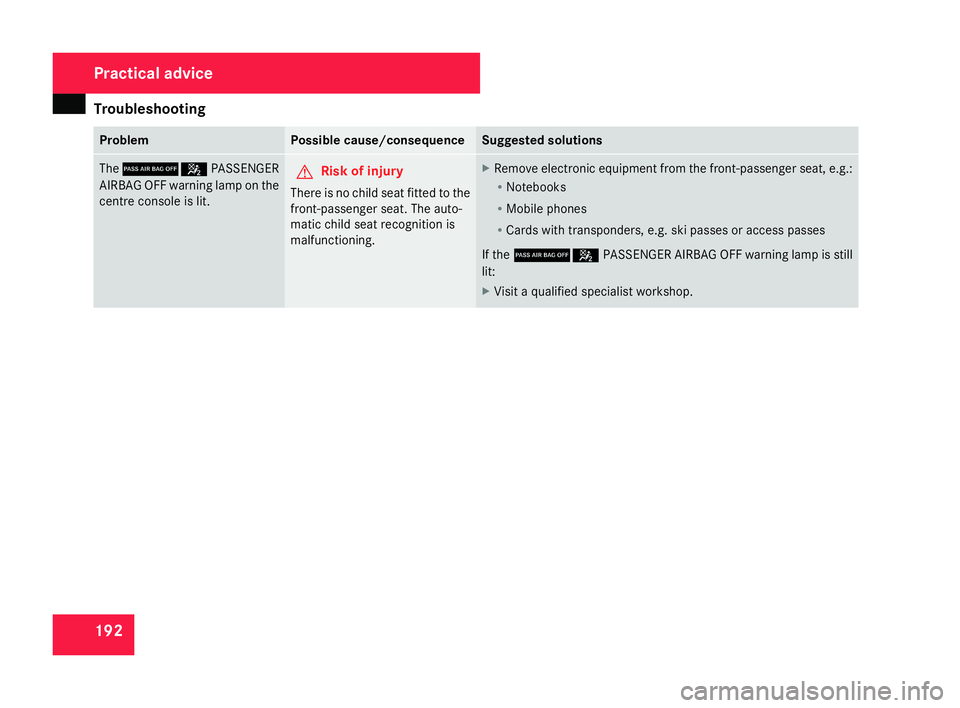
The
75 PASSENGER
AIRBAG OFF warning lamp on the
centre console is lit. G
Risk of injury
There is no child seat fitted to the
front-passenger seat. The auto-
matic child seat recognition is
malfunctioning . X
Remove electronic equipment from the front-passenger seat, e.g. :
R Notebooks
R Mobile phones
R Cards with transponders, e.g. ski passes or access passes
If the 75 PASSENGER AIRBAG OFF warning lamp is still
lit :
X Visit a qualified specialist workshop. Practical advice
171_AKB; 3; 4, en-GB
vpfaff7,
2007-11-13T10:50:25+01:00 - Seite 192