2008 MERCEDES-BENZ SL ROADSTER reset
[x] Cancel search: resetPage 118 of 317
On-boar
dcomputer 1151
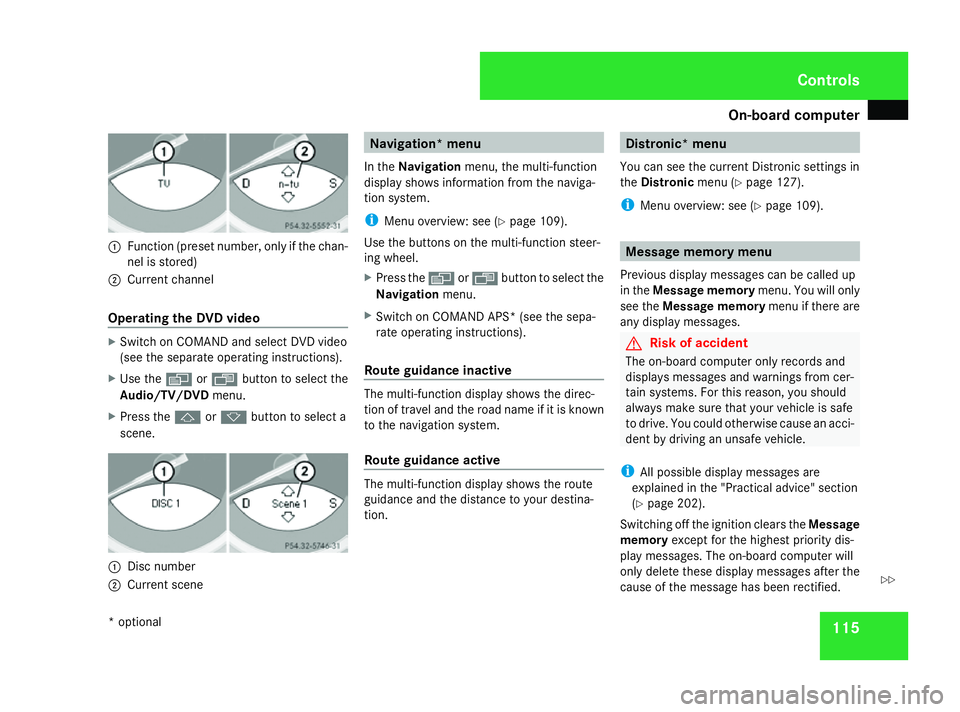
Function (preset number, only if the chan-
nel is stored)
2 Current channel
Operating the DVD video X
Switc honC OMAND and select DVD video
(see the separate operating instructions).
X Use the èor· button to select the
Audio/TV/DVD menu.
X Press the jork button to select a
scene. 1
Disc number
2 Current scene Navigation* menu
In the Navigation menu, the multi-function
display shows information from the naviga-
tion system.
i Menu overview: see (Y page 109).
Use the button sonthe multi-function steer-
ing wheel.
X Press the èorÿ button to select the
Navigation menu.
X Switc honC OMAND APS* (see the sepa-
rate operating instructions).
Route guidance inactive The multi-function display shows the direc-
tion of travel and the road name if it is known
to the navigation system.
Route guidance active
The multi-function display shows the route
guidance and the distanc
etoyour destina-
tion. Distronic* menu
You can see the curren tDistronic settings in
the Distronic menu (Ypage 127).
i Menu overview: see (Y page 109). Message memorym
enu
Previous display messages can be called up
in the Message memory menu. You will only
see the Message memory menu if there are
any display messages. G
Risk of accident
The on-board computer only records and
display smessages and warnings from cer-
tain systems. For this reason, you should
alway smake sure that your vehicle is safe
to drive. You could otherwise cause an acci-
dent by driving an unsafe vehicle.
i All possible display messages are
explained in the "Practical advice" section
(Y page 202).
Switching off the ignition clears the Message
memory except for the highest priority dis-
play messages. The on-board computer will
only delete these display messages after the
cause of the message has been rectified. Controls
*o ptional
230_AKB; 5; 4, en-GB
bjanott,
Version: 2.9.6 2008-04-08T15:09:54+02:00-Seite 115 ZDateiname: 6515_3089_02_buchblock.pdf; preflight
Page 119 of 317
On-boar
dcomputer 116
i
Menu overview: see (Y page 109).
Displaying messages Use the buttons on the multi-function steer-
ing wheel.
X Press the èor· buttonrepeatedly
until either the original menu or the Mes-
sage memory menu appears.
If the Message memory menu does not
appear, ther eare no display messages.
If ther eare messages, the following mes-
sage may appear in the multi-function dis-
play, for example: 2messages.
X Use the jork buttontos croll
through the display messages. Settings menu
There are two function sintheSettings
menu. You can use the To reset: Press
reset button for 3seconds function to
restore most settings to factory settings. You
can also use the submenus here to make indi-
vidual settings for your vehicle.
i Menu overview: see (Y page 109).
Use the buttons on the multi-function steer-
ing wheel.
Resetting to factor ysettings For safety reasons
,not all function sare reset:
permanen tSpeedtronic can only be set in the
Vehicle submenu. The Headlampmode
function in the Lightingsubmenu is only
reset if the vehicle is stationary.
X Press the èor· buttontoselect the
Settings menu.
X Press and hold the reset butto nonthe
instrument cluster for approximately three
seconds.
Ap rompt appears in the multi-function dis-
play asking you to press the reset button
again to confirm. X
Press the reset butto nagain.
The function sofmost submenus are
restored to factory settings.
or
X If you want to retain the settings, do not
press the reset butto nasecon dtime.
The Settings menu appears again after
approximately 5seconds.
X Press the èor· buttontos elect a
differen tmenu.
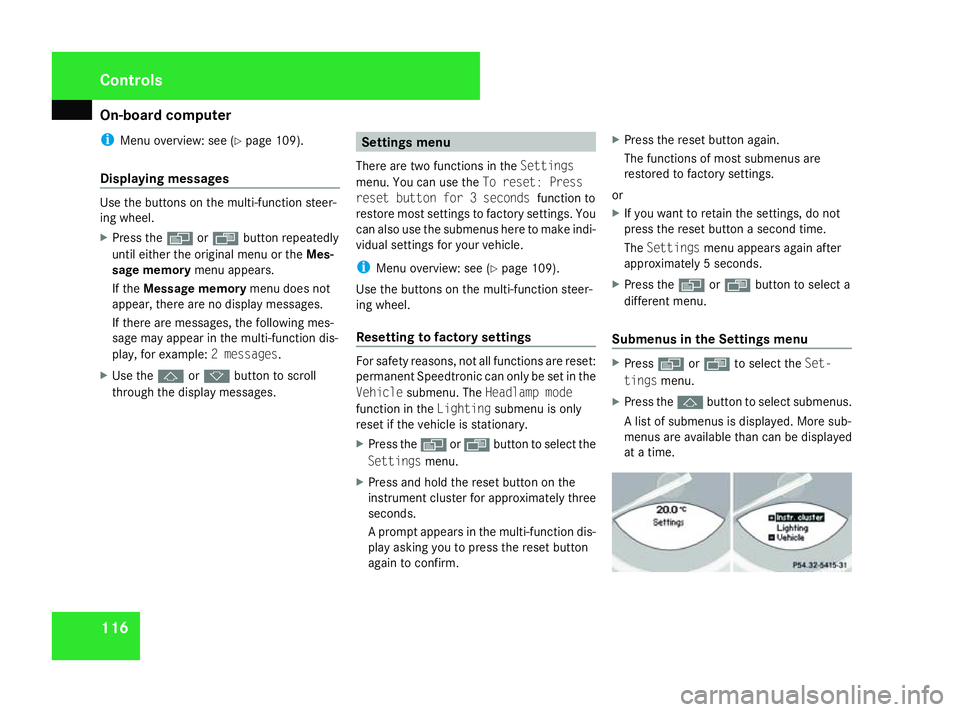
Submenus in the Settings menu X
Press èor· to select the Set-
tings menu.
X Press the jbuttontos elect submenus.
Al ist of submenus is displayed. More sub-
menus are available than can be displayed
at at ime. Controls
230_AKB
;5;4,en-GB
bjanott, Version:2.9.6
2008-04-08T15:09:54+02:0
0-Seite 116 Dateiname: 6515_3089_02_buchblock.pdf; preflight
Page 125 of 317
On-boar
dcomputer 122
X
Press æorç to activate or deacti-
vate Fold in mirrors when locking .
X Press the j,èorÿ buttonto
select adifferen tdisplay. Trip computer menu
You can use the Trip computermenu to call
up or reset statistical data for your vehicle.
i You can select KilometresorMiles as
the unit of measuremen tfor distance
(Y page 117).
i Menu overview: see (Y page 109).
Use the buttons on the multi-function steer-
ing wheel.
Consumption statistics from start The values refer to the start of the journey.
X Press èor· to select From
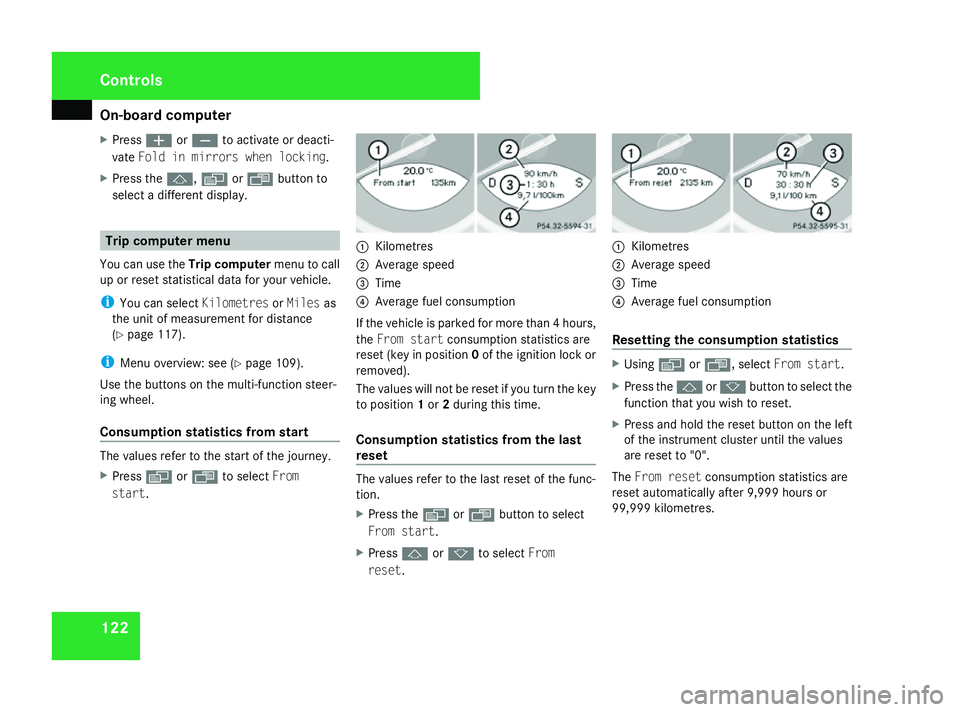
start. 1
Kilometres
2 Average speed
3 Time
4 Average fuel consumption
If the vehicle is parked for more than 4hours,
the From start consumption statistic sare
reset (key in position 0of the ignition lock or
removed).
The values will not be reset if you turn the key
to position 1or 2during this time.
Consumption statistics from the last
reset The values refer to the last reset of the func-
tion.
X
Press the èor· buttontos elect
From start.
X Press jork to select From
reset. 1
Kilometres
2 Average speed
3 Time
4 Average fuel consumption
Resetting the consumption statistics X
Using èor·,s electFrom start.
X Press the jork buttontoselect the
function that you wish to reset.
X Press and hold the reset butto nonthe left
of the instrument cluster until the values
are reset to "0".
The From reset consumption statistic sare
reset automatically after 9,99 9hours or
99,999 kilometres. Controls
230_AKB
;5;4,en-GB
bjanott, Version:2.9.6
2008-04-08T15:09:54+02:0
0-Seite 122 Dateiname: 6515_3089_02_buchblock.pdf; preflight
Page 132 of 317
Driving sys
tems 1291
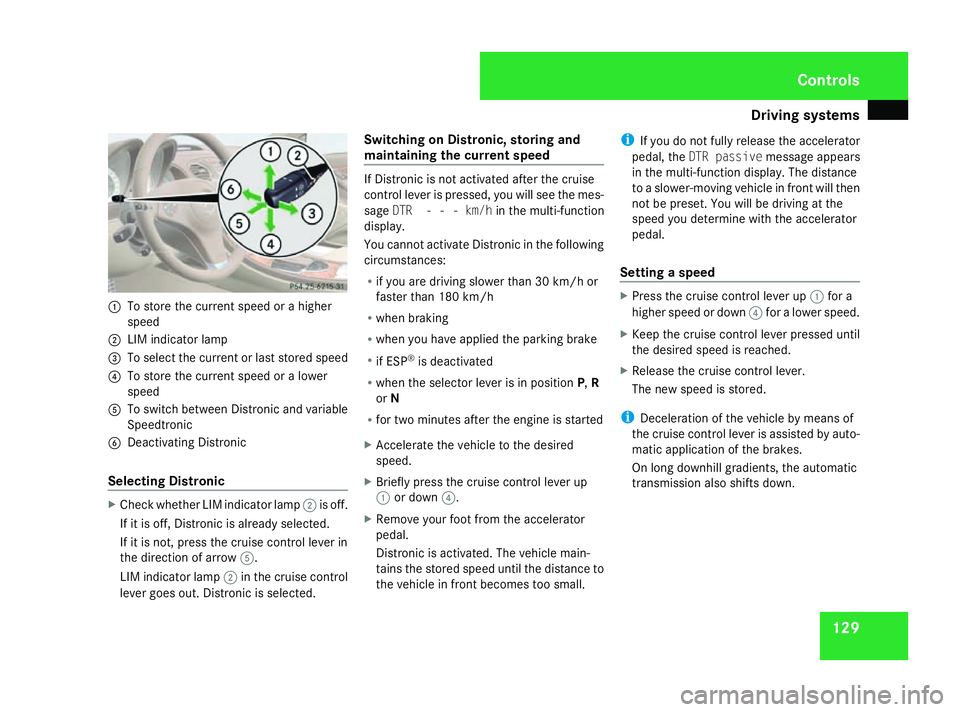
To store the current spee dorahigher
speed
2 LIM indicator lamp
3 To select the current or last store dspeed
4 To store the current spee doralower
speed
5 To switc hbetween Distronicand variable
Speedtronic
6 Deactivatin gDistronic
Sele ctingD istronic X
Check whether LIM indicator lamp 2is off.
If it is off, Distroni cisa lready selected.
If it is not, pres sthe cruis econtro llever in
the direction of arrow 5.
LIM indicator lamp 2in the cruis econtrol
leve rgoeso ut.D istroni ciss elec ted. Switching on
Distronic,storingand
maintainin gthe current speed If Distroni
cisn ot activated after the cruise
contro llever is pressed, youw ills ee the mes-
sage DTR- --km/h in the multi-function
displa y.
Yo uc anno tactivat eDistroni cinthe following
circumstances:
R ifyo ua redrivin gslowe rtha n3 0km/ hor
faster than 180 km/h
R when braking
R when yo uhavea pplied the parking brake
R if ESP ®
is deactivated
R when the selector lever is in position P,R
or N
R for two minutes afte rthe engine is started
X Accelerate the vehicle to the desired
speed.
X Briefly press the cruise control lever up
1 or down 4.
X Remove your foot from the accelerator
pedal.
Distronic is activated .The vehicle main-
tains the store dspeed until the distance to
the vehicle in front becomes too small. i
If yo udon ot fully release the accelerator
pedal ,the DTR passive messageappears
in the multi-function display. The distance
to as lower-moving vehicle in front will then
not be preset. You will be driving at the
speed yo udetermine with the accelerator
pedal.
Setting aspeed X
Pres sthe cruise control lever up 1for a
higher speed or down 4for alower speed.
X Kee pthe cruise control lever presse duntil
the desire dspeed is reached.
X Release the cruise control lever.
The new speed is stored.
i Deceleration of the vehicle by means of
the cruise control lever is assiste dbyauto-
mati capplicatio nofthe brakes.
On long downhil lgradients, the automatic
transmission also shifts down. Controls
230_AKB; 5; 4, en-GB
bjanott,
Version: 2.9.6
2008-04-08T15:09:54+02:00
-Seite 129 ZDateiname: 6515_3089_02_buchblock.pdf; preflight
Page 189 of 317
Tyre
sand wheels 186tyres is se
tcorrectly for the operating con-
ditions concerned.
X Als oo bser ve the note sinthe sectio non
tyr ep ressures (Y page 184). G
Ris
kofa ccident
Th et yrep ressure loss warning syste mcan
onl ygiver eliabl ewarnings if yo uhaves et
the correc ttyrep ressure.
If an incorrect tyr epressure is set, these
incorrect values will be monitored.
At yrew ithi nsufficient pressure results in
vehicl einstability when driving, thus
increasing the risk of an accident.
X Make sure tha tthe key is in position 2in
the ignition lock.
Th es tandard displa yappears in the multi-
functio ndisplay ( Ypage 110).
X Press korj to select the tyr epres-
sure function:
Run Fla tIndicator active
Menu: R-Button æ
X Press the reset button on the left of the
instrumen tcluster.
Th ef ollowing message appear sinthe
multi-functio ndisplay:
Restar tRun Fla tIndicator? Yes Cancel
If yo uwishtoc onfirmthe restart:
X Press the æbutton.
Th ef ollowing message appear sinthe
multi-functio ndisplay:
Run Fla tIndicator restarted
After ateach-i nperiod, the tyr epressure
loss warning syste mwillm onitor the set
tyr ep ressures of al lfou rtyres.
If yo uwishtoc ancel the restart:
X Press the çbutton.
or
X Wait unti lthe message
Restar tRun Fla tIndicator?
Yes Cancel disappears.
Th et yrep ressure values stored at the last
restar twillc ontinue to be monitored. Checking the tyre pressure electroni-
cally*
Th et yrep ressure monitor onl yfun ctions if
the correc twheel electronics ar efitted to all
wheels .These monitor the pressure in al lfour
tyres ,which yo uhaves etwhen restarting the
tyr ep ressure monitor. Th emonitor warns you
when the pressure drops in one or mor eof
the tyres. G
Ris
kofa ccident
Th et yrep ressure monitor does not warn
yo uofani ncorrectly se ttyrep ressure. The
table on the insid eofthe fuel filler flap will
help yo udecidew hether the tyr epressures
shoul dbec orrected.
Th et yrep ressure monitor is not able to
warn yo uofasuddenlossofp ressure, e.g.
if the tyr eispenetrate dbyaforeign object.
In the event of asudde nlossofp ressure,
bring the vehicl etoahaltbyb raking care-
fully. Do not make any sudden steering
movements when doing so.
i Theo peratio noft he tyr epressure moni-
tor ca nbeaffected by interferenc efrom
radi otransmitting equipment (e.g. radio
headphones, two-wa yradios )tha tm aybe
being operated in or nea rthe vehicle. Operation
*optional
230_AKB; 5; 4, en-GB
bjanott,
Version: 2.9.6 2008-04-08T15:09:54+02:00-Seite 186 Dateiname: 6515_3089_02_buchblock.pdf; preflight
Page 190 of 317
Tyre
sand wheels 187
i
If yo uarecarrying adefla tedt yreint he
vehicle, yo umayonl yreactivate the tyre
pressure monitor if:
R the deflate dtyreisnol ongerint he vehi-
cle
R yo uh avea djusted the tyr epressure cor-
rectly
Callin gupt he tyre pressure using the
on-board computer X
Make sure tha tthe key is in position 2in
the ignition lock.
X Press the jork button to select the
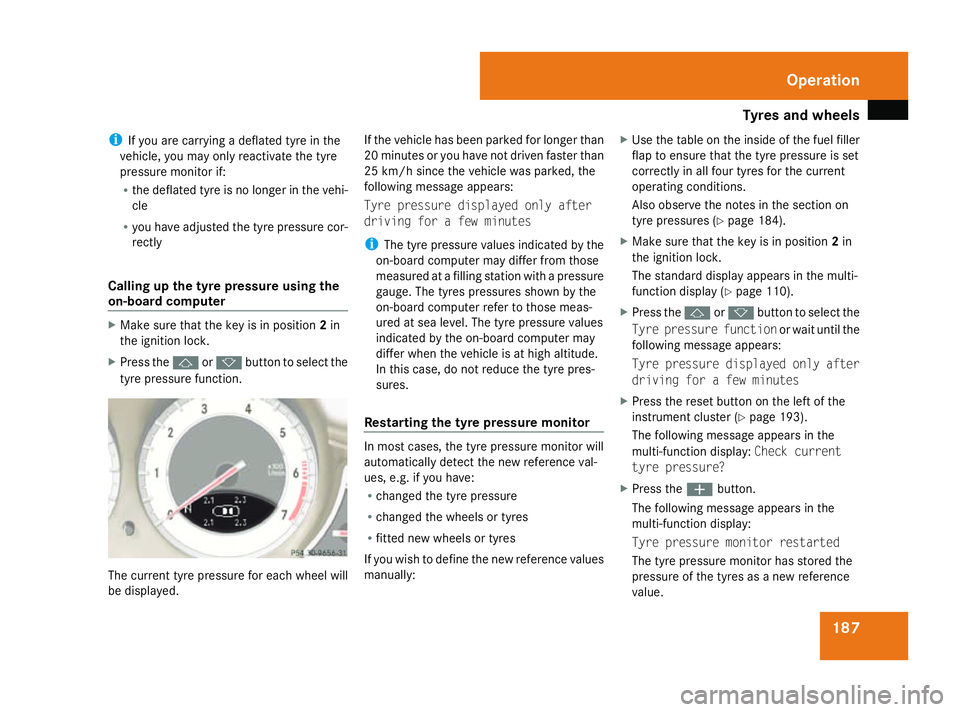
tyr ep ressure function. Th
ec urrent tyr epressure for each whee lwill
be displayed. If the vehicl
ehasbeen parked for longe rthan
20 minute soryouhave not driven faste rthan
25 km/h since the vehicl ewasparked ,the
following message appears:
Tyr epressure displayed onl yafter
drivin gfor afew minutes
i Thet yrep ressure values indicated by the
on-board computer ma ydiffe rf romt hose
measured at afillin gstatio nwithap ressure
gauge. Th etyres pressures shown by the
on-board computer refer to those meas-
ured at se alevel.T he tyrep ressure values
indicated by the on-board computer may
diffe rwhent he vehicl eisathigha ltitude.
In thi scase, d onot reduc ethe tyr epres-
sures.
Restarting the tyre pressure monitor In mos
tcases, t he tyrepressure monitor will
automaticall ydetect the new reference val-
ues, e.g .ifyouhave:
R change dthe tyr epressure
R change dthe wheels or tyres
R fitted new wheels or tyres
If yo uwishtod efinethe new reference values
manually: X
Use the table on the insid eofthe fuel filler
flap to ensur ethatthe tyr epressure is set
correctly in al lfou rtyres for the current
operating conditions.
Als oo bser ve the note sinthe sectio non
tyr ep ressures (Y page 184).
X Make sure tha tthe key is in position 2in
the ignition lock.
Th es tandard displa yappears in the multi-
functio ndisplay ( Ypage 110).
X Press the jork button to select the
Tyr epressure function or wait untilthe
following message appears:
Tyr epressure displayed onl yafter
drivin gfor afew minutes
X Press the reset button on the left of the
instrumen tcluste r(Ypage 193).
Th ef ollowing message appear sinthe
multi-functio ndisplay: Check current
tyr epressure?
X Press the æbutton.
Th ef ollowing message appear sinthe
multi-functio ndisplay:
Tyr epressure monito rrestarted
Th et yrep ressure monitor ha sstored the
pressure of the tyres as anew reference
value. Operation
230_AKB; 5; 4, en-GB
bjanott,
Version: 2.9.6
2008-04-08T15:09:54+02:0
0-Seite 187 ZDateiname: 6515_3089_02_buchblock.pdf; preflight
Page 197 of 317
Care
194 Fading out th
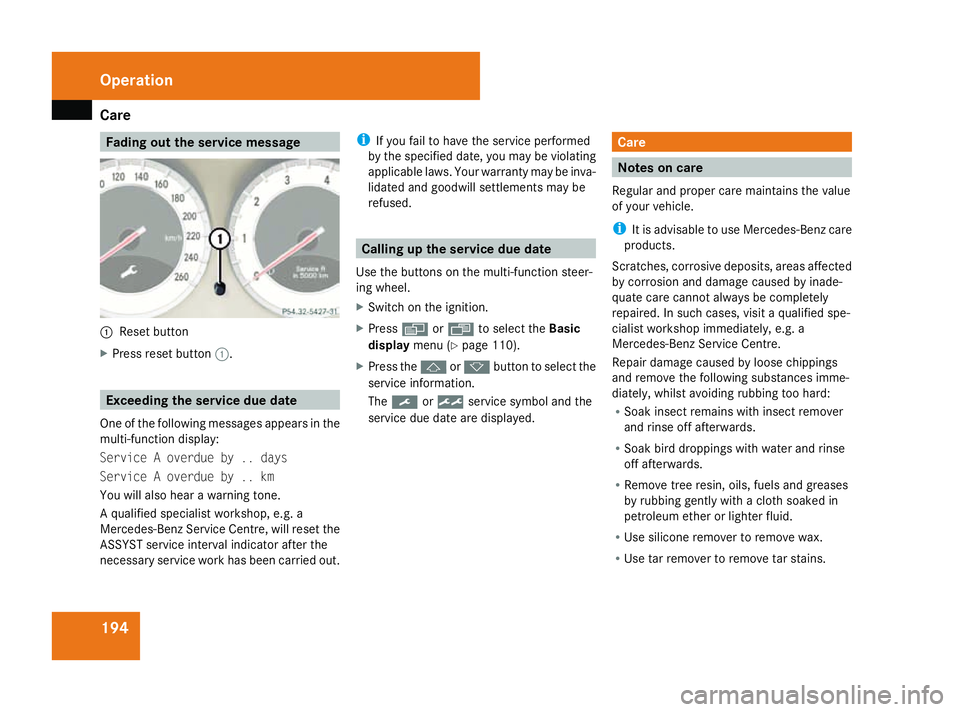
eservice message 1
Reset button
X Pres srese tbutton 1. Exceeding th
eservice du edate
One of th efollowing messages appears in the
multi-functio ndisplay:
Service Aoverdue by .. days
Service Aoverdue by .. km
You will also hear awarning tone.
Aq ualified specialist workshop, e.g .a
Mercedes-Ben zServic eCentre, will rese tthe
ASSYS Tservice interval indicator after the
necessar yservice work has been carried out. i
If you fail to have th eservice performed
by th especified date, you may be violating
applicabl elaws. Your warranty may be inva-
lidated and goodwill settlements may be
refused. Calling up th
eservice du edate
Use th ebuttons on th emulti-functio nsteer-
ing wheel.
X Switch on th eignition.
X Press èorÿ to selec tthe Basic
display menu(Ypage 110).
X Pres sthe j ork button to selec tthe
service information.
The 9 or½ service symbol and the
service due date are displayed. Care
Notes on care
Regular and prope rcarem aintain sthe value
of your vehicle.
i It is advisabl etouse Mercedes-Ben zcare
products.
Scratches, corrosive deposits, areas affected
by corrosion and damage caused by inade-
quate car ecannot always be completely
repaired. In such cases ,visit aqualified spe-
cialis tworkshop immediately, e.g .a
Mercedes-Ben zServic eCentre.
Repair damage caused by loose chippings
and remove th efollowing substances imme-
diately, whilst avoidin grubbin gtoo hard:
R Soak insect remain swith insect remover
and rinse off afterwards.
R Soak bird droppings with water and rinse
off afterwards.
R Remov etreer esin, oils, fuels and greases
by rubbin ggently with acloths oaked in
petroleum ether or lighter fluid.
R Use silicone remover to remove wax.
R Use tar remover to remove tar stains. Operation
230_AKB; 5; 4, en-GB
bjanott
,V ersion: 2.9.6
2008-04-08T15:09:54+02:00
-Seite 194 Dateiname: 6515_3089_02_buchblock.pdf; preflight
Page 282 of 317
Battery
279
i
If the battery powe rsuppl yhasbeen inter-
rupte d(e.g. if it ha sbeenr econnected) ,you
must carry ou tthe following tasks:
R Set the time (see the COMAND operating
instructions)
R Reset the functio nfor folding the exterior
mirror sin/out automatically* by folding
the mirror soutonce ( Ypage 80). Jump-starting
If your vehicle's battery is discharged, the
engine can be jump-started fro manother
vehicl eorfromane xternalbattery using jump
leads.
Observe the following points:
R Jump-starting ma yonlybep erforme dwhen
the engine and catalytic converter ar ecold.
R Do not start the engine if the battery is fro-
zen. Let the battery tha wfirst.
R Jump-starting ma yonlybep erforme dfrom
batteries with anominal voltag eof12V.
R Onl yusejum pleads which ar eprotected
against polarity reversal and which have a
sufficient cross-sectio nand insulate dter-
minal clamps. i
Jump lead swhich ar eprotecte dagain st
polarity reversal and furthe rinformation
abou tjump-starting can be obtained from
any Mercedes-Benz Service Centre.
! Avoi drepeated and lengthy starting
attempts .Onlyu sethe jump-starting pro-
cedur efor the battery in the engine com-
partment.
Do not us earapid- charging devic etostart
the engine. G
Ris
kofi njury
There is ariskofa cidb urns when jump-
starting avehicl edueto the gases which
escap efromt he battery .Donot lean over
the battery whil ethe engine is being jump-
started. G
Ris
kofe xplosion
Gase sescapin gfromt he battery during
jump-starting ma ycause minor explosions.
Avoi dcreating sparks. Kee pnake dflames
away fro mthe battery ,and do not smoke.
Compl ywiths afety precautions and take
protective measures when handling batter-
ies. Yo uwillf ind thes eunder "Battery "in
the index. X
Make sure tha tthe two vehicles do not
touch.
X Depres sthe parking brake.
X Mov ethe selector lever to P.
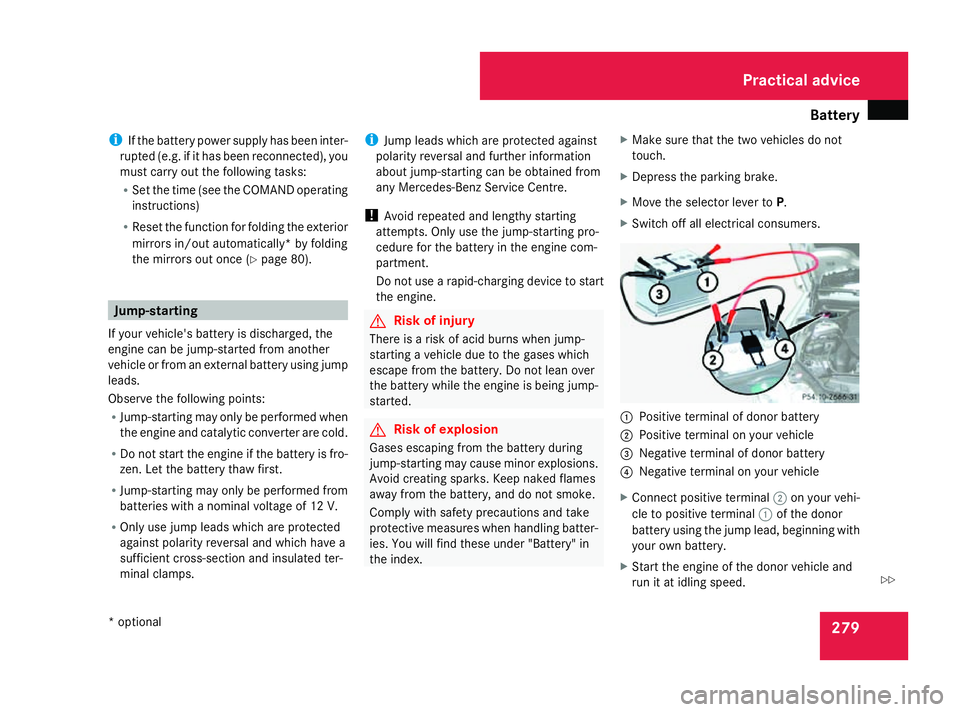
X Switch off al lelectrical consumers. 1
Positiv etermina lofdonor battery
2 Positiv etermina lonyourv ehicle
3 Negativ etermina lofdonor battery
4 Negativ etermina lonyourv ehicle
X Connect positiv eterminal 2onyour vehi-
cle to positiv eterminal 1of the donor
batter yusing the jump lead ,begin ning with
your ownb atter y.
X Start the engine of the donor vehicle and
runitati dlingspeed. Pra
ctical advice
*o ptional
230_AKB; 5; 4, en-GB
bjanott
,V ersion: 2.9.6
2008-04-08T15:09:54+02:00
-Seite 279 ZDateiname: 6515_3089_02_buchblock.pdf; preflight