Page 105 of 261
![MERCEDES-BENZ GLK SUV 2008 Owners Manual X
Press the :or9 button to select the
Permanent display: function.
You will see the selected setting: outside
temperature orDig. speedo [mph].
X Press the abutton to save the setting.
Time/date This s MERCEDES-BENZ GLK SUV 2008 Owners Manual X
Press the :or9 button to select the
Permanent display: function.
You will see the selected setting: outside
temperature orDig. speedo [mph].
X Press the abutton to save the setting.
Time/date This s](/manual-img/4/55572/w960_55572-104.png)
X
Press the :or9 button to select the
Permanent display: function.
You will see the selected setting: outside
temperature orDig. speedo [mph].
X Press the abutton to save the setting.
Time/date This submenu is only available on vehicles
with Audio 20.
Your vehicle may be equipped with one of the
following audio systems:
A: Audio 20
B: Audio 50 APS*
C: COMAND APS*
X You can see which audio system is fitted in
your vehicle by referring to the separate
operating instructions.
Depending on the audio system fitted, time
and date are received from GPS satellites and
therefore cannot be set using the on-board
computer. Refer to the following table. A B C
Set using the on-board com-
puter X
Automatic GPS satellite recep-
tion X X
Set the time zone just once (see
separate operating instructions) X X
In the
Time/date submenu, you can set the
time and date.
Setting the time
X Press the =or; button to select the
Settings menu.
X Press the :or9 button to select the
Time/date submenu.
X Press the abutton to confirm.
X Press the :or9 button to select the
Time: function.
You will see the time currently set. X
Press the abutton to change it.
X Press the =or; button to select the
display to be changed: hours, minutes.
X Press the :or9 button to set the
selected display.
X Press the abutton to store the entry.
Setting the date
X Press the =or; button to select the
Settings menu.
X Press the :or9 button to select the
Time/date submenu.
X Press the abutton to confirm.
X Press the :or9 button to select the
Date: function.
You will see the date currently set.
X Press the abutton to change it.
X Press the =or; button to select the
display to be changed: day, month, year.
X Press the :or9 button to set the
selected display.
X Press the abutton to store the entry.
Lights Switching the daytime driving lights on/
off
If you have activated the
Daytime driving
lights: function and the light switch is in the
$ orc position, the dipped-beam
headlamps are switched on automatically
when the engine is running.
In countries where daytime driving lights are
legally required, Onis the factory setting.
X Press the =or; button to select the
Settings menu.
X Press the :or9 button to select the
Light submenu.
X Press the abutton to confirm. 102
On-board computer (12-button multi-function steering wheel*)Controls
* optional
X204_AKB; 1; 5, en-GB
wobuchh,
Version: 2.11.4 2008-10-15T13:20:56+02:00 - Seite 102Dateiname: 6515_0671_02_buchblock.pdf; preflight
Page 106 of 261
X
Press the :or9 button to select the
Daytime driving lights: function.
You will see the selected setting: Onor
Off.
X Press the abutton to save the setting.
Activating/deactivating the Intelligent
Light System*
When you activate the Intell. Light Sys-
tem: function, you activate the following:
R motorway mode
R active light function
R cornering light function
R extended range foglamps
X Press the =or; button to select the
Settings menu.
X Press the :or9 button to select the
Light submenu.
X Press the abutton to confirm.
X Press the :or9 button to select the
Intell. Light System: function.
You will see the selected setting: Onor
Off.
X Press the abutton to save the setting.
Activating or deactivating the surround
lighting and exterior lighting delayed
switch-off
The Surround lighting: function allows
you to set whether the exterior lighting should
come on when it is dark:
R for 40 seconds after unlocking the vehicle
with the key.
The exterior lighting switches off when you
open the driver’s door.
R for 15 seconds after switching off the
engine and closing the doors.
If the engine is switched off and then none
of the doors are opened, or if an open door
is not closed, the exterior lighting goes out
after 60 seconds.
If you activate the Surround lighting:
function, the following light up: R
the side lamps
R the front foglamps
R the licence plate lighting
X Press the =or; button to select the
Settings menu.
X Press the :or9 button to select the
Light submenu.
X Press the abutton to confirm.
X Press the :or9 button to select the
Surround lighting: function.
You will see the selected setting: Onor
Off.
X Press the abutton to save the setting.
Deactivating the delayed switch-off tempora-
rily:
X Before leaving the vehicle, turn the key to
position 0in the ignition lock.
X Turn the key to position 2in the ignition
lock and back to position 0.
Delayed switch-off is deactivated.
Delayed switch-off is deactivated the next
time you start the engine.
Activating/deactivating the interior light-
ing delayed switch-off
When you activate the Interior lighting
delay sw. off: function and remove the
key from the ignition lock, the interior lighting
remains on for around 10 seconds if it is dark.
X Press the =or; button to select the
Settings menu.
X Press the :or9 button to select the
Light submenu.
X Press the abutton to confirm.
X Press the :or9 button to select the
Interior lighting delay sw. off:
function.
You will see the selected setting: Onor
Off.
X Press the abutton to save the setting. On-board computer (12-button multi-function steering wheel*)
103Controls
* optional
X204_AKB; 1; 5, en-GB
wobuchh,
Version: 2.11.4 2008-10-15T13:20:56+02:00 - Seite 103 ZDateiname: 6515_0671_02_buchblock.pdf; preflight
Page 107 of 261
Vehicle
Set permanent SPEEDTRONIC with
Limit
speed (winter tyres): (Ypage 113).
Activating/deactivating automatic door
locking
If you select the Automatic Door Locks:
function, the vehicle is centrally locked above
a speed of around 15 km/h.
For more information on automatic door lock-
ing, see (Y page 59).
X Press the =or; button to select the
Settings menu.
X Press the :or9 button to select the
Vehicle submenu.
X Press the abutton to confirm.
X Press the :or9 button to select the
Automatic door locks: function.
You will see the selected setting: Onor
Off .
X Press the abutton to save the setting.
Convenience Activating/deactivating the easy-entry/
exit feature*
You can use the Easy-Entry/Exit: function
to activate or deactivate the easy-entry/exit
feature (Y page 67). G
Risk of injury
The steering wheel moves when the EASY-
ENTRY/EXIT feature is active. There is a risk
of occupants becoming trapped. Before acti-
vating the EASY-ENTRY/EXIT feature, make
sure that nobody can become trapped.
Do not leave children unsupervised in the
vehicle, even if they are secured in a child
restraint system. The children could open the
driver's door and thereby unintentionally acti-
vate the EASY-ENTRY/EXIT feature and
become trapped. X
Press the =or; button to select the
Settings menu.
X Press the :or9 button to select the
Convenience submenu.
X Press the abutton to confirm.
X Press the :or9 button to select the
Easy Entry/Exit: function.
You will see the selected setting: Onor
Off .
X Press the abutton to save the setting.
Switching the fold in mirrors when lock-
ing*function on/off
If you switch on the Fold mirrors in when
locking: function, the exterior mirrors fold
in when you lock the vehicle. When you
unlock the vehicle and then open the driver's
or front-passenger door, the exterior mirrors
fold out again.
If you have switched the function on and you
fold the exterior mirrors in using the button
on the door (Y page 68), they will not fold out
automatically. The exterior mirrors can then
only be folded out using the button on the
door.
X Press the =or; button to select the
Settings menu.
X Press the :or9 button to select the
Convenience submenu.
X Press the abutton to confirm.
X Press the :or9 button to select the
Fold in mirrors when locking: func-
tion.
You will see the selected setting: Onor
Off .
X Press the abutton to save the setting.
Restoring the factory settings For safety reasons, not all functions are reset:
the
Limit Speed (winter tyres): func-
tion in permanent Speedtronic can only be set
in the Vehicle submenu. The Daytime
driving lights: function in theLights104
On-board computer (12-button multi-function steering wheel*)Controls
* optional
X204_AKB; 1; 5, en-GB
wobuchh,
Version: 2.11.4 2008-10-15T13:20:56+02:00 - Seite 104Dateiname: 6515_0671_02_buchblock.pdf; preflight
Page 108 of 261
submenu is only reset if the vehicle is sta-
tionary.
X Press the =or; button to select the
Settings menu.
X Press the :or9 button to select the
Factory setting submenu.
X Press the abutton to confirm.
The Reset all settings? message is
shown.
X Press the :or9 button to select
Yes orNo.
X Press the abutton to confirm the selec-
tion.
If you have selected Yes, the multi-function
display shows a confirmation message. Off-road driving
Overview of off-road driving systems
The systems which are relevant for off-road
driving are explained on the following pages:
R 4MATIC (permanent four-wheel drive), for
optimum traction
R DSR (Downhill Speed Regulation)* (vehi-
cles with Off-Road Pro engineering pack-
age*), which assists you when driving
downhill
R Off-road driving program* (vehicles with
Off-road Pro engineering package*), which
assists you when driving off-road
You will find further information about driving
off-road in the "Operation" section
(Y page 158). 4MATIC* (permanent four-wheel
drive)
4MATIC ensures that all four wheels are per-
manently driven. Together with ESP ®
and
ETS, it improves the traction of your vehicle
whenever a drive wheel spins due to insuffi-
cient grip. G
Risk of accident
4MATIC cannot reduce the risk of an accident
if you drive too fast.
If a drive wheel spins due to insufficient grip:
R only depress the accelerator pedal as far as
necessary when pulling away.
R accelerate less when driving.
R adapt your driving style to suit road and
traffic conditions.
i In wintry driving conditions, the maximum
effect of 4MATIC can only be achieved if
you use winter tyres (M+S tyres), with snow
chains if necessary.
! When testing the parking brake, operate
the vehicle only briefly (for a maximum of
ten seconds) on a brake test dynamometer.
When doing this, turn the key to position
0 or 1in the ignition. Failure to do this can
cause damage to the drive train or the
brake system.
! A function or performance test should
only be carried out on a twin-axle dyna-
mometer. If you wish to operate the vehicle
on such a dynamometer, please consult a
Mercedes-Benz Service Centre in advance.
You could otherwise damage the drive train
or the brake system. DSR (Downhill Speed Regulation)*
(vehicles with the off-road engineer-
ing package*)
You will find information about driving off-
road in the "Operation" section
(Y page 158).
DSR is an aid to assist you when driving down-
hill. It keeps the speed of travel at the speed
selected on the on-board computer. The
steeper the downhill gradient, the greater the
DSR braking effect on the vehicle. When driv-
ing on flat stretches of road or on an uphill Off-road driving
105Controls
* optional
X204_AKB; 1; 5, en-GB
wobuchh,
Version: 2.11.4 2008-10-15T13:20:56+02:00 - Seite 105 ZDateiname: 6515_0671_02_buchblock.pdf; preflight
Page 109 of 261
gradient, the DSR braking effect is minimal or
non-existent. G
Risk of accident
DSR is only an aid designed to assist you when
driving downhill. You are responsible for keep-
ing control of the vehicle and for assessing
whether the downhill gradient can be man-
aged.
When activating DSR the vehicle may brake
suddenly due to DSR intervening. This is
dependent on the downhill gradient and the
difference between the current speed and the
speed set. DSR may not always be able to
keep to the set speed, depending on road sur-
face and tyre conditions. You could lose con-
trol of the vehicle and cause an accident.
Select a set speed suitable for the prevailing
conditions and when necessary, apply the
brakes manually.
DSR controls the vehicle’s speed in the D,R
and Nselector lever positions. You can drive
at a higher or a lower speed than that set on
the on-board computer at any time by accel-
erating or braking. G
Risk of accident
If you depress the accelerator pedal with DSR
activated, then the set speed can be excee-
ded. Drive downhill with special care and
always keep in mind that DSR brakes the vehi-
cle as soon as you remove your foot from the
accelerator pedal. The vehicle may be heavily
braked by DSR depending on the gradient and
the difference between the vehicle's road
speed and the set speed. You could lose con-
trol of the vehicle and cause an accident.
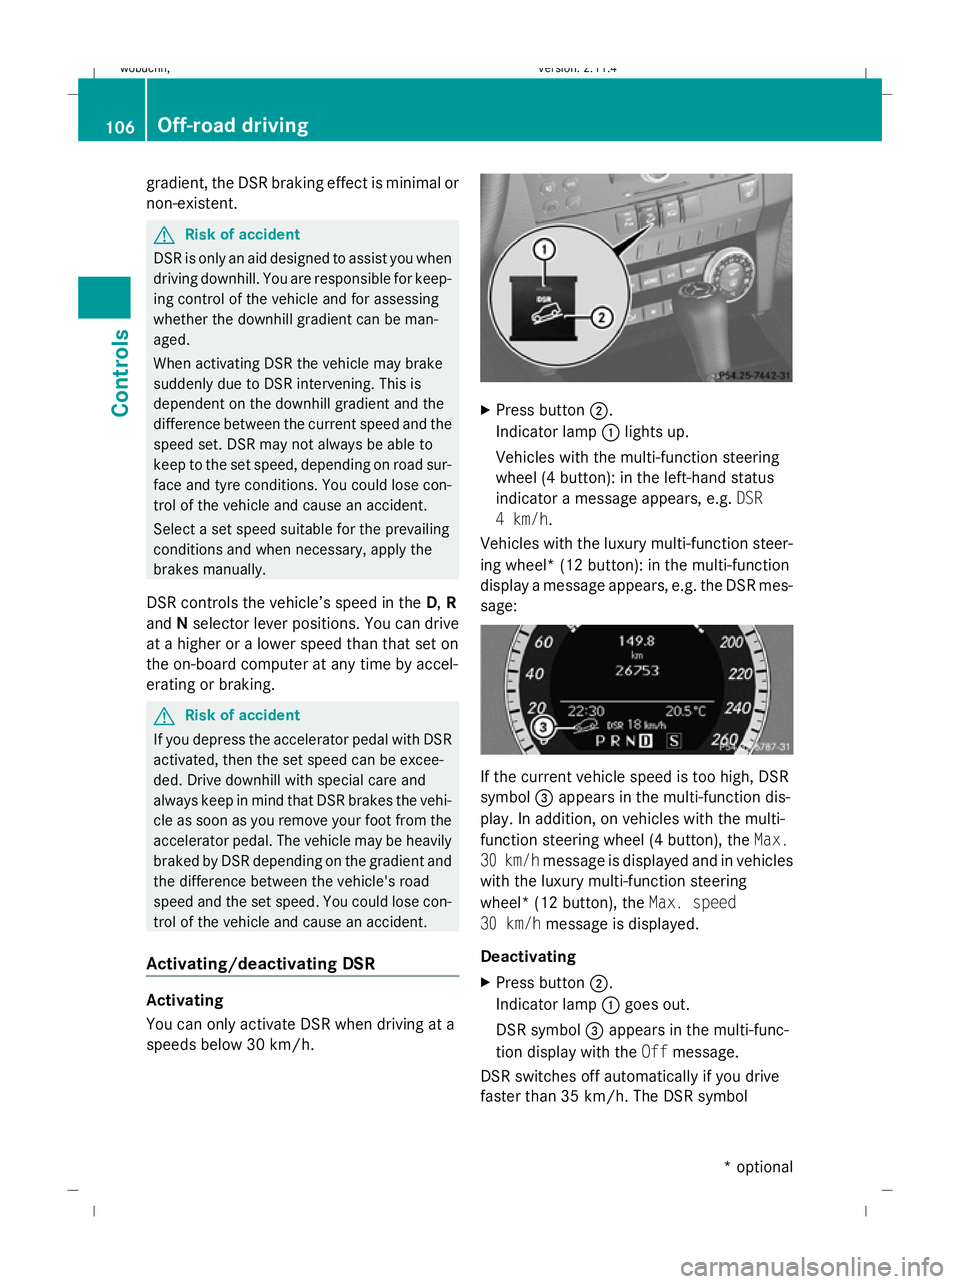
Activating/deactivating DSR Activating
You can only activate DSR when driving at a
speeds below 30 km/h. X
Press button ;.
Indicator lamp :lights up.
Vehicles with the multi-function steering
wheel (4 button): in the left-hand status
indicator a message appears, e.g. DSR
4 km/h.
Vehicles with the luxury multi-function steer-
ing wheel* (12 button): in the multi-function
display a message appears, e.g. the DSR mes-
sage: If the current vehicle speed is too high, DSR
symbol =appears in the multi-function dis-
play. In addition, on vehicles with the multi-
function steering wheel (4 button), the Max.
30 km/h message is displayed and in vehicles
with the luxury multi-function steering
wheel* (12 button), the Max. speed
30 km/h message is displayed.
Deactivating
X Press button ;.
Indicator lamp :goes out.
DSR symbol =appears in the multi-func-
tion display with the Offmessage.
DSR switches off automatically if you drive
faster than 35 km/h. The DSR symbol 106 Off-road drivingControls
* optional
X204_AKB; 1; 5, en-GB
wobuchh,
Version: 2.11.4 2008-10-15T13:20:56+02:00 - Seite 106Dateiname: 6515_0671_02_buchblock.pdf; preflight
Page 110 of 261
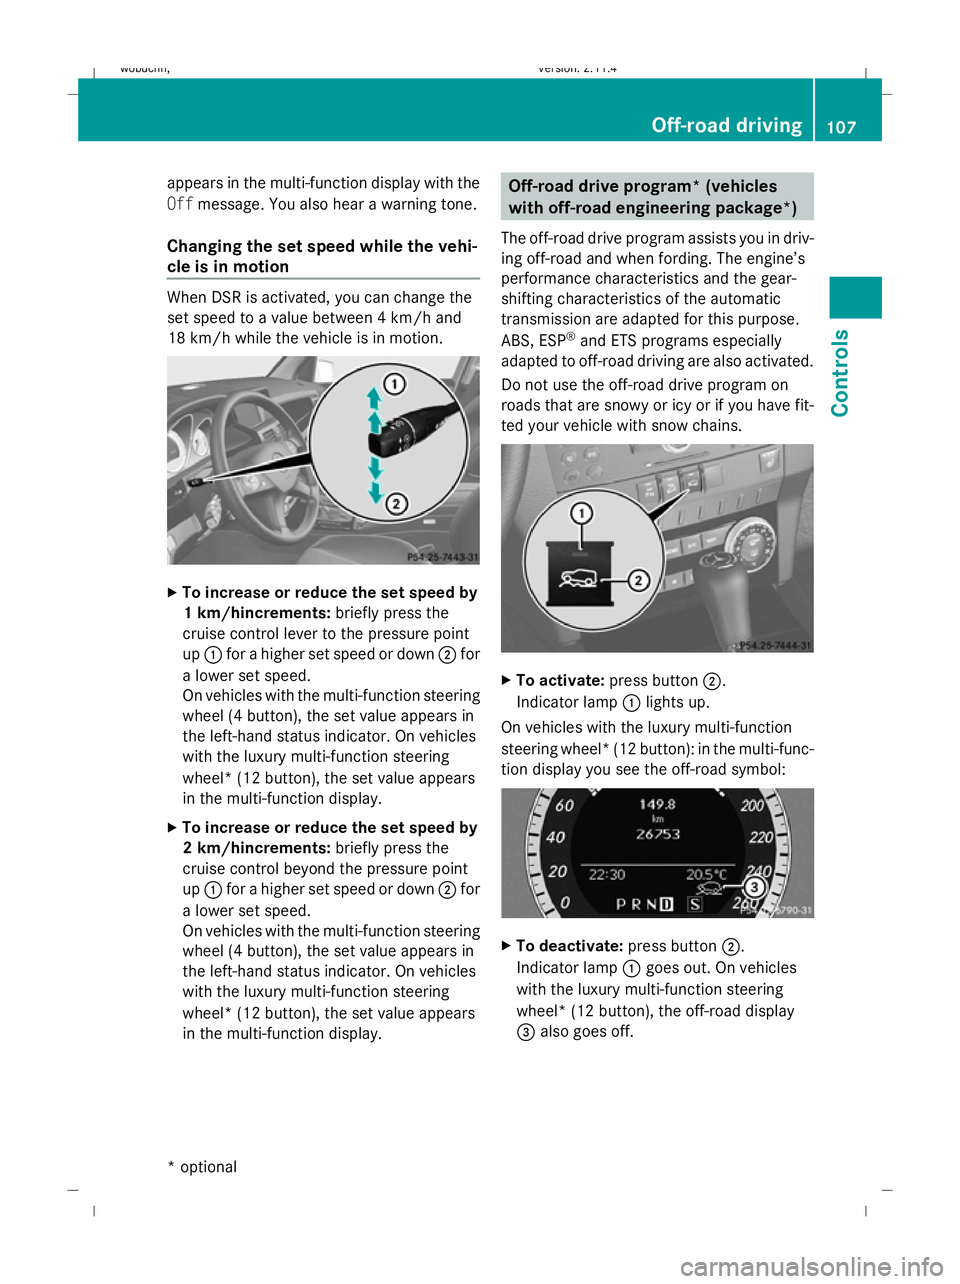
appears in the multi-function display with the
Off
message. You also hear a warning tone.
Changing the set speed while the vehi-
cle is in motion When DSR is activated, you can change the
set speed to a value between 4 km/h and
18 km/h while the vehicle is in motion.
X
To increase or reduce the set speed by
1 km/hincrements: briefly press the
cruise control lever to the pressure point
up : for a higher set speed or down ;for
a lower set speed.
On vehicles with the multi-function steering
wheel (4 button), the set value appears in
the left-hand status indicator. On vehicles
with the luxury multi-function steering
wheel* (12 button), the set value appears
in the multi-function display.
X To increase or reduce the set speed by
2 km/hincrements: briefly press the
cruise control beyond the pressure point
up : for a higher set speed or down ;for
a lower set speed.
On vehicles with the multi-function steering
wheel (4 button), the set value appears in
the left-hand status indicator. On vehicles
with the luxury multi-function steering
wheel* (12 button), the set value appears
in the multi-function display. Off-road drive program* (vehicles
with off-road engineering package*)
The off-road drive program assists you in driv-
ing off-road and when fording. The engine’s
performance characteristics and the gear-
shifting characteristics of the automatic
transmission are adapted for this purpose.
ABS, ESP ®
and ETS programs especially
adapted to off-road driving are also activated.
Do not use the off-road drive program on
roads that are snowy or icy or if you have fit-
ted your vehicle with snow chains. X
To activate: press button ;.
Indicator lamp :lights up.
On vehicles with the luxury multi-function
steering wheel* (12 button): in the multi-func-
tion display you see the off-road symbol: X
To deactivate: press button;.
Indicator lamp :goes out. On vehicles
with the luxury multi-function steering
wheel* (12 button), the off-road display
= also goes off. Off-road driving
107Controls
* optional
X204_AKB; 1; 5, en-GB
wobuchh,
Version: 2.11.4 2008-10-15T13:20:56+02:00 - Seite 107 ZDateiname: 6515_0671_02_buchblock.pdf; preflight
Page 111 of 261
Driving systems
Overview of driving systems
The vehicle's driving systems are described
on the following pages:
R cruise control* and Speedtronic*, which
are used to control the speed of the vehicle
R Parktronic*, which assists you in parking
and manoeuvring
R reversing camera*, which assists you when
parking and manoeuvring
The ABS, BAS, adaptive brake lights, ESP ®
and EBV (electronic brake-power distribution)
driving safety systems are described in the
"Driving safety systems" section
(Y page 51). Cruise control*
Cruise control maintains a constant road
speed for you. It brakes automatically in order
to avoid exceeding the set speed. On long and
steep downhill gradients, especially if the
vehicle is laden or towing a trailer, you must
select shift range 1,2or3 in good time. By
doing so, you will make use of the braking
effect of the engine, which relieves the load
on the brake system and prevents the brakes
from overheating and wearing too quickly. G
Risk of accident
Do not change down for additional engine
braking on a slippery road surface. This could
cause the drive wheels to lose their grip and
the vehicle could skid.
Use cruise control only if road and traffic con-
ditions make it appropriate to maintain a
steady speed for a prolonged period. You can
store any road speed above 30 km/h. G
Risk of accident
Cruise control cannot take account of road
and traffic conditions. Always pay attention to traffic conditions
even when cruise control is activated.
Cruise control is only an aid designed to assist
driving. You are responsible for the vehicle's
speed and for braking in good time. G
Risk of accident
Do not use cruise control:
R in road and traffic conditions which do not
allow you to maintain a constant speed (e.g.
heavy traffic or winding roads). You could
otherwise cause an accident.
R on slippery roads. Braking or accelerating
could cause the drive wheels to lose trac-
tion and the vehicle could then skid.
R when there is poor visibility, e.g. due to fog,
heavy rain or snow
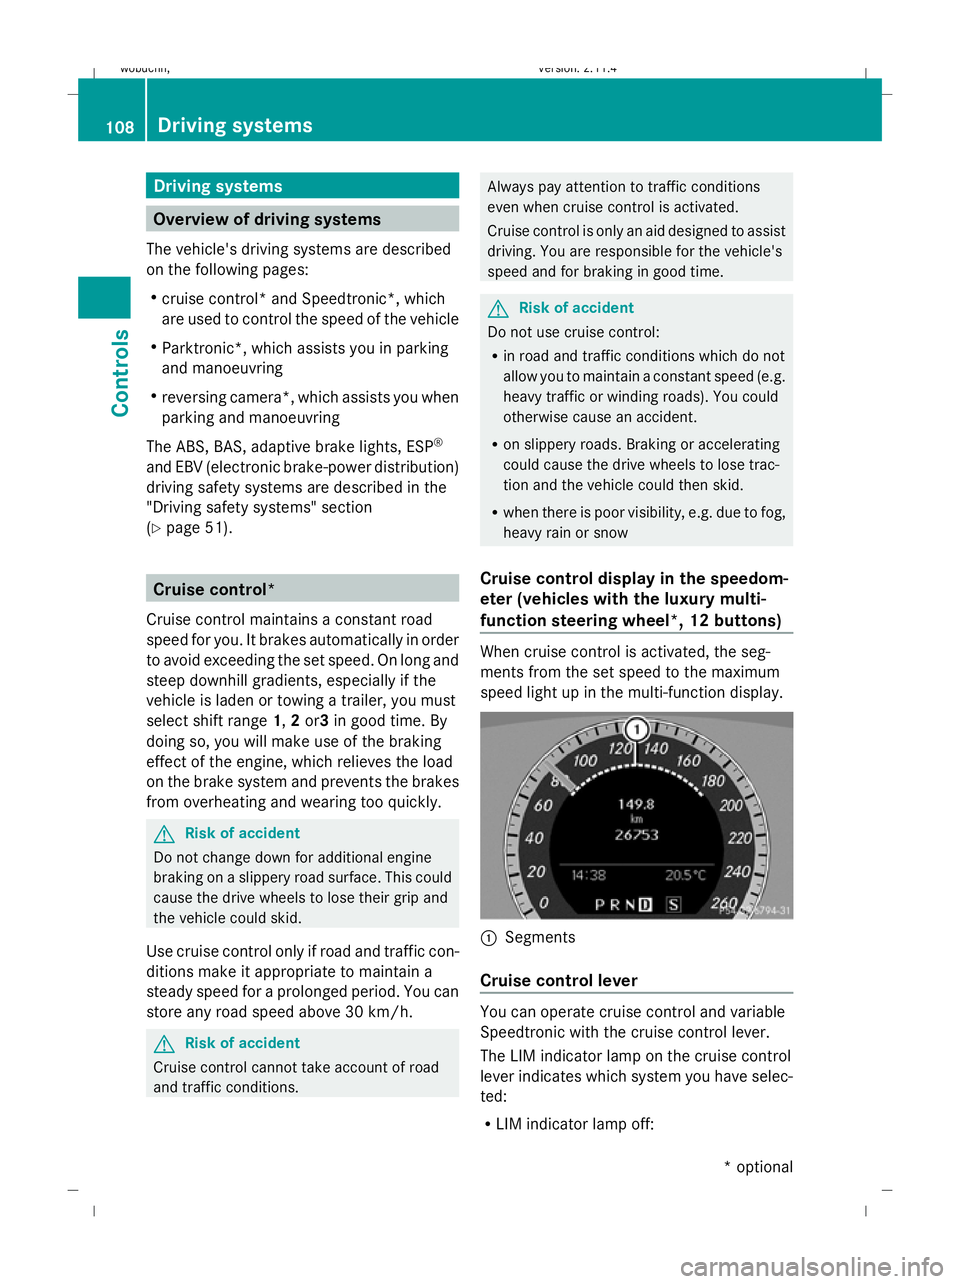
Cruise control display in the speedom-
eter (vehicles with the luxury multi-
function steering wheel *,12 buttons) When cruise control is activated, the seg-
ments from the set speed to the maximum
speed light up in the multi-function display.
:
Segments
Cruise control lever You can operate cruise control and variable
Speedtronic with the cruise control lever.
The LIM indicator lamp on the cruise control
lever indicates which system you have selec-
ted:
R
LIM indicator lamp off: 108 Driving systemsControls
* optional
X204_AKB; 1; 5, en-GB
wobuchh,
Version: 2.11.4 2008-10-15T13:20:56+02:00 - Seite 108Dateiname: 6515_0671_02_buchblock.pdf; preflight
Page 112 of 261
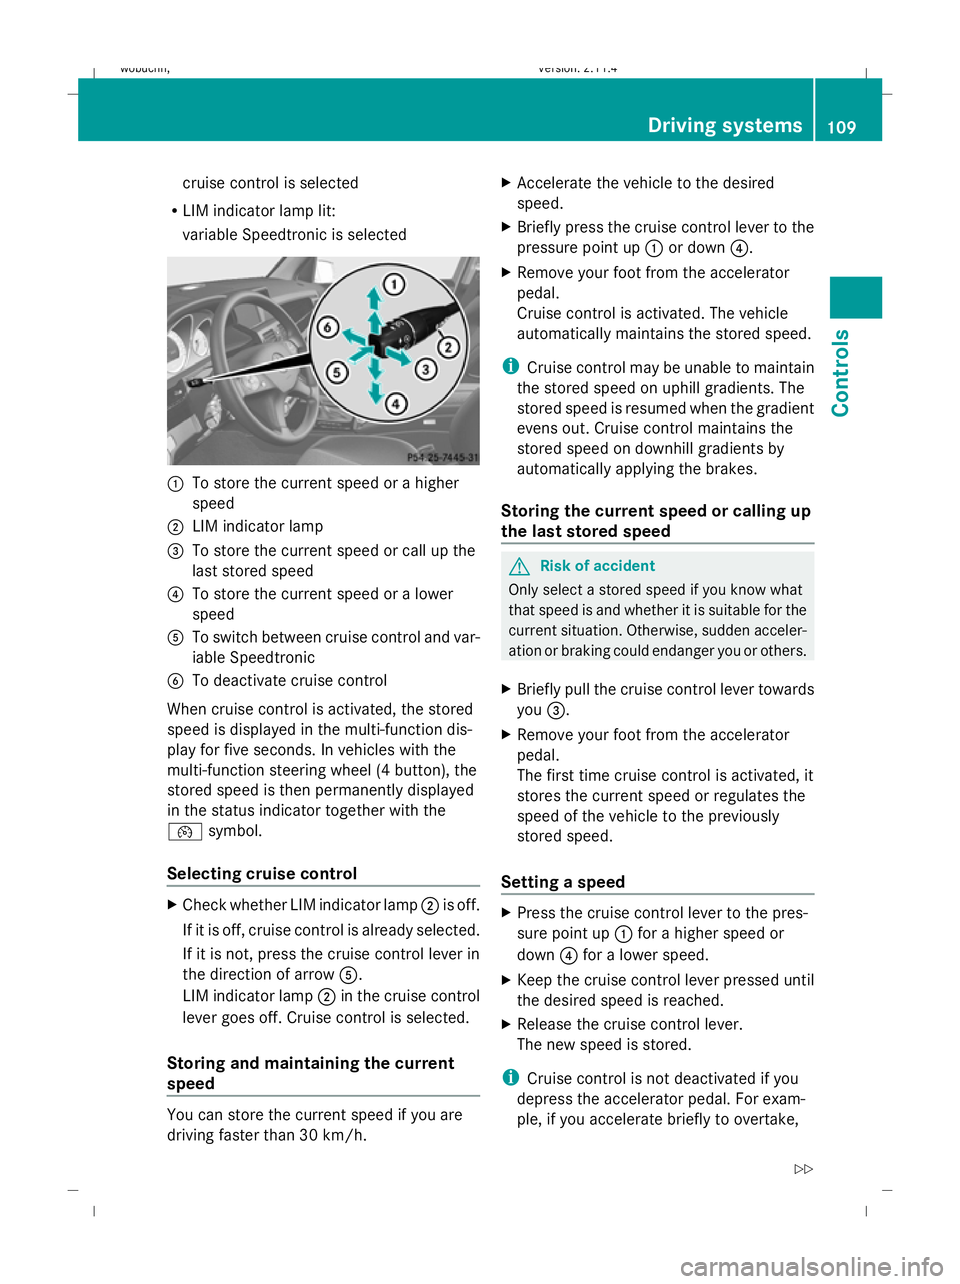
cruise control is selected
R LIM indicator lamp lit:
variable Speedtronic is selected :
To store the current speed or a higher
speed
; LIM indicator lamp
= To store the current speed or call up the
last stored speed
? To store the current speed or a lower
speed
A To switch between cruise control and var-
iable Speedtronic
B To deactivate cruise control
When cruise control is activated, the stored
speed is displayed in the multi-function dis-
play for five seconds. In vehicles with the
multi-function steering wheel (4 button), the
stored speed is then permanently displayed
in the status indicator together with the
¯ symbol.
Selecting cruise control X
Check whether LIM indicator lamp ;is off.
If it is off, cruise control is already selected.
If it is not, press the cruise control lever in
the direction of arrow A.
LIM indicator lamp ;in the cruise control
lever goes off. Cruise control is selected.
Storing and maintaining the current
speed You can store the current speed if you are
driving faster than 30 km/h. X
Accelerate the vehicle to the desired
speed.
X Briefly press the cruise control lever to the
pressure point up :or down ?.
X Remove your foot from the accelerator
pedal.
Cruise control is activated. The vehicle
automatically maintains the stored speed.
i Cruise control may be unable to maintain
the stored speed on uphill gradients. The
stored speed is resumed when the gradient
evens out. Cruise control maintains the
stored speed on downhill gradients by
automatically applying the brakes.
Storing the current speed or calling up
the last stored speed G
Risk of accident
Only select a stored speed if you know what
that speed is and whether it is suitable for the
current situation. Otherwise, sudden acceler-
ation or braking could endanger you or others.
X Briefly pull the cruise control lever towards
you =.
X Remove your foot from the accelerator
pedal.
The first time cruise control is activated, it
stores the current speed or regulates the
speed of the vehicle to the previously
stored speed.
Setting a speed X
Press the cruise control lever to the pres-
sure point up :for a higher speed or
down ?for a lower speed.
X Keep the cruise control lever pressed until
the desired speed is reached.
X Release the cruise control lever.
The new speed is stored.
i Cruise control is not deactivated if you
depress the accelerator pedal. For exam-
ple, if you accelerate briefly to overtake, Driving systems
109Controls
X204_AKB; 1; 5, en-GB
wobuchh, Version: 2.11.4 2008-10-15T13:20:56+02:00 - Seite 109 ZDateiname: 6515_0671_02_buchblock.pdf; preflight
 1
1 2
2 3
3 4
4 5
5 6
6 7
7 8
8 9
9 10
10 11
11 12
12 13
13 14
14 15
15 16
16 17
17 18
18 19
19 20
20 21
21 22
22 23
23 24
24 25
25 26
26 27
27 28
28 29
29 30
30 31
31 32
32 33
33 34
34 35
35 36
36 37
37 38
38 39
39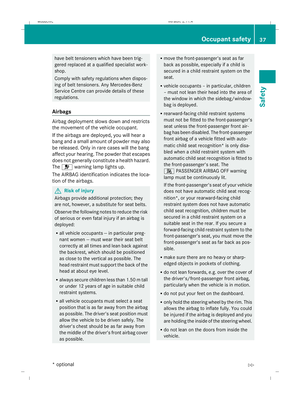 40
40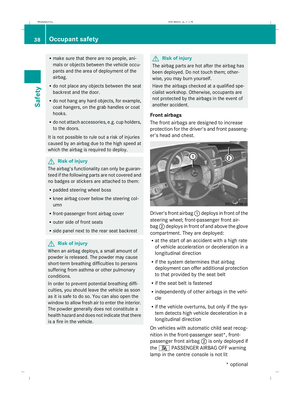 41
41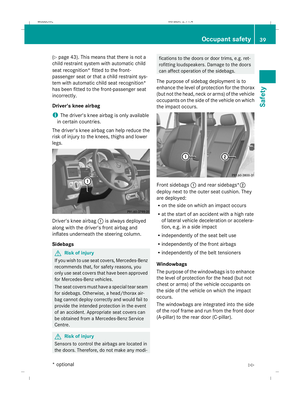 42
42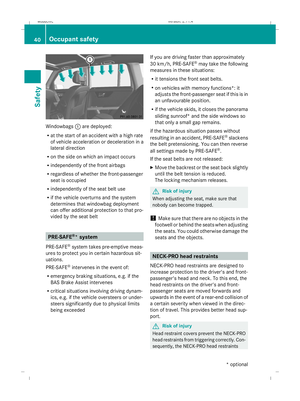 43
43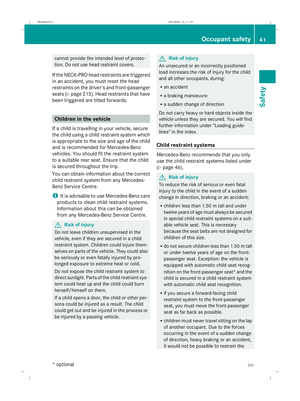 44
44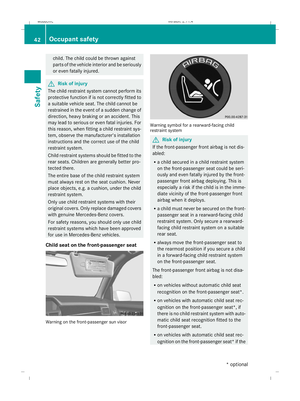 45
45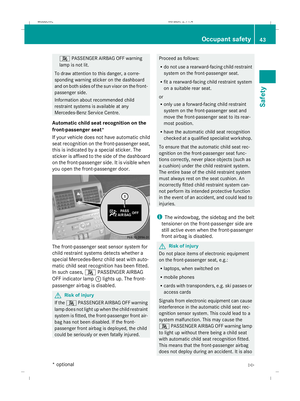 46
46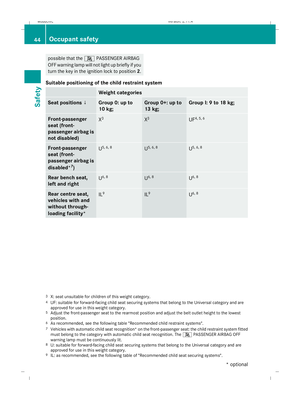 47
47 48
48 49
49 50
50 51
51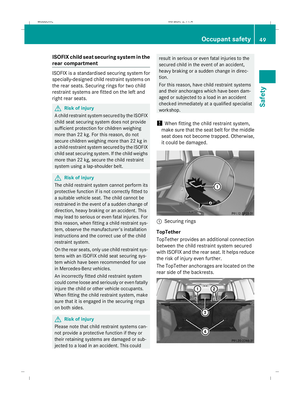 52
52 53
53 54
54 55
55 56
56 57
57 58
58 59
59 60
60 61
61 62
62 63
63 64
64 65
65 66
66 67
67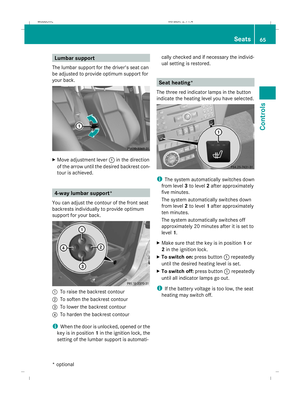 68
68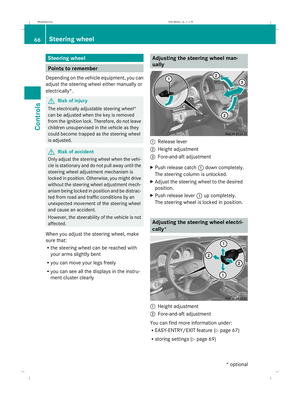 69
69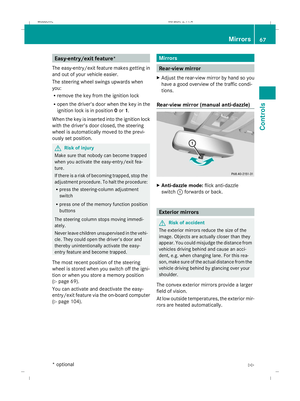 70
70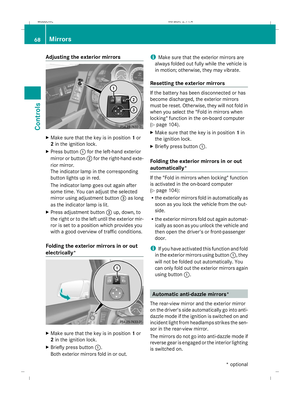 71
71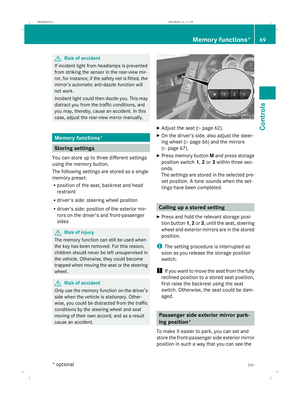 72
72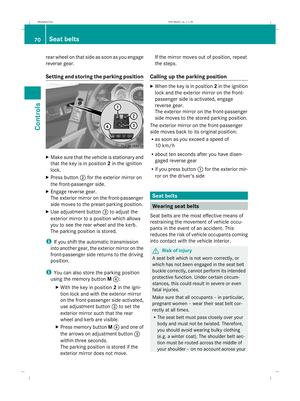 73
73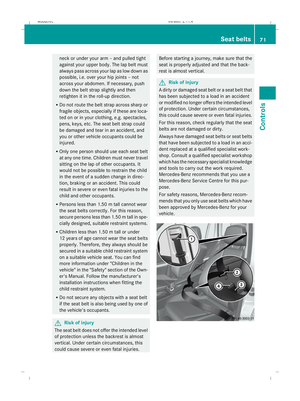 74
74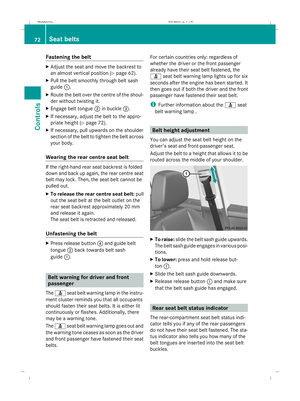 75
75 76
76 77
77 78
78 79
79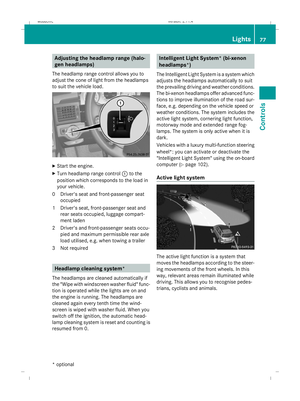 80
80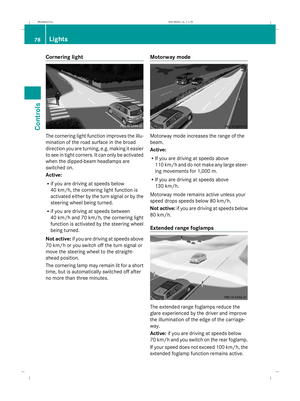 81
81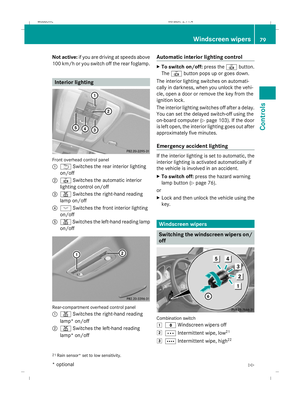 82
82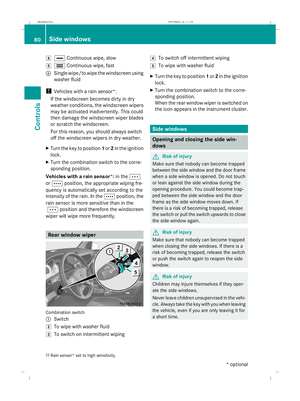 83
83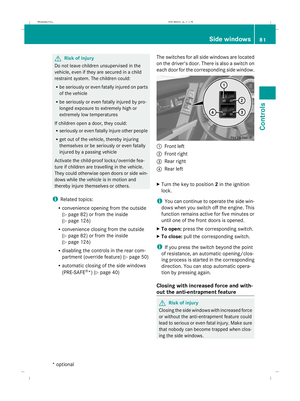 84
84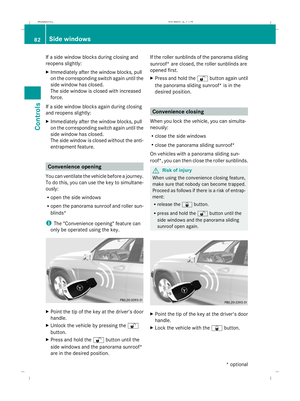 85
85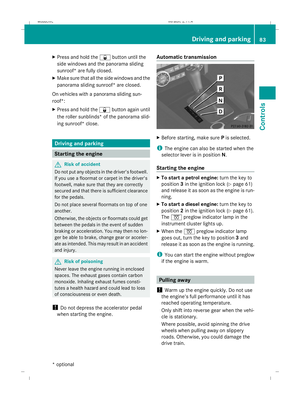 86
86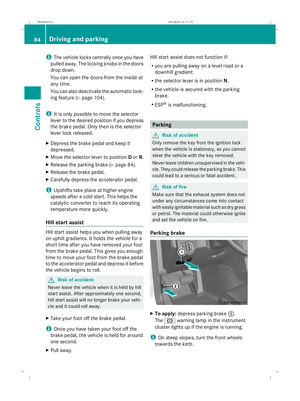 87
87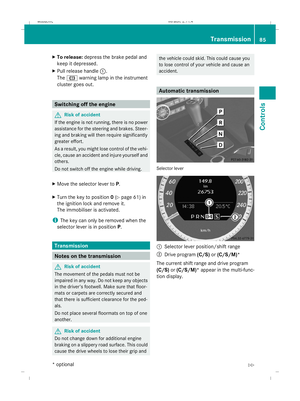 88
88 89
89 90
90 91
91 92
92 93
93 94
94 95
95 96
96 97
97 98
98 99
99 100
100 101
101 102
102 103
103 104
104 105
105 106
106 107
107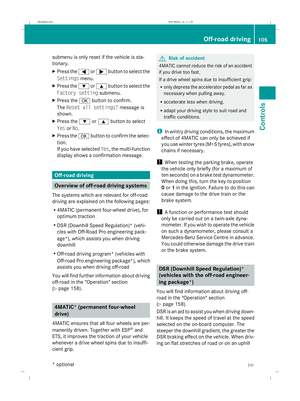 108
108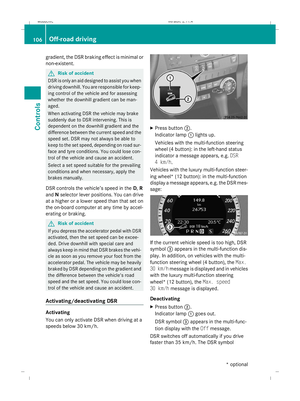 109
109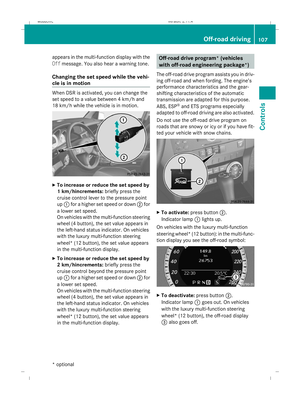 110
110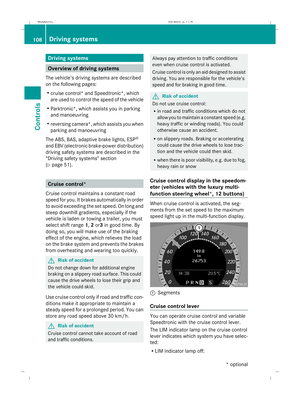 111
111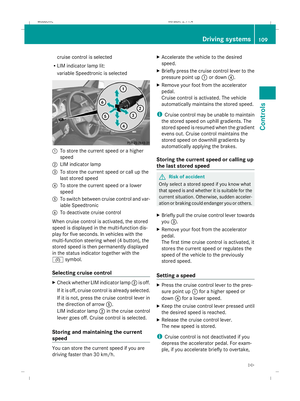 112
112 113
113 114
114 115
115 116
116 117
117 118
118 119
119 120
120 121
121 122
122 123
123 124
124 125
125 126
126 127
127 128
128 129
129 130
130 131
131 132
132 133
133 134
134 135
135 136
136 137
137 138
138 139
139 140
140 141
141 142
142 143
143 144
144 145
145 146
146 147
147 148
148 149
149 150
150 151
151 152
152 153
153 154
154 155
155 156
156 157
157 158
158 159
159 160
160 161
161 162
162 163
163 164
164 165
165 166
166 167
167 168
168 169
169 170
170 171
171 172
172 173
173 174
174 175
175 176
176 177
177 178
178 179
179 180
180 181
181 182
182 183
183 184
184 185
185 186
186 187
187 188
188 189
189 190
190 191
191 192
192 193
193 194
194 195
195 196
196 197
197 198
198 199
199 200
200 201
201 202
202 203
203 204
204 205
205 206
206 207
207 208
208 209
209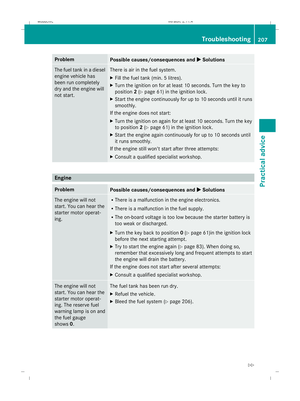 210
210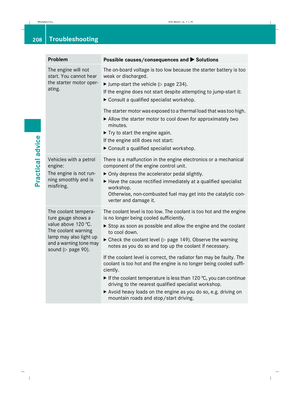 211
211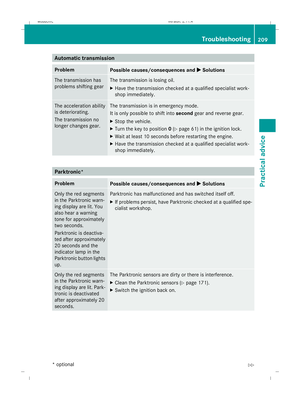 212
212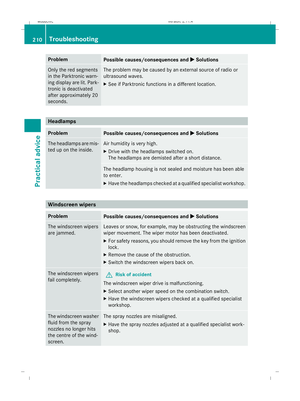 213
213 214
214 215
215 216
216 217
217 218
218 219
219 220
220 221
221 222
222 223
223 224
224 225
225 226
226 227
227 228
228 229
229 230
230 231
231 232
232 233
233 234
234 235
235 236
236 237
237 238
238 239
239 240
240 241
241 242
242 243
243 244
244 245
245 246
246 247
247 248
248 249
249 250
250 251
251 252
252 253
253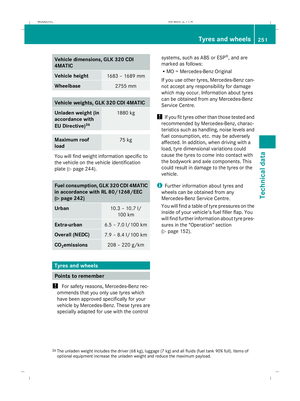 254
254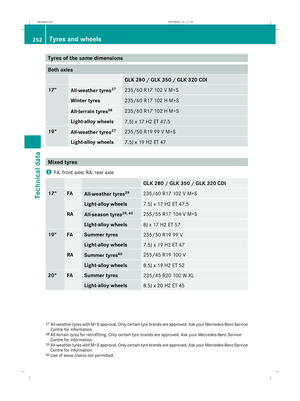 255
255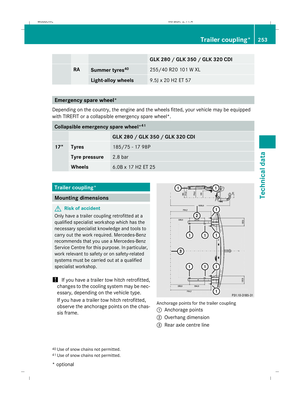 256
256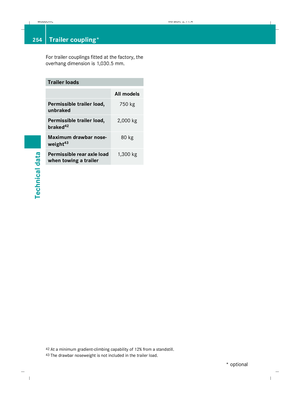 257
257 258
258 259
259 260
260![MERCEDES-BENZ GLK SUV 2008 Owners Manual X
Press the :or9 button to select the
Permanent display: function.
You will see the selected setting: outside
temperature orDig. speedo [mph].
X Press the abutton to save the setting.
Time/date This s MERCEDES-BENZ GLK SUV 2008 Owners Manual X
Press the :or9 button to select the
Permanent display: function.
You will see the selected setting: outside
temperature orDig. speedo [mph].
X Press the abutton to save the setting.
Time/date This s](/manual-img/4/55572/w960_55572-104.png)


