2008 MERCEDES-BENZ E-CLASS ESTATE belt
[x] Cancel search: beltPage 98 of 401
Seat belts
95Seat belts
Wearing seat belts
Seat belts are the most effective means of
restraining the movement of vehicle occu-
pants in the event of an accident. This
reduces the risk of vehicle occupants coming
into contact with the vehicle interior. G
Risk of injury
A seat belt which is not worn correctly, or
which has not been engaged in the seat belt
buckle correctly, cannot perform its inten-
ded protective function. Under certain cir-
cumstances this could cause severe or
even fatal injuries.
Make sure that all occupants – in particular,
pregnant women – wear their seat belt cor-
rectly at all times.
R The seat belt must pass closely over your
body and must not be twisted. You
should therefore avoid wearing bulky
clothing (e.g. a winter coat). The shoulder
belt section must be routed across the
middle of your shoulder – on no account
across your neck or under your arm – and
pulled tight against your upper body. The
lap belt must always pass across your lap
as low down as possible, i.e. over your hip joints – not across your abdomen. If
necessary, push down the belt strap
slightly and then retighten it in the roll-up
direction.
R Do not route the belt strap across sharp
or fragile objects, especially if these are
located on or in your clothing, e.g. spec-
tacles, pencils, keys, etc. The seat belt
strap could be damaged and tear in an
accident and you or other vehicle occu-
pants could be injured.
R Only one person should use each seat
belt at any one time. Children must never
travel sitting on the lap of other occu-
pants. It would not be possible to restrain
the child in the event of a sudden change
in direction, braking or an accident. This
could result in severe or even fatal inju-
ries to the child and other occupants.
R Persons less than 1.50 m tall cannot
wear the seat belts correctly. For this
reason, secure persons less than 1.50 m
tall in specially designed, suitable
restraint systems.
R Children less than 1.50 m tall or under
12 years of age cannot wear the seat
belts properly. Therefore, always secure
these children in suitable child restraint systems on suitable vehicle seats. You
can find more information under "Chil-
dren in the vehicle" in the "Safety" sec-
tion of the Owner's Manual. Follow the
manufacturer's installation instructions
when fitting the child restraint system.
R Do not secure any objects with a seat belt
if the seat belt is also being used by one
of the vehicle's occupants. G
Risk of injury
The seat belt does not offer the intended
level of protection unless the backrest is
almost vertical. Under certain circumstan-
ces this could cause severe or even fatal
injuries.
Before starting a journey, make sure that
the seat is properly adjusted and that the
backrest is almost vertical. G
Risk of injury
A dirty or damaged seat belt or a seat belt
that has been subjected to a load in an
accident or modified no longer offers the
intended level of protection. Under certain
circumstances this could cause severe or
even fatal injuries. Controls
211_AKB; 2; 5, en-GB
mkalafa,
Version: 2.9.4
2008-02-29T16:57:07+01:00 - Seite 95 ZDateiname: 6515_3416_02_buchblock.pdf; preflight
Page 99 of 401
Seat belts
96 For this reason, check regularly that the
seat belts are not damaged or dirty.
Always have damaged seat belts or seat
belts that have been subjected to a load in
an accident replaced at a qualified special-
ist workshop. Choose a qualified specialist
workshop which has the necessary special-
ist knowledge and tools for the work
required. Mercedes-Benz recommends
that you use a Mercedes-Benz Service
Centre for this purpose.
For safety reasons, Mercedes-Benz recom-
mends that you only use seat belts which
have been approved by Mercedes-Benz for
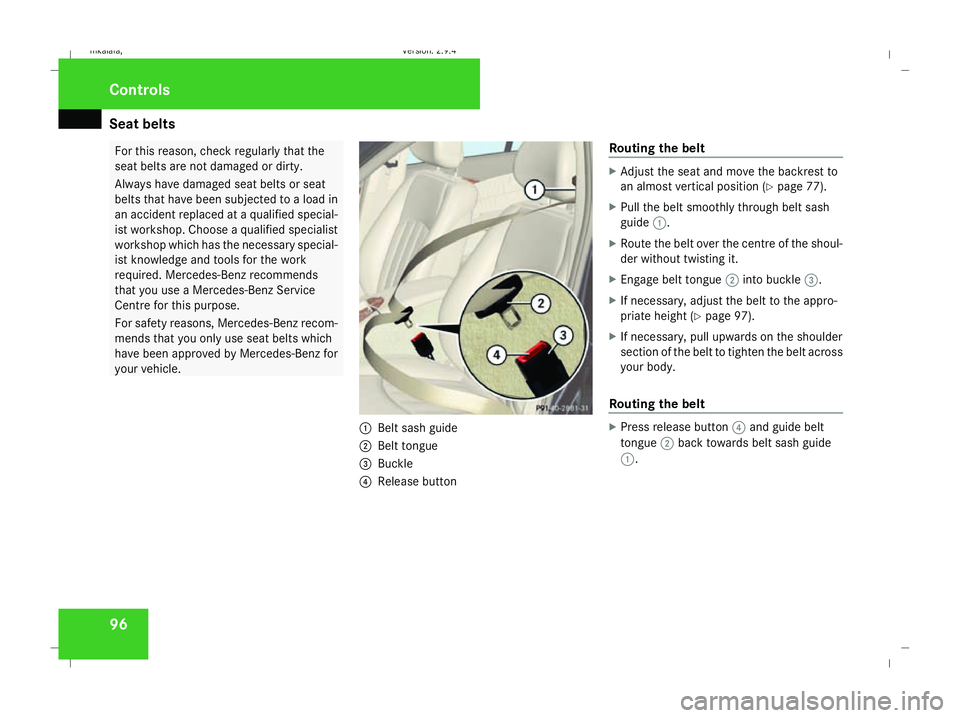
your vehicle. 1
Belt sash guide
2 Belt tongue
3 Buckle
4 Release button Routing the belt X
Adjust the seat and move the backrest to
an almost vertical position (Y page 77).
X Pull the belt smoothly through belt sash
guide 1.
X Route the belt over the centre of the shoul-
der without twisting it.
X Engage belt tongue 2into buckle 3.
X If necessary, adjust the belt to the appro-
priate height (Y page 97).
X If necessary, pull upwards on the shoulder
section of the belt to tighten the belt across
your body.
Routing the belt X
Press release button 4and guide belt
tongue 2back towards belt sash guide
1. Controls
211_AKB; 2; 5, en-GB
mkalafa,
Version: 2.9.4 2008-02-29T16:57:07+01:00 - Seite 96Dateiname: 6515_3416_02_buchblock.pdf; preflight
Page 100 of 401
Seat belts
97Belt warning for driver and front
passenger
The < seat belt warning lamp in the instru-
ment cluster reminds you that all occupants
should fasten their seat belts. The
or it may flash. Additionally, there may be a
warning tone.
The < seat belt warning lamp goes out and
the warning tone ceases when the driver and
the front passenger have fastened their seat
belt.
For certain countries only: regardless of
whether the driver or the front passenger is
already secured, the
has been started. The
front passenger have fastened their seat belt.
i Further information about the
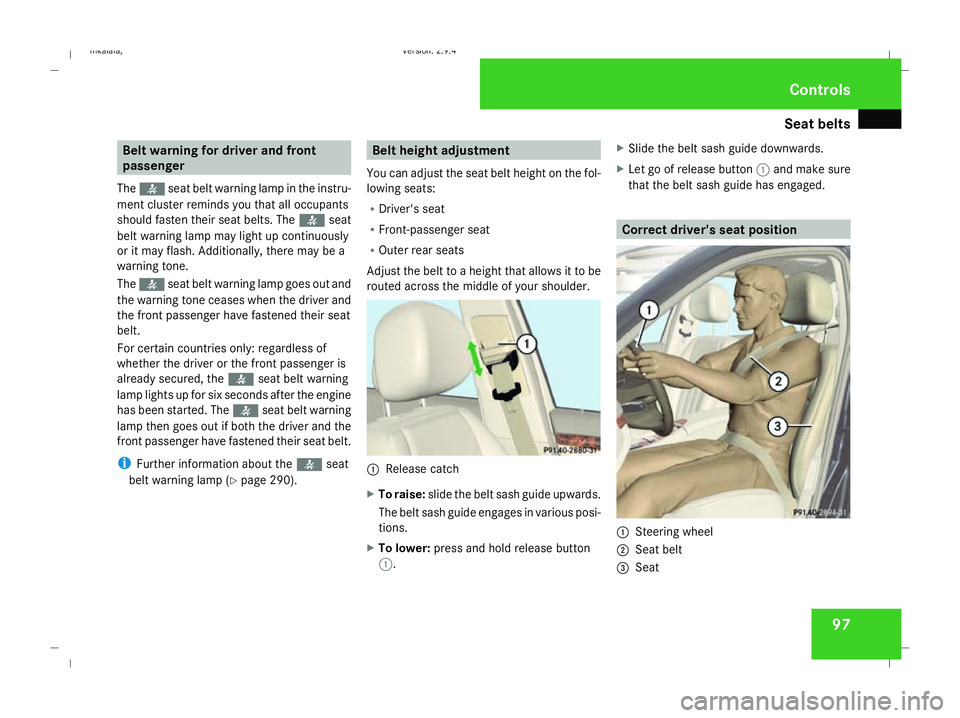
You can adjust the seat belt height on the fol-
lowing seats:
R Driver's seat
R Front-passenger seat
R Outer rear seats
Adjust the belt to a height that allows it to be
routed across the middle of your shoulder. 1
Release catch
X To raise: slide the belt sash guide upwards.
The belt sash guide engages in various posi-
tions.
X To lower: press and hold release button
1. X
Slide the belt sash guide downwards.
X Let go of release button 1and make sure
that the belt sash guide has engaged. Correct driver's seat position
1
Steering wheel
2 Seat belt
3 Seat Controls
211_AKB; 2; 5, en-GB
mkalafa,
Version: 2.9.4 2008-02-29T16:57:07+01:00 - Seite 97 ZDateiname: 6515_3416_02_buchblock.pdf; preflight
Page 101 of 401
Seat belts
98 G
Risk of accident
Only adjust the driver's seat when the vehi-
cle is stationary. You will otherwise be dis-
tracted from the road and traffic conditions
and you could lose control of the vehicle as
a result of the seat moving. This could
cause an accident. G
Risk of accident
Only adjust the steering wheel when the
vehicle is stationary and do not pull away
until the steering wheel adjustment mech-
anism is locked in position. You might oth-
erwise drive without the steering wheel
adjustment mechanism being locked in
position. As a result you could be distracted
from road and traffic conditions by an unex-
pected movement of the steering wheel
and thereby cause an accident.
The steerability of the vehicle is however
not affected.
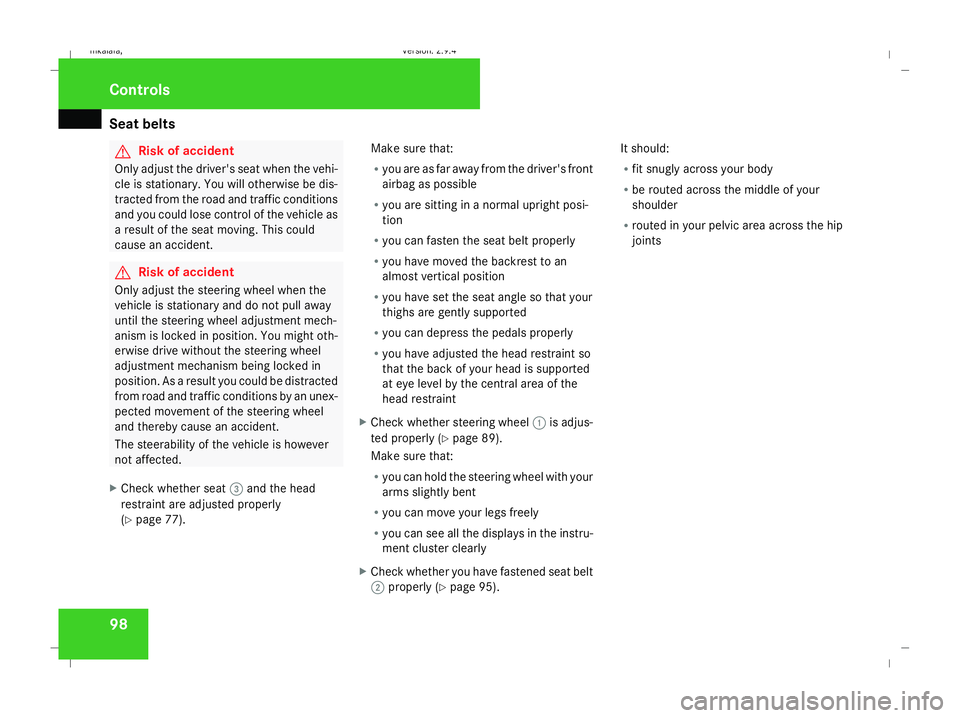
X Check whether seat 3and the head
restraint are adjusted properly
(Y page 77). Make sure that:
R
you are as far away from the driver's front
airbag as possible
R you are sitting in a normal upright posi-
tion
R you can fasten the seat belt properly
R you have moved the backrest to an
almost vertical position
R you have set the seat angle so that your
thighs are gently supported
R you can depress the pedals properly
R you have adjusted the head restraint so
that the back of your head is supported
at eye level by the central area of the
head restraint
X Check whether steering wheel 1is adjus-
ted properly (Y page 89).
Make sure that:
R you can hold the steering wheel with your
arms slightly bent
R you can move your legs freely
R you can see all the displays in the instru-
ment cluster clearly
X Check whether you have fastened seat belt
2 properly (Y page 95). It should:
R
fit snugly across your body
R be routed across the middle of your
shoulder
R routed in your pelvic area across the hip
joints Controls
211_AKB; 2; 5, en-GB
mkalafa,
Version: 2.9.4 2008-02-29T16:57:07+01:00 - Seite 98Dateiname: 6515_3416_02_buchblock.pdf; preflight
Page 159 of 401
Driving sys
tems 156 R
HOLD is deactivated by depressing the
accelerator pedal or the brake pedal
R there is a malfunction in the system or an
interruption in the power supply, e.g. bat-
tery failure
R the electrical system in the engine com-
partment, the battery or the fuses are
tampered with
R the battery is disconnected G
Risk of accident
If you wish to leave the vehicle or park it,
deactivate HOLD and secure the vehicle
against rolling away.
You will see a warning message in the multi-
function display if HOLD is activated and:
R the driver's door is opened and you release
the seat belt
R the ignition is switched off
R the bonnet is opened
Vehicles with manual transmission:
Brake immediately
X Immediately depress the brake pedal firmly
until the warning message in the multi-
function display goes out. This deactivates
HOLD. Vehicles with automatic transmission*:
Selector lever in park position
X Move the selector lever to Pto prevent the
vehicle from rolling away.
HOLD is deactivated. The warning message
in the multi-function display goes out.
A horn will also sound at regular intervals if
HOLD is activated and you:
R stop the engine and open the driver's door
R open the bonnet
The horn draws your attention to the fact that
the vehicle has been parked while HOLD is
still activated. The sound becomes louder if
you attempt to lock the vehicle. The vehicle
is not locked until HOLD is deactivated.
i If the ignition has been switched off, the
engine cannot be restarted until HOLD is
deactivated.
If there is a fault in the system or power supply
while HOLD is activated, the Brake immedi-
ately message appears in the multi-function
display. Immediately depress the brake firmly
until the warning message disappears from
the multi-function display, or in vehicles with
automatic transmission*, move the selector
lever to P. This deactivates HOLD. AIRMATIC DC*
Vehicle level Your vehicle automatically adjusts its ride
height to reduce petrol consumption and
improve driving safety.
The following vehicle levels are possible:
R
Normal
R Raised
R Lowered
The "Normal" and "Raised" vehicle levels can
be set manually.
The "Lowered" vehicle level is set automati-
cally:
R at speeds above 140 km/h
R if you have selected "Sports tuning I or
II" (Y page 157)
Setting the vehicle level manually
Select the "Normal" setting for normal road
surfaces and "Raised" for driving with snow
chains or on particularly poor road surfaces. G
Risk of injury
Make sure that nobody is in the vicinity of
the wheel housing or under the vehicle Controls
* optional
211_AKB; 2; 5, en-GB
mkalafa
,V ersion: 2.9.4
2008-02-29T16:57:07+01:00 - Seite 156 Dateiname: 6515_3416_02_buchblock.pdf; preflight
Page 183 of 401
Sliding sunroof
180
The following messages can appear in the
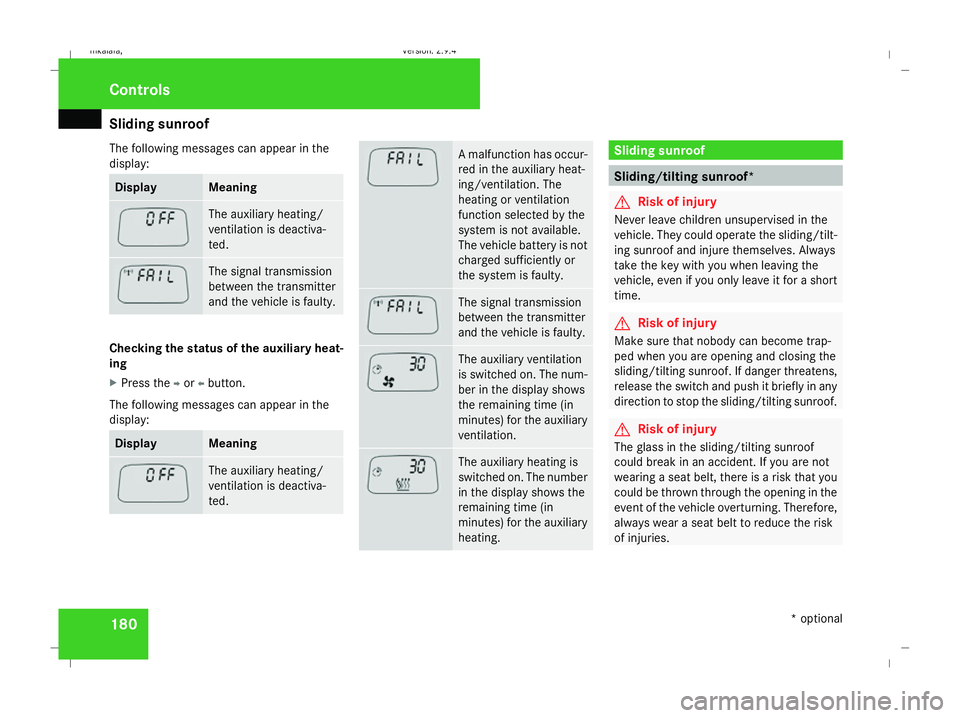
display: Display Meaning
The auxiliary heating/
ventilation is deactiva-
ted.
The signal transmission
between the transmitter
and the vehicle is faulty.
Checking the status of the auxiliary heat-
ing
X
Press the por obutton.
The following messages can appear in the
display: Display Meaning
The auxiliary heating/
ventilation is deactiva-
ted. A malfunction has occur-
red in the auxiliary heat-
ing/ventilation. The
heating or ventilation
function selected by the
system is not available.
The vehicle battery is not
charged sufficiently or
the system is faulty.
The signal transmission
between the transmitter
and the vehicle is faulty.
The auxiliary ventilation
is switched on. The num-
ber in the display shows
the remaining time (in
minutes) for the auxiliary
ventilation.
The auxiliary heating is
switched on. The number
in the display shows the
remaining time (in
minutes) for the auxiliary
heating. Sliding sunroof
Sliding/tilting sunroof*
G
Risk of injury
Never leave children unsupervised in the
vehicle. They could operate the sliding/tilt-
ing sunroof and injure themselves. Always
take the key with you when leaving the
vehicle, even if you only leave it for a short
time. G
Risk of injury
Make sure that nobody can become trap-
ped when you are opening and closing the
sliding/tilting sunroof. If danger threatens,
release the switch and push it briefly in any
direction to stop the sliding/tilting sunroof. G
Risk of injury
The glass in the sliding/tilting sunroof
could break in an accident. If you are not
wearing a seat belt, there is a risk that you
could be thrown through the opening in the
event of the vehicle overturning. Therefore,
always wear a seat belt to reduce the risk
of injuries. Controls
* optional
211_AKB; 2; 5, en-GB
mkalafa,
Version: 2.9.4 2008-02-29T16:57:07+01:00 - Seite 180Dateiname: 6515_3416_02_buchblock.pdf; preflight
Page 186 of 401
Sliding sunroof
183
X
Press the switch in the direction of
arrow 3and hold it until the sliding/tilting
sunroof is fully raised at the rear.
X Keep the switch pressed for an additional
second.
X Make sure that the sliding/tilting sunroof
can be opened or closed fully again
(Y page 181).
X If this is not the case, consult a qualified
specialist workshop. Panorama sliding sunroof with roller
sunblind*
Panorama sliding sunroof G
Risk of injury
Make sure that nobody can become trap-
ped when closing the panorama sliding sun-
roof. If danger threatens, release the switch
and push it briefly in any direction to stop
the panorama sliding sunroof. G
Risk of injury
The glass in the panorama sliding sunroof
could break in an accident. If you are not
wearing a seat belt, there is a risk that you could be thrown through the opening in the
event of the vehicle overturning. Therefore,
always wear a seat belt to reduce the risk
of injuries.
! Only open the panorama sliding sunroof
if it is free of snow and ice. Otherwise, mal-
functions may occur.
Do not allow anything to protrude from the
panorama sliding sunroof. The seals could
otherwise be damaged.
i When the panorama sliding sunroof is
open, resonance noises may occur as well
as the usual airflow noises. They are caused
by minor pressure fluctuations in the vehi-
cle interior. Change the position of the pan-
orama sliding sunroof or open a side
window slightly to reduce or eliminate
these noises.
i It is also possible to open and close the
panorama sliding sunroof from the outside
using the "Summer opening" (Y page 109)
and the "Convenience clos-
ing" (Y page 109) features respectively.
i If PRE-SAFE ®
has been activated, the pan-
orama sliding sunroof closes automatically,
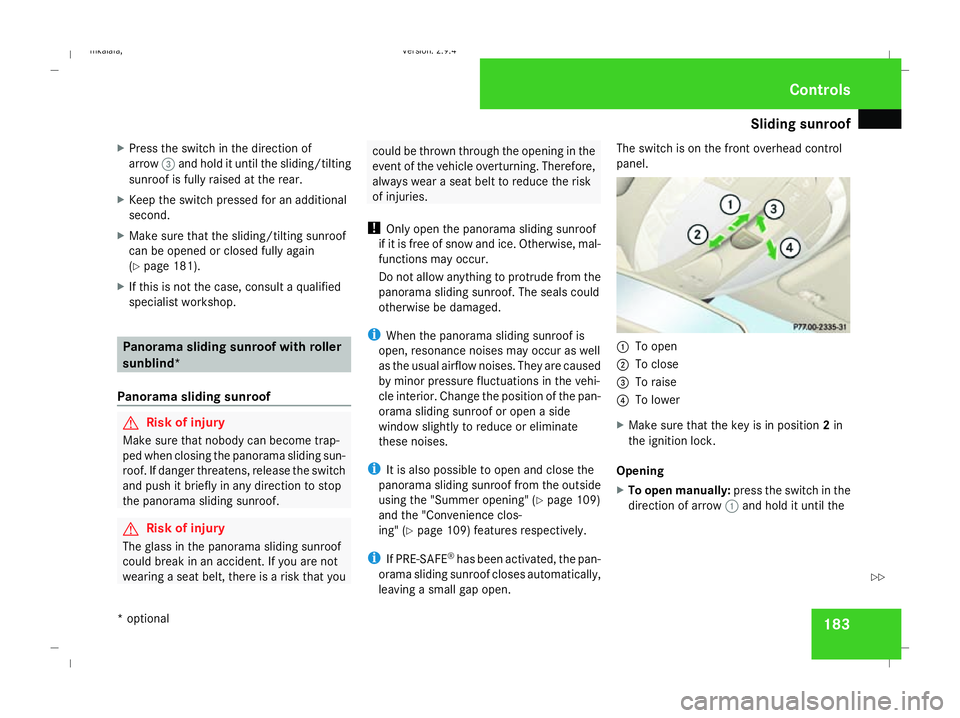
leaving a small gap open. The switch is on the front overhead control
panel.
1
To open
2 To close
3 To raise
4 To lower
X Make sure that the key is in position 2in
the ignition lock.
Opening
X To open manually: press the switch in the
direction of arrow 1and hold it until the Controls
* optional
211_AKB; 2; 5, en-GB
mkalafa,
Version: 2.9.4 2008-02-29T16:57:07+01:00 - Seite 183 ZDateiname: 6515_3416_02_buchblock.pdf; preflight
Page 194 of 401
Loading and stowing
191
R
Only load the additional loading floor in the
boot up to a maximum of 20 kg.
R Secure the load with sufficiently strong and
wear-resistant load restraints. Pad sharp
edges for protection.
i Load restraints are available at any quali-
fied specialist workshop, e.g. a Mercedes-
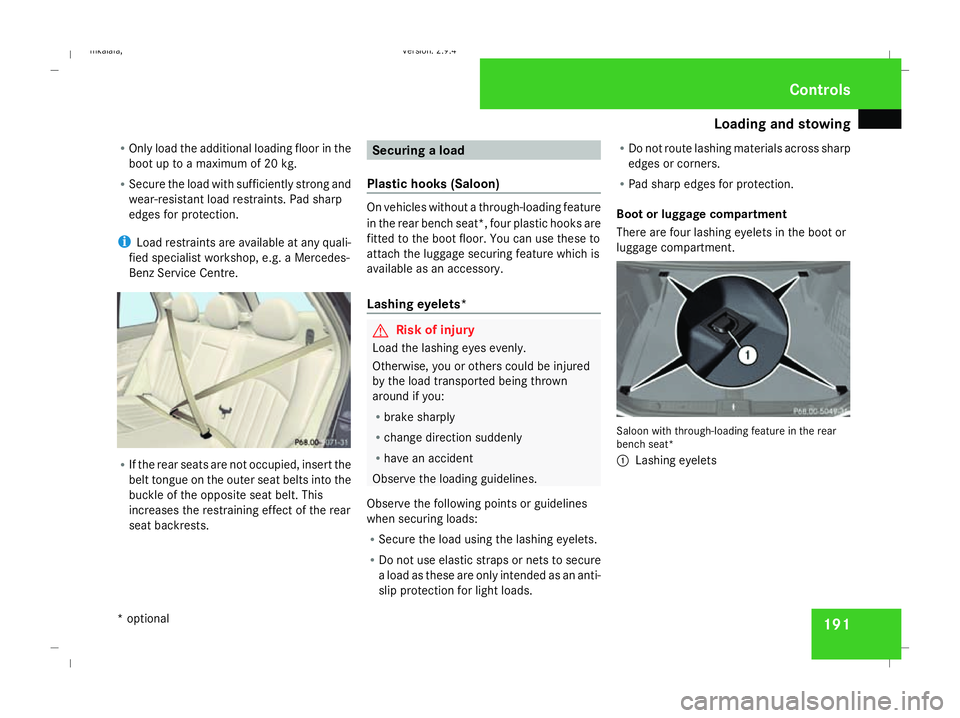
Benz Service Centre. R
If the rear seats are not occupied, insert the
belt tongue on the outer seat belts into the
buckle of the opposite seat belt. This
increases the restraining effect of the rear
seat backrests. Securing a load
Plastic hooks (Saloon) On vehicles without a through-loading feature
in the rear bench seat*, four plastic hooks are
fitted to the boot floor. You can use these to
attach the luggage securing feature which is
available as an accessory.
Lashing eyelets*
G
Risk of injury
Load the lashing eyes evenly.
Otherwise, you or others could be injured
by the load transported being thrown
around if you:
R brake sharply
R change direction suddenly
R have an accident
Observe the loading guidelines.
Observe the following points or guidelines
when securing loads:
R Secure the load using the lashing eyelets.
R Do not use elastic straps or nets to secure
a load as these are only intended as an anti-
slip protection for light loads. R
Do not route lashing materials across sharp
edges or corners.
R Pad sharp edges for protection.
Boot or luggage compartment
There are four lashing eyelets in the boot or
luggage compartment. Saloon with through-loading feature in the rear
bench seat*
1
Lashing eyelets Controls
* optional
211_AKB; 2; 5, en-GB
mkalafa,
Version: 2.9.4 2008-02-29T16:57:07+01:00 - Seite 191 ZDateiname: 6515_3416_02_buchblock.pdf; preflight