2008 MERCEDES-BENZ E-CLASS ESTATE instrument cluster
[x] Cancel search: instrument clusterPage 30 of 401
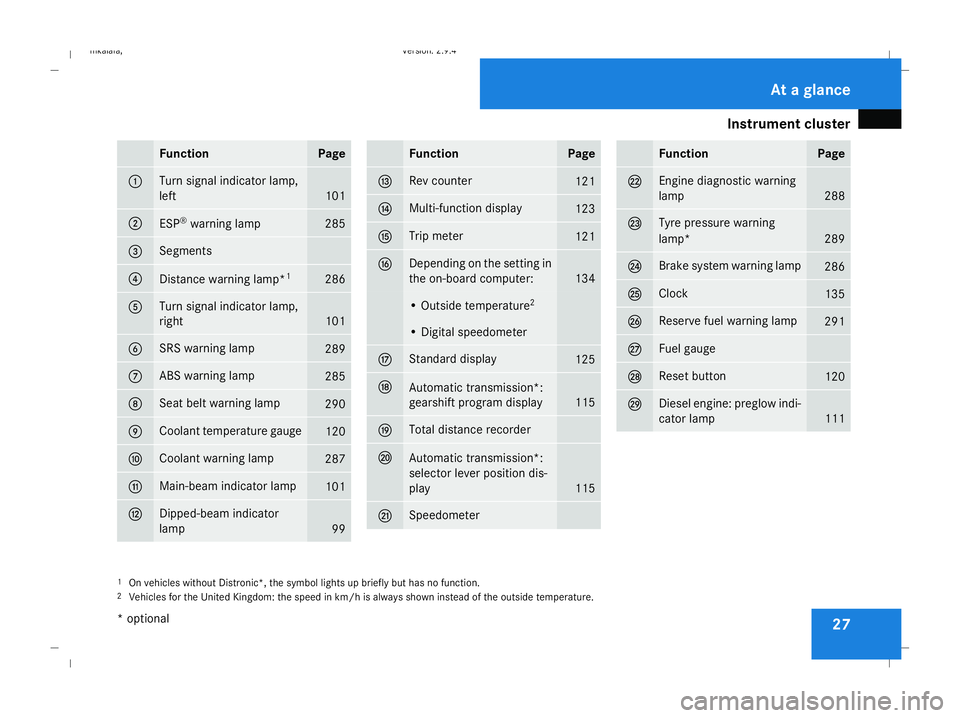
Instrument cluster
27Function Page
1 Turn signal indicator lamp,
left
101
2
ESP
®
warning lamp 285
3 Segments
4
Distance warning lamp*
1 286
5 Turn signal indicator lamp,
right
101
6 SRS warning lamp
289
7 ABS warning lamp
285
8 Seat belt warning lamp
290
9 Coolant temperature gauge
120
a Coolant warning lamp
287
b Main-beam indicator lamp
101
c Dipped-beam indicator
lamp
99 Function Page
d Rev counter
121
e Multi-function display
123
f Trip meter
121
g Depending on the setting in
the on-board computer:
134
• Outside temperature
2 • Digital speedometer
h Standard display
125
j
Automatic transmission*:
gearshift program display
115
k Total distance recorder
l
Automatic transmission*:
selector lever position dis-
play
115
m Speedometer Function Page
n Engine diagnostic warning
lamp
288
o Tyre pressure warning
lamp*
289
p Brake system warning lamp
286
q Clock
135
r Reserve fuel warning lamp
291
s Fuel gauge
t Reset button
120
u Diesel engine: preglow indi-
cator lamp
111
1
On vehicles without Distronic*, the symbol lights up briefly but has no function.
2 Vehicles for the United Kingdom: the speed in km/h is always shown instead of the outside temperature. At a glance
* optional
211_AKB; 2; 5, en-GB
mkalafa,
Version: 2.9.4 2008-02-29T16:57:07+01:00 - Seite 27Dateiname: 6515_3416_02_buchblock.pdf; preflight
Page 31 of 401
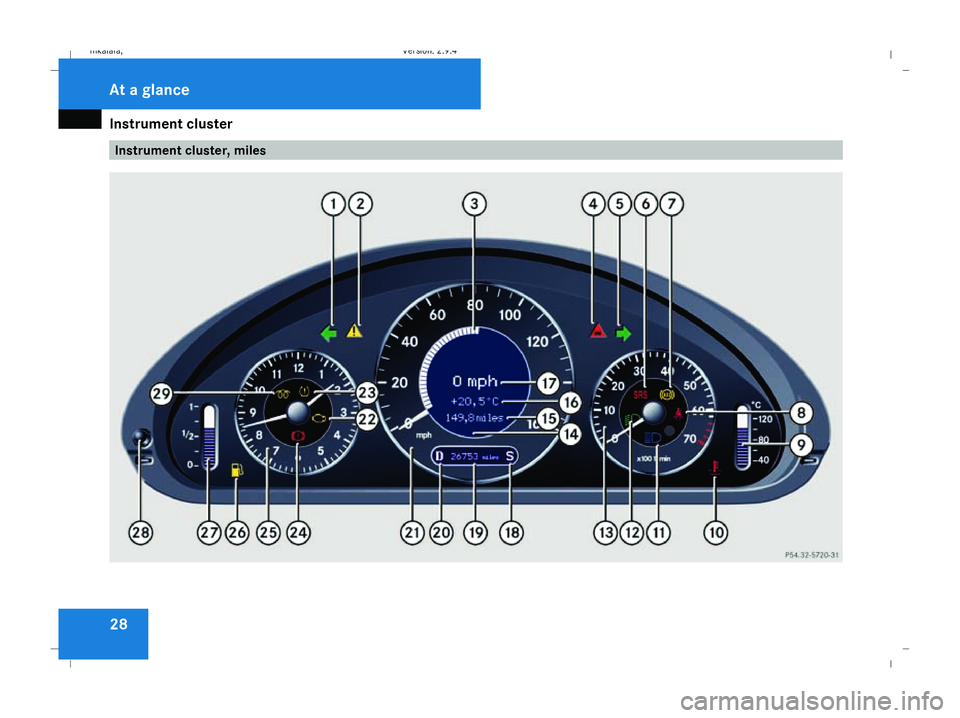
Instrument cluster
28 Instrument cluster, milesAt a glance
211_AKB; 2; 5, en-GB
mkalafa
, Version: 2.9.4
2008-02-29T16:57:07+01:00 - Seite 28 Dateiname: 6515_3416_02_buchblock.pdf; preflight
Page 32 of 401
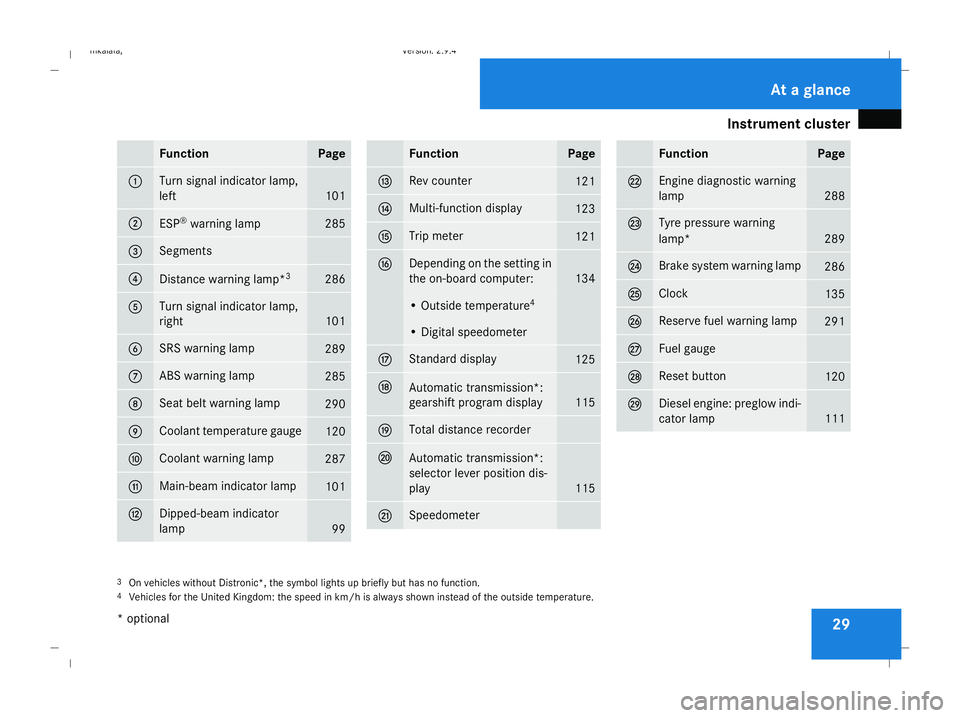
Instrument cluster
29Function Page
1 Turn signal indicator lamp,
left
101
2
ESP
®
warning lamp 285
3 Segments
4
Distance warning lamp*
3 286
5 Turn signal indicator lamp,
right
101
6 SRS warning lamp
289
7 ABS warning lamp
285
8 Seat belt warning lamp
290
9 Coolant temperature gauge
120
a Coolant warning lamp
287
b Main-beam indicator lamp
101
c Dipped-beam indicator
lamp
99 Function Page
d Rev counter
121
e Multi-function display
123
f Trip meter
121
g Depending on the setting in
the on-board computer:
134
• Outside temperature
4 • Digital speedometer
h Standard display
125
j
Automatic transmission*:
gearshift program display
115
k Total distance recorder
l
Automatic transmission*:
selector lever position dis-
play
115
m Speedometer Function Page
n Engine diagnostic warning
lamp
288
o Tyre pressure warning
lamp*
289
p Brake system warning lamp
286
q Clock
135
r Reserve fuel warning lamp
291
s Fuel gauge
t Reset button
120
u Diesel engine: preglow indi-
cator lamp
111
3
On vehicles without Distronic*, the symbol lights up briefly but has no function.
4 Vehicles for the United Kingdom: the speed in km/h is always shown instead of the outside temperature. At a glance
* optional
211_AKB; 2; 5, en-GB
mkalafa,
Version: 2.9.4 2008-02-29T16:57:07+01:00 - Seite 29Dateiname: 6515_3416_02_buchblock.pdf; preflight
Page 44 of 401
Occupant safety
41deceleration force would normally be high
enough to trigger the systems, or they
could be triggered unintentionally. Never
carry out any modifications on the restraint
systems.
Never tamper with electronic components
and their software.
SRS (Supplemental Restraint System)
The SRS reduces the risk of occupants com-
ing into contact with the vehicle's interior in
the event of an accident. It can also reduce
the forces to which occupants are subjected
during an accident.
The SRS consists of:
R the 1 warning lamp
R belt tensioners
R belt force limiters
R airbags
The 1 1 warning lamp The SRS functions are checked regularly
when you turn on the ignition and when the
engine is running. Malfunctions can therefore
be detected in good time. The
1 warning lamp in the instrument
cluster lights up when the ignition is switched
on. It goes out no later than a few seconds
after the engine is started. G
Risk of injury
If SRS is malfunctioning, individual systems
may be activated unintentionally or not be
triggered in the event of an accident with
heavy braking.
A malfunction has occurred if the 1
warning lamp:
R does not light up when you switch on the
ignition
R does not go out after the engine has been
running for a few seconds
R lights up again once the engine is running
In this case, have SRS checked immedi-
ately at a qualified specialist workshop.
Triggering of belt tensioners, belt force
limiters and airbags In the event of a collision, the sensor in the
airbag control unit evaluates important phys-
ical data such as duration, direction and force
of the vehicle deceleration or acceleration.
Based on the evaluation of this data, and depending on the vehicle's rate of longitudi-
nal deceleration in a collision, the airbag con-
trol unit pre-emptively triggers the belt
tensioners in the first stage.
i
The front belt tensioners can only be trig-
gered if the belt tongue is correctly
engaged in the seat belt buckle.
The front airbags are only deployed if there is
an even higher rate of vehicle deceleration in
a longitudinal direction.
Your vehicle has adaptive, dual stage front
airbags. When the first activation threshold
has been reached, the front airbag is filled
with enough propellant gas to minimise the
risk of injury. The front airbag is only fully
inflated if a second threshold is reached
within a few milliseconds, due to the control
unit having detected further deceleration.
Criteria for triggering belt tensioners and
airbags
In the first stage of a collision, the airbag con-
trol unit evaluates the duration and direction
of vehicle acceleration or deceleration in
order to determine whether it is necessary to
trigger the belt tensioner and/or airbag.
The belt tensioner and airbag triggering
thresholds are variable and are adapted to the
rate of deceleration of the vehicle. This proc- Safety
211_AKB; 2; 5, en-GB
mkalafa,
Version: 2.9.4
2008-02-29T16:57:07+01:00 - Seite 41 ZDateiname: 6515_3416_02_buchblock.pdf; preflight
Page 63 of 401
Driving safety sys
tems60 ESP
®
(Electronic Stability Program)
ESP ®
monitors driving stability and traction,
i.e. power transmission between the tyres
and the road surface.
If ESP ®
detects that the vehicle is deviating
from the direction desired by the driver, one
or more wheels are braked to stabilise the
vehicle. The engine output is also modified, if
necessary, to keep the vehicle on the desired
course within physical limits. ESP ®
assists
the driver when pulling away on wet or slip-
pery roads. ESP ®
can also stabilise the vehi-
cle during braking.
When ESP ®
intervenes, the vwarning
lamp flashes in the instrument cluster. G
Risk of accident
If the v warning lamp in the instrument
cluster flashes, proceed as follows:
R Do not deactivate ESP ®
under any cir-
cumstances.
R Only depress the accelerator pedal as far
as necessary when pulling away.
R Adapt your driving style to suit the pre-
vailing road and weather conditions.
The vehicle could otherwise go into a skid. ESP
®
cannot reduce the risk of an accident
if you drive too fast. ESP ®
cannot override
the laws of physics.
! If the vehicle is to be towed with the front
or rear axle raised, the ignition must be
switched off (key in position 0or 1in the
ignition lock). Application of the brakes by
ESP ®
could otherwise destroy the brake
system on the front or rear axle.
! Vehicles with 4MATIC* may not be towed
with the front or rear axle raised.
i Only use wheels with the recommended
tyre sizes. Only then will ESP ®
function
properly.
Deactivating/activating ESP ® ESP
®
is activated automatically when the
engine is running.
It may be best to deactivate ESP ®
in the fol-
lowing situations:
R when using snow chains
R in deep snow
R on sand or gravel G
Risk of accident
Activate ESP ®
as soon as the situations
described above no longer apply. ESP ®
will
otherwise not be able to stabilise the vehi-
cle if the vehicle starts to skid or a wheel
starts to spin.
If you deactivate ESP ®
:
R ESP ®
no longer improves driving stability.
R engine torque is not limited and the drive
wheels are able to spin. The spinning
wheels produce a cutting effect for better
traction.
R traction control is still activated.
R ESP ®
still provides support when you
brake.
i If ESP ®
is deactivated and one or more
wheels start to spin, the vwarning lamp
in the instrument cluster flashes. In such
situations ESP ®
will not stabilise the vehi-
cle. Safety
* optional
211_AKB; 2; 5, en-GB
mkalafa
,V ersion: 2.9.4
2008-02-29T16:57:07+01:00 - Seite 60 Dateiname: 6515_3416_02_buchblock.pdf; preflight
Page 64 of 401
Driving safety sys
tems 611
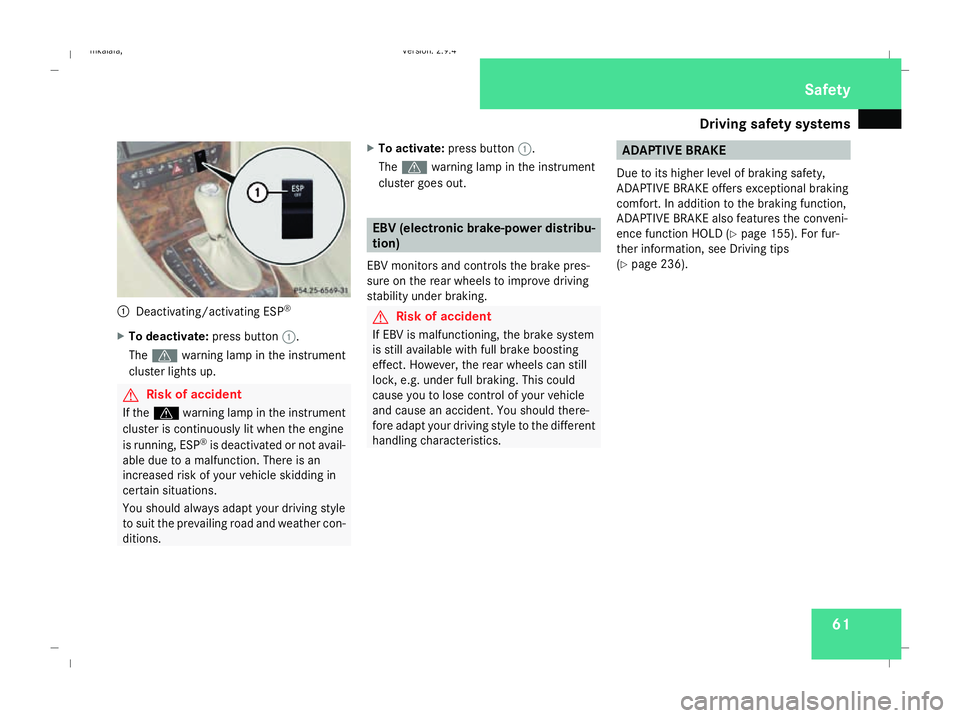
Deactivating/activating ESP ®
X To deactivate: press button1.
The v warning lamp in the instrument
cluster lights up. G
Risk of accident
If the v warning lamp in the instrument
cluster is continuously lit when the engine
is running, ESP ®
is deactivated or not avail-
able due to a malfunction. There is an
increased risk of your vehicle skidding in
certain situations.
You should always adapt your driving style
to suit the prevailing road and weather con-
ditions. X
To activate: press button 1.
The v warning lamp in the instrument
cluster goes out. EBV (electronic brake-power distribu-
tion)
EBV monitors and controls the brake pres-
sure on the rear wheels to improve driving
stability under braking. G
Risk of accident
If EBV is malfunctioning, the brake system
is still available with full brake boosting
effect. However, the rear wheels can still
lock, e.g. under full braking. This could
cause you to lose control of your vehicle
and cause an accident. You should there-
fore adapt your driving style to the different
handling characteristics. ADAPTIVE BRAKE
Due to its higher level of braking safety,
ADAPTIVE BRAKE offers exceptional braking
comfort. In addition to the braking function,
ADAPTIVE BRAKE also features the conveni-
ence function HOLD (Y page 155). For fur-
ther information, see Driving tips
(Y page 236). Safety
211_AKB; 2; 5, en-GB
mkalafa
,V ersion: 2.9.4
2008-02-29T16:57:07+01:00 - Seite 61 ZDateiname: 6515_3416_02_buchblock.pdf; preflight
Page 68 of 401
65
Opening and closing
...........................66
Key positions ....................................... 76
Seats .................................................... 77
Steering wheel .................................... 89
Mirrors ................................................. 91
Memory functions* .............................93
Seat belts ............................................. 95
Lights ................................................... 99
Windscreen wipers ...........................105
Side windows .................................... 107Driving and parking
..........................110
Transmission ..................................... 114
Instrument cluster ............................120
On-board computer ..........................121
Driving systems ................................ 142
Air conditioning ................................. 162
Sliding sunroof .................................. 180
Loading and stowing ........................186
Features ............................................. 207 Controls
211_AKB; 2; 5, en-GB
mkalafa,
Version: 2.9.4
2008-02-29T16:57:07+01:00 - Seite 65 Dateiname: 6515_3416_02_buchblock.pdf; preflight
Page 102 of 401
Lights
99Lights
Light switch
For reasons of safety, Mercedes-Benz recom-
mends that you drive with the lights switched
on even during the daytime. In some coun-
tries, daytime operation of headlamps varies
due to legal requirements and self-imposed
obligations. In these countries, the dipped-
beam headlamps are automatically switched
on when the engine is started.
i If you drive in countries in which traffic
drives on the opposite side of the road to
the country where the vehicle is registered,
oncoming traffic may be dazzled by the
asymmetrical dipped-beam headlamps.
Have the headlamps changed to symmet-
rical dipped beam when driving in these
countries. You can obtain information
about this from any Mercedes-Benz Service
Centre. $
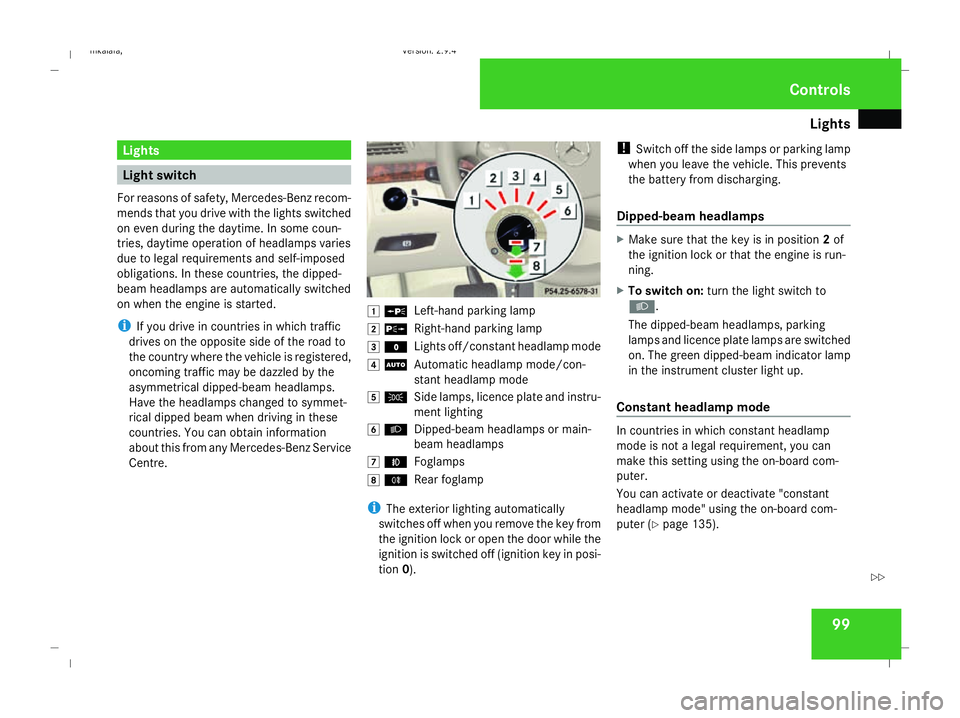
a
Left-hand parking lamp
% g
Right-hand parking lamp
& M
Lights off/constant headlamp mode
( U
Automatic headlamp mode/con-
stant headlamp mode
) C
Side lamps, licence plate and instru-
ment lighting
* B
Dipped-beam headlamps or main-
beam headlamps
, ¥
Foglamps
. †
Rear foglamp
i The exterior lighting automatically
switches off when you remove the key from
the ignition lock or open the door while the
ignition is switched off (ignition key in posi-
tion 0). !
Switch off the side lamps or parking lamp
when you leave the vehicle. This prevents
the battery from discharging.
Dipped-beam headlamps X
Make sure that the key is in position 2of
the ignition lock or that the engine is run-
ning.
X To switch on: turn the light switch to
B.
The dipped-beam headlamps, parking
lamps and licence plate lamps are switched
on. The green dipped-beam indicator lamp
in the instrument cluster light up.
Constant headlamp mode In countries in which constant headlamp
mode is not a legal requirement, you can
make this setting using the on-board com-
puter.
You can activate or deactivate "constant
headlamp mode" using the on-board com-
puter (Y page 135). Controls
211_AKB; 2; 5, en-GB
mkalafa,
Version: 2.9.4 2008-02-29T16:57:07+01:00 - Seite 99 ZDateiname: 6515_3416_02_buchblock.pdf; preflight