2008 MERCEDES-BENZ CLS COUPE ECO mode
[x] Cancel search: ECO modePage 8 of 329

5
Central locking
Automatic locking (on-board com-
puter) . . . . . . . . . . . . . . . . . . . . . . . 127
Key . . . . . . . . . . . . . . . . . . . . . . . . . . 66
KEYLESS GO . . . . . . . . . . . . . . . 68, 69
Central locking/unlocking button . . . 70
Central unlocking Key . . . . . . . . . . . . . . . . . . . . . . . . . . 66
KEYLESS GO . . . . . . . . . . . . . . . 68, 69
Centre console
Lower section . . . . . . . . . . . . . . . . . . 32
Upper section . . . . . . . . . . . . . . . . . . 34
Changing a wheel
see Flat tyre
Child-proof locks
Rear doors . . . . . . . . . . . . . . . . . . . . 56
Side windows (rear) . . . . . . . . . . . . . 56
Children
in the vehicle . . . . . . . . . . . . . . . . . . 49
Restraint systems . . . . . . . . . . . . . . 49
Child seat
Automatic recognition . . . . . . . . . . . 51
Automatic recognition (malfunc-
tion) . . . . . . . . . . . . . . . . . . . . . . . . 243
ISOFIX . . . . . . . . . . . . . . . . . . . . . . . 55
Recommendations . . . . . . . . . . . . . . 54
Suitable positions . . . . . . . . . . . . . . 53
Cigarette lighter . . . . . . . . . . . . . . . . 181
Cockpit Overview . . . . . . . . . . . . . . . . . . . . . 22 Collapsible wheel
Pumping up . . . . . . . . . . . . . . . . . . 285
Storage location . . . . . . . . . . . . . . . 218
Technical data . . . . . . . . . . . . . . . . 308
COMAND . . . . . . . . . . . . . . . . . . . . . . . 114
On-board computer . . . . . . . . . . . . 114
Constant headlamp mode
Setting (on-board computer) . . . . . 125
Consumption statistics (on-board
computer) . . . . . . . . . . . . . . . . . . . . . . 130
Convenience closing . . . . . . . . . . . . . 100
Coolant . . . . . . . . . . . . . . . . . . . . . . . . 196
Checking the level . . . . . . . . . . . . . 196
Display message . . . . . . . . . . 229, 232
Mixture ratio . . . . . . . . . . . . . . . . . 316
Temperature gauge . . . . . . . . . . . . 110
Warning lamp . . . . . . . . . . . . . . . . . 246
Cruise control . . . . . . . . . . . . . . . . . . 132
Display message . . . . . . . . . . . . . . 227
Cup holder . . . . . . . . . . . . . . . . . . . . . 172 D
Dashboard see Cockpit
Date
Setting (on-board computer) . . . . . 124
Daytime driving lights
see Constant headlamp mode Delayed switch-off
Exterior lighting (on-board com-
puter)
. . . . . . . . . . . . . . . . . . . . . . . 126
Interior lighting (on-board com-
puter) . . . . . . . . . . . . . . . . . . . . . . . 126
Diesel
Low outside temperatures . . . . . . . 193
Diesel engine
Winter driving . . . . . . . . . . . . . . . . . 193
Digital speedometer . . . . . . . . . . . . . 116
Dipped-beam headlamps Automatic headlamp mode* . . . . . . 92
Display message . . . . . . . . . . . . . . 233
Symmetrical . . . . . . . . . . . . . . . . . . 208
Display message . . . . . . . . . . . . . . . . 219
Displaying . . . . . . . . . . . . . . . . . . . 121
Service display . . . . . . . . . . . . . . . . 209
Symbol messages . . . . . . . . . . . . . 228
Text messages . . . . . . . . . . . . . . . . 220
Up (AMG menu) . . . . . . . . . . . . . . . 116
Distance warning function . . . . . . . . 138
Distance warning lamp . . . . . . . . . . . 138
Distronic . . . . . . . . . . . . . . . . . . . . . . . 135
Cleaning the sensors . . . . . . . . . . . 213
Cover . . . . . . . . . . . . . . . . . . . . . . . 213
Display message . . . . . . . . . . . . . . 221
Distance warning function . . . . . . . 138
Driving tips . . . . . . . . . . . . . . . . . . . 141
Warning lamp . . . . . . . . . . . . . . . . . 245 Index
219_AKB; 2; 4, en-GB
mkalafa,
2007-11-13T09:28:36+01:00 - Seite 5
Page 86 of 329
Mirrors
83Easy-entry/exit feature*
The Easy-entry/exit feature makes getting in
and out of your vehicle easier.
The steering wheel swings upwards when
you:
R remove the key from the ignition lock
R open the driver's door when the key is in
the ignition lock or in position 1
The steering wheel is moved automatically to
the position previously set when the key is
inserted into the ignition lock with the driver's
door closed. G
Risk of injury
Make sure that nobody can become trap-
ped when you activate the easy-entry/exit
feature.
If there is a risk of becoming trapped, stop
the adjustment procedure. To halt the pro-
cedure:
R press the steering-column adjustment
switch
R press one of the memory function posi-
tion buttons
The steering column stops moving immedi-
ately. Never leave children unsupervised in the
vehicle. They could open the driver's door
and thereby unintentionally activate the
easy-entry feature and become trapped.
The most recent position of the steering
wheel is stored when you switch off the igni-
tion or when you store a memory position
(Y page 86).
You can activate and deactivate the Easy-
entry/exit feature via the on-board computer
(Y page 128). Mirrors
Before starting off, adjust the mirrors in such
a way that you can get a good overview of
road and traffic conditions. Rear-view mirror
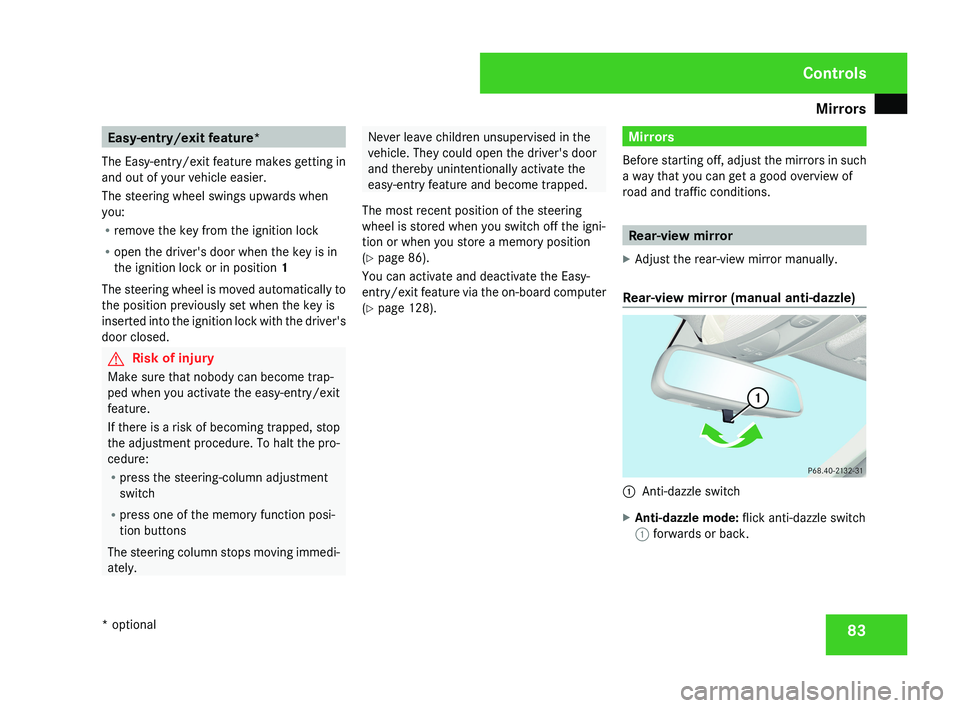
X Adjust the rear-view mirror manually.
Rear-view mirror (manual anti-dazzle) 1
Anti-dazzle switch
X Anti-dazzle mode: flick anti-dazzle switch
1 forwards or back. Controls
* optional
219_AKB; 2; 4, en-GB
mkalafa,
2007-11-13T09:28:36+01:00 - Seite 83
Page 124 of 329
On-board computer
121Distronic* menu
You can read the current Distronic settings in
the Distronic menu. (Y page 135)
i Menu overview: see ( Y page 114).Message memory menu
Previous display messages can be called up
in
the Message memory menu. You will only
see the Message memory menu if there are
any display messages. G
Risk of accident
The on-board computer only records and
displays messages and warnings from cer-
tain systems. For this reason, you should
always make sure that your vehicle is safe
to
drive. You could otherwise cause an acci-
dent by driving an unsafe vehicle.
Switching off the ignition clears the Message
memory except for the highest priority dis-
play messages. The on-board computer will
delete these display messages only after the
reason for the message has been rectified.
i Menu overview: see ( Y page 114). Displaying messages Use the buttons on the multi-function steer-
ing wheel.
X
Press the è or · button repeatedly
until either the original menu or the Mes-
sage memory menu appears.
If the Message memory menu does not
appear, there are no display messages.
If there are messages, the following mes-
sage may appear in the multi-function dis-
play, for example: 2 messages.
X Press the j or k
button to call up a
display message.
You can scroll through the display mes-
sages in sequence. The possible display
messages are explained in the "Practical
advice" section ( Y page 219). Settings menu
There are two functions in the Settings...
menu:
the To reset: Press reset button
for 3 seconds function, which you can use
to reset most settings to the factory settings.
There are also submenus in which you can
make individual settings for your vehicle.
i Menu overview: see ( Y page 114).
Use the buttons on the multi-function steer-
ing wheel.
Resetting to factory settings For safety reasons, not all functions are reset:
permanent
Speedtronic can only be set in the
Vehicle menu. The Headlamp mode function
in the Lighting submenu is only reset if the
vehicle is stationary.
X Press the è
or · button to select the
Settings... menu.
X Press and hold the reset button on the left-
hand side of the instrument cluster for
approximately three seconds.
A
prompt appears in the multi-function dis-
play asking you to press the reset button
again to confirm. Controls
* optional
219_AKB; 2; 4, en-GB
mkalafa,
2007-11-13T09:28:36+01:00 - Seite 121 Z
Page 125 of 329
On-board computer
122
X
Press the reset button again.
The functions of most submenus are
restored to the factory settings.
or
X If you want to retain the settings, do not
press the reset button a second time.
After approximately 5 seconds, the Set-
tings... menu appears again.
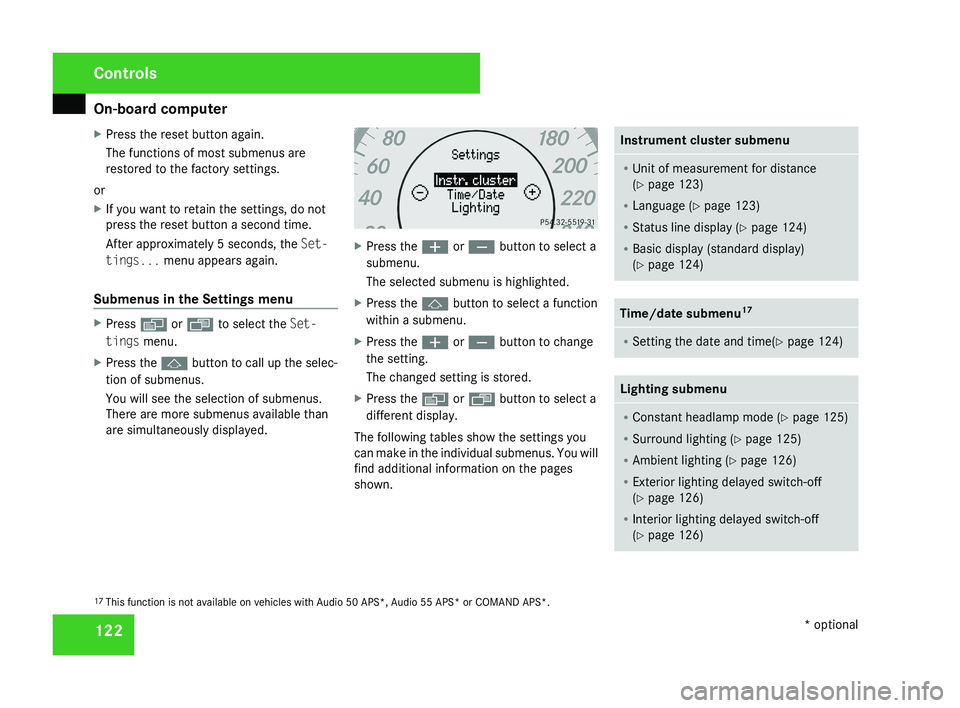
Submenus in the Settings menu X
Press è or · to select the Set-
tings menu.
X Press the j button to call up the selec-
tion of submenus.
You will see the selection of submenus.
There are more submenus available than
are simultaneously displayed. X
Press the æ or ç button to select a
submenu.
The selected submenu is highlighted.
X Press the j button to select a function
within a submenu.
X Press the æ or ç button to change
the setting.
The changed setting is stored.
X Press the è or ÿ button to select a
different display.
The following tables show the settings you
can make in the individual submenus. You will
find additional information on the pages
shown. Instrument cluster submenu
R
Unit of measurement for distance
(Y page 123)
R Language (Y page 123)
R Status line display ( Y page 124)
R Basic display (standard display)
(Y page 124) Time/date submenu
17 R
Setting the date and time(Y page 124) Lighting submenu
R
Constant headlamp mode (Y page 125)
R Surround lighting ( Y page 125)
R Ambient lighting (Y page 126)
R Exterior lighting delayed switch-off
(Y page 126)
R Interior lighting delayed switch-off
(Y page 126) 17
This function is not available on vehicles with Audio 50 APS*, Audio 55 APS* or COMAND APS*. Controls
* optional
219_AKB; 2; 4, en-GB
mkalafa,
2007-11-13T09:28:36+01:00 - Seite 122
Page 128 of 329
On-board computer
125
X
Press the è or · button to select the
Settings... menu.
X Press the j
button to call up the selec-
tion of submenus.
X Press the æ
or ç button to select the
Time/Date submenu.
Setting the time
X Use j to select Clock, hours Con-
firm by press. R (or Clock, minutes
Confirm by press. R).
X Press the æ or ç button to set a
value.
X Press the reset button on the left of the
instrument cluster.
The set time is stored.
Setting the date
X Press the j
button to select Set date
Day (or Set date Month or Set date
Year).
X Press the æ or ç button to set the
values.
X Press the j, è or ÿ button to
select a different display. Setting constant headlamp mode If you have set constant headlamp mode and
the light switch is in position M orU,
the
side lamps, dipped-beam headlamps and
licence plate lighting are switched on auto-
matically when the engine is running. Turning
the light switch to a different position
switches on the corresponding lights.
For safety reasons, it is only possible to set
this function when the vehicle is stationary.
In countries in which constant headlamp
mode is a legal requirement, Constant is the
factory setting.
X Press the è
or · button to select the
Settings... menu.
X Press the j
button to call up the selec-
tion of submenus.
X Press the æ
or ç button to select the
Lighting submenu.
X Press the j button to select Headlamp
mode.
X Press the æ or ç button to set the
mode
for the headlamps to Manual or Con-
stant (constant headlamp mode).
X Press the j, è or ÿ button to
select a different display. Switching the surround lighting on or
off If the surround lighting is switched on, the
following lights will be switched on automat-
ically
in the dark after you have unlocked the
vehicle using the key:
R the side lamps
R the tail lamps
R the licence plate lighting
R the front foglamps
R the lights* in the exterior mirrors
The surround lighting switches off automati-
cally if you open the driver's door or after 40
seconds.
X Press the è
or · button to select the
Settings... menu.
X Press the j
button to call up the selec-
tion of submenus.
X Press the æ
or ç button to select the
Lighting submenu.
X Press the j button to select the Sur-
round lighting function. Controls
* optional
219_AKB; 2; 4, en-GB
mkalafa,
2007-11-13T09:28:36+01:00 - Seite 125 Z
Page 158 of 329

Air conditioning
155Function Recommendation/Notes
d , Activates/deactivates Thermatic i
Only use this operating mode for a short time, e.g. in
a tunnel. Otherwise, the windows can mist up due to
lack of fresh air. (Y page 164)
e U Controls the air conditioning automatically i
Activate automatic air conditioning. AUTO appears in
the display. (Y page 159)
4-zone Thermotronic* Controls
* optional
219_AKB; 2; 4, en-GB
mkalafa,
2007-11-13T09:28:36+01:00 - Seite 155
Page 160 of 329
Air conditioning
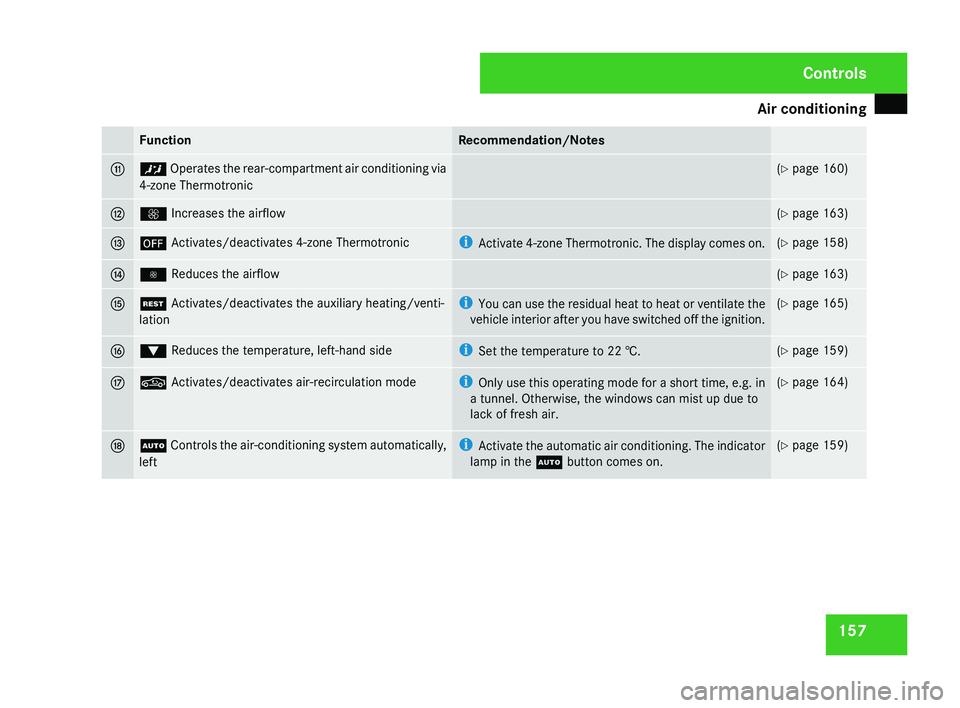
157Function Recommendation/Notes
b ™ Operates the rear-compartment air conditioning via
4-zone Thermotronic (Y page 160)
c Q Increases the airflow (Y page 163)
d ´ Activates/deactivates 4-zone Thermotronic i
Activate
4-zone Thermotronic. The display comes on. (Y page 158)
e · Reduces the airflow (Y page 163)
f T Activates/deactivates the auxiliary heating/venti-
lation i
You
can use the residual heat to heat or ventilate the
vehicle interior after you have switched off the ignition. (Y page 165)
g % Reduces the temperature, left-hand side i
Set the temperature to
22 †. (Y page 159)
h , Activates/deactivates air-recirculation mode i
Only
use this operating mode for a short time, e.g. in
a tunnel. Otherwise, the windows can mist up due to
lack of fresh air. (Y page 164)
j U
Controls the air-conditioning system automatically,
left i
Activate the automatic air conditioning. The indicator
lamp in the U button comes on. (Y page 159) Controls
219_AKB; 2; 4, en-GB
mkalafa,
2007-11-13T09:28:36+01:00 - Seite 157
Page 168 of 329
Air conditioning
165
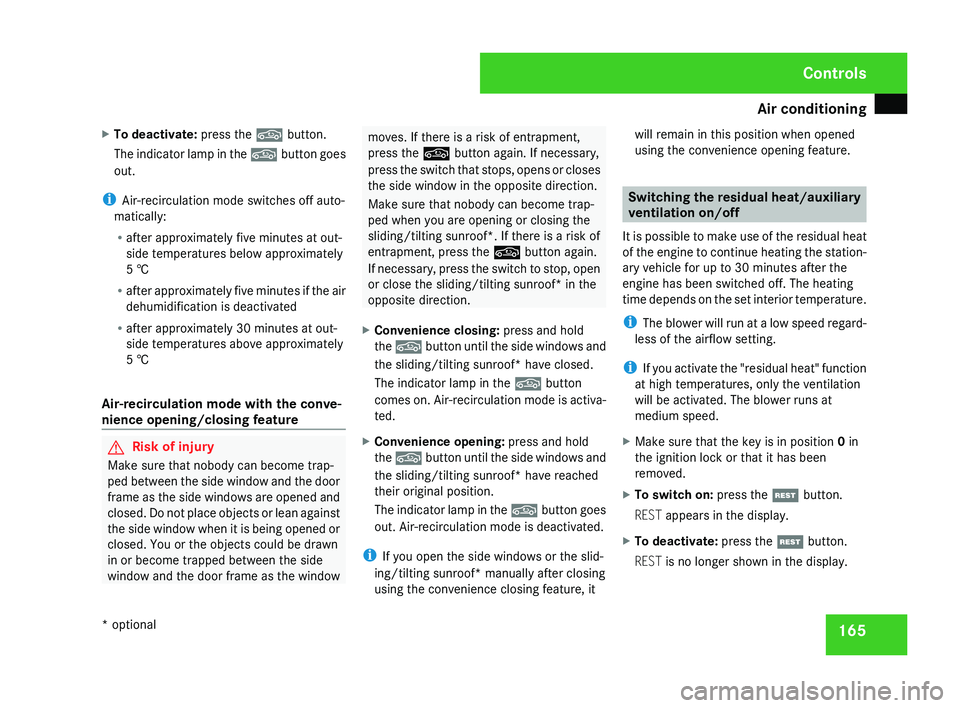
X
To deactivate: press the , button.
The indicator lamp in the , button goes
out.
i Air-recirculation mode switches off auto-
matically:
R after approximately five minutes at out-
side temperatures below approximately
5 †
R after
approximately five minutes if the air
dehumidification is deactivated
R after approximately 30 minutes at out-
side temperatures above approximately
5 †
Air-recirculation mode with the conve-
nience opening/closing feature G
Risk of injury
Make sure that nobody can become trap-
ped
between the side window and the door
frame as the side windows are opened and
closed. Do not place objects or lean against
the side window when it is being opened or
closed. You or the objects could be drawn
in or become trapped between the side
window and the door frame as the window moves. If there is a risk of entrapment,
press the , button again. If necessary,
press
the switch that stops, opens or closes
the side window in the opposite direction.
Make sure that nobody can become trap-
ped when you are opening or closing the
sliding/tilting sunroof*. If there is a risk of
entrapment, press the , button again.
If necessary, press the switch to stop, open
or close the sliding/tilting sunroof* in the
opposite direction.
X Convenience closing: press and hold
the ,
button until the side windows and
the sliding/tilting sunroof* have closed.
The indicator lamp in the , button
comes on. Air-recirculation mode is activa-
ted.
X Convenience opening: press and hold
the ,
button until the side windows and
the sliding/tilting sunroof* have reached
their original position.
The indicator lamp in the , button goes
out. Air-recirculation mode is deactivated.
i If you open the side windows or the slid-
ing/tilting sunroof* manually after closing
using the convenience closing feature, it will remain in this position when opened
using the convenience opening feature. Switching the residual heat/auxiliary
ventilation on/off
It
is possible to make use of the residual heat
of the engine to continue heating the station-
ary vehicle for up to 30 minutes after the
engine has been switched off. The heating
time depends on the set interior temperature.
i The blower will run at a low speed regard-
less of the airflow setting.
i If you activate the "residual heat" function
at high temperatures, only the ventilation
will be activated. The blower runs at
medium speed.
X Make sure that the key is in position 0 in
the ignition lock or that it has been
removed.
X To switch on: press the T button.
REST appears in the display.
X To deactivate: press the T button.
REST is no longer shown in the display. Controls
* optional
219_AKB; 2; 4, en-GB
mkalafa,
2007-11-13T09:28:36+01:00 - Seite 165