Page 179 of 329
Loading and stowing
176
X
Press button 1.
Flap 2 folds down.
X Press catch 3 in and pull out frame 4
containing the skibag. G
Risk of poisoning
When the skibag has been removed, always
drive with the boot lid closed. Exhaust
fumes could otherwise enter the vehicle
interior. Luggage net in the front-passenger
footwell
G
Risk of injury
Only place lightweight items in the luggage
net. Do not use it to transport heavy, bulky,
sharp-edged or fragile objects. In the event
of an accident, the luggage net will not
secure the transported goods. Loading guidelines
G
Risk of injury
Secure and position the load as described
in the loading guidelines.
Even if you follow all the loading guidelines,
the load will increase the risk of injury in the
event of an accident. G
Risk of poisoning
Keep the boot lid closed while the vehicle
is in operation. Otherwise, exhaust fumes
could enter the vehicle interior and poison
you.
The handling characteristics of a laden vehi-
cle are dependent on the distribution of the
load within the vehicle. You should therefore
load your vehicle as shown in the illustrations.
Observe the following notes when transport-
ing a load:
R When transporting a load, never exceed the
maximum permissible gross vehicle weight
or the permissible axle loads for the vehicle
(including occupants).
R Position heavy loads as far forwards and as
low in the boot as possible.
R The load must not protrude above the
upper edge of the backrests. R
Always place the load against the front or
rear seat backrests.
R Secure the load with sufficiently strong and
wear-resistant load restraints. Pad sharp
edges for protection.
i Load restraints are available at any quali-
fied specialist workshop, e.g. a Mercedes-
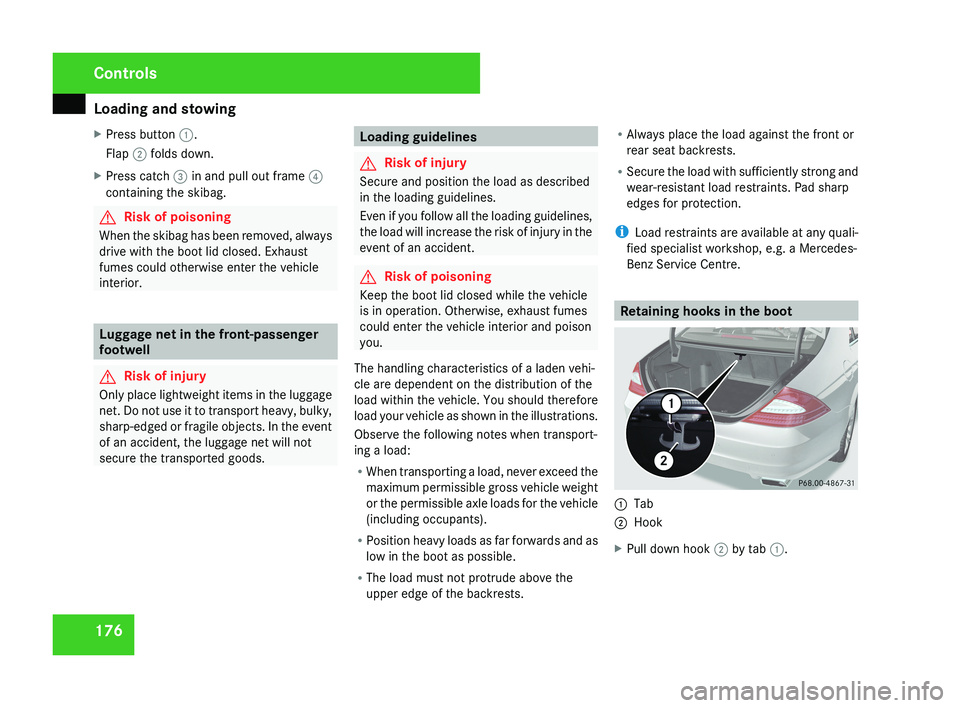
Benz Service Centre. Retaining hooks in the boot1
Tab
2 Hook
X Pull down hook 2 by tab 1.
Controls
219_AKB; 2; 4, en-GB
mkalafa,
2007-11-13T09:28:36+01:00 - Seite 176
Page 219 of 329
Where will I find...?
216 Where will I find...?
Warning triangle
The warning triangle is located in the luggage
well under the boot floor.1 Warning triangle
X Remove warning triangle 1.Setting up the warning triangle
1
Retainer
2 Side reflectors
3 Feet
X Fold feet 3 down and out to the side.
X Pull side reflectors 2 upwards to form a
triangle and lock them at the top using
retainer 1.
First-aid kit
i Check the expiry date of the first-aid kit
annually, and replace the contents if nec-
essary.
The first-aid kit is located in the stowage com-
partment under the front-passenger seat.
1 Handle
X To open: pull handle 1 up.
X Fold the cover forwards.
X Remove the first-aid kit.
Practical advice
219_AKB; 2; 4, en-GB
mkalafa,
2007-11-13T09:28:36+01:00 - Seite 216
Page 220 of 329
Where will I find...?
217Fire extinguisher*
i Have the fire extinguisher refilled after
each use and checked every one or two
years. Otherwise, it may fail in an emer-
gency.
Observe the legal requirements in all coun-
tries concerned.
The fire extinguisher is located in the stowage
compartment underneath the driver's seat.1 Handle
X To open: pull handle 1 up.
X Fold the cover forwards.
X Remove the fire extinguisher.
Vehicle tool kit, jack and spare
wheel*
The vehicle tool kit is located in a stowage
compartment underneath the boot floor.
G Risk of injury
The jack is designed only to raise and hold
the vehicle for a short time while a wheel
is being changed.
If you are carrying out work on the vehicle,
you must use stands.
Make sure that the jack is placed on a firm,
non-slip and level surface. Do not use
wooden blocks or similar objects as a jack
underlay. Otherwise, the jack will not be
able to achieve its load-bearing capacity
due to the restricted height.
Do not start the engine at any time while a
wheel is being changed.
Do not lie under the vehicle when it is being
supported by the jack. If you do not raise
the vehicle as described, it could slip off the
jack (e.g. if the engine is started or a door
or the boot lid is opened or closed) and you
could be seriously injured.
i When using the jack, you should also
observe the safety notes in the "Flat tyre"
section ( Y page 276). X
Fold up the boot floor and hook the retainer
into the top of the boot frame.
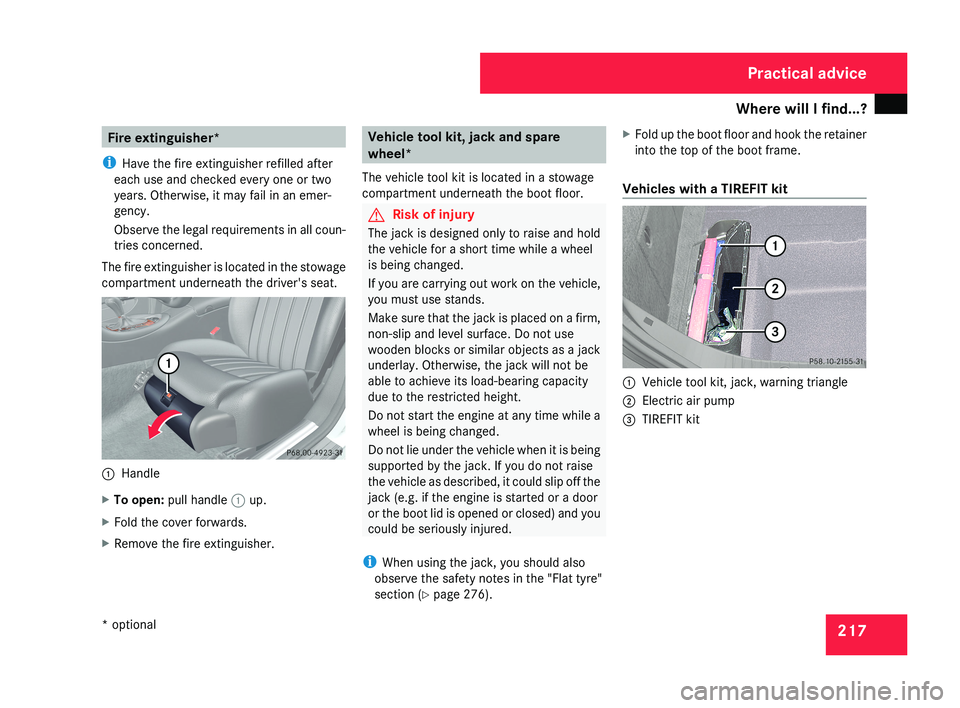
Vehicles with a TIREFIT kit
1 Vehicle tool kit, jack, warning triangle
2 Electric air pump
3 TIREFIT kit
Practical advice
* optional
219_AKB; 2; 4, en-GB
mkalafa,
2007-11-13T09:28:36+01:00 - Seite 217
Page 221 of 329
Where will I find...?
218
Vehicles with "Minispare" emergency
spare wheel*/collapsible emergency
spare wheel* or a spare wheel
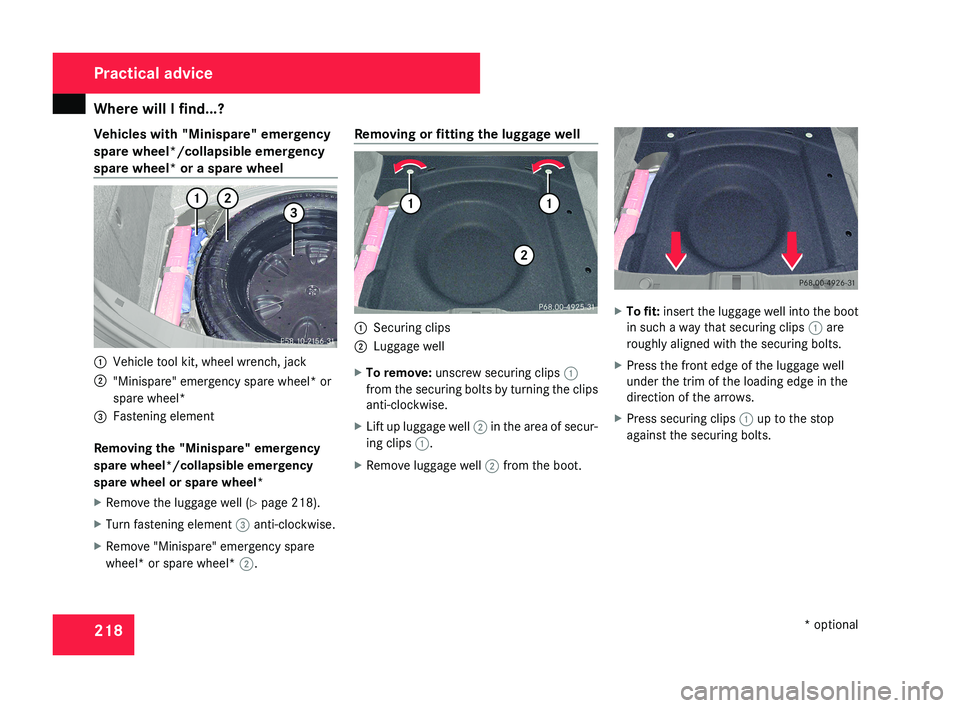
1
Vehicle tool kit, wheel wrench, jack
2 "Minispare" emergency spare wheel* or
spare wheel*
3 Fastening element
Removing the "Minispare" emergency
spare wheel*/collapsible emergency
spare wheel or spare wheel*
X Remove the luggage well (Y page 218).
X Turn fastening element 3 anti-clockwise.
X Remove "Minispare" emergency spare
wheel* or spare wheel* 2.Removing or fitting the luggage well
1
Securing clips
2 Luggage well
X To remove: unscrew securing clips 1
from the securing bolts by turning the clips
anti-clockwise.
X Lift up luggage well 2 in the area of secur-
ing clips 1.
X Remove luggage well 2 from the boot. X
To fit: insert the luggage well into the boot
in such a way that securing clips 1 are
roughly aligned with the securing bolts.
X Press the front edge of the luggage well
under the trim of the loading edge in the
direction of the arrows.
X Press securing clips 1 up to the stop
against the securing bolts. Practical advice
* optional
219_AKB; 2; 4, en-GB
mkalafa,
2007-11-13T09:28:36+01:00 - Seite 218
Page 231 of 329
Display messages
228 Symbol messages
G
Risk of accident and injury
Always have maintenance work carried out at a qualified specialist workshop which has the necessary specialist knowledge and tools to
carry out the work required.
Mercedes-Benz recommends that you use a Mercedes-Benz Service Centre for this purpose.
In
particular, work relevant to safety or on safety-related systems must be carried out at a qualified specialist workshop. If this work is not
carried out correctly, the operating safety of your vehicle could be compromised. There is a risk of accident and injury. Display messages Possible cause/consequence Possible solution
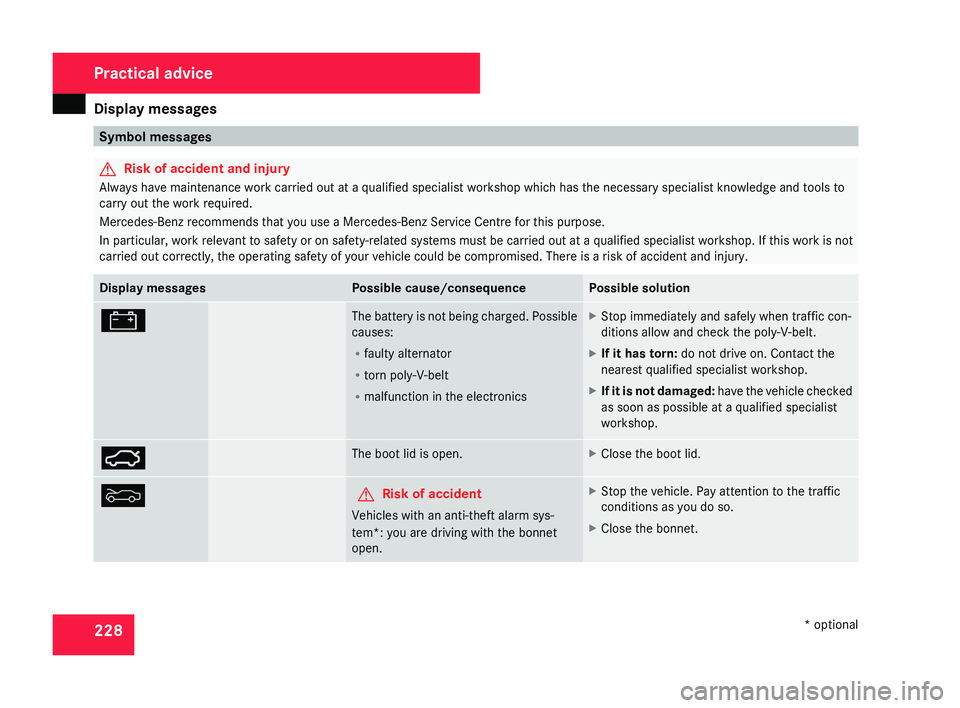
# The battery is not being charged. Possible
causes:
R
faulty alternator
R torn poly-V-belt
R malfunction in the electronics X
Stop immediately and safely when traffic con-
ditions allow and check the poly-V-belt.
X If it has torn: do not drive on. Contact the
nearest qualified specialist workshop.
X If it is not damaged:
have the vehicle checked
as soon as possible at a qualified specialist
workshop. Ê The boot lid is open. X
Close the boot lid. Y G
Risk of accident
Vehicles with an anti-theft alarm sys-
tem*: you are driving with the bonnet
open. X
Stop the vehicle. Pay attention to the traffic
conditions as you do so.
X Close the bonnet. Practical advice
* optional
219_AKB; 2; 4, en-GB
mkalafa,
2007-11-13T09:28:36+01:00 - Seite 228
Page 269 of 329
Locking/unlocking in an emergency
266 Locking/unlocking in an emergency
Emergency key
If the vehicle can no longer be unlocked or
locked with the key or the KEYLESS GO
key*, use the emergency key element.
If you use the emergency key element to
unlock and open the driver's door or the boot
lid, the anti-theft alarm system* will be trig-
gered ( Y page 61).
There are several ways to turn off the alarm:
X Press the k or j button on the key.
or
X Insert the key into the ignition lock.
or
X Press the KEYLESS GO but-
ton* ( Y page 74).
or
X Lock or unlock the vehicle using KEYLESS
GO*. Releasing and removing the emergency
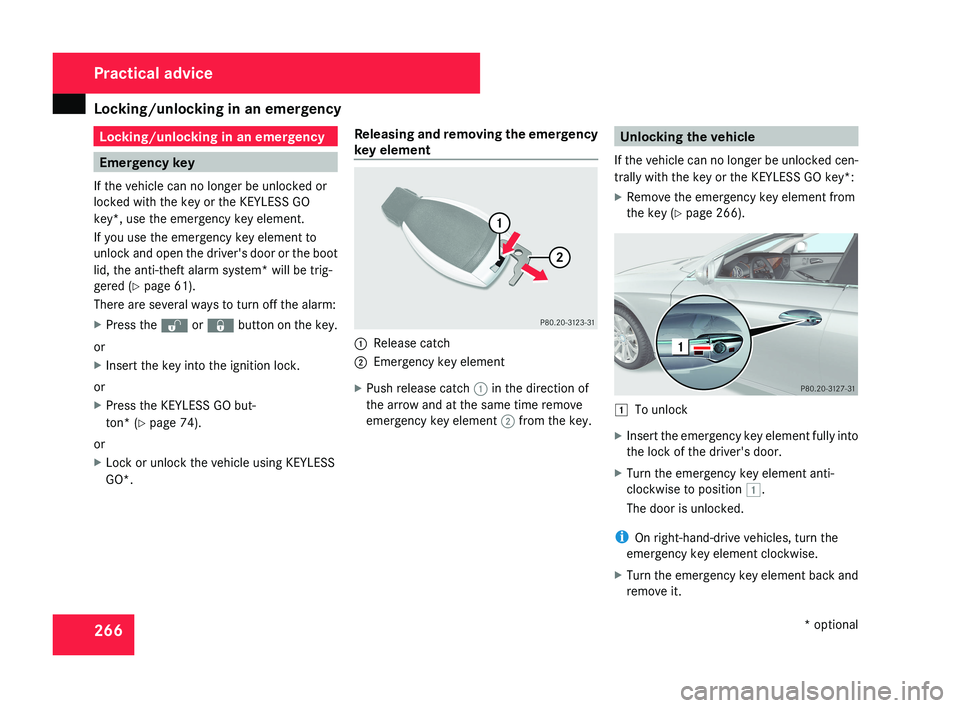
key element 1
Release catch
2 Emergency key element
X Push release catch 1 in the direction of
the arrow and at the same time remove
emergency key element 2 from the key. Unlocking the vehicle
If the vehicle can no longer be unlocked cen-
trally with the key or the KEYLESS GO key*:
X Remove the emergency key element from
the key (Y page 266). $
To unlock
X Insert the emergency key element fully into
the lock of the driver's door.
X Turn the emergency key element anti-
clockwise to position $.
The door is unlocked.
i On right-hand-drive vehicles, turn the
emergency key element clockwise.
X Turn the emergency key element back and
remove it. Practical advice
* optional
219_AKB; 2; 4, en-GB
mkalafa,
2007-11-13T09:28:36+01:00 - Seite 266
Page 270 of 329
Locking/unlocking in an emergency
267Locking the vehicle
If the vehicle can no longer be locked cen-
trally with the key or the KEYLESS GO key*:
X Open the driver's door.
X Close the front-passenger door, the rear
doors and the boot lid.
X Press the central locking button
(Y page 70).
X Check whether the locking knobs on the
doors are still visible. Press the locking
knobs down by hand if necessary.
X Remove the emergency key element from
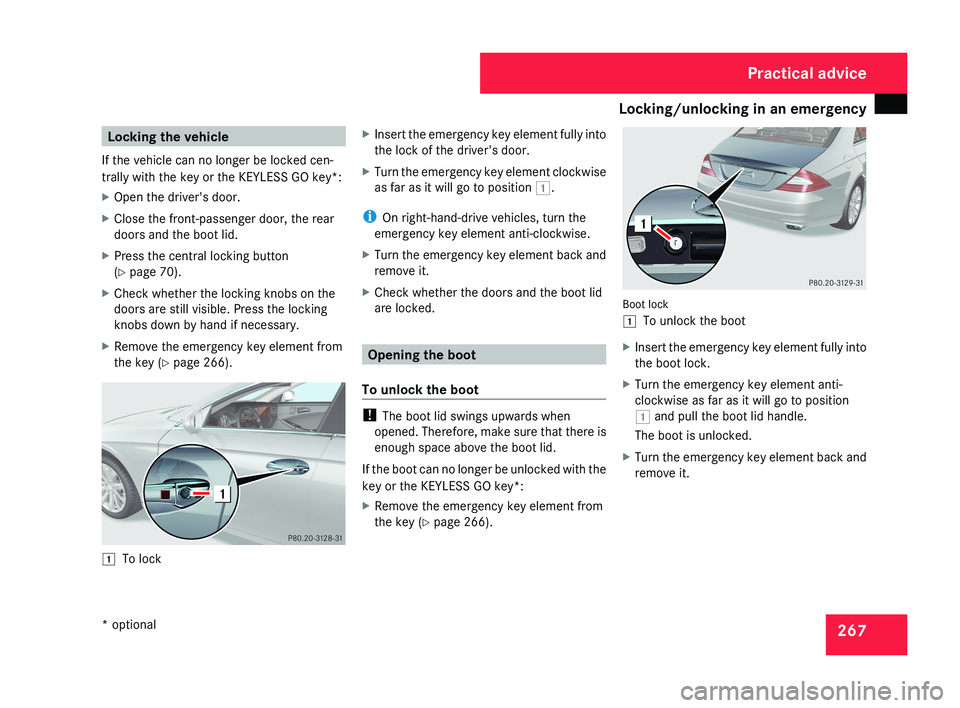
the key (Y page 266).$ To lock X
Insert the emergency key element fully into
the lock of the driver's door.
X Turn the emergency key element clockwise
as far as it will go to position $.
i On right-hand-drive vehicles, turn the
emergency key element anti-clockwise.
X Turn the emergency key element back and
remove it.
X Check whether the doors and the boot lid
are locked.
Opening the boot
To unlock the boot
! The boot lid swings upwards when
opened. Therefore, make sure that there is
enough space above the boot lid.
If the boot can no longer be unlocked with the
key or the KEYLESS GO key*:
X Remove the emergency key element from
the key (Y page 266).
Boot lock
$ To unlock the boot
X Insert the emergency key element fully into
the boot lock.
X Turn the emergency key element anti-
clockwise as far as it will go to position
$ and pull the boot lid handle.
The boot is unlocked.
X Turn the emergency key element back and
remove it.
Practical advice
* optional
219_AKB; 2; 4, en-GB
mkalafa,
2007-11-13T09:28:36+01:00 - Seite 267
Page 271 of 329
Locking/unlocking in an emergency
268
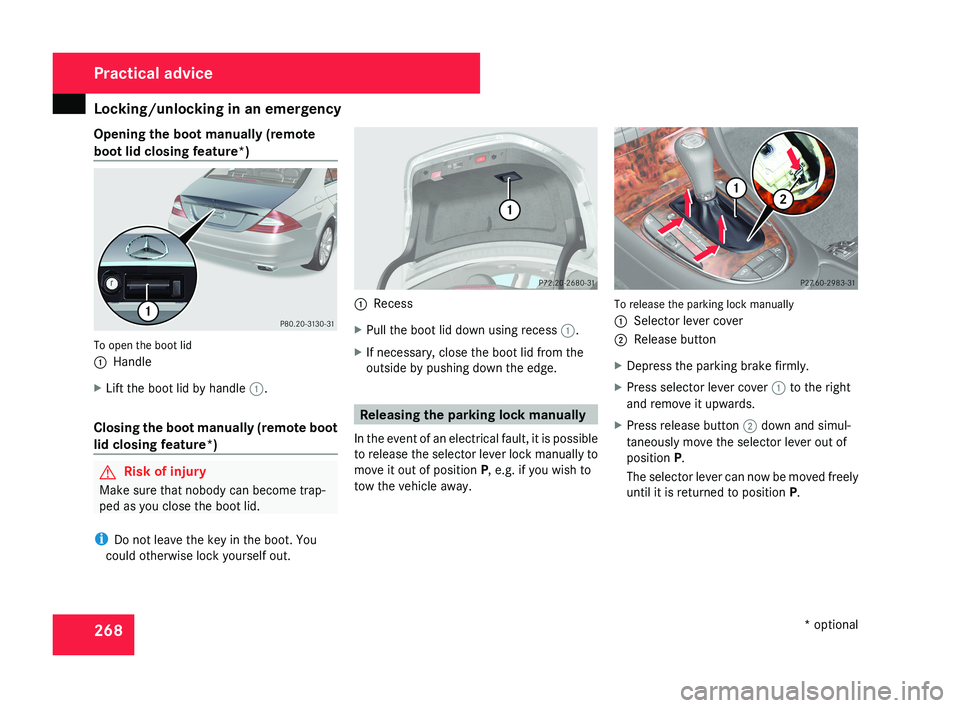
Opening the boot manually (remote
boot lid closing feature*)
To open the boot lid
1
Handle
X Lift the boot lid by handle 1.
Closing the boot manually (remote boot
lid closing feature*) G
Risk of injury
Make sure that nobody can become trap-
ped as you close the boot lid.
i Do not leave the key in the boot. You
could otherwise lock yourself out. 1
Recess
X Pull the boot lid down using recess 1.
X If necessary, close the boot lid from the
outside by pushing down the edge. Releasing the parking lock manually
In the event of an electrical fault, it is possible
to release the selector lever lock manually to
move it out of position P, e.g. if you wish to
tow the vehicle away. To release the parking lock manually
1
Selector lever cover
2 Release button
X Depress the parking brake firmly.
X Press selector lever cover 1 to the right
and remove it upwards.
X Press release button 2 down and simul-
taneously move the selector lever out of
position P.
The selector lever can now be moved freely
until it is returned to position P. Practical advice
* optional
219_AKB; 2; 4, en-GB
mkalafa,
2007-11-13T09:28:36+01:00 - Seite 268