Page 69 of 225
68 Audio
Music Register
i CD information, including album, title, artist
name and track name is obtained from the
Gracenote
® Media Database (�page 64).
�In the “Disc” submenu select “REC”.
The Record menu appears on the sub-
menu.
Selecting tracks to be recorded
�Rotate ymz or slide omp until
“Tracks” is highlighted.
�Press n.
�Select tracks to be recorded by switch-
ing the check mark next to each track
entry on or off.
1Record all tracks (default)
2Option for selecting individual tracks
3Confirm selection
i If you do not select individual tracks before
recording, all tracks on the CD will be recorded.
Selecting a destination folder
�Rotate ymz or slide omp until
“Folder” is highlighted.
�Press n.
1Create new folder (default)
2Existing folders
3Currently active folder
�To select folder: Rotate ymz or slide
qmr.
�Press n.
i If you do not select a destination folder be-
fore recording, a new folder will be created.
Recording music files
Page 70 of 225
69 Audio
Music Register
Start the reording
�Rotate ymz or slide omp until “Start”
is highlighted.
�Press n.
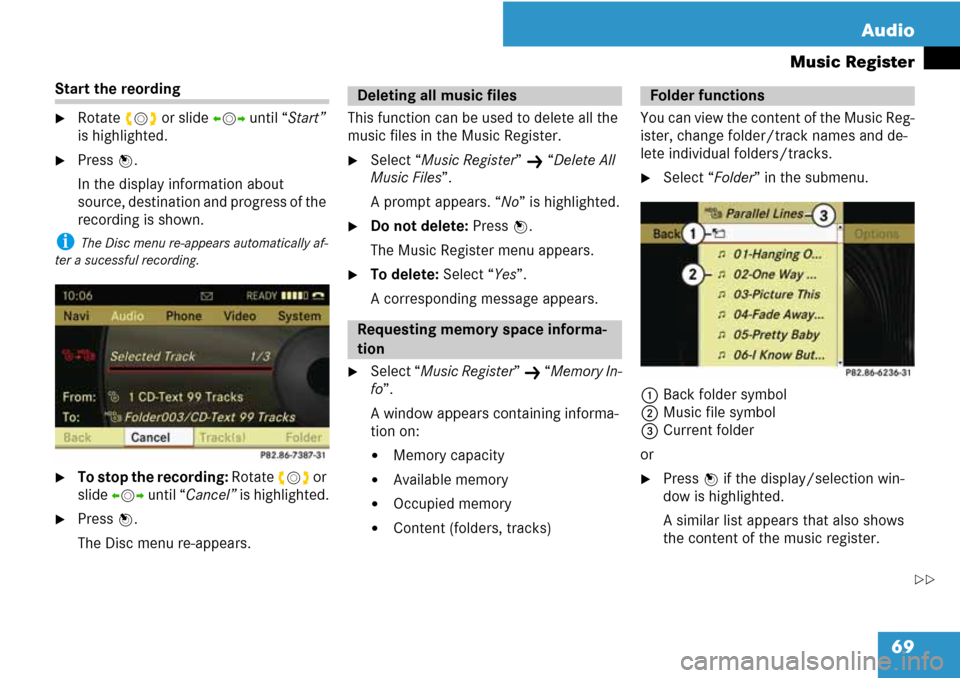
In the display information about
source, destination and progress of the
recording is shown.
i The Disc menu re-appears automatically af-
ter a sucessful recording.
�To stop the recording: Rotate ymz or
slide omp until “Cancel” is highlighted.
�Press n.
The Disc menu re-appears.This function can be used to delete all the
music files in the Music Register.
�Select “Music Register” K “Delete All
Music Files”.
A prompt appears. “No” is highlighted.
�Do not delete: Press n.
The Music Register menu appears.
�To delete: Select “Yes”.
A corresponding message appears.
�Select “Music Register” K “Memory In-
fo”.
A window appears containing informa-
tion on:
�Memory capacity
�Available memory
�Occupied memory
�Content (folders, tracks)You can view the content of the Music Reg-
ister, change folder/track names and de-
lete individual folders/tracks.
�Select “Folder” in the submenu.
1Back folder symbol
2Music file symbol
3Current folder
or
�Press n if the display/selection win-
dow is highlighted.
A similar list appears that also shows
the content of the music register.
Deleting all music files
Requesting memory space informa-
tion
Folder functions
��
Page 76 of 225
75 Video
DVD video
�After use, replace the discs into the
sleeve.
�Protect the discs from heat and direct
sunlight.
Some DVDs may not comply with the
NTSC or PAL TV playback standards.
Sound, picture and other playback prob-
lems may occur when you play such DVDs.
As standard, COMAND can play video
DVDs which meet the following criteria:
�Region code 1 or region code 0 (no re-
gion code)
i With a video DVD having another region
code, a corresponding message will be dis-
played.
�PAL or NTSC TV standard
Information on this can usually be found ei-
ther on the DVD itself or on the DVD
sleeve.
i The factory setting for COMAND is region
code 1. An authorized Mercedes-Benz Center
can change this setting. This will enable you to
play video DVDs with other region codes, provid-
ed that they have been made to the PAL or NTSC
TV standard.
It may be the case that some functions or
actions may not be possible at certain
times, or may not be possible in general,
depending on the DVD.
When you activate such functions or ac-
tions, this is indicated by the 7 symbol in
the display.
�Proceed as described in the “Loading
CDs and DVDs” section (
�page 54).
�Proceed as described in the “Ejecting
CDs and DVDs” section (
�page 57).
DVD playback conditions
Functional restrictions
Loading DVDs
Ejecting DVDs
Page 79 of 225
78 Video
DVD video
�Slide and hold omp until the desired
point is reached.
or
�Press and hold G or H on the
control unit until the desired point is
reached.
The control menu will appear.
�In DVD video mode, if necessary dis-
play the menu system (
�page 77).
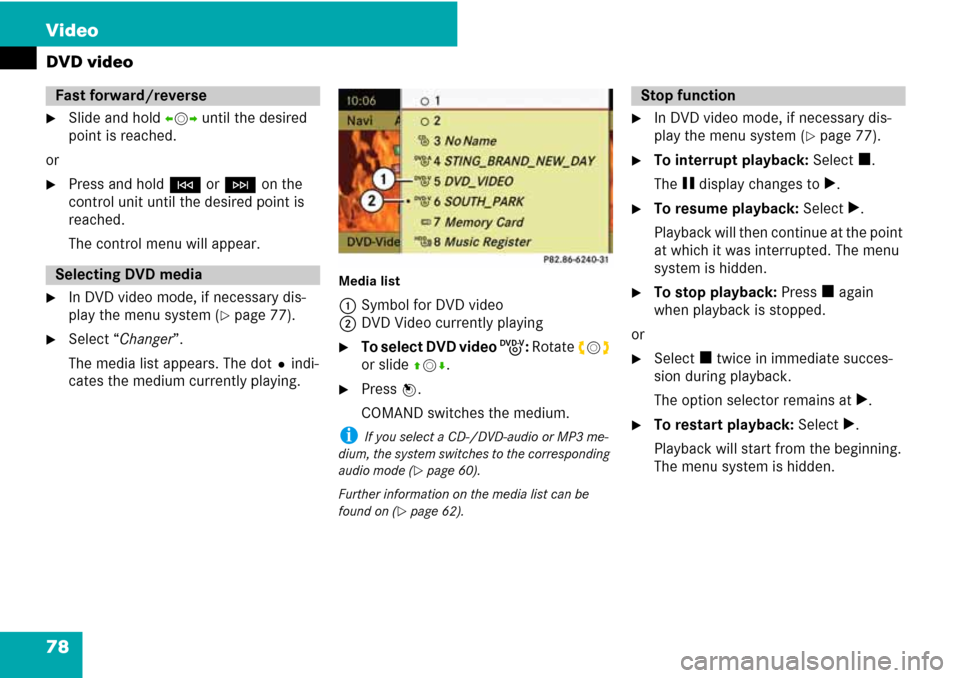
�Select “Changer”.
The media list appears. The dotRindi-
cates the medium currently playing.
Media list
1Symbol for DVD video
2DVD Video currently playing
�To select DVD video I: Rotate ymz
or slide qmr.
�Press n.
COMAND switches the medium.
i If you select a CD-/DVD-audio or MP3 me-
dium, the system switches to the corresponding
audio mode (
�page 60).
Further information on the media list can be
found on (
�page 62).
�In DVD video mode, if necessary dis-
play the menu system (
�page 77).
�To interrupt playback: Select h.
The g display changes to T.
�To resume playback: Select T.
Playback will then continue at the point
at which it was interrupted. The menu
system is hidden.
�To stop playback: Press h again
when playback is stopped.
or
�Select h twice in immediate succes-
sion during playback.
The option selector remains at T.
�To restart playback: Select T.
Playback will start from the beginning.
The menu system is hidden.
Fast forward/reverse
Selecting DVD media
Stop function
Page 80 of 225
79 Video
DVD video
�In DVD video mode, if necessary dis-
play the menu system (
�page 77).
�To activate playback pause:
Select g.
The g display changes to T.
�To resume playback: Select T.
�To skip forwards or backwards: Ro-
tate ymz or slide omp.
or
�Press G or H on the control unit.
The control menu appears for approx.
eight seconds (
�page 77).
i The function is only available if the DVD is di-
vided into several films/tracks.
�In DVD video mode, if necessary dis-
play the menu system (
�page 77).
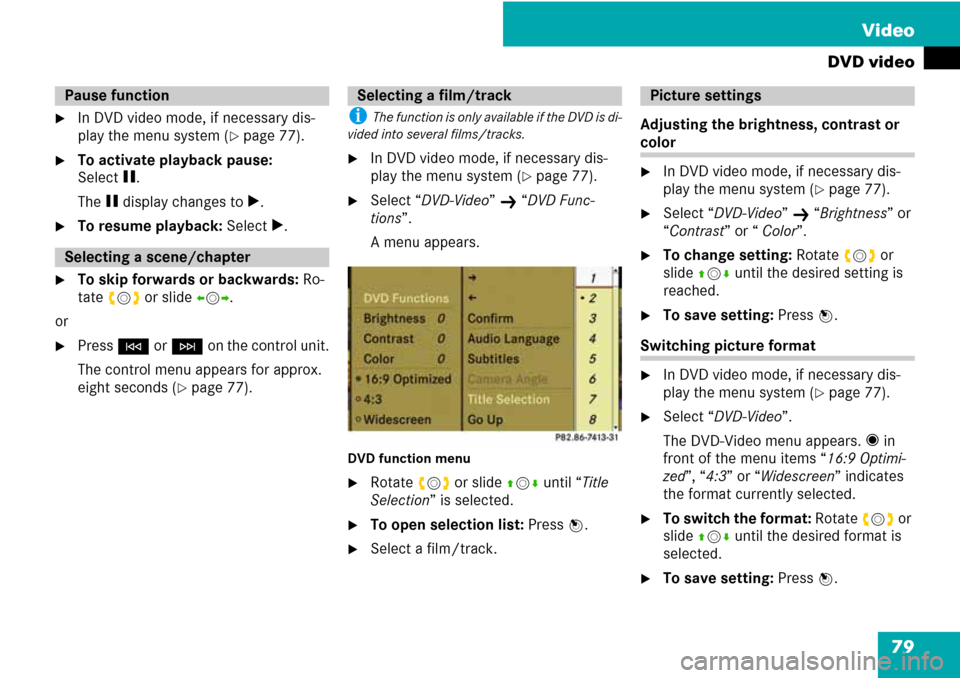
�Select “DVD-Video” K “DVD Func-
tions”.
A menu appears.
DVD function menu
�Rotate ymz or slide qmr until “Title
Selection” is selected.
�To open selection list: Press n.
�Select a film/track.Adjusting the brightness, contrast or
color
�In DVD video mode, if necessary dis-
play the menu system (
�page 77).
�Select “DVD-Video” K “Brightness” or
“Contrast” or “ Color”.
�To change setting: Rotate ymz or
slide qmr until the desired setting is
reached.
�To save setting: Press n.
Switching picture format
�In DVD video mode, if necessary dis-
play the menu system (
�page 77).
�Select “DVD-Video”.
The DVD-Video menu appears. F in
front of the menu items “16:9 Optimi-
zed”, “4:3” or “Widescreen” indicates
the format currently selected.
�To switch the format: Rotate ymz or
slide qmr until the desired format is
selected.
�To save setting: Press n.
Pause function
Selecting a scene/chapter
Selecting a film/trackPicture settings
Page 82 of 225
81 Video
DVD video
Stopping film or skipping to the
beginning/end of a scene
�Select any menu item from the DVD
menu.
The selection menu appears.
�To stop a film: Select the menu item
“Stop”.
�To skip to the end of the scene: Se-
lect the menu item r.
�To skip to the beginning of the
scene: Select the menu item p.
i Depending on the DVD, it is possible the
menu items p and r either have no func-
tion or no function in certain parts of the DVD
menu. This is indicated by the 7 symbol on the
display.
Switching to the next DVD menu up
�Press the í button.
or
�Select the corresponding menu item
from the DVD menu.
or
�Select any menu item from the DVD
menu.
�In the selection menu select the menu
item “Go Up”.
i Depending on the DVD, it is possible the
menu item “Go Up” either has no function or no
function in certain parts of the DVD menu. This is
indicated by the 7 symbol on the display.
Back to movie
�Press the í button repeatedly until
the film is shown.
or
�Select the corresponding menu item
from the DVD menu.
or
�Select any menu item from the DVD
menu.
�In the selection menu select the menu
item “Back (to movie)”.
i Depending on the DVD, it is possible the
menu item “Back (to movie)” either has no func-
tion or no function in certain parts of the DVD
menu.
i The function is not available for all DVDs. If
it is available, you can set the DVD menu lan-
guage, the audio language or the audio format.
The number of settings is determined by the DVD
content. The settings may also be possible in the
DVD menu (
�page 80).
�In DVD video mode, if necessary dis-
play the menu system (
�page 77).
�Select “DVD-Video” K “DVD Func-
tions”.
�Select “Audio Language”.
A selection menu will appear after a
short time. The dotRin front of an en-
try indicates the currently selected lan-
guage.
�To change setting: Rotate ymz or
slide qmr until the desired setting is
reached.
�To save setting: Press n.
�To exit menu without changes: Slide
omp.
Setting language
Page 84 of 225
83 Telephone
General information ......................85
Activating the mobile phone ........86
Submenu overview .......................91
COMAND phone book ...................93
Call lists ..........................................97
Making calls ................................ 101
Address book .............................. 104
Page 86 of 225
85 Telephone
General information
The telephone function via the Bluetooth®
interface is available in conjunction with a
Bluetooth-enabled mobile phone.
With a suitable mobile phone, you can use
COMAND’s hands-free feature and receive
electronic business cards (vCards) via the
Bluetooth
® interface.
Further information on suitable mobile
phones and connecting Bluetooth-enabled
mobile phones to COMAND is available via
the Internet at www.mbusa.com.Interruptions to the connection may occur
if
�there is inadequate GSM network cov-
erage in certain regions
�you are switching from one GSM trans-
mitting/receiving station (GSM cell) to
another and there is no voice channel
available in this cell
�you are using a SIM card that is not
compatible with the available network.
�when using a mobile phone with “Twin-
card”, the mobile phone is simulta-
neously logged into the network with
the second SIM card.
If the mobile phone is connected with
COMAND via the Bluetooth
® interface, you
can operate the phone using the following
devices:
�COMAND controller and keypad on the
COMAND control unit
�Multifunction steering wheel
�Voice ControlThe explanations in this section assume
that the mobile phone is connected to CO-
MAND via the Bluetooth
® interface. Excep-
tions are explicitly described.
Under the following circumstances, the
phone may not yet be useable:
�If it is not yet logged into a network.
The phone will try independently to log
into a network. If no network is
available, you will not be able to make
“911” emergency calls.
If you try to make an outgoing call, the
message “No Service” appears briefly.
General information
Making calls via Bluetooth®
interface
Interruptions to the connection
while driving
Operating options
Functional restrictions