Page 17 of 58
![MAZDA MODEL 6 2008 Navigation Manual (in English) 17
Getting started
Navigation Set Up
Before Steps
select
select
User Setting
MENUENTERENTER
ENTERENTER
Open the
[USER SETTINGS]
screen
nMap Color
Select a screen color from to options](/manual-img/28/13578/w960_13578-16.png "MAZDA MODEL 6 2008 Navigation Manual (in English) 17
Getting started
Navigation Set Up
Before Steps
select
select
User Setting
MENUENTERENTER
ENTERENTER
Open the
[USER SETTINGS]
screen
nMap Color
Select a screen color from to options")
17
Getting started
Navigation Set Up
Before Steps
select
select
User Setting
MENUENTERENTER
ENTERENTER
Open the
[USER SETTINGS]
screen
nMap Color
Select a screen color from to options.
nMap Mode
lAuto : The display will automatically switch between Day
and Night illumination mode when the headlights are
turned off and on respectively.
lDay :The display will be presented in Day illumination mode
regardless of whether the headlights are on or off.
lNight : The display will be presented in Night illumination mode
regardless of whether the headlights are on or off.
nDistance
Select the distance unit from or .
nAverage Speed
Set the average speed for each road to be driven.
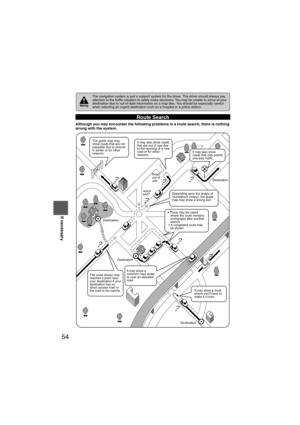
(This function sets the standard speed (average vehicle speed
for each route) used for calculating the estimated arrival time
when calculating the route time.)
: Average speed setting
:Changes back to default
nRoad Restriction Warnings
The display of warnings during route guidance when passing
through areas with traffic restrictions can be turned on or off.
<00310025003e00280025001a004300320025003a002d0043002900250012004600530053004f0004000400340045004b004900040015001b00040004002a0056004d00480045005d00100004002e0059005200490004001c00100004001600140014001b00
0400040017001e0019001b000400340031>
Page 18 of 58
18
RoutingAddress
Book
Getting started
Navigation Set Up
Before Steps
select
select
User Setting
MENUENTERENTER
ENTERENTER
Open the
[USER SETTINGS]
screen
nArrival Time
The time which is displayed until reaching the destination or a
way point can be set as an estimated arrival time or the
remaining time.
Select to display the estimated arrival time, or to
display the remaining time.
nKeyboard Layout
The layout of input keys can be selected as or .
nClock
Allows selection of whether clock is to be displayed.
nBeep
Allows selection of whether beep will sound.
<00310025003e00280025001a004300320025003a002d0043002900250012004600530053004f0004000400340045004b004900040015001c00040004002a0056004d00480045005d00100004002e0059005200490004001c00100004001600140014001b00
0400040017001e0019001b000400340031>
Page 19 of 58
 19
Getting started
Navigation Set Up
This function allows you set the categories on the area displayed when the (Point of Interest)
menu is selected on the map. Quick POI enables you store up to six")
19
Getting started
Navigation Set Up
This function allows you set the categories on the area displayed when the (Point of Interest)
menu is selected on the map. Quick POI enables you store up to six different kinds of
categories which you use most regularly.
1 select
2 select
Quick POI Selection
MENUENTERENTER
ENTERENTER
Open the [QUICK POI SELECTION] screen
Select the button for Quick POI storage.
Note
lSelect the category to be changed
: This button allows you to restore the factory
settings.
Select a category.Once selected, subcategories will be displayed.
: Subcategories from all of the
individual categories will be
displayed together.
Select the subcategories to be displayed on the
map.
Repeat the above steps to add further POI markers displayed on the menu.
<00310025003e00280025001a004300320025003a002d0043002900250012004600530053004f0004000400340045004b004900040015001d00040004002a0056004d00480045005d00100004002e0059005200490004001c00100004001600140014001b00
0400040017001e0019001b000400340031>
Page 20 of 58
20
RoutingAddress
Book
Getting started
Navigation Set Up
You can change the language of the menu and the voice guidance.
Before Steps
select
select
Language
MENUENTERENTER
ENTERENTER
Open the [LANGUAGE] screen
Select your preferred language from the list.
<00310025003e00280025001a004300320025003a002d0043002900250012004600530053004f0004000400340045004b004900040016001400040004002a0056004d00480045005d00100004002e0059005200490004001c00100004001600140014001b00
0400040017001e0019001b000400340031>
Page 21 of 58
![MAZDA MODEL 6 2008 Navigation Manual (in English) 21
Getting started
Navigation Set Up
Before Steps
select
select
Map Configuration
MENUENTERENTER
ENTERENTER
Open the
[MAP
CONFIGURATION]
screen
nMap Screen
Select single or dual map displ](/manual-img/28/13578/w960_13578-20.png "MAZDA MODEL 6 2008 Navigation Manual (in English) 21
Getting started
Navigation Set Up
Before Steps
select
select
Map Configuration
MENUENTERENTER
ENTERENTER
Open the
[MAP
CONFIGURATION]
screen
nMap Screen
Select single or dual map displ")
21
Getting started
Navigation Set Up
Before Steps
select
select
Map Configuration
MENUENTERENTER
ENTERENTER
Open the
[MAP
CONFIGURATION]
screen
nMap Screen
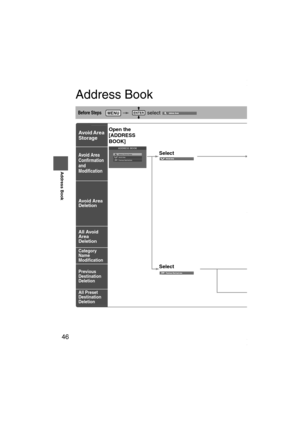
Select single or dual map display.
nTurn Guidance
Turn Arrow (on first screen)
While using route guidance, the
directions for the next junction where
you have to turn are shown as a Turn
Arrow in the upper right.
Tu r n L i s t
While using route guidance, the
directions for the next junction where
you have to turn are shown as Turn
List.
Turn Arrow (on second screen)
While using route guidance, the
directions for the next junction where
you have to turn are shown as Turn
Arrow.
Note
Before a fork in the road, an enlarged diagram of the junction automatically
appears in a second screen.This is to make route guidance even clearer.
nJunction Detail
Select whether the Enlarged Junction diagram screen is displayed automatically.
nFreeway Information
Allows selection of whether the guidance screen is to be displayed while driving on a freeway.
Single mapDual map
<00310025003e00280025001a004300320025003a002d0043002900250012004600530053004f0004000400340045004b004900040016001500040004002a0056004d00480045005d00100004002e0059005200490004001c00100004001600140014001b00
0400040017001e0019001b000400340031>
Page 22 of 58
22
RoutingAddress
Book
Getting started
Navigation Set Up
This function allows you to correct any error in the position or direction of your vehicle display.
Before Steps select
Adjusting Current Position and Direction
select
Open the [Calibrate Position] screen
Move to the correct position and select .
Use
or to adjust the direction in which you are
heading, and select .
DistanceThis function automatically corrects any error in the display of the current position
that might occur after tire replacement.
select
You will have to drive about 6 miles (10 km) before distance correction is complete.
Map VersionThe map and softwar
select
Map and software ve
Calibration
MENUENTERENTER
ENTERENTER
ENTER
ENTERENTER
ENTER
<00310025003e00280025001a004300320025003a002d0043002900250012004600530053004f0004000400340045004b004900040016001600040004002a0056004d00480045005d00100004002e0059005200490004001c00100004001600140014001b00
0400040017001e0019001b000400340031>
Page 23 of 58
23
Getting started
select
select .
n in which you are
ay of the current position
ce correction is complete.
Map VersionThe map and software version numbers can be confirmed using this function.
select
Map and software versions are now displayed.
ENTERENTERENTER
ENTER
ENTERENTER
<00310025003e00280025001a004300320025003a002d0043002900250012004600530053004f0004000400340045004b004900040016001700040004002a0056004d00480045005d00100004002e0059005200490004001c00100004001600140014001b00
0400040017001e0019001b000400340031>
Page 24 of 58
![MAZDA MODEL 6 2008 Navigation Manual (in English) 24
RoutingAddress
Book
Getting started
Navigation Set Up
This function replaces all the settings in the mobile navigation system with the initial default
settings.
[Default List]
Before Steps
se](/manual-img/28/13578/w960_13578-23.png "MAZDA MODEL 6 2008 Navigation Manual (in English) 24
RoutingAddress
Book
Getting started
Navigation Set Up
This function replaces all the settings in the mobile navigation system with the initial default
settings.
[Default List]
Before Steps
se")
24
RoutingAddress
Book
Getting started
Navigation Set Up
This function replaces all the settings in the mobile navigation system with the initial default
settings.
[Default List]
Before Steps
select
select
ItemInitial condition
Menu names
Map Orientation North up
Map display mode Single-screen display
Map Display scale/Map scale for Dual-screen is not object of backup.Single-screen: 10,000 map (1/16 mi)Display guidance language English
Quick-POI map display All Off
Quick-POI Selection A : Gas station
B : ATM
C : Police Station
D : Grocery store
E : All Restaurant
F : Hotel
Search Area US9 (including Washington DC)
Map Color 1
Day/Night/Auto Setting Auto
Distance Units (Miles/KM) (Global setting) Miles
Volume Presets 4
Time display change (12h/24h)24h
Keyboard layout ABC
Arrival Time Time
Navigation Setup (Clock) Off
Navigation Setup (Beep) On
Map Configuration
Freeway Information Off
Guidance Screen ON
Map screen Single
Turn Guidance Screen Turn List
Restore System Defaults
MENUENTERENTER
ENTERENTER
Open the [SYSTEM DEFAULTS] screen
Select .
If you execute Restore System Defaults, all of your stored setting data will be deleted.
<00310025003e00280025001a004300320025003a002d0043002900250012004600530053004f0004000400340045004b004900040016001800040004002a0056004d00480045005d00100004002e0059005200490004001c00100004001600140014001b00
0400040017001e0019001b000400340031>


![MAZDA MODEL 6 2008 Navigation Manual (in English) 18
RoutingAddress
Book
Getting started
Navigation Set Up
Before Steps
select
select
User Setting
MENUENTERENTER
ENTERENTER
Open the
[USER SETTINGS]
screen
nArrival Time
The time which i](/manual-img/28/13578/w960_13578-17.png "MAZDA MODEL 6 2008 Navigation Manual (in English) 18
RoutingAddress
Book
Getting started
Navigation Set Up
Before Steps
select
select
User Setting
MENUENTERENTER
ENTERENTER
Open the
[USER SETTINGS]
screen
nArrival Time
The time which i")
 20
RoutingAddress
Book
Getting started
Navigation Set Up
You can change the language of the menu and the voice guidance.
Before Steps
select
select
Language
MENUENTERENTER
ENTERENTER
Open th")
 22
RoutingAddress
Book
Getting started
Navigation Set Up
This function allows you to correct any error in the position or direction of your vehicle display.
Before Steps select
Adjusting Curr")
 23
Getting started
select
select .
n in which you are
ay of the current position
ce correction is complete.
Map VersionThe map and software version numbers can be confirmed using this functi")