Page 30 of 312
BASIC FUNCTIONS
29
D
To set the cursor position as a des-
tination
A specific point on the map can be set as
a destination using the one −touch scroll
function.
Touch “Enter”.
The screen changes and displays the map
location of the selected destination and the
route preference. (See “Starting route
guidance” on page 59.)
DTo register the cursor position as a
memory point
Memory point registration enables easy
access to a specific point.
Touch “Mark”.
When you touch “Mark”, the following
screen appears for a few seconds, and
then the map screen returns.
The registered point is shown byon the
map.
To change the icon or name, etc., see “ —
Editing memory points” on page 93.
Up to 106 memory points can be regis-
tered. If there is an attempt to register
more than 106, a message appears for
confirmation.
GX470_Navi_U (OM60D58U) 07/06/16
Page 31 of 312
BASIC FUNCTIONS
30
D
To see information about the icon
where the cursor is set
To display information about an icon, set
the cursor on it.
POI INFORMATION
When the cursor is set on a POI icon, the
name and
“Info.”are displayed on the top
of the screen.
Touch “Info.”.
Information such as the name, address,
and phone number are displayed.
If “Enter
”is touched, the position of the
cursor is set as a destination.
If there is already a set destination, “Add
to
” and “Replace”are displayed.
“Add to
”: To add a destination.
“Replace
”: To delete the existing des-
tinations and set a new one.
To register this POI as a memory point,
touch “Mark” . (See page 92.)
If
is touched, the registered telephone
number can be called.
INFORMATION
The desired Point of Interest can be
displayed on the map screen. (See “
— Display POI icons” on page 76.)
GX470_Navi_U (OM60D58U) 07/06/16
Page 32 of 312

BASIC FUNCTIONS
31
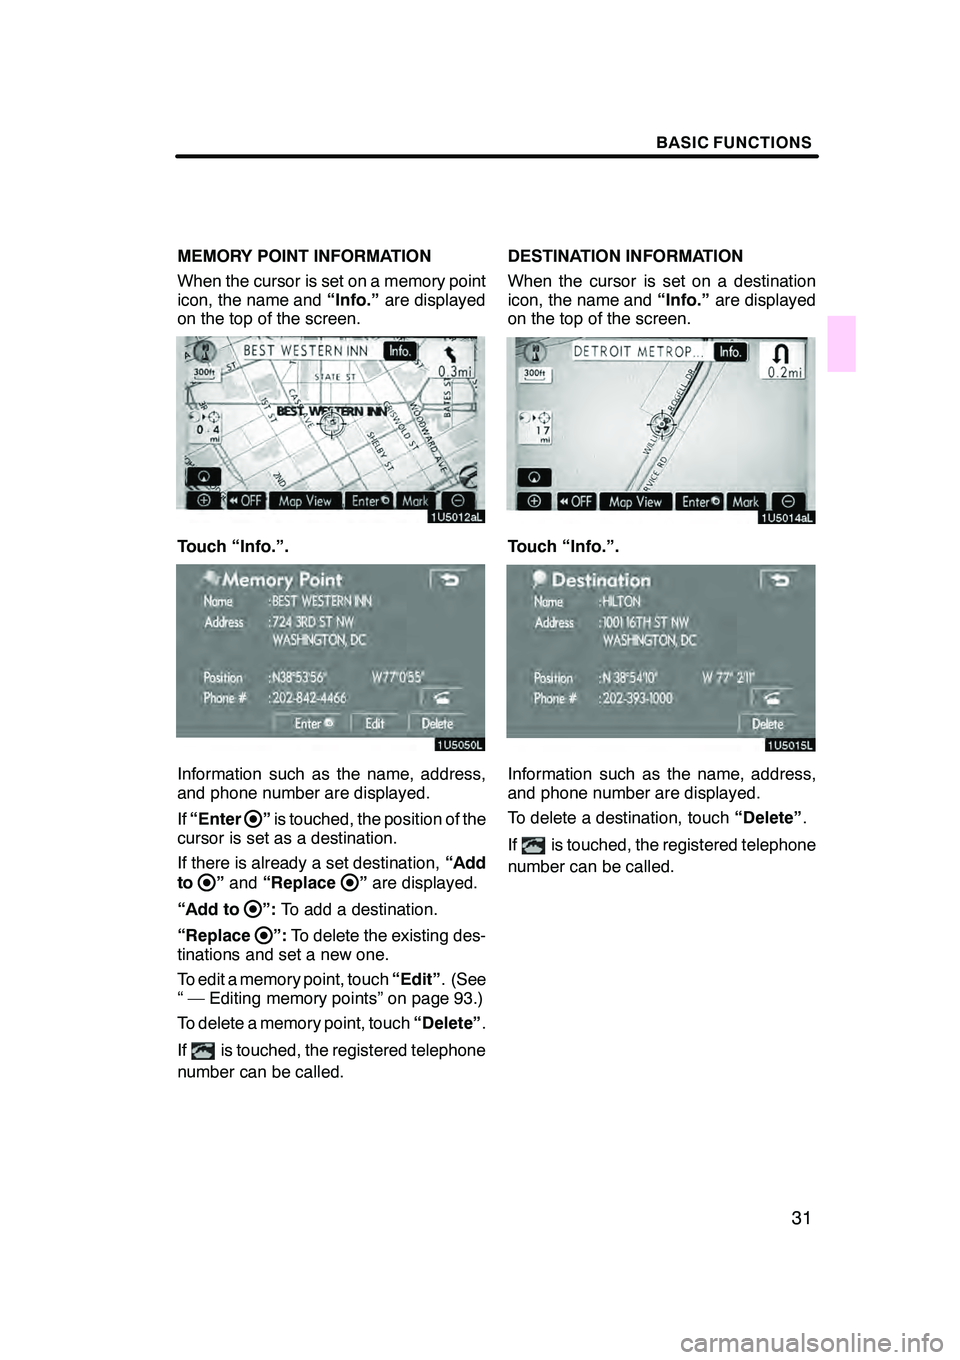
MEMORY POINT INFORMATION
When the cursor is set on a memory point
icon, the name and“Info.”are displayed
on the top of the screen.
Touch “Info.”.
Information such as the name, address,
and phone number are displayed.
If “Enter
”is touched, the position of the
cursor is set as a destination.
If there is already a set destination, “Add
to
” and “Replace”are displayed.
“Add to
”: To add a destination.
“Replace
”: To delete the existing des-
tinations and set a new one.
To edit a memory point, touch “Edit”. (See
“ — Editing memory points” on page 93.)
To delete a memory point, touch “Delete”.
If
is touched, the registered telephone
number can be called. DESTINATION INFORMATION
When the cursor is set on a destination
icon, the name and
“Info.”are displayed
on the top of the screen.
Touch “Info.”.
Information such as the name, address,
and phone number are displayed.
To delete a destination, touch “Delete”.
If
is touched, the registered telephone
number can be called.
GX470_Navi_U (OM60D58U) 07/06/16
Page 33 of 312
BASIC FUNCTIONS
32
Any one of the screen configurations can
be selected .
1. Touch this button to display the fol-
lowing screen.
2. To select the desired screen config-
uration, touch one of the following but-
tons.Depending on the conditions, certain
screen configuration buttons cannot be
selected.
:
To display the single map screen.
(See page 33.)
: To display the dual map screen.
(See page 33.)
: To display the compass mode
screen. (See page 34.)
: To display the turn list screen.
(See page 66.)
: To display the arrow screen. (See
page 66.)
: To display the freeway information
screen. (See page 64.)
: To display the intersection guid-
ance screen or the guidance
screen on the freeway. (See page
65.)
GX470_Navi_U (OM60D58U) 07/06/16
— Switching the screens
Page 34 of 312
BASIC FUNCTIONS
33
D
Screen configurations
SINGLE MAP
This is a regular map screen.
While on a different screen, touching
will display the single map screen.
The screen shows the single map. DUAL MAP
A map can be displayed split in two.
While on a different screen, touching
will display the dual map screen.
The screen shows the dual map. The map
on the left is the main map.
The right side map can be edited.
Touch the right side map to display the
edit screen.
This screen can perform the following pro-
cedures:
1. Changing the map scale
2. Displaying the POI icon
3. Changing the orientation of the map
Touch “OK” when you complete edi-
ting.
The screen returns to the dual map screen.
GX470_Navi_U (OM60D58U) 07/06/16
Page 35 of 312

BASIC FUNCTIONS
34
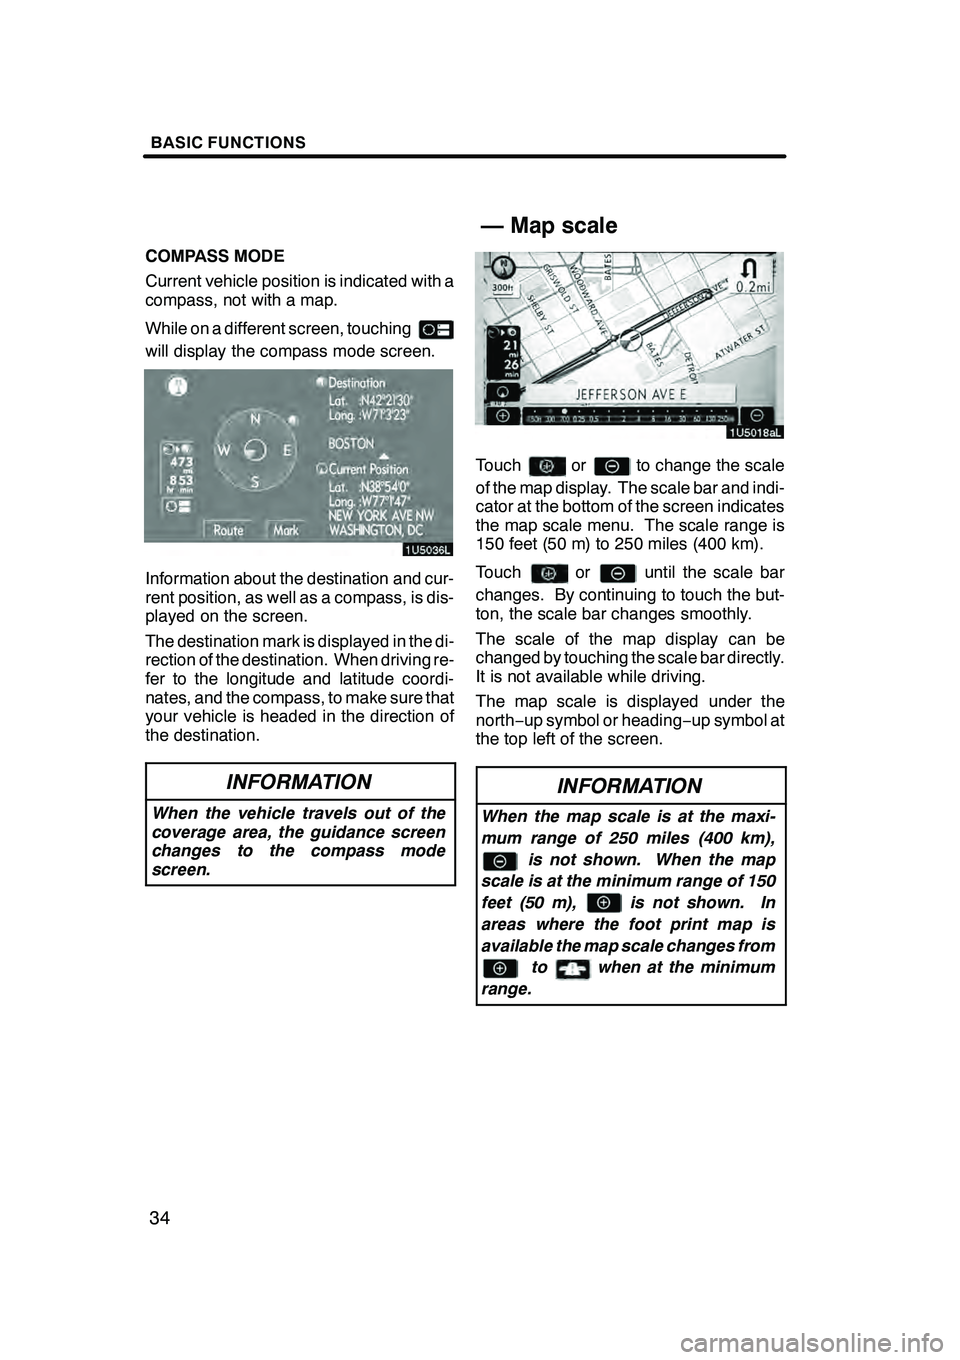
COMPASS MODE
Current vehicle position is indicated with a
compass, not with a map.
While on a different screen, touching
will display the compass mode screen.
Information about the destination and cur-
rent position, as well as a compass, is dis-
played on the screen.
The destination mark is displayed in the di-
rection of the destination. When driving re-
fer to the longitude and latitude coordi-
nates, and the compass, to make sure that
your vehicle is headed in the direction of
the destination.
INFORMATION
When the vehicle travels out of the
coverage area, the guidance screen
changes to the compass mode
screen.
Touchorto change the scale
of the map display. The scale bar and indi-
cator at the bottom of the screen indicates
the map scale menu. The scale range is
150 feet (50 m) to 250 miles (400 km).
Touch
oruntil the scale bar
changes. By continuing to touch the but-
ton, the scale bar changes smoothly.
The scale of the map display can be
changed by touching the scale bar directly.
It is not available while driving.
The map scale is displayed under the
north− up symbol or heading −up symbol at
the top left of the screen.
INFORMATION
When the map scale is at the maxi-
mum range of 250 miles (400 km),
is not shown. When the map
scale is at the minimum range of 150
feet (50 m), is not shown. In
areas where the foot print map is
available the map scale changes from to when at the minimum
range.
GX470_Navi_U (OM60D58U) 07/06/16
— Map scale
Page 36 of 312

BASIC FUNCTIONS
35
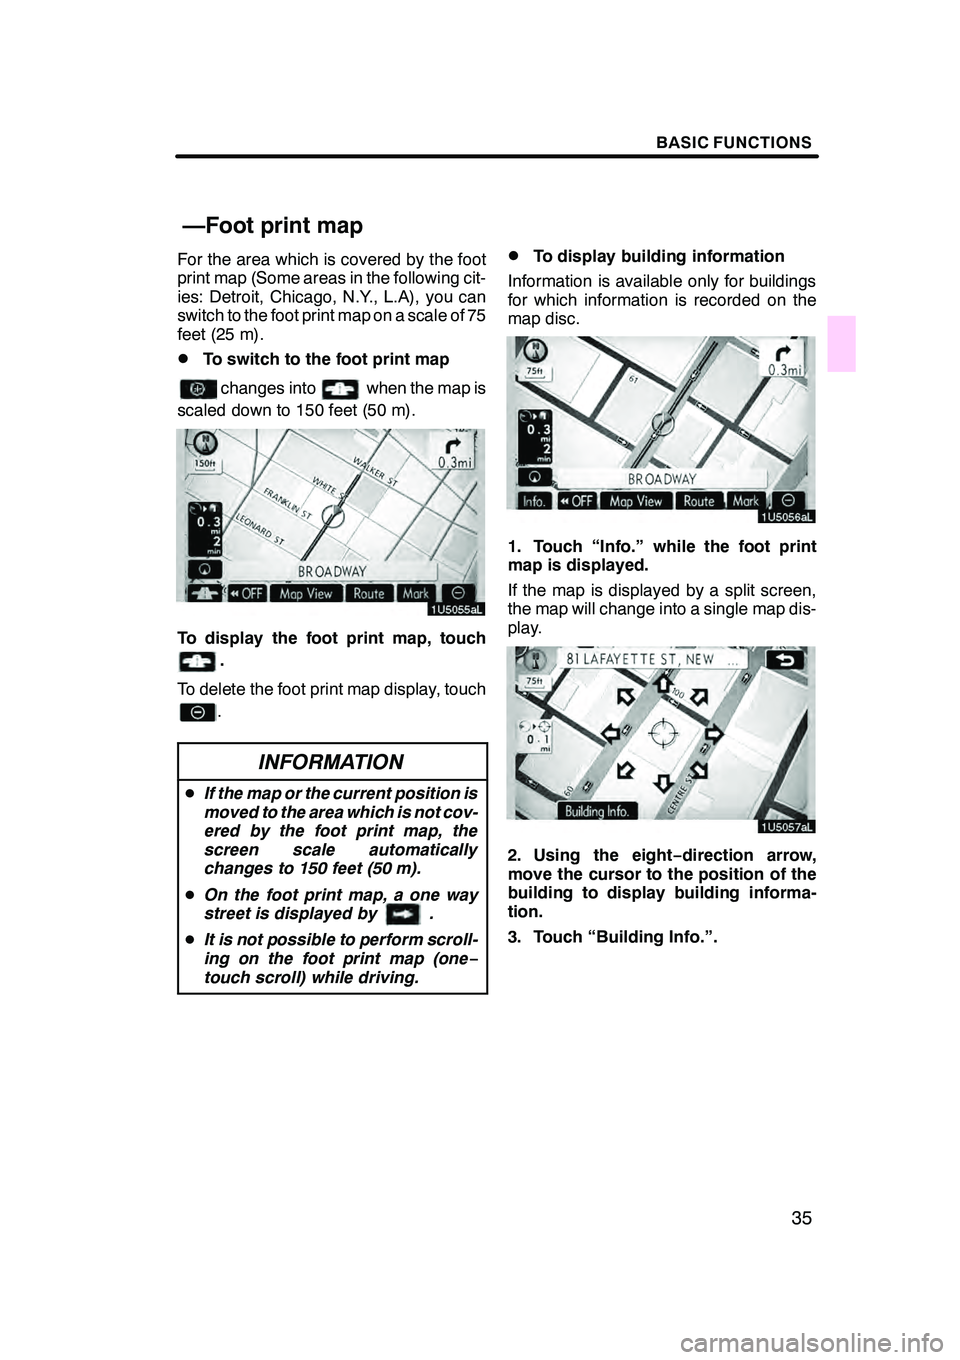
For the area which is covered by the foot
print map (Some areas in the following cit-
ies: Detroit, Chicago, N.Y., L.A), you can
switch to the foot print map on a scale of 75
feet (25 m).
DTo switch to the foot print map
changes intowhen the map is
scaled down to 150 feet (50 m).
To display the foot print map, touch
.
To delete the foot print map display, touch
.
INFORMATION
D If the map or the current position is
moved to the area which is not cov-
ered by the foot print map, the
screen scale automatically
changes to 150 feet (50 m).
D On the foot print map, a one way
street is displayed by .
D It is not possible to perform scroll-
ing on the foot print map (one −
touch scroll) while driving.
DTo display building information
Information is available only for buildings
for which information is recorded on the
map disc.
1. Touch “Info.” while the foot print
map is displayed.
If the map is displayed by a split screen,
the map will change into a single map dis-
play.
2. Using the eight −direction arrow,
move the cursor to the position of the
building to display building informa-
tion.
3. Touch “Building Info.”.
GX470_Navi_U (OM60D58U) 07/06/16
—Foot print map
Page 37 of 312
BASIC FUNCTIONS
36
Details of POIs in some buildings may be
displayed.
For detailed POI information, touch the
building name. You can see details of the
selected POIs."North− up screen
"Heading− up screen
The orientation of the map can be changed
from North− up to Heading −up by touching
the orientation symbol at the top left of the
screen.
North− up symbol
Regardless of the direction of vehicle trav-
el, North is always up.
Heading− up symbol
The direction of vehicle travel is always up.
A red arrow indicates North.
GX470_Navi_U (OM60D58U) 07/06/16
— Orientation of the map