Page 17 of 72
AUDIO/VIDEO SYSTEM
201 �
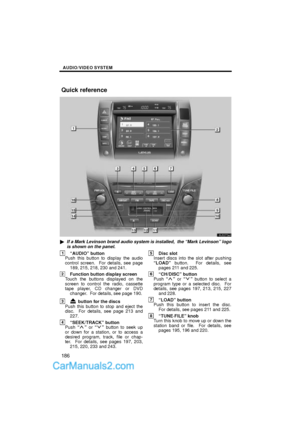
Listening to satellite radio
Push the AM´SATº button to choose
either an AM station or a SAT (sattellite)
channel.
Besides AMº, SAT1º, SAT2º or SAT3º
appears on the display.
Turn this knob to select the next or pre-
vious channel.
If you turn continuously, you can rapidly
scroll forward or down through the chan-
nels.
Page 18 of 72
AUDIO/VIDEO SYSTEM
202 �
Channel category
Touch either TYPE�º or TYPE�º to go
to the next or previous category.
�Presetting a channel
1. Tune in the desired channel.
2. Touch one of the channel selector
touch-screen buttons (1 Ð 6) and hold
it until a beep is heard.
This sets the channel to the button and the
name and number of the channel appears
on the touch-screen button.
Each SAT mode can store up to 6 stations.
To change the preset channel to a different
one, follow the same procedure.
The preset channel memory is cancelled
when the power source is interrupted by
battery disconnection or a blown fuse.
Page 19 of 72
 for the
channel yo")
AUDIO/VIDEO SYSTEM
203 �
Selecting a channel
Tune in the desired channel using one of
the following methods.
Preset tuning: Touch the channel selec-
tor touch-screen button (1 Ð 6) for the
channel you want. The touch-screen but-
ton (1 Ð 6) is highlighted and channel
number appears on the display.
To select channel within the current
category: Push the
º or º button of
SEEK/TRACKº.To scan the currently selected channel
category: Touch TYPE SCANº or push
the SCANº button briefly. SCANº ap-
pears on the display. The radio will find the
next channel in the same channel catego-
ry, stay there for a few seconds, and then
scan again. To select a channel, touch
TYPE SCANº or push the SCANº but-
ton a second time.
To scan the preset channels: Push the
SCANº button and hold it until you hear
a beep. P.SCANº appears on the display.
The radio will find the next preset channel,
stay there for a few seconds, and then
move to the next preset channel. To select
a channel, push the SCANº button a sec-
ond time.
Page 20 of 72
AUDIO/VIDEO SYSTEM
204 �
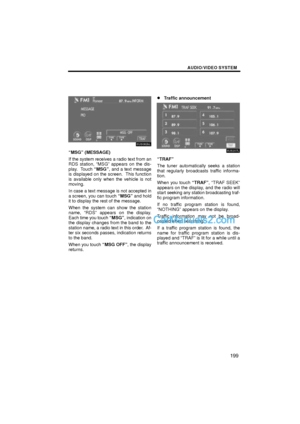
Displaying the title and name
When you touch TEXTº, the song/pro-
gram title and the artist name/feature are
displayed.
Up to 10 alphanumeric characters can be
displayed. (Some information will not be
fully displayed.)
When you touch TEXTº again, the dis-
play returns.
Page 21 of 72

AUDIO/VIDEO SYSTEM
205 �
If the satellite radio tuner malfunctions
When problems occur with the XM� tuner, a message will appear on the display. Refer-
ring to the table below to identify the problem, take the suggested corrective action.
ANTENNA
The XM� antenna is not connected. Check whether the XM� antenna
cable is attached securely.
ANTENNAA short circuit occurs in the antenna or the surrounding antenna cable.
See a Lexus certified dealer for assistance.
UPDATING
You have not subscribed to the XM� Satellite Radio. The radio is being
updated with the latest encryption code. Contract the XM� Satellite
Radio for subscription information. When a contract is canceled, you
can choose the CH000º and all free-to-air channels.
UPDATINGThe premium channel you selected is not authorized. Wait for about 2
seconds until the radio returns to the previous channel or CH001º. If
it does not change automatically, select another channel. If you want
to listen to the premium channel, contact the XM� Satellite Radio.
NO
SIGNALThe XM� signal is too weak at the current location. Wait until your ve-
hicle reaches a location with a stronger signal.
LOADINGThe unit is acquiring audio or program information. Wait until the unit
has received the information.
OFF AIRThe channel you selected is not broadcasting any programming. Select
another channel.
-----There is no song/program title or artist name/feature associated with the
channel at that time. No action needed.
---The channel you selected is no longer available. Wait for about 2 sec-
onds until the radio returns to the previous channel or CH001º. If it does
not change automatically, select another channel.
Contact the XM� Listener Care Center at 1 - 877 - 515 - 3987 (U.S.A.) or 1 - 877 - 438
- 9677 (Canada).
Page 22 of 72

AUDIO/VIDEO SYSTEM
206
NOTICE
This equipment has been tested and
found to comply with the limits for a
class B digital device, pursuant to
Part 15 of the FCC Rules. These lim-
its are designed to provide reason-
able protection against harmful inter-
ference in a residential installation.
This equipment generates, uses and
can radiate radio frequency energy
and, if not installed and used in ac-
cordance with the instructions, may
cause harmful interference to radio
communications. However, there is
no guarantee that interference will
not occur in a particular installation.
If this equipment does cause harmful
interference to radio or television re-
ception, which can be determined by
turning the equipment off and on, the
user is encouraged to try to correct
the interference by one or more of the
following measures:
Ð Reorient or relocate the receiving
antenna.
Ð Increase the separation between
the equipment and receiver.
Ð Connect the equipment into an
outlet on a circuit different from that
to which the receiver is connected.
Ð Consult the dealer or an experi-
enced radio/TV technician for help.
Information to user
Alternation or modifications carried
out without appropriate authoriza-
tion may invalidate the user's right to
operate the equipment.
INFORMATION
This XM� tuner supports Audio Ser-
vicesº (Music and Talk) of only XM�Satellite Radio and Text Informa-
tionº* linked to the respective Audio
Servicesº.
*Text Information includes, Station
Name, (Artist) Name, (Song) Title and
Category Name.
Page 23 of 72
AUDIO/VIDEO SYSTEM
207 �
Setting a cassette tape
When you insert a cassette tape, the ex-
posed tape should face to the right.
The player will automatically start when
you insert a cassette tape. At this time,
TAPEº appears on the display.
If a metal or chrome equivalent cassette
tape is put in the cassette player, the player
will automatically recognize it and MTLº
appears on the display.
�Ejecting a cassette tape
To stop or eject the cassette tape, push
the
button.
�Playing a cassette tape
If a cassette is already in the slot, push
the TAPEº button.
Push the AUDIOº button to display
this screen.
Ð Cassette tape player
operation
Page 24 of 72

AUDIO/VIDEO SYSTEM
208
Dolby� Noise Reduction* feature: If you
are listening to a tape that was recorded
with Dolby� B Noise Reduction, touch
º. The º touch-screen button will
be highlighted. Touch
º again to turn
off Dolby� B NR.
The Dolby NR mode reduces tape noise by
about 10 dB. For best sound reproduction,
play your tapes with these buttons on or off
according to the mode used for recording
the tape.
* Dolby noise reduction manufactured un-
der license from Dolby Laboratories Li-
censing Corporation. DOLBY and the
double-D symbol
are trademarks of
Dolby Laboratories Licensing Corpora-
tion.
�Manual program selection
Reverse button: You can reverse the tape
by touching ��. The display will show
the opposite direction after reversing the
tape. Also if the tape reaches the end of
one side, it is automatically reversed to the
other side.
Fast forward and Rewind buttons: Yo u
can fast forward or fast rewind by touching
�� or ��.
To stop the tape while it is fast forwarding,
touch ��, to stop the tape while it is re-
winding, touch �� .
If a tape rewinds completely, the cassette
player will stop and then play the same
side. If a tape fast forwards completely, the
cassette player will play the other side of
the tape using the auto-reverse feature.
Auto-reverse feature: After the cassette
player reaches the end of a tape, it auto-
matically reverses and begins to play the
other side, regardless of whether the cas-
sette was playing or fast forwarding.