2008 KIA Sedona tow
[x] Cancel search: towPage 86 of 339
377
Features of your vehicle
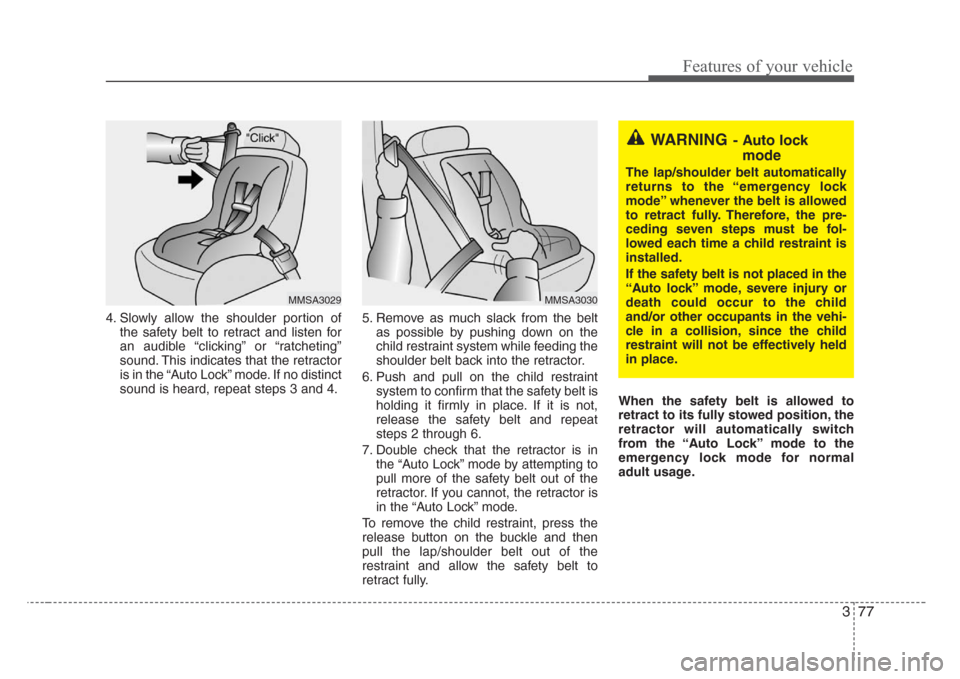
4. Slowly allow the shoulder portion of
the safety belt to retract and listen for
an audible “clicking” or “ratcheting”
sound. This indicates that the retractor
is in the “Auto Lock” mode. If no distinct
sound is heard, repeat steps 3 and 4.5. Remove as much slack from the belt
as possible by pushing down on the
child restraint system while feeding the
shoulder belt back into the retractor.
6. Push and pull on the child restraint
system to confirm that the safety belt is
holding it firmly in place. If it is not,
release the safety belt and repeat
steps 2 through 6.
7. Double check that the retractor is in
the “Auto Lock” mode by attempting to
pull more of the safety belt out of the
retractor. If you cannot, the retractor is
in the “Auto Lock” mode.
To remove the child restraint, press the
release button on the buckle and then
pull the lap/shoulder belt out of the
restraint and allow the safety belt to
retract fully.When the safety belt is allowed to
retract to its fully stowed position, the
retractor will automatically switch
from the “Auto Lock” mode to the
emergency lock mode for normal
adult usage.
MMSA3029MMSA3030
WARNING- Auto lock
mode
The lap/shoulder belt automatically
returns to the “emergency lock
mode” whenever the belt is allowed
to retract fully. Therefore, the pre-
ceding seven steps must be fol-
lowed each time a child restraint is
installed.
If the safety belt is not placed in the
“Auto lock” mode, severe injury or
death could occur to the child
and/or other occupants in the vehi-
cle in a collision, since the child
restraint will not be effectively held
in place.
Page 89 of 339
Features of your vehicle
80 3
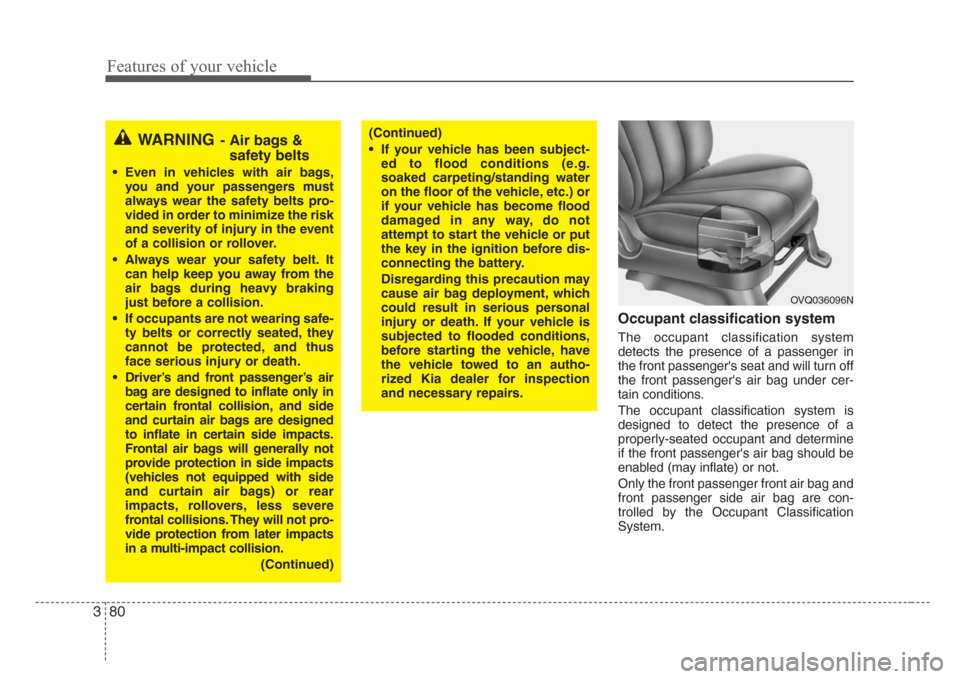
Occupant classification system
The occupant classification system
detects the presence of a passenger in
the front passenger's seat and will turn off
the front passenger's air bag under cer-
tain conditions.
The occupant classification system is
designed to detect the presence of a
properly-seated occupant and determine
if the front passenger's air bag should be
enabled (may inflate) or not.
Only the front passenger front air bag and
front passenger side air bag are con-
trolled by the Occupant Classification
System.
WARNING- Air bags &
safety belts
• Even in vehicles with air bags,
you and your passengers must
always wear the safety belts pro-
vided in order to minimize the risk
and severity of injury in the event
of a collision or rollover.
• Always wear your safety belt. It
can help keep you away from the
air bags during heavy braking
just before a collision.
• If occupants are not wearing safe-
ty belts or correctly seated, they
cannot be protected, and thus
face serious injury or death.
• Driver’s and front passenger’s air
bag are designed to inflate only in
certain frontal collision, and side
and curtain air bags are designed
to inflate in certain side impacts.
Frontal air bags will generally not
provide protection in side impacts
(vehicles not equipped with side
and curtain air bags) or rear
impacts, rollovers, less severe
frontal collisions. They will not pro-
vide protection from later impacts
in a multi-impact collision.
(Continued)
(Continued)
• If your vehicle has been subject-
ed to flood conditions (e.g.
soaked carpeting/standing water
on the floor of the vehicle, etc.) or
if your vehicle has become flood
damaged in any way, do not
attempt to start the vehicle or put
the key in the ignition before dis-
connecting the battery.
Disregarding this precaution may
cause air bag deployment, which
could result in serious personal
injury or death. If your vehicle is
subjected to flooded conditions,
before starting the vehicle, have
the vehicle towed to an autho-
rized Kia dealer for inspection
and necessary repairs.
OVQ036096N
Page 90 of 339
381
Features of your vehicle
Main components of occupant classi-
fication system
• Detection devices located under the
front passenger seat frame.
• Electronic system to determine
whether passenger air bag systems
(both front and side) should be activat-
ed or deactivated.
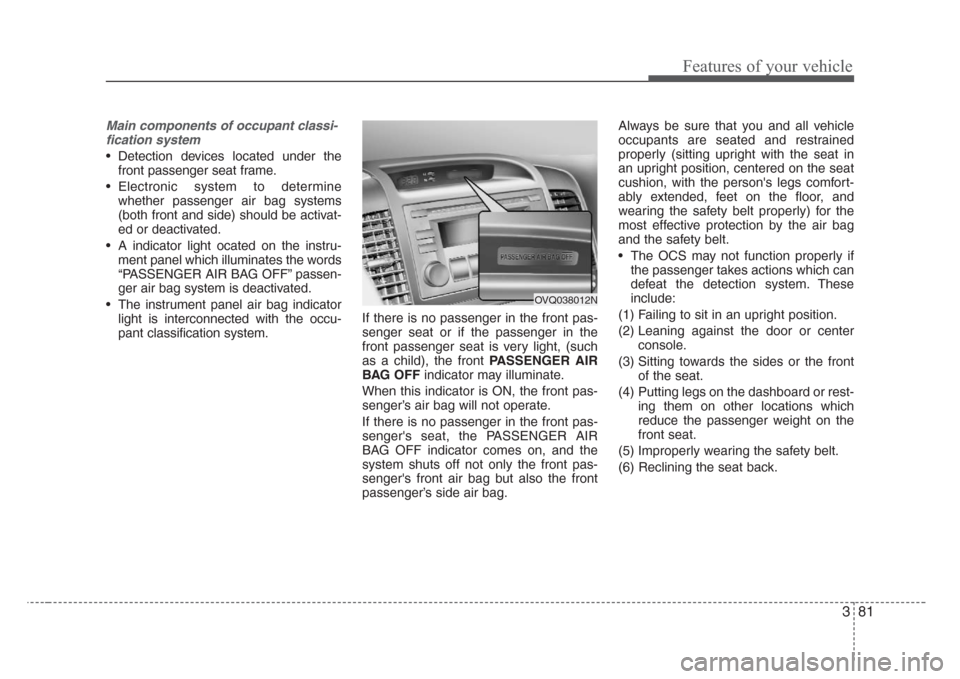
• A indicator light ocated on the instru-
ment panel which illuminates the words
“PASSENGER AIR BAG OFF” passen-
ger air bag system is deactivated.
• The instrument panel air bag indicator
light is interconnected with the occu-
pant classification system.If there is no passenger in the front pas-
senger seat or if the passenger in the
front passenger seat is very light, (such
as a child), the front PASSENGER AIR
BAG OFFindicator may illuminate.
When this indicator is ON, the front pas-
senger’s air bag will not operate.
If there is no passenger in the front pas-
senger's seat, the PASSENGER AIR
BAG OFF indicator comes on, and the
system shuts off not only the front pas-
senger's front air bag but also the front
passenger’s side air bag.Always be sure that you and all vehicle
occupants are seated and restrained
properly (sitting upright with the seat in
an upright position, centered on the seat
cushion, with the person's legs comfort-
ably extended, feet on the floor, and
wearing the safety belt properly) for the
most effective protection by the air bag
and the safety belt.
• The OCS may not function properly if
the passenger takes actions which can
defeat the detection system. These
include:
(1) Failing to sit in an upright position.
(2) Leaning against the door or center
console.
(3) Sitting towards the sides or the front
of the seat.
(4) Putting legs on the dashboard or rest-
ing them on other locations which
reduce the passenger weight on the
front seat.
(5) Improperly wearing the safety belt.
(6) Reclining the seat back.
OVQ038012N
Page 93 of 339
Features of your vehicle
84 3
1KMN3663
1KMN3664
1KMN3665
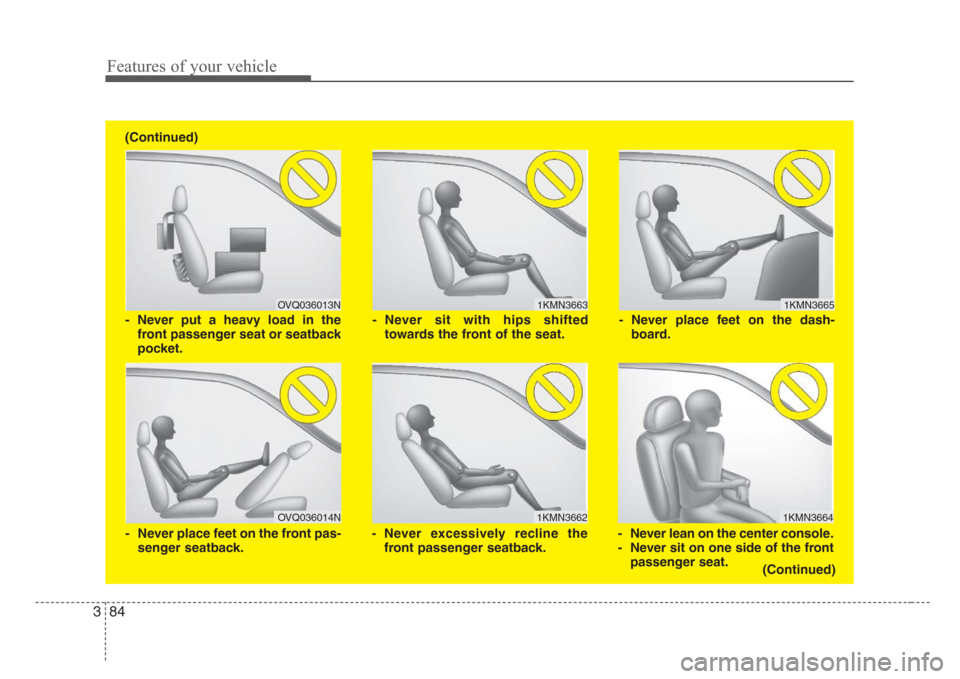
- Never sit with hips shifted
towards the front of the seat.
- Never lean on the center console.
- Never sit on one side of the front
passenger seat. - Never place feet on the dash-
board.
(Continued)
OVQ036013N
1KMN3662
- Never put a heavy load in the
front passenger seat or seatback
pocket.
- Never excessively recline the
front passenger seatback.
OVQ036014N
- Never place feet on the front pas-
senger seatback. (Continued)
Page 112 of 339
3 103
Features of your vehicle
Outside rearview mirror
Be sure to adjust mirror angles before
driving.
Your vehicle is equipped with both left-
hand and right-hand outside rearview
mirrors. The mirrors can be adjusted
remotely with the remote switch. The mir-
ror heads can be folded back to prevent
damage during an automatic car wash or
when passing in a narrow street.
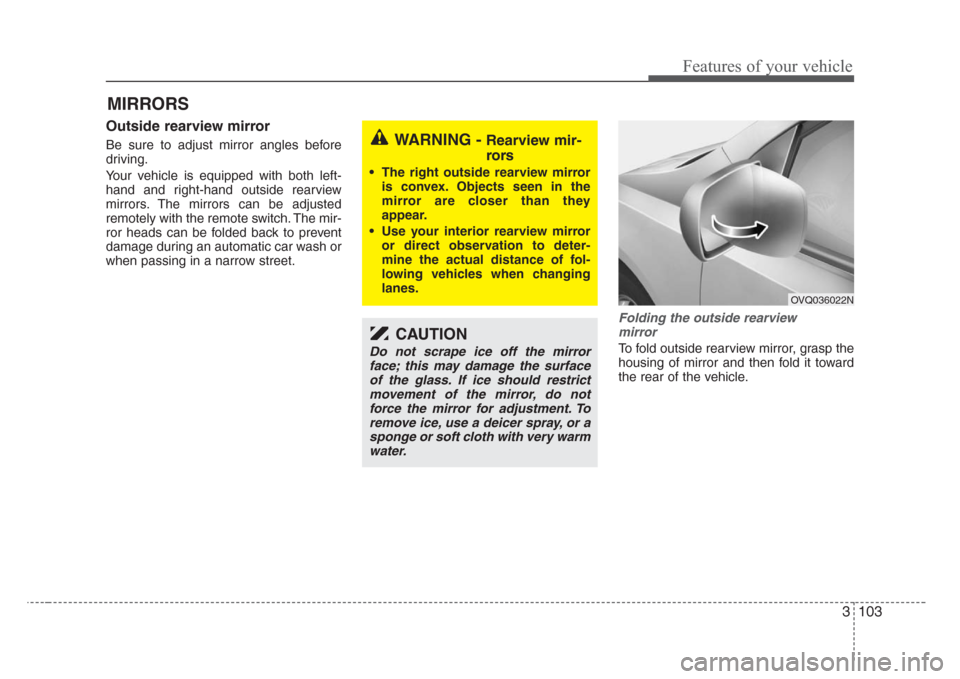
Folding the outside rearview
mirror
To fold outside rearview mirror, grasp the
housing of mirror and then fold it toward
the rear of the vehicle.
MIRRORS
WARNING - Rearview mir-
rors
• The right outside rearview mirror
is convex. Objects seen in the
mirror are closer than they
appear.
• Use your interior rearview mirror
or direct observation to deter-
mine the actual distance of fol-
lowing vehicles when changing
lanes.
CAUTION
Do not scrape ice off the mirror
face; this may damage the surface
of the glass. If ice should restrict
movement of the mirror, do not
force the mirror for adjustment. To
remove ice, use a deicer spray, or a
sponge or soft cloth with very warm
water.
OVQ036022N
Page 115 of 339

Features of your vehicle
106 3
Rearview mirror
Adjust the rearview mirror to center on
the view through the rear window. Make
this adjustment before you start driving.
Manual type (if equipped)
Make this adjustment before you start
driving and while the day/night lever is in
the day position.
Pull the day/night lever toward you to
reduce glare from the headlights of vehi-
cles behind you during night driving.
Remember that you lose some rearview
clarity in the night position.Electric type (if equipped)
The electric rearview mirror automatical-
ly controls the glare from the headlights
of the car behind you in nighttime or low
light driving conditions. The sensor
mounted in the mirror senses the light
level around the vehicle, and through a
chemical reaction, automatically controls
the headlight glare from vehicles behind
you.
When the engine is running, the glare is
automatically controlled by the sensor
mounted in the rearview mirror.
Whenever the shift lever is shifted into
reverse (R), the mirror will automatically
go to the brightest setting in order to
improve the drivers view behind the vehi-
cle.
WARNING - Rear visibility
Do not place objects in the rear seat
or cargo area which would interfere
with your vision out the rear win-
dow.
1VQA2105OLD028078Day
Night
Day/Night lever
CAUTION
When cleaning the mirror, use a
paper towel or similar material
dampened with glass cleaner. Do
not spray glass cleaner directly on
the mirror as that may cause the liq-
uid cleaner to enter the mirror hous-
ing.
Page 119 of 339

Features of your vehicle
110 3
Trip odometer
TRIP A: Trip odometer A
TRIP B: Trip odometer B
The trip odometer indicates the distance
of individual trips selected by the driver.
Trip odometer A and B can be reset to 0
by pressing the reset button for 1 second
or more, and then releasing.
Tachometer
The tachometer indicates the approxi-
mate number of engine revolutions per
minute (rpm).
Use the tachometer to select the correct
shift points and to prevent lugging and/or
over-revving the engine.
The tachometer pointer may move slight-
ly when the ignition switch is in ACC or
ON position with the engine OFF. This
movement is normal and will not affect
the accuracy of the tachometer once the
engine is running.
Engine temperature gauge
This gauge shows the temperature of the
engine coolant when the ignition switch
is ON.
Do not continue driving with an overheat-
ed engine. If your vehicle overheats, refer
to “Overheating” in the Index.
CAUTION
Do not operate the engine within
the tachometer's RED ZONE.
This may cause severe engine dam-
age.
CAUTION
If the gauge pointer moves beyond
the normal range area toward the
“H” position, it indicates overheat-
ing that may damage the engine.
OVQ036031NOVQ036406N1VQA2125
Page 128 of 339
3 119
Features of your vehicle
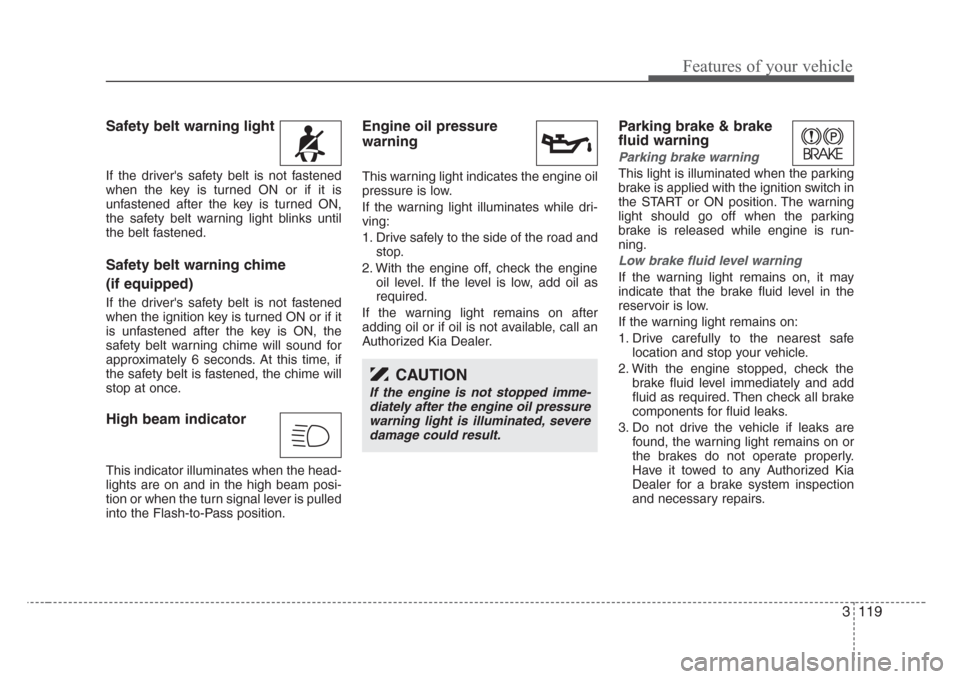
Safety belt warning light
If the driver's safety belt is not fastened
when the key is turned ON or if it is
unfastened after the key is turned ON,
the safety belt warning light blinks until
the belt fastened.
Safety belt warning chime
(if equipped)
If the driver's safety belt is not fastened
when the ignition key is turned ON or if it
is unfastened after the key is ON, the
safety belt warning chime will sound for
approximately 6 seconds. At this time, if
the safety belt is fastened, the chime will
stop at once.
High beam indicator
This indicator illuminates when the head-
lights are on and in the high beam posi-
tion or when the turn signal lever is pulled
into the Flash-to-Pass position.
Engine oil pressure
warning
This warning light indicates the engine oil
pressure is low.
If the warning light illuminates while dri-
ving:
1. Drive safely to the side of the road and
stop.
2. With the engine off, check the engine
oil level. If the level is low, add oil as
required.
If the warning light remains on after
adding oil or if oil is not available, call an
Authorized Kia Dealer.
Parking brake & brake
fluid warning
Parking brake warning
This light is illuminated when the parking
brake is applied with the ignition switch in
the START or ON position. The warning
light should go off when the parking
brake is released while engine is run-
ning.
Low brake fluid level warning
If the warning light remains on, it may
indicate that the brake fluid level in the
reservoir is low.
If the warning light remains on:
1. Drive carefully to the nearest safe
location and stop your vehicle.
2. With the engine stopped, check the
brake fluid level immediately and add
fluid as required. Then check all brake
components for fluid leaks.
3. Do not drive the vehicle if leaks are
found, the warning light remains on or
the brakes do not operate properly.
Have it towed to any Authorized Kia
Dealer for a brake system inspection
and necessary repairs.
CAUTION
If the engine is not stopped imme-
diately after the engine oil pressure
warning light is illuminated, severe
damage could result.