2008 GEELY CK wheel bolts
[x] Cancel search: wheel boltsPage 20 of 392

13Section 2 Engine Components Replacement1. Avoid gasoline ejection when work.
2. Drain the coolant to empty.
3. Remove air filter assembly with hose. See (Figure 23)
4. Remove battery
5. Remove fuel delivery pipe sub-assembly
6. Disconnect water hoses, disconnect heater outlet hose
from A/C hose.
7. Loose nut, remove accelerator control cable
8. Remove throttle body assembly
9. Remove power steering pump reservoir assembly
10. Remove front exhaust pipe assembly
11. Remove steering gear boot
12. Seperate steering column assembly. See (Figure 24)
13. Remove front wheel hub nut
14. Disconnect front wheel vehicle speed sensor (with ABS)
15. Detach steering tie rod ball stud pin assembly
16. Detach front lower swing arm sub-assembly
17. Detach front propeller assembly. See (Figure 25)
Detach front propeller from the shaft hub with plastic hammer.
18. Disconnect transmission shift cable or gear shift level assembly
19. Disconnect clutch cylinder assembly or disconnect clutch cable
20. Detach engine assembly and transaxle
(a) Hoisting engine ;
(b) Remove 3 bolts. Detach the right engine mounting bracket. See (Figure 26) ;
(c) Remove 1 bolt. Detach the left engine mounting bracket;
(d) Remove 1 bolt. Detach the rear engine mounting bracket;
(e) Remove engine and transaxle and put them on the pallet;
(f) Jack up the boday.Figure 23
Figure 24
Figure 25 Figure 26
Page 21 of 392

1421. Remove radiator assembly
22. Remove engine V-belt
23. Remove No. 1 V- belt (A/C compressor to crankshaft pulley)
24. Remove generator assembly
25. Remove A/C compressor
26. Remove compressor installing No. 1 bracket. Remove 4 bolts and compressor installing No.
1 bracket.
27. Remove starter assembly
28. Remove power steering pump V- belt
29. Detach power steering pump assembly
30. Remove power steering pump, adjust the bracket
31. Detach manual transaxle assembly (Separate automatic transaxle assembly)
32. Detach clutch cover panel assembly.
33. Detach clutch pressure plate assembly.
34. Detach flywheel sub-assembly.
35. Remove engine rear end cover.
36. Remove injector assembly and remove intake manifold.
Remove 2 bolts and intake manifold support and remove 7 bolts,
2 nuts, intake manifold and gasket. See (Figure 27).
37. Remove knock sensor
38. Remove water temperature gauge sensor
39. Remove crankshaft position sensor
40. Remove engine oil pressure switch
41. Remove water inlet hose housing
42. Remove water outlet hose joint
43. Detach exhaust manifold. See (Figure 28)
44. Remove engion oil filter sub-assembly
45. Remove ignition coil and high voltage cable
46. Install engine sub-assembly
47. Install ignition coil and high voltage cable
48. Install engine oil filter sub-assembly
49. Install exhaust manifold
(a) Install new gasket and exhaust manifold stay with
5 nuts, Torque: 34N. m
(b) Install exhaust manifold stay with two bolts.
Torque: 59N. m
(c) Install upper heat shield with 4 bolts.Torque: 17N. mFigure 27
Figure 28
Page 22 of 392

1550. Install water outlet hose joint. See (Figure 29, 30)
Figure 29
51. Install water inlet hose housing. See (Figure 31, 32)
Figure 31 Figure 32
52. Install engine oil pressure switch
53. Install crankshaft position sensor
Torque: 9, 3N. m
54. Install water temperature gauge and water temperature sensor
Torque: 15N. m
55. Install knock sensor
Torque: 44N. M
56. Install intake manifold. See (Figure 33)
Install the intake manifold with new gasket with 7 bolts and 2
nuts. Uniformly tighten bolts and nuts in several time.
57. Install injector assembly
58. Install rear end cover
59. Install flywheel sub-assembly. See (Figure 34)
(a) Install flywheel to crankshaft.
(b)Install and uniformly tighten and connect bolt as shown in the
figure. Torque: 78N. m
60. Install clutch assembly
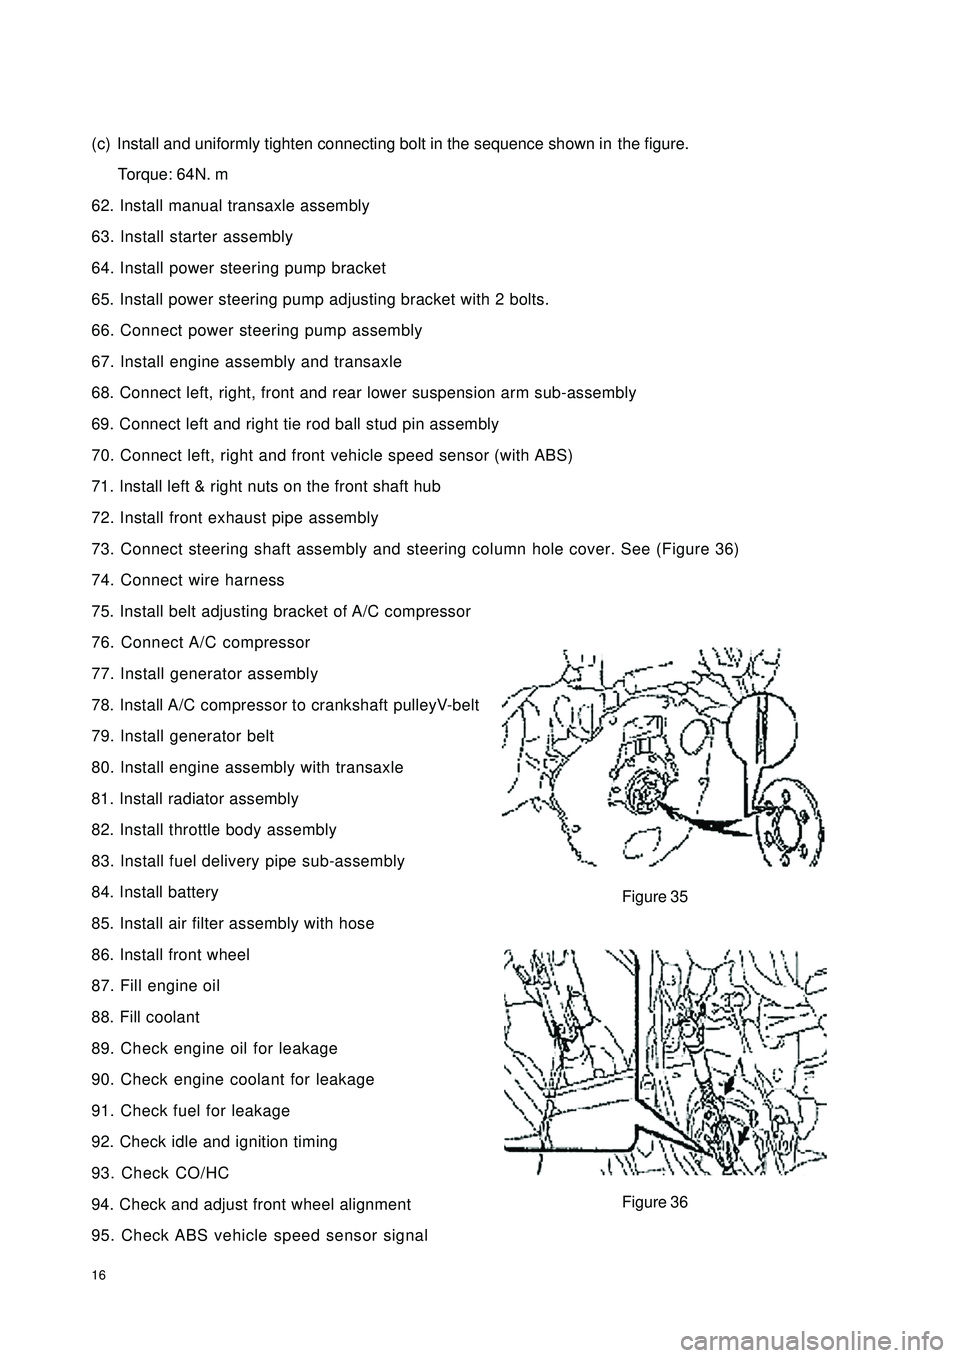
61. Install flywheel and ring gear. See (Figure 35)
(a)Install the oil thrower, it’s chamfer side on crankshaft in
the axie direction.
(b) Install flywheel and ring gear on crankshaft.Figure 33
Figure 34 Figure 30
Page 23 of 392

16(c) Install and uniformly tighten connecting bolt in the sequence shown inthe figure.
Torque: 64N. m
62. Install manual transaxle assembly
63. Install starter assembly
64. Install power steering pump bracket
65. Install power steering pump adjusting bracket with 2 bolts.
66. Connect power steering pump assembly
67. Install engine assembly and transaxle
68. Connect left, right, front and rear lower suspension arm sub-assembly
69. Connect left and right tie rod ball stud pin assembly
70. Connect left, right and front vehicle speed sensor (with ABS)
71. Install left & right nuts on the front shaft hub
72. Install front exhaust pipe assembly
73. Connect steering shaft assembly and steering column hole cover. See (Figure 36)
74. Connect wire harness
75. Install belt adjusting bracket of A/C compressor
76. Connect A/C compressor
77. Install generator assembly
78. Install A/C compressor to crankshaft pulleyV-belt
79. Install generator belt
80. Install engine assembly with transaxle
81. Install radiator assembly
82. Install throttle body assembly
83. Install fuel delivery pipe sub-assembly
84. Install battery
85. Install air filter assembly with hose
86. Install front wheel
87. Fill engine oil
88. Fill coolant
89. Check engine oil for leakage
90. Check engine coolant for leakage
91. Check fuel for leakage
92. Check idle and ignition timing
93. Check CO/HC
94. Check and adjust front wheel alignment
95. Check ABS vehicle speed sensor signalFigure 35
Figure 36
Page 110 of 392

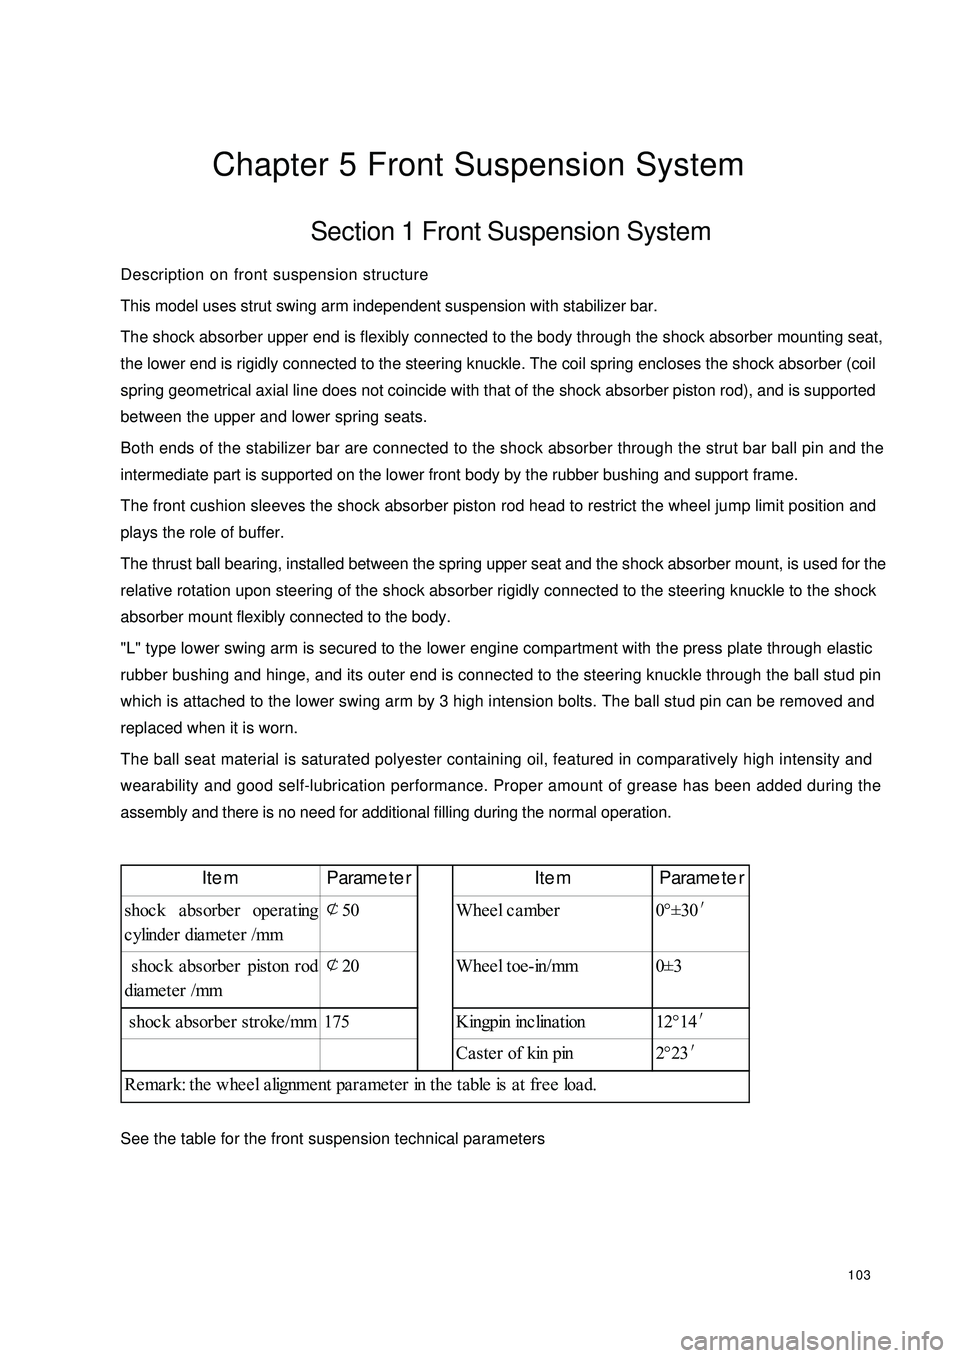
103Chapter 5 Front Suspension SystemSection 1 Front Suspension SystemDescription on front suspension structure
This model uses strut swing arm independent suspension with stabilizer bar.
The shock absorber upper end is flexibly connected to the body through the shock absorber mounting seat,
the lower end is rigidly connected to the steering knuckle. The coil spring encloses the shock absorber (coil
spring geometrical axial line does not coincide with that of the shock absorber piston rod), and is supported
between the upper and lower spring seats.
Both ends of the stabilizer bar are connected to the shock absorber through the strut bar ball pin and the
intermediate part is supported on the lower front body by the rubber bushing and support frame.
The front cushion sleeves the shock absorber piston rod head to restrict the wheel jump limit position and
plays the role of buffer.
The thrust ball bearing, installed between the spring upper seat and the shock absorber mount, is used for the
relative rotation upon steering of the shock absorber rigidly connected to the steering knuckle to the shock
absorber mount flexibly connected to the body.
"L" type lower swing arm is secured to the lower engine compartment with the press plate through elastic
rubber bushing and hinge, and its outer end is connected to the steering knuckle through the ball stud pin
which is attached to the lower swing arm by 3 high intension bolts. The ball stud pin can be removed and
replaced when it is worn.
The ball seat material is saturated polyester containing oil, featured in comparatively high intensity and
wearability and good self-lubrication performance. Proper amount of grease has been added during the
assembly and there is no need for additional filling during the normal operation.
See the table for the front suspension technical parametersItem Parameter Item Parameter
shoc k a bsorbe r ope ra ting
cylinder diameter /mm¢
50 Wheel camber 0°±30′
shoc k a bsorbe r piston rod
diameter /mm¢
20 Wheel toe-in/mm 0±3
shoc k a bsorbe r stroke /mm 175 Kingpin inc lina tion 12°14′
Ca ste r of kin pin 2°23′
Remark: the wheel alignment parameter in the table is at free load.
Page 115 of 392

108Replacement1. Remove the front wheel.
2. Remove the ABS sensor from the steering knuckle. Separate the sensor and signal wire from the wire
harness bracket on the front shock absorber.
3. Separate the front brake hose
Remove 2 clips and separate the front brake hose from the front shock absorber bracket.
4. Remove the stabilizer bar link rod assembly
Remove the nut connecting the stabilizer bar link rod assembly and the shock absorber.
5. Remove the front shock absorber with the coil spring
(1) Remove the nuts and bolts connecting the shock absorber and brake.
(2) Remove the 4 nuts connecting the front shock absorber and vehicle body.
Notice: reliable object shall be used to support the brake assembly!
Page 119 of 392

1123. Remove lower swing arm front support frame
Remove the 4 bolts connecting the lower swing arm front support frame and vehicle body.
4. Disassemble lower swing arm assembly
Disassembly of lower swing arm assembly is in the reverse order of the assembly.
Notice: Do not tighten type 1 hexagon nut
5. Install lower swing arm front support frame
Attach the lower swing arm front support frame to the vehicle body with bolts .
Torque: 80~90N.m
6. Install lower swing arm assembly
(1) Install the bolts and nuts connecting the lower swing arm assembly and lower swing arm front support
frame.
Notice: Do not tighten the bolts
(2) Attach the left lower swing arm assembly ball stud pin to the steering knuckle with bolts and nuts.
Torque: 80~90N.m
(3) Install the attaching bolt between the lower swing arm rear spring joint cover and the body.
Torque: 80~90N.m
7. Set nut
(1) Lower the vehicle and center the front wheel.
Be careful of the security
(2) Tighten the bolts connecting lower swing arm assembly and lower swing arm front support frame
Torque: 90~100N.m
(3) Tighten the set nuts on the lower swing arm assembly rear spring joint
Torque: 90~100N.m
Page 130 of 392

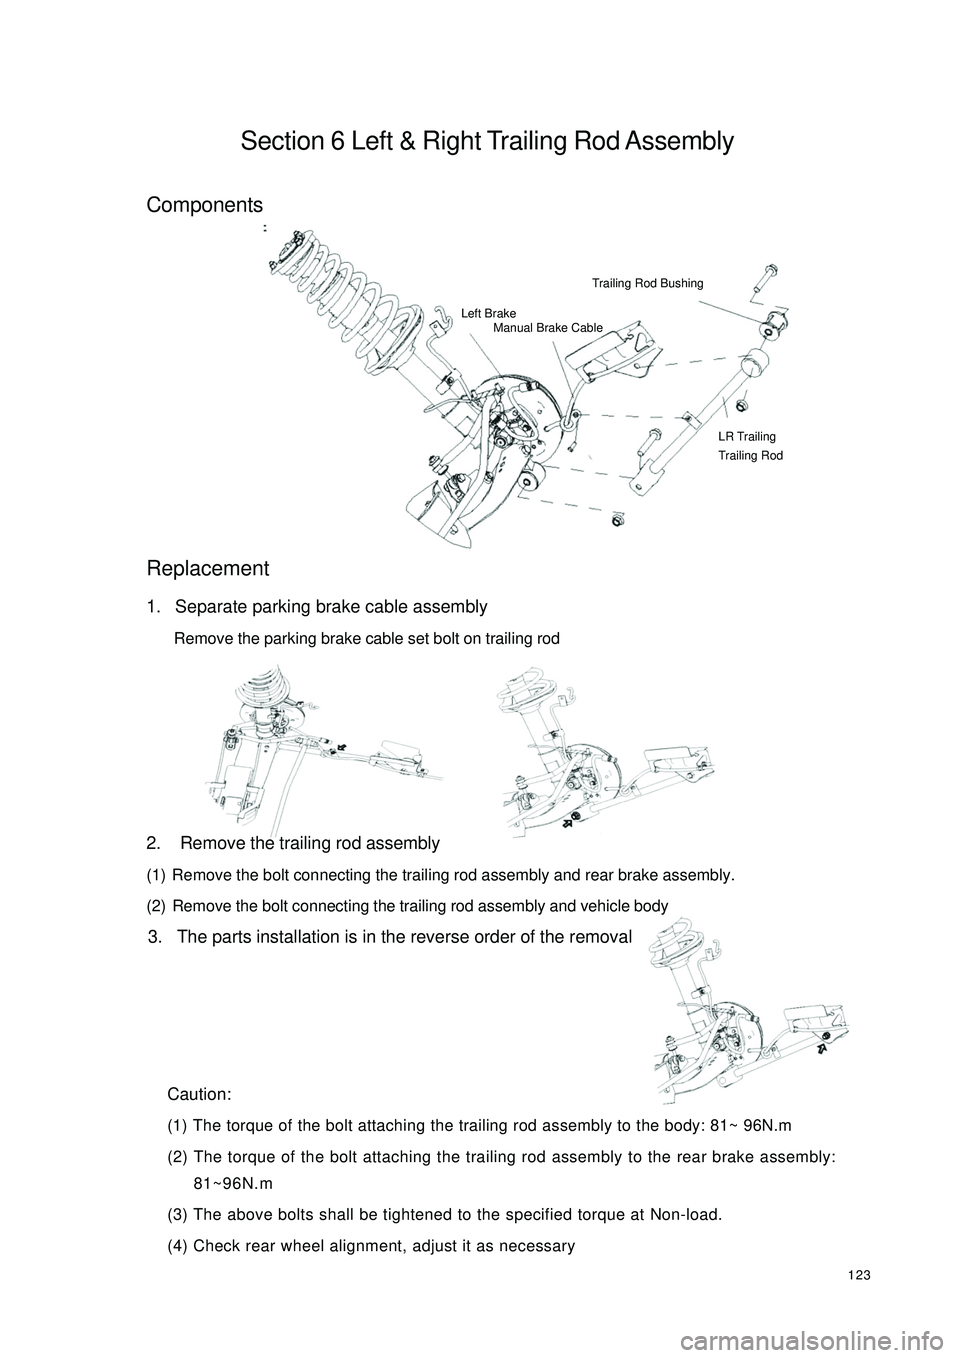
123Section 6 Left & Right Trailing Rod AssemblyComponents
Replacement1. Separate parking brake cable assembly
Remove the parking brake cable set bolt on trailing rod
2. Remove the trailing rod assembly
(1) Remove the bolt connecting the trailing rod assembly and rear brake assembly.
(2) Remove the bolt connecting the trailing rod assembly and vehicle body
3. The parts installation is in the reverse order of the removal
Caution:
(1) The torque of the bolt attaching the trailing rod assembly to the body: 81~ 96N.m
(2) The torque of the bolt attaching the trailing rod assembly to the rear brake assembly:
81~96N.m
(3) The above bolts shall be tightened to the specified torque at Non-load.
(4) Check rear wheel alignment, adjust it as necessaryLeft Brake
Manual Brake Cable Trailing Rod Bushing LR Trailing
Trailing Rod