Page 217 of 278

Downloaded from www.Manualslib.com manuals search engine Removing a wheel
All vehicles
WARNINGS
Park your vehicle in such aposition that neither the trafficnor you are hindered or endangered.
Set up a warning triangle.
Make sure that the vehicle is onfirm, level ground with thewheels pointing straight ahead.
WARNINGS
Switch off the ignition and applythe parking brake.
If your vehicle has a manualtransmission, select first orreverse gear. If it has an automatictransmission, select park.
Have the passengers leave thevehicle.
Secure the diagonally oppositewheel with an appropriate blockor wheel chock.
Make sure that the arrows ondirectional tyres point in thedirection of rotation when the vehicleis moving forwards. If you have to fita spare wheel with the arrowspointing in the opposite direction,have the tyre refitted in the correctdirection by a properly trainedtechnician.
Do not work underneath thevehicle when it is supported onlyby a jack.
Make sure that the jack isvertical to the jacking point andthe base is flat on the ground.
CAUTION
Do not lay alloy wheels facedown on the ground, this willdamage the paint.
215
Wheels and tyresE92932 E93020
Page 218 of 278

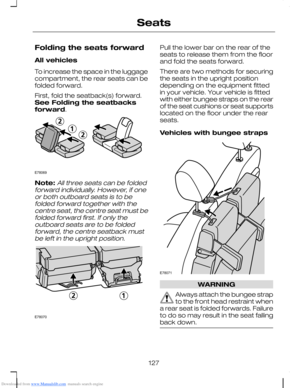
Downloaded from www.Manualslib.com manuals search engine •Insert the flat end of the wheelbrace between the rim and thehub cover and twist carefully toremove the cover.
Vehicles with locking wheelnuts
Note:Replacement locks and wheelnuts can be obtained using the wheelnut reference number certificate.
•Insert the nut key onto the lockingnut.
All vehicles
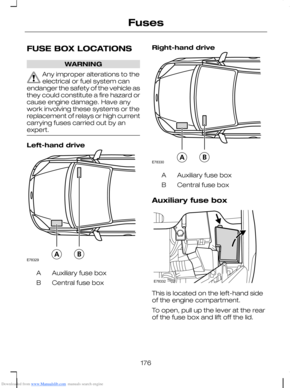
1.Slacken the wheel nuts.
2.Place the jack with the whole footarea on firm ground.
3.Jack up the vehicle until the wheelis clear of the ground.
4.Unscrew and remove the wheelnuts and take off the wheel.
Fitting a wheel
All vehicles
Note:Make sure that you use thecorrect wheel nut for the type ofwheel, if in doubt check with yourdealer.
1.Push the wheel onto the wheelstuds.
2.Screw on the wheel nuts andsecure in a clockwise directionensuring that the tapered end ofthe wheel nuts is facing the wheel.
3.Lower the vehicle and remove thejack.
Vehicles with locking wheelnuts
•Insert the nut key onto the lockingnut.
216
Wheels and tyresE78139 E72572
Page 219 of 278

Downloaded from www.Manualslib.com manuals search engine All vehicles
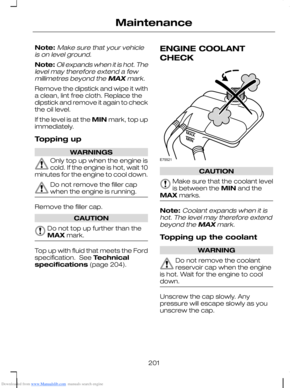
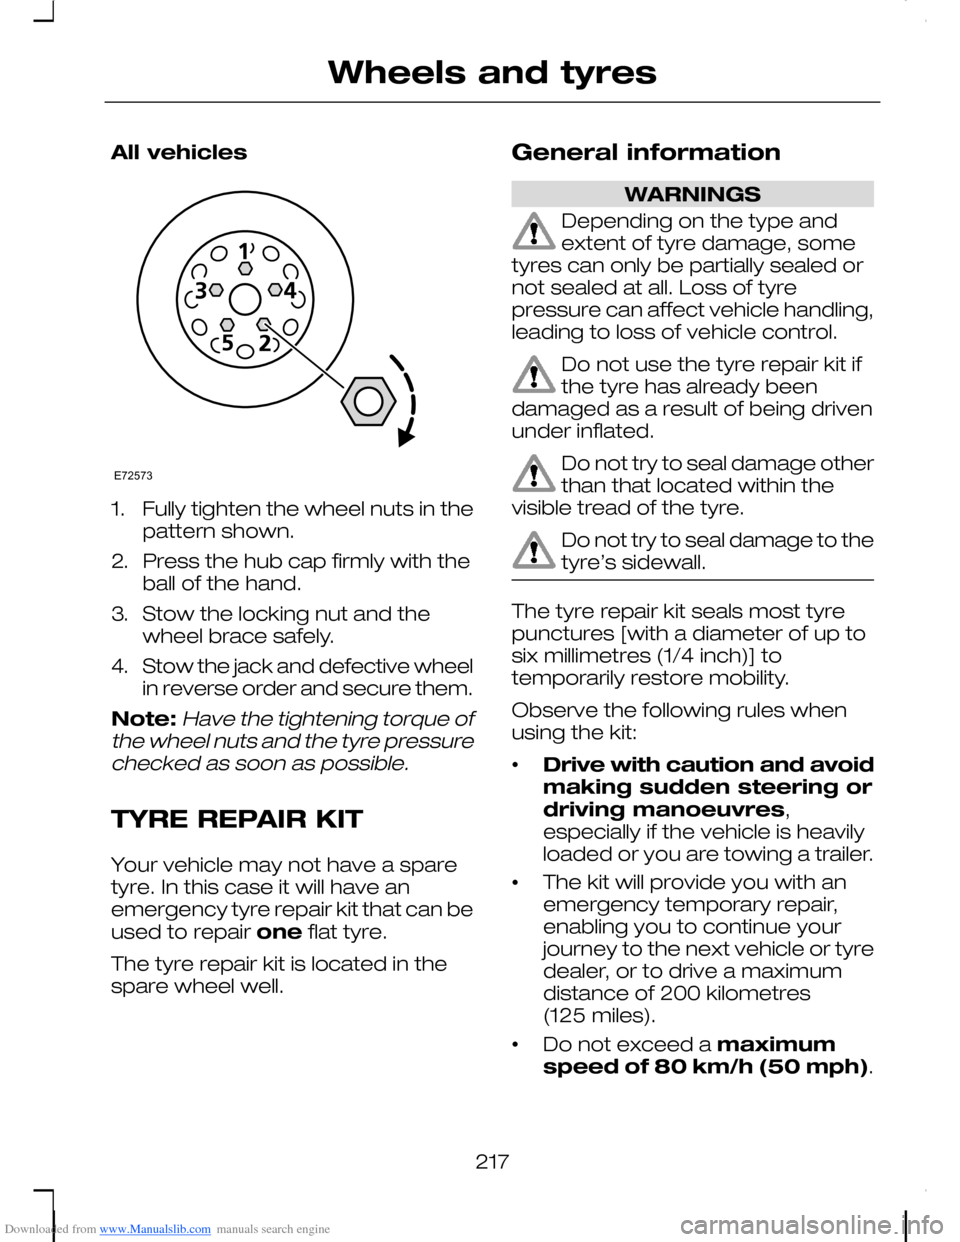
1.Fully tighten the wheel nuts in thepattern shown.
2.Press the hub cap firmly with theball of the hand.
3.Stow the locking nut and thewheel brace safely.
4.Stow the jack and defective wheelin reverse order and secure them.
Note:Have the tightening torque ofthe wheel nuts and the tyre pressurechecked as soon as possible.
TYRE REPAIR KIT
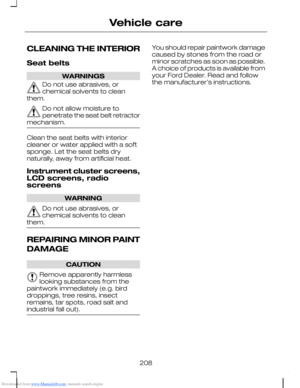
Your vehicle may not have a sparetyre. In this case it will have anemergency tyre repair kit that can beused to repair one flat tyre.
The tyre repair kit is located in thespare wheel well.
General information
WARNINGS
Depending on the type andextent of tyre damage, sometyres can only be partially sealed ornot sealed at all. Loss of tyrepressure can affect vehicle handling,leading to loss of vehicle control.
Do not use the tyre repair kit ifthe tyre has already beendamaged as a result of being drivenunder inflated.
Do not try to seal damage otherthan that located within thevisible tread of the tyre.
Do not try to seal damage to thetyre’s sidewall.
The tyre repair kit seals most tyrepunctures [with a diameter of up tosix millimetres (1/4 inch)] totemporarily restore mobility.
Observe the following rules whenusing the kit:
•Drive with caution and avoidmaking sudden steering ordriving manoeuvres,especially if the vehicle is heavilyloaded or you are towing a trailer.
•The kit will provide you with anemergency temporary repair,enabling you to continue yourjourney to the next vehicle or tyredealer, or to drive a maximumdistance of 200 kilometres(125 miles).
•Do not exceed a maximumspeed of 80 km/h (50 mph).
217
Wheels and tyresE72573
Page 220 of 278

Downloaded from www.Manualslib.com manuals search engine •Keep the kit out of the reach ofchildren.
•Only use the kit when the ambienttemperature is between –30°C(-22°F) and +70°C (+158°F).
Using the tyre repair kit
WARNINGS
Compressed air can act as anexplosive or propellant.
Never leave the tyre repair kitunattended while in use.
CAUTION
Do not keep the compressoroperating for more than 10minutes.
Note:Use the tyre repair kit only forthe vehicle with which it was supplied.
•Park your vehicle at the roadsideso that you do not obstruct theflow of traffic and so that you areable to use the kit without beingin danger.
•Apply the parking brake, even ifyou have parked on a level road,to make sure that the vehicle willnot move.
•Do not attempt to remove foreignobjects like nails or screwspenetrating the tyre.
•Leave the engine running whilethe kit is in use, but not if thevehicle is in an enclosed or poorlyventilated area (for example,inside a building). In thesecircumstances, switch thecompressor on with the engineturned off.
•Replace the sealant bottle with anew one before the expiry date(see top of bottle) is reached.
•Inform all other users of thevehicle that the tyre has beentemporarily sealed with the tyrerepair kit and make them awareof the special driving conditions tobe observed.
Inflating the tyre
WARNINGS
Check the sidewall of the tyreprior to inflation. If there are anycracks, bumps or similar damage, donot attempt to inflate the tyre.
Do not stand directly beside thetyre while the compressor ispumping.
Watch the sidewall of the tyre.If any cracks, bumps or similardamage appear, turn off thecompressor and let the air out bymeans of the pressure relief valve B.Do not continue driving with this tyre.
The sealant contains naturalrubber latex. Avoid contact withskin and clothing. If this happens,rinse the affected areas immediatelywith plenty of water and contact yourdoctor.
218
Wheels and tyres
Page 221 of 278
Downloaded from www.Manualslib.com manuals search engine WARNINGS
If the tyre inflation pressure doesnot reach 1.8 bar (26 psi) withinseven minutes, the tyre may havesuffered excessive damage, makinga temporary repair impossible. In thiscase, do not continue driving with thistyre.
CAUTION
Screwing the bottle onto thebottle holder will pierce the sealof the bottle. Do not unscrew thebottle from the holder as the sealantwill escape.
219
Wheels and tyres
Page 222 of 278
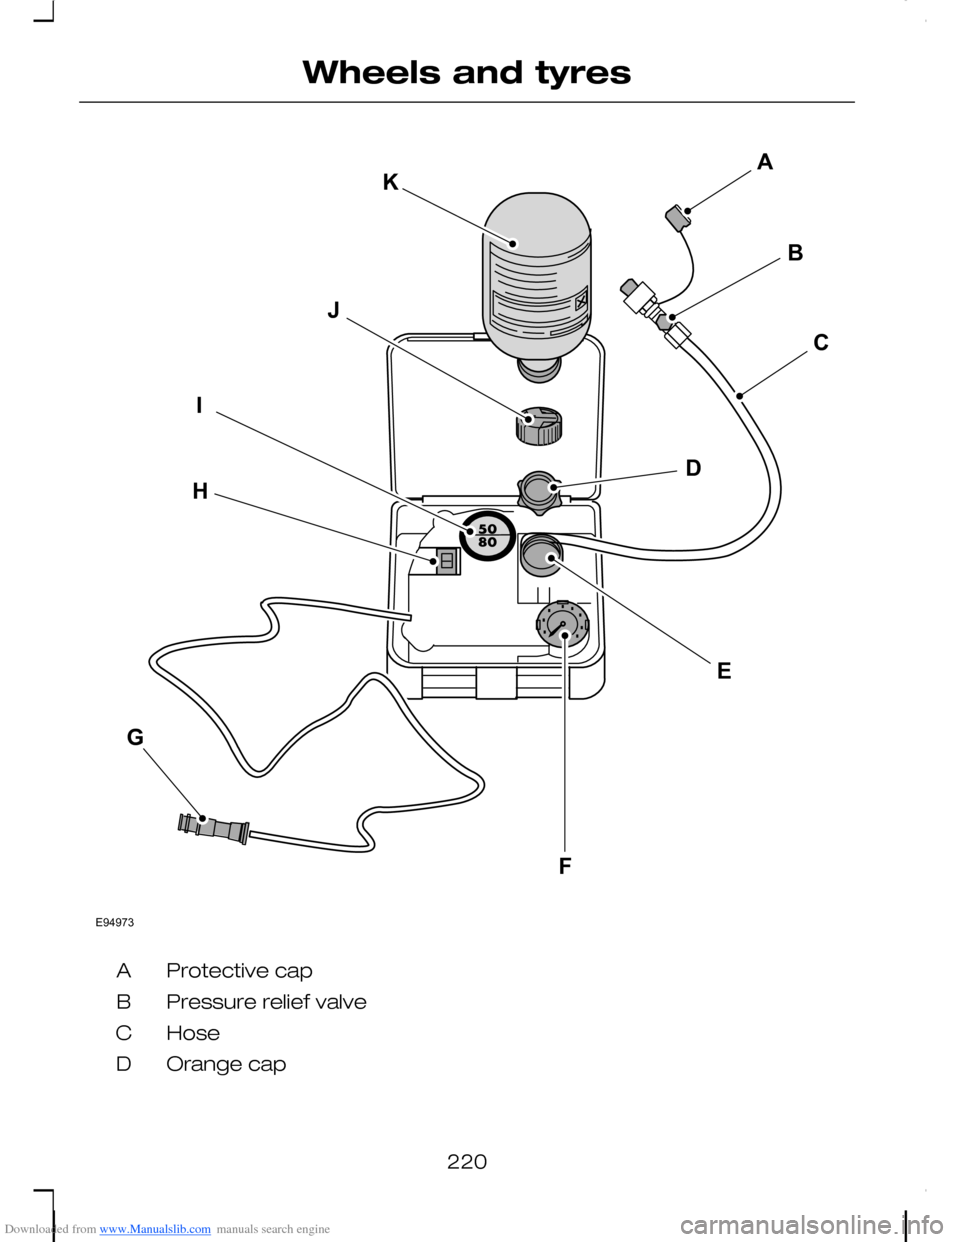
Downloaded from www.Manualslib.com manuals search engine Protective capA
Pressure relief valveB
HoseC
Orange capD
220
Wheels and tyresE94973BJIFECKAGHD
Page 223 of 278

Downloaded from www.Manualslib.com manuals search engine Bottle holderE
Pressure gaugeF
Power plug with cableG
Compressor switchH
LabelI
Bottle lidJ
Sealant bottleK
1.Open the lid of the tyre repair kit.
2.Peel off the label I showing themaximum permissible speed of80 km/h (50 mph) from the casingand attach it to the instrumentpanel in the driver’s field of view.Make sure the label does notobscure anything important.
3.Take the hose C and the powerplug with cable G out of the kit.
4.Unscrew the orange cap D andthe bottle lid J.
5.Screw the sealant bottle Kclockwise into the bottle holder Efully tight.
6.Remove the valve cap from thedamaged tyre.
7.Detach the protective cap A fromthe hose C and screw the hoseC firmly onto the valve of thedamaged tyre.
8.Make sure that the compressorswitch H is in position 0.
9.Insert the power plug G into thecigar lighter socket or auxiliarypower socket. See Cigarlighter (page 134). See Auxiliarypower sockets (page 134).
10.Start the engine.
11.Move the compressor switch Hto position 1.
12.Inflate the tyre for no longer thanseven minutes to an inflationpressure of minimum 1.8 bar(26 psi) and a maximum of3.5 bar (51 psi). Move thecompressor switch H to position0 and check the current tyrepressure with pressure gaugeF.
13.Remove the power plug G fromthe cigar lighter socket orauxiliary power socket.
14.Quickly unscrew the hose Cfrom the tyre valve and replacethe protective cap A. Fasten thevalve cap again.
15.Leave the sealant bottle K in thebottle holder E.
16.Make sure the kit, the bottle lidand the orange cap are storedsafely, but still easily accessiblein the vehicle. The kit will berequired again when you checkthe tyre pressure.
221
Wheels and tyres
Page 224 of 278

Downloaded from www.Manualslib.com manuals search engine 17.Immediately drive approximatelythree kilometres (two miles) sothat the sealant can seal thedamaged area.
Note:When pumping in the sealantthrough the tyre valve, the pressuremay rise up to 6 bar (87 psi) but willdrop again after about 30 seconds.
WARNING
If you experience heavyvibrations, unsteady steeringbehaviour or noises while driving,reduce your speed and drive withcaution to a place where it is safe foryou to stop the vehicle. Recheck thetyre and its pressure. If the tyrepressure is less than 1.3 bar (19 psi)or if there are any cracks, bumps orsimilar damage visible, do notcontinue driving with this tyre.
Checking the tyre pressure
1.Stop the vehicle after drivingapproximately three kilometres(two miles). Check, and wherenecessary, adjust the pressure ofthe damaged tyre.
2.Attach the kit and read the tyrepressure from the pressure gaugeF.
3.If the pressure of the sealant-filledtyre is 1.3 bar (19 psi) or more,adjust it to the specified pressure.See Technical specifications(page 224).
4.Follow the inflation procedureonce again to top up the tyre.
5.Check the tyre pressure againfrom the pressure gauge F. If thetyre pressure is too high, deflatethe tyre to the specified pressureusing the pressure relief valve B.
6.Once you have inflated the tyre toits correct tyre pressure, movethe compressor switch H toposition 0, remove the powerplug G from the socket, unscrewthe hose C, fasten the valve capand replace the protective cap A.
7.Leave the sealant bottle K in thebottle holder E and store the kitaway safely in its original location.
8.Drive to the nearest tyre specialistto get the damaged tyre replaced.Before the tyre is removed fromthe rim, inform your tyre dealerthat the tyre contains sealant.Renew the kit as soon as possibleafter it has been used once.
Note:Remember that emergencyroadside tyre repair kits only providetemporary mobility. Regulationsconcerning tyre repair after usage oftyre repair kit may differ from countryto country. You should consult a tyrespecialist for advice.
WARNING
Before driving, make sure thetyre is adjusted to therecommended inflation pressure.See Technical specifications(page 224). Monitor the tyre pressureuntil the sealed tyre is replaced.
222
Wheels and tyres