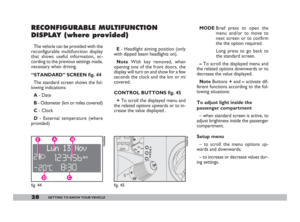
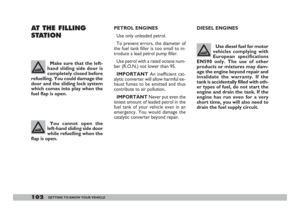
Page 57 of 222
56GETTING TO KNOW YOUR VEHICLE
A
B
fig. 67
F0A0178b
Manual adjustment from the
inside fig. 66
Turn knob Afrom inside the vehicle.
A
2
1
fig. 66
F0A0042b
If the mirror makes it
difficult to get through
narrow gaps, fold it from
position 1 to position 2.
Electrical adjustment fig. 67
This operation is only possible with
ignition key at MAR.
Press switch Ain the four directions
to adjust the mirror as required.
Use switch Bto select the mirror
(left-hand or right-hand) you want to
adjust.
You should adjust the mirrors when
the vehicle is stationary and with the
handbrake engaged.
The electrical mirror demisting device
will be switched on automatically with
the heated rear window. DOOR MIRRORS
Manual adjustment from the
outside fig. 65
Open the window and move mirror
A directly with your hands.
A
1
2
fig. 65
F0A0041b
001-105 Doblo GB 16-12-2008 14:22 Pagina 56
Page 58 of 222
57GETTING TO KNOW YOUR VEHICLE57
HEATING AND VENTILATION SYSTEM
A.Fixed side vents - B.Adjustable side vents - C.Adjustable
central vents A.Fixed side vents - B.Adjustable side vents - C.Adjustable
central vents - D.Rear seat lower vents.
BABCCA
D
D
Fig. 69 - Version with central tunnel
BABCCA
Fig. 68 - Version with central unit
F0A0702b
F0A0703b
001-105 Doblo GB 16-12-2008 14:22 Pagina 57
Page 59 of 222

58GETTING TO KNOW YOUR VEHICLE
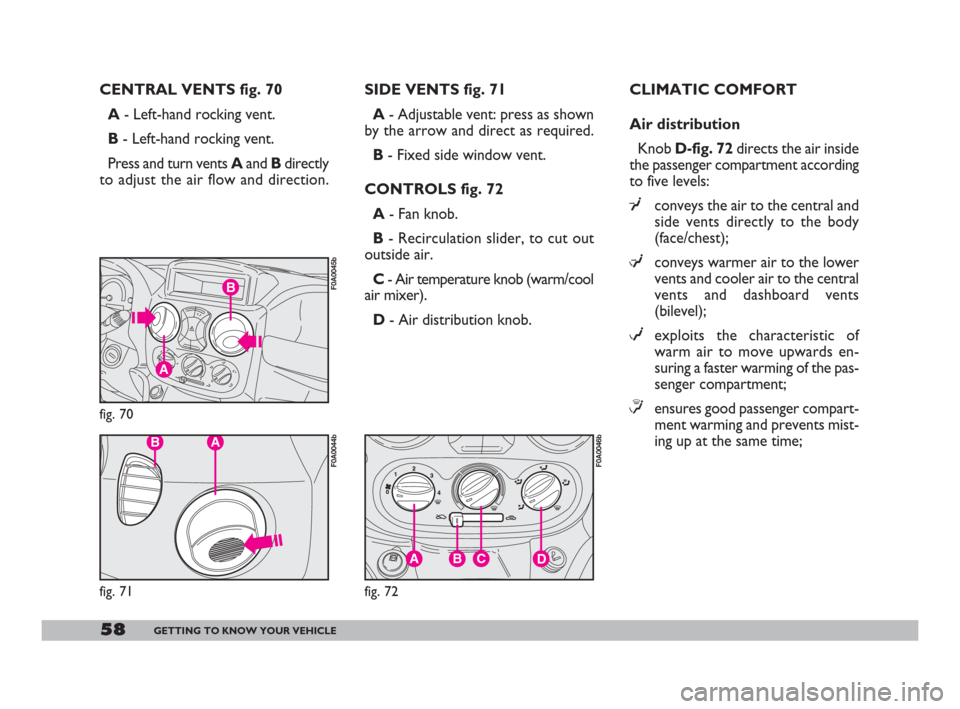
CENTRAL VENTS fig. 70
A- Left-hand rocking vent.
B- Left-hand rocking vent.
Press and turn vents Aand Bdirectly
to adjust the air flow and direction.SIDE VENTS fig. 71
A- Adjustable vent: press as shown
by the arrow and direct as required.
B- Fixed side window vent.
CONTROLS fig. 72
A- Fan knob.
B- Recirculation slider, to cut out
outside air.
C- Air temperature knob (warm/cool
air mixer).
D- Air distribution knob. CLIMATIC COMFORT
Air distribution
Knob D-fig. 72directs the air inside
the passenger compartment according
to five levels:
¥conveys the air to the central and
side vents directly to the body
(face/chest);
µconveys warmer air to the lower
vents and cooler air to the central
vents and dashboard vents
(bilevel);
wexploits the characteristic of
warm air to move upwards en-
suring a faster warming of the pas-
senger compartment;
≤ensures good passenger compart-
ment warming and prevents mist-
ing up at the same time;
B
A
fig. 70
F0A0045b
BA
fig. 71
F0A0044b
BCAD
fig. 72
F0A0046b
001-105 Doblo GB 16-12-2008 14:22 Pagina 58
Page 60 of 222
59GETTING TO KNOW YOUR VEHICLE
-all the air is conveyed to the wind-
screen and front side windows for
demisting and defrosting.
The distribution levels are graphical-
ly illustrated in the following figures.
fig. 73
F0A0704b
fig. 75
F0A0705b
fig. 74
F0A0707b
fig. 77
F0A0706b
fig. 76
F0A0708b
001-105 Doblo GB 16-12-2008 14:22 Pagina 59
Page 61 of 222

60GETTING TO KNOW YOUR VEHICLE
Heating
1)Air temperature knob C: point-
er in the red sector.
2)Fan knob A: pointer at the re-
quired speed.
3)Air distribution knob D: pointer
at
≤to warm the feet and demist the
windscreen at the same time;
µto convey air to the feet and cool-
er air to the central vents and
dashboard vents;
wfor fast heating.
Fast heating
1)Close the vents on the dashboard.
2)Air temperature knob A: point-
er at -in the red sector.
3)Fan knob Aat fourth speed,
pointer at 4-.
4)Air temperature knob D: point-
er at w.To prevent misting up:
IMPORTANTIf the outside air is
very damp, if it is raining and/or if there
is a considerable difference between
temperature inside and outside the ve-
hicle, prevent the windows from
misting up as follows:
– slider Bat Y;
– air temperature knob C: pointer at
-in the red sector;
– fan knob Aat second speed or
faster, pointer at 2;
– air distribution knob D: pointer at
-; switch to ≤if the windows start
misting up.
If the vehicle has a climate control
system, you are recommended to ad-
just the controls as described above
and press button A-fig. 78to speed
up the demisting process. Demisting and defrosting the
windscreen and the front side
windows
This function - called max-def- is
obtained by turning the control point-
ers to the orange symbols, specifical-
ly:
1)Air temperature knob A: point-
er at -in the red sector.
2)Fan knob B
: pointer at top speed
4-.
3)Air distribution knob D: pointer
at -.
4)Slider Bat Y.
After demisting and/or defrosting,
operate the controls to restore the
required comfort.
001-105 Doblo GB 16-12-2008 14:22 Pagina 60
Page 62 of 222

61GETTING TO KNOW YOUR VEHICLE
Demisting and defrosting the
rear window/s
Press button (. The electric mirror
demisting device also comes on.
Warning light 1on the instrument
panel will turn on.
You are advised to switch the button
off as soon as the rear window is clear.
Ventilation
1)Centre and side vents: complete-
ly open.
2)Air temperature knob C: point-
er in the blue sector.
3)Slider Bat Y.
4)Fan knob A: pointer at the re-
quired speed.
5)Air distribution knob D: pointer
at ¥.Recirculation
With the slider Bat Tthe inter-
nal air is recirculated.
IMPORTANTThis function is par-
ticularly useful when the outside air
is heavily polluted (in a traffic jam, tun-
nel, etc.) and when running on dusty
roads. You are advised against using
this function for long periods, howev-
er, especially if there are a lot of peo-
ple in the vehicle or on cold or rainy
days since the windows could mist up
effecting visibility and driving.MANUAL CLIMATE
CONTROL SYSTEM
(where provided)
The climate control system is ad-
justed manually.
CONTROLS fig. 78
A - Knob for operating the fan and
switching the climate control system
on and off.
The climate control system can on-
ly be switched on when the pointer on
this knob is at speed 1, 2, 3or 4 -,
the led on the knob will light up when
the system is on.
BCAD
fig. 78
F0A0047b
001-105 Doblo GB 16-12-2008 14:22 Pagina 61
Page 63 of 222

62GETTING TO KNOW YOUR VEHICLE
Maximum cooling
1) Air temperature knob C: point-
er in the blue sector.
2)Fan knob Aat fourth speed,
pointer at 4-.
3)Slider B: at T.
4)Air distribution knob D: pointer
at ¥.
5)Climate control system: press
knob C-fig. 78.
To moderate the cooling effect: po-
sition slider Bat Y, increase the
temperature and reduce the fan speed. Consequently, the climate control
system cannot be switched on when
the pointer is at 0p.
B- Recirculation slider, to cut out
outside air.
IMPORTANTThis function is par-
ticularly useful when the outside air
is heavily polluted (in a traffic jam, tun-
nel, etc.) and when running on dusty
roads. You are advised against using
this function for long periods, howev-
er, especially if there are a lot of peo-
ple in the vehicle or on cold or rainy
days since the windows could mist up
effecting visibility and driving.
C- Air temperature knob (warm/cool
air mixer).
D- Air distribution knob.CLIMATIC COMFORT
See previous chapter for air distrib-
ution and heating/ventilation functions.
IMPORTANTThe manual climate
control system is very useful for
speeding up the demising process be-
cause it dries the air. Simply adjust the
controls for the demisting function
(see previous section) and switch the
manual climate control system on by
pressing knob A-fig. 78. The system uses refrig-
erating fluid R134a which
will not pollute the envi-
ronment if it accidentally leaks.
Under no circumstances should
fluid R12 be used as this is in-
compatible with the system’s
component parts.
001-105 Doblo GB 16-12-2008 14:22 Pagina 62
Page 64 of 222

63GETTING TO KNOW YOUR VEHICLE
LOOKING AFTER
THE SYSTEM
During the winter, the climate con-
trol system must be turned on at least
once a month for about ten minutes.
Have the system efficiency checked
before the summer at a Fiat Deal-
ership.STEERING COLUMN
STALKS
LEFT-HAND STALK
The left-hand stalk operates most of
the external lights.
The external lights can only be
switched on when the ignition key is
at MAR. The instrument panel and
the heating/ventilation (or climate con-
trol system) controls and the cigar
lighter ring will come on with the ex-
ternal lights.
The system is filled with
R134a refrigerant which
will not pollute the envi-
ronment in the event of leakage.
Under no circumstances should
R12 fluid be used as it is incom-
patible with the system compo-
nents and contains CFC.
fig. 79
F0A0048b
Side/taillights fig. 79
These come on when you turn the
ring from åto 6. Instrument panel
warning light 3will come on.
Dipped beam headlights fig. 80
These come on when you turn the
knurled switch from 6to 2.
IMPORTANTThe dipped beam
headlights will automatically be
switched off when the main beam
headlights are switched on if the front
fog lights are on.
62
y1∆
fig. 80
F0A0049b
001-105 Doblo GB 16-12-2008 14:22 Pagina 63