2008 CHEVROLET CORVETTE fuel
[x] Cancel search: fuelPage 1 of 432

Seats and Restraint Systems........................... 1-1
Front Seats
............................................... 1-2
Safety Belts
.............................................. 1-9
Child Restraints
.......................................1-26
Airbag System
.........................................1-43
Restraint System Check
............................1-58
Features and Controls..................................... 2-1
Keys
........................................................ 2-3
Doors and Locks
......................................2-10
Windows
.................................................2-16
Theft-Deterrent Systems
............................2-18
Starting and Operating Your Vehicle
...........2-21
Mirrors
....................................................2-37
OnStar
®System
......................................2-43
Universal Home Remote System
................2-46
Storage Areas
.........................................2-53
Roof Panel
..............................................2-57
Convertible Top
.......................................2-62
Instrument Panel............................................. 3-1
Instrument Panel Overview
.......................... 3-4
Climate Controls
......................................3-26
Warning Lights, Gages, and Indicators
........3-34
Driver Information Center (DIC)
..................3-51
Audio System(s)
.......................................3-84Driving Your Vehicle....................................... 4-1
Your Driving, the Road, and the Vehicle
....... 4-2
Towing
...................................................4-29
Service and Appearance Care.......................... 5-1
Service
..................................................... 5-3
Fuel
......................................................... 5-5
Checking Things Under the Hood
...............5-12
Rear Axle
...............................................5-51
Headlamp Aiming
.....................................5-51
Bulb Replacement
....................................5-52
Windshield Replacement
...........................5-55
Windshield Wiper Blade Replacement
.........5-55
Tires
......................................................5-58
Appearance Care
.....................................5-87
Vehicle Identi�cation
.................................5-98
Electrical System
......................................5-99
Capacities and Speci�cations
...................5-107
Maintenance Schedule..................................... 6-1
Maintenance Schedule
................................ 6-2
Customer Assistance Information.................... 7-1
Customer Assistance and Information
........... 7-2
Reporting Safety Defects
...........................7-16
Vehicle Data Recording and Privacy
...........7-18
Index................................................................ 1
2008 Chevrolet Corvette Owner ManualM
Page 91 of 432
REVERSE (R):Use this gear to back up.
Notice:Shifting to R (Reverse) while the vehicle is
moving forward could damage the transmission.
The repairs would not be covered by the vehicle
warranty. Shift to R (Reverse) only after the vehicle
is stopped.
To rock your vehicle back and forth to get out of snow,
ice, or sand without damaging your transmission,
seeIf Your Vehicle is Stuck in Sand, Mud, Ice, or Snow
on page 4-23.
NEUTRAL (N):In this position, your engine does not
connect with the wheels. To restart when you are
already moving, use NEUTRAL (N) only. If your vehicle
needs towing, seeTowing Your Vehicle on page 4-29.
{CAUTION:
Shifting into a drive gear while the engine is
running at high speed is dangerous. Unless
your foot is �rmly on the brake pedal, the
vehicle could move very rapidly. You could
lose control and hit people or objects. Do not
shift into a drive gear while the engine is
running at high speed.Notice:Shifting out of P (Park) or N (Neutral) with
the engine running at high speed may damage
the transmission. The repairs would not be covered
by the vehicle warranty. Be sure the engine is
not running at high speed when shifting the vehicle.
DRIVE (D):This position is for normal driving.
It provides the best fuel economy for your vehicle.
If you need more power for passing, and you are:
Going less than about 35 mph (56 km/h), push the
accelerator pedal about halfway down.
Going about 35 mph (56 km/h) or more, push the
accelerator all the way down.
Downshifting the transmission in slippery road conditions
could result in skidding, see “Skidding” underLoss of
Control on page 4-13.
SPORT MODE (S):When in SPORT MODE (S), the
transmission will work as an automatic until you use the
Manual Paddle Shift Controls, which activates the
driver manual gear selection. See Manual Paddle Shift
later in this section. While in automatic SPORT
MODE (S), the transmission computer determines when
the vehicle is being driven in a competitive manner
and will select and hold the transmission in lower gears
and have more noticeable upshifts for sportier vehicle
performance.
2-27
Page 93 of 432
The Manual Paddle Shift system will not allow either an
up-shift or a down-shift if the vehicle speed is too
fast or too slow, nor will it allow a start from Fourth (4)
or higher gear
If up-shifting does not occur when needed, the vehicle
speed will be limited to protect the engine.
The transmission will also automatically down-shift as
the vehicle slows down and comes to a stop.
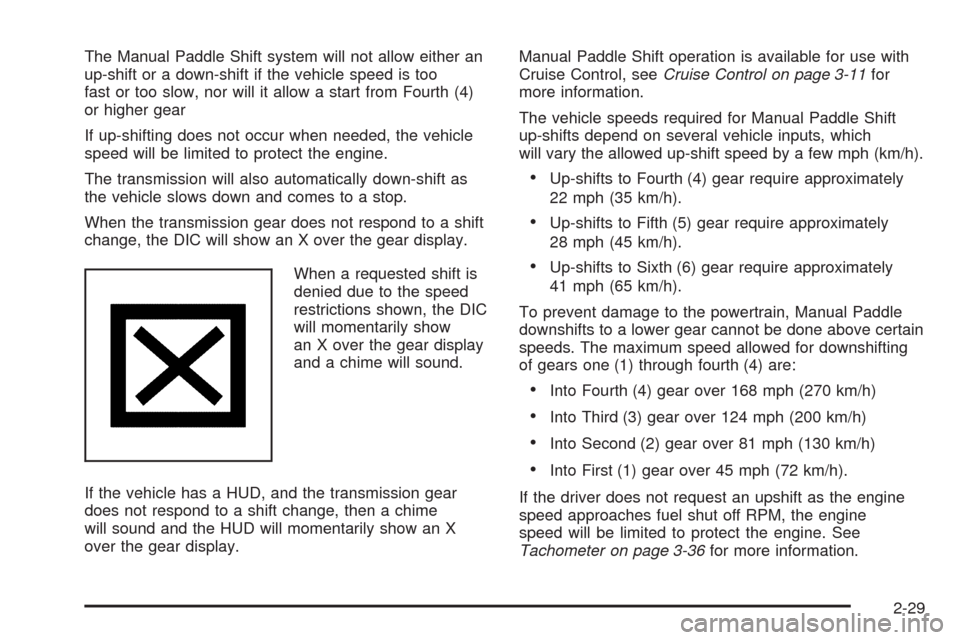
When the transmission gear does not respond to a shift
change, the DIC will show an X over the gear display.
When a requested shift is
denied due to the speed
restrictions shown, the DIC
will momentarily show
an X over the gear display
and a chime will sound.
If the vehicle has a HUD, and the transmission gear
does not respond to a shift change, then a chime
will sound and the HUD will momentarily show an X
over the gear display.Manual Paddle Shift operation is available for use with
Cruise Control, seeCruise Control on page 3-11for
more information.
The vehicle speeds required for Manual Paddle Shift
up-shifts depend on several vehicle inputs, which
will vary the allowed up-shift speed by a few mph (km/h).
Up-shifts to Fourth (4) gear require approximately
22 mph (35 km/h).
Up-shifts to Fifth (5) gear require approximately
28 mph (45 km/h).
Up-shifts to Sixth (6) gear require approximately
41 mph (65 km/h).
To prevent damage to the powertrain, Manual Paddle
downshifts to a lower gear cannot be done above certain
speeds. The maximum speed allowed for downshifting
of gears one (1) through fourth (4) are:
Into Fourth (4) gear over 168 mph (270 km/h)
Into Third (3) gear over 124 mph (200 km/h)
Into Second (2) gear over 81 mph (130 km/h)
Into First (1) gear over 45 mph (72 km/h).
If the driver does not request an upshift as the engine
speed approaches fuel shut off RPM, the engine
speed will be limited to protect the engine. See
Tachometer on page 3-36for more information.
2-29
Page 95 of 432
Shift Speeds (Manual Transmission)
{CAUTION:
If you skip a gear when you downshift, you
could lose control of your vehicle. You could
injure yourself or others. Do not shift down
more than one gear at a time when you
downshift.
This chart shows when to shift to the next higher gear
for the best fuel economy.
Manual Transmission Recommended
Shift Speeds in mph (km/h)
EngineAcceleration Shift Speed
1to2 2to3 3to4 4to5 5to6
All
Engines15 (24) 25 (40) 40 (64) 45 (72) 50 (80)If your engine speed drops below 900 rpm, or if the
engine is not running smoothly, you should downshift to
the next lower gear. You may have to downshift two
or more gears to keep the engine running smoothly or
for good engine performance.
Notice:When shifting gears, do not move the shift
lever around unnecessarily. This may damage
the transmission. Shift directly into the next gear.
One to Four Shift Light
(Manual Transmission)
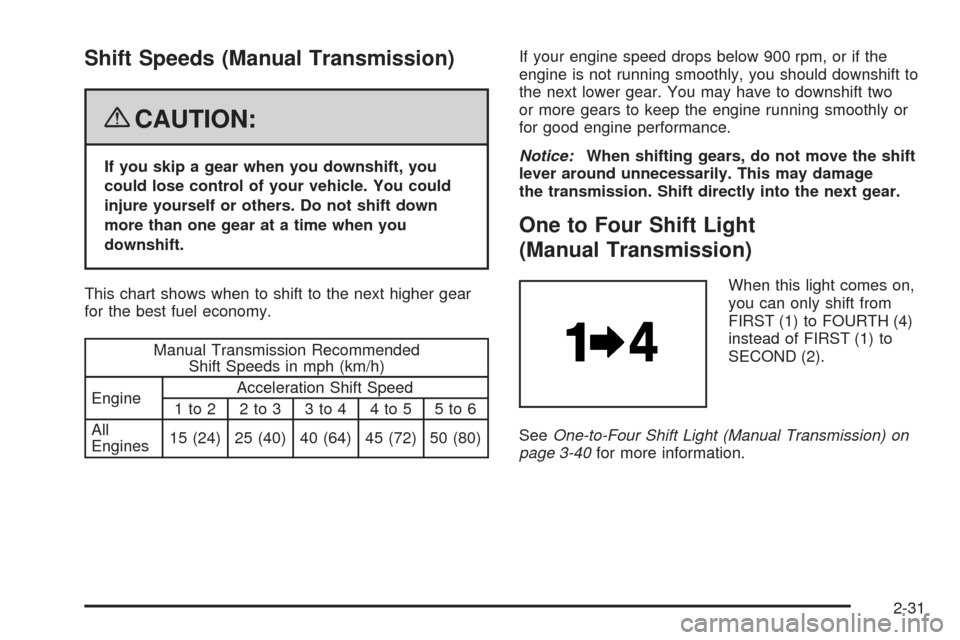
When this light comes on,
you can only shift from
FIRST (1) to FOURTH (4)
instead of FIRST (1) to
SECOND (2).
SeeOne-to-Four Shift Light (Manual Transmission) on
page 3-40for more information.
2-31
Page 138 of 432
Tire Pressure Light.......................................3-44
Malfunction Indicator Lamp.............................3-45
Engine Oil Pressure Gage.............................3-48
Security Light...............................................3-49
Fog Lamp Light............................................3-49
Lights On Reminder......................................3-50
Highbeam On Light.......................................3-50
Fuel Gage...................................................3-50
Driver Information Center (DIC).......................3-51
DIC Operation and Displays...........................3-52
DIC Warnings and Messages.........................3-57
Other Messages...........................................3-74
DIC Vehicle Personalization............................3-75Audio System(s).............................................3-84
Setting the Clock..........................................3-85
Radio(s)......................................................3-85
Using an MP3..............................................3-98
XM Radio Messages...................................3-102
Navigation/Radio System..............................3-103
Theft-Deterrent Feature................................3-103
Audio Steering Wheel Controls......................3-103
Radio Reception.........................................3-104
Diversity Antenna System.............................3-105
XM™ Satellite Radio Antenna System............3-105
Section 3 Instrument Panel
3-2
Page 141 of 432
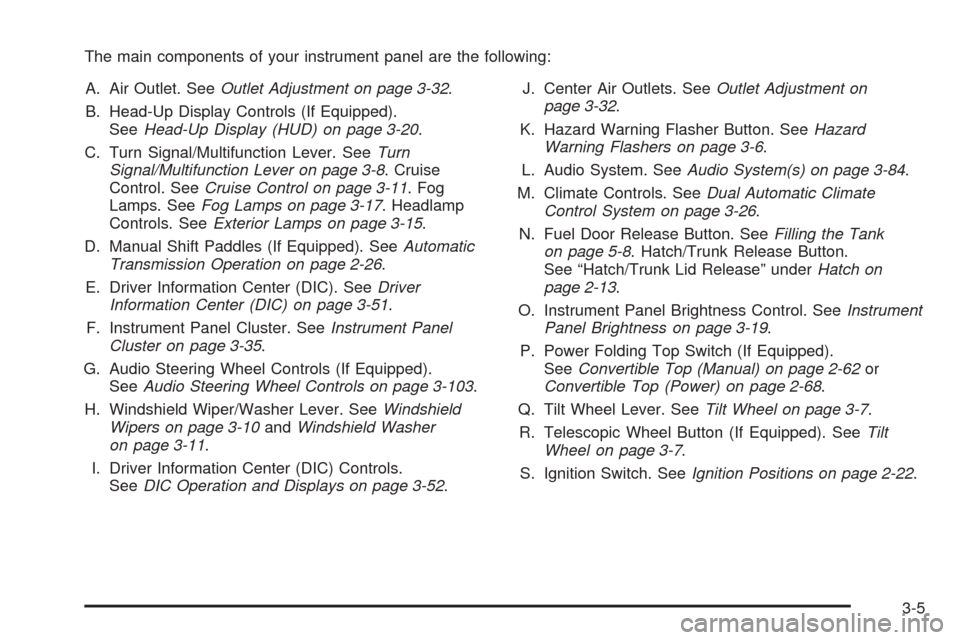
The main components of your instrument panel are the following:
A. Air Outlet. SeeOutlet Adjustment on page 3-32.
B. Head-Up Display Controls (If Equipped).
SeeHead-Up Display (HUD) on page 3-20.
C. Turn Signal/Multifunction Lever. SeeTurn
Signal/Multifunction Lever on page 3-8. Cruise
Control. SeeCruise Control on page 3-11. Fog
Lamps. SeeFog Lamps on page 3-17. Headlamp
Controls. SeeExterior Lamps on page 3-15.
D. Manual Shift Paddles (If Equipped). SeeAutomatic
Transmission Operation on page 2-26.
E. Driver Information Center (DIC). SeeDriver
Information Center (DIC) on page 3-51.
F. Instrument Panel Cluster. SeeInstrument Panel
Cluster on page 3-35.
G. Audio Steering Wheel Controls (If Equipped).
SeeAudio Steering Wheel Controls on page 3-103.
H. Windshield Wiper/Washer Lever. SeeWindshield
Wipers on page 3-10andWindshield Washer
on page 3-11.
I. Driver Information Center (DIC) Controls.
SeeDIC Operation and Displays on page 3-52.J. Center Air Outlets. SeeOutlet Adjustment on
page 3-32.
K. Hazard Warning Flasher Button. SeeHazard
Warning Flashers on page 3-6.
L. Audio System. SeeAudio System(s) on page 3-84.
M. Climate Controls. SeeDual Automatic Climate
Control System on page 3-26.
N. Fuel Door Release Button. SeeFilling the Tank
on page 5-8. Hatch/Trunk Release Button.
See “Hatch/Trunk Lid Release” underHatch on
page 2-13.
O. Instrument Panel Brightness Control. SeeInstrument
Panel Brightness on page 3-19.
P. Power Folding Top Switch (If Equipped).
SeeConvertible Top (Manual) on page 2-62or
Convertible Top (Power) on page 2-68.
Q. Tilt Wheel Lever. SeeTilt Wheel on page 3-7.
R. Telescopic Wheel Button (If Equipped). SeeTilt
Wheel on page 3-7.
S. Ignition Switch. SeeIgnition Positions on page 2-22.
3-5
Page 157 of 432

Manual Paddle Shift Gear Indicator (If Equipped)
These displays on the HUD are for use when
using the manual paddle shift controls to shift
the transmission. See “Manual Paddle Shift” in
Automatic Transmission Operation on page 2-26.
Shift Light
This light is used for performance driving to indicate
that the vehicle’s best performance level has
been reached to shift the transmission into the next
higher gear. An arrow pointing up will light up on
the display just prior to reaching the engine fuel
cut-off mode. This cut-off is about 6,500 RPM for
the LS3 engine and 7,000 RPM for the LS7 engine.
Check Gages Warning
Engine Coolant Temperature Gage
Transmission Fluid Temperature Gage,
(Automatic Transmission Vehicles Only)
Engine Oil Temperature Gage
Engine Oil Pressure Gage
G-Force Gage
Audio Functions, Street Mode Only
Navigation, Only with Navigation Radio,
Turn-by-Turn GuidanceThere are three HUD modes that you can choose to view
in the HUD display. By pressing the MODE button, you
can scroll through these modes in the following order:
Street Mode supports
audio and navigation
functions with your choice
of tachometer settings.
Track Mode 1 supports the
G-Force gage and minor
gages with a circular
tachometer.
Track Mode 2 supports
G-Force gages and minor
gages with a linear
tachometer.
3-21
Page 164 of 432
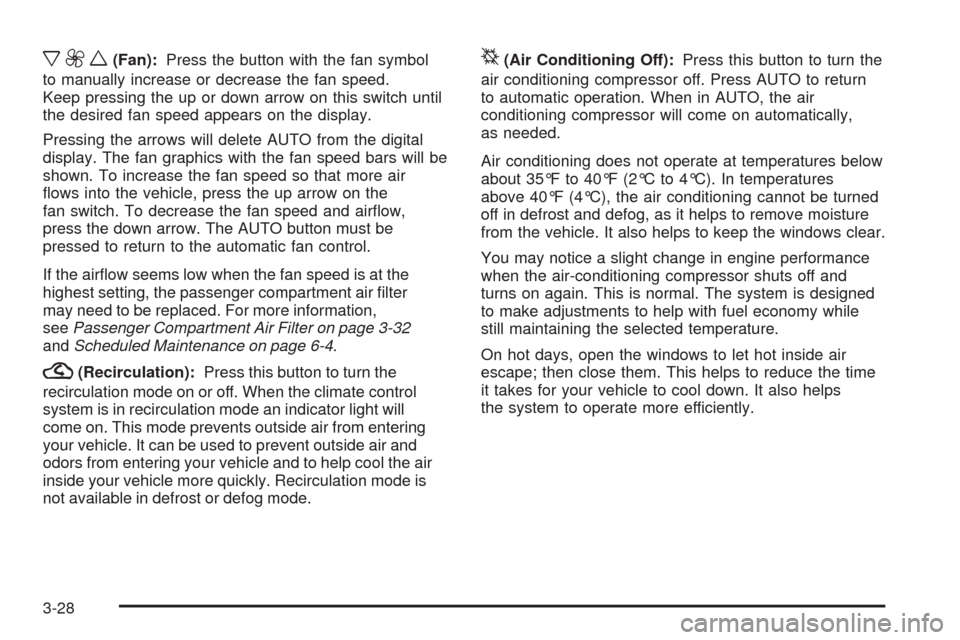
x9w(Fan):Press the button with the fan symbol
to manually increase or decrease the fan speed.
Keep pressing the up or down arrow on this switch until
the desired fan speed appears on the display.
Pressing the arrows will delete AUTO from the digital
display. The fan graphics with the fan speed bars will be
shown. To increase the fan speed so that more air
�ows into the vehicle, press the up arrow on the
fan switch. To decrease the fan speed and air�ow,
press the down arrow. The AUTO button must be
pressed to return to the automatic fan control.
If the air�ow seems low when the fan speed is at the
highest setting, the passenger compartment air �lter
may need to be replaced. For more information,
seePassenger Compartment Air Filter on page 3-32
andScheduled Maintenance on page 6-4.
?(Recirculation):Press this button to turn the
recirculation mode on or off. When the climate control
system is in recirculation mode an indicator light will
come on. This mode prevents outside air from entering
your vehicle. It can be used to prevent outside air and
odors from entering your vehicle and to help cool the air
inside your vehicle more quickly. Recirculation mode is
not available in defrost or defog mode.
^(Air Conditioning Off):Press this button to turn the
air conditioning compressor off. Press AUTO to return
to automatic operation. When in AUTO, the air
conditioning compressor will come on automatically,
as needed.
Air conditioning does not operate at temperatures below
about 35°F to 40°F (2°C to 4°C). In temperatures
above 40°F (4°C), the air conditioning cannot be turned
off in defrost and defog, as it helps to remove moisture
from the vehicle. It also helps to keep the windows clear.
You may notice a slight change in engine performance
when the air-conditioning compressor shuts off and
turns on again. This is normal. The system is designed
to make adjustments to help with fuel economy while
still maintaining the selected temperature.
On hot days, open the windows to let hot inside air
escape; then close them. This helps to reduce the time
it takes for your vehicle to cool down. It also helps
the system to operate more efficiently.
3-28