2008 CHEVROLET CORVETTE bulb
[x] Cancel search: bulbPage 1 of 432

Seats and Restraint Systems........................... 1-1
Front Seats
............................................... 1-2
Safety Belts
.............................................. 1-9
Child Restraints
.......................................1-26
Airbag System
.........................................1-43
Restraint System Check
............................1-58
Features and Controls..................................... 2-1
Keys
........................................................ 2-3
Doors and Locks
......................................2-10
Windows
.................................................2-16
Theft-Deterrent Systems
............................2-18
Starting and Operating Your Vehicle
...........2-21
Mirrors
....................................................2-37
OnStar
®System
......................................2-43
Universal Home Remote System
................2-46
Storage Areas
.........................................2-53
Roof Panel
..............................................2-57
Convertible Top
.......................................2-62
Instrument Panel............................................. 3-1
Instrument Panel Overview
.......................... 3-4
Climate Controls
......................................3-26
Warning Lights, Gages, and Indicators
........3-34
Driver Information Center (DIC)
..................3-51
Audio System(s)
.......................................3-84Driving Your Vehicle....................................... 4-1
Your Driving, the Road, and the Vehicle
....... 4-2
Towing
...................................................4-29
Service and Appearance Care.......................... 5-1
Service
..................................................... 5-3
Fuel
......................................................... 5-5
Checking Things Under the Hood
...............5-12
Rear Axle
...............................................5-51
Headlamp Aiming
.....................................5-51
Bulb Replacement
....................................5-52
Windshield Replacement
...........................5-55
Windshield Wiper Blade Replacement
.........5-55
Tires
......................................................5-58
Appearance Care
.....................................5-87
Vehicle Identi�cation
.................................5-98
Electrical System
......................................5-99
Capacities and Speci�cations
...................5-107
Maintenance Schedule..................................... 6-1
Maintenance Schedule
................................ 6-2
Customer Assistance Information.................... 7-1
Customer Assistance and Information
........... 7-2
Reporting Safety Defects
...........................7-16
Vehicle Data Recording and Privacy
...........7-18
Index................................................................ 1
2008 Chevrolet Corvette Owner ManualM
Page 145 of 432
Turn and Lane-Change Signals
(Auto Signal)
The turn signal has two upward (for right) and two
downward (for left) positions. These positions allow you
to signal a turn or a lane change.
To signal a turn, move the multifunction lever all the
way up or down. When the turn is �nished, the lever will
return automatically.
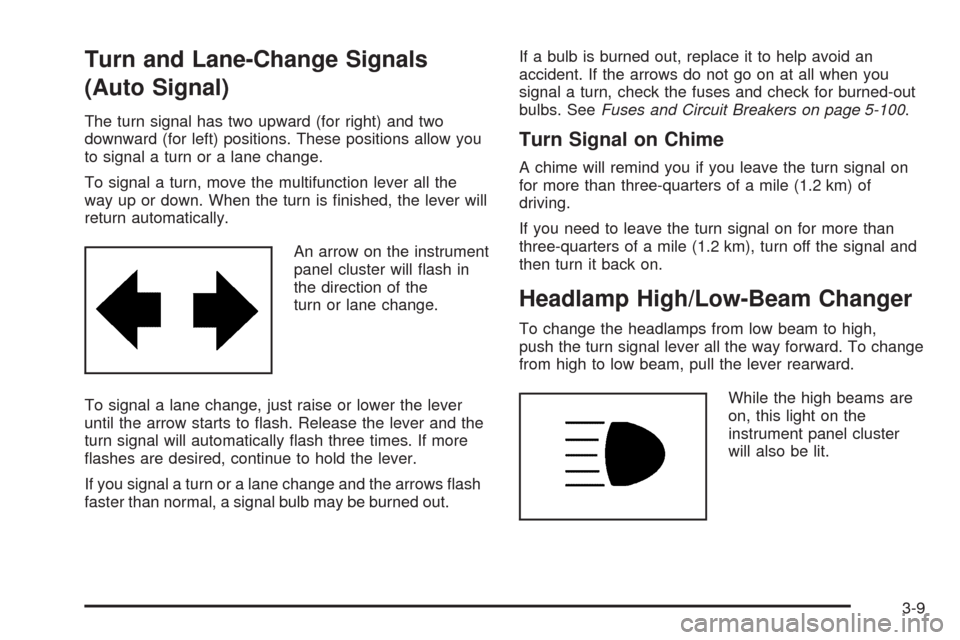
An arrow on the instrument
panel cluster will �ash in
the direction of the
turn or lane change.
To signal a lane change, just raise or lower the lever
until the arrow starts to �ash. Release the lever and the
turn signal will automatically �ash three times. If more
�ashes are desired, continue to hold the lever.
If you signal a turn or a lane change and the arrows �ash
faster than normal, a signal bulb may be burned out.If a bulb is burned out, replace it to help avoid an
accident. If the arrows do not go on at all when you
signal a turn, check the fuses and check for burned-out
bulbs. SeeFuses and Circuit Breakers on page 5-100.
Turn Signal on Chime
A chime will remind you if you leave the turn signal on
for more than three-quarters of a mile (1.2 km) of
driving.
If you need to leave the turn signal on for more than
three-quarters of a mile (1.2 km), turn off the signal and
then turn it back on.
Headlamp High/Low-Beam Changer
To change the headlamps from low beam to high,
push the turn signal lever all the way forward. To change
from high to low beam, pull the lever rearward.
While the high beams are
on, this light on the
instrument panel cluster
will also be lit.
3-9
Page 183 of 432
Emissions Inspection and
Maintenance Programs
Some state/provincial and local governments have or
might begin programs to inspect the emission control
equipment on your vehicle. Failure to pass this
inspection could prevent you from getting a vehicle
registration.
Here are some things you need to know to help your
vehicle pass an inspection:
Your vehicle will not pass this inspection if the check
engine light is on or not working properly.
To perform a check engine light bulb check with the
keyless ignition, make sure the transmitter fob is in the
passenger compartment. SeeIgnition Positions on
page 2-22. Press the bottom of the Acc. button on
the instrument panel and hold the button down
for �ve seconds. The instrument panel, including the
check engine light, will light up and the ignition will
be on, but the engine will not start — if you press the
bottom of the Acc. button only brie�y, less than
�ve seconds, the accessory power mode will be turned
on, but not the ignition. After the bulb check, be sure
to press and release the Acc. button again to turn
the ignition off and avoid draining the vehicle’s battery.Your vehicle will not pass this inspection if the OBD
(on-board diagnostic) system determines that critical
emission control systems have not been completely
diagnosed by the system. The vehicle would be
considered not ready for inspection. This can happen
if you have recently replaced the battery or if the battery
has run down. The diagnostic system is designed to
evaluate critical emission control systems during normal
driving. This may take several days of routine driving.
If you have done this and your vehicle still does not pass
the inspection for lack of OBD system readiness, your
dealer/retailer can prepare the vehicle for inspection.
3-47
Page 273 of 432
Service............................................................5-3
Accessories and Modi�cations..........................5-3
California Proposition 65 Warning.....................5-4
California Perchlorate Materials Requirements.....5-4
Doing Your Own Service Work.........................5-4
Adding Equipment to the Outside of the
Vehicle......................................................5-5
Fuel................................................................5-5
Gasoline Octane............................................5-5
Gasoline Speci�cations....................................5-6
California Fuel...............................................5-6
Additives.......................................................5-7
Fuels in Foreign Countries...............................5-8
Filling the Tank..............................................5-8
Filling a Portable Fuel Container.....................5-11
Checking Things Under the Hood....................5-12
Hood Release..............................................5-13
Engine Compartment Overview.......................5-14
Engine Oil...................................................5-17
Engine Oil Life System..................................5-23
Engine Air Cleaner/Filter................................5-25
Automatic Transmission Fluid.........................5-27
Manual Transmission Fluid.............................5-27
Hydraulic Clutch...........................................5-27
Engine Coolant.............................................5-28
Coolant Surge Tank Pressure Cap..................5-31Engine Overheating.......................................5-31
Overheated Engine Protection
Operating Mode........................................5-33
Cooling System............................................5-34
Power Steering Fluid.....................................5-39
Windshield Washer Fluid................................5-41
Brakes........................................................5-42
Battery........................................................5-45
Jump Starting...............................................5-46
Rear Axle.......................................................5-51
Headlamp Aiming...........................................5-51
Bulb Replacement..........................................5-52
High Intensity Discharge (HID) Lighting............5-52
Halogen Bulbs..............................................5-52
Headlamps, Front Turn Signal, and
Parking Lamps..........................................5-53
Taillamps, Turn Signal, and Stoplamps............5-54
Replacement Bulbs.......................................5-55
Windshield Replacement.................................5-55
Windshield Wiper Blade Replacement..............5-55
Tires..............................................................5-58
Winter Tires.................................................5-59
Tire Sidewall Labeling...................................5-60
Tire Terminology and De�nitions.....................5-62
Run-Flat Tires..............................................5-64
Section 5 Service and Appearance Care
5-1
Page 324 of 432
Bulb Replacement
For the proper type of replacement bulbs, see
Replacement Bulbs on page 5-55.
For any bulb changing procedure not listed in this
section, contact your dealer/retailer.
High Intensity Discharge (HID)
Lighting
{CAUTION:
The low beam high intensity discharge lighting
system operates at a very high voltage. If you
try to service any of the system components,
you could be seriously injured. Have your
dealer/retailer or a quali�ed technician
service them.Your vehicle has HID headlamps. After your vehicle’s
HID headlamp bulb has been replaced, you may notice
that the beam is a slightly different shade than it was
originally. This is normal.
Halogen Bulbs
{CAUTION:
Halogen bulbs have pressurized gas inside
and can burst if you drop or scratch the bulb.
You or others could be injured. Be sure to read
and follow the instructions on the bulb package.
5-52
Page 325 of 432
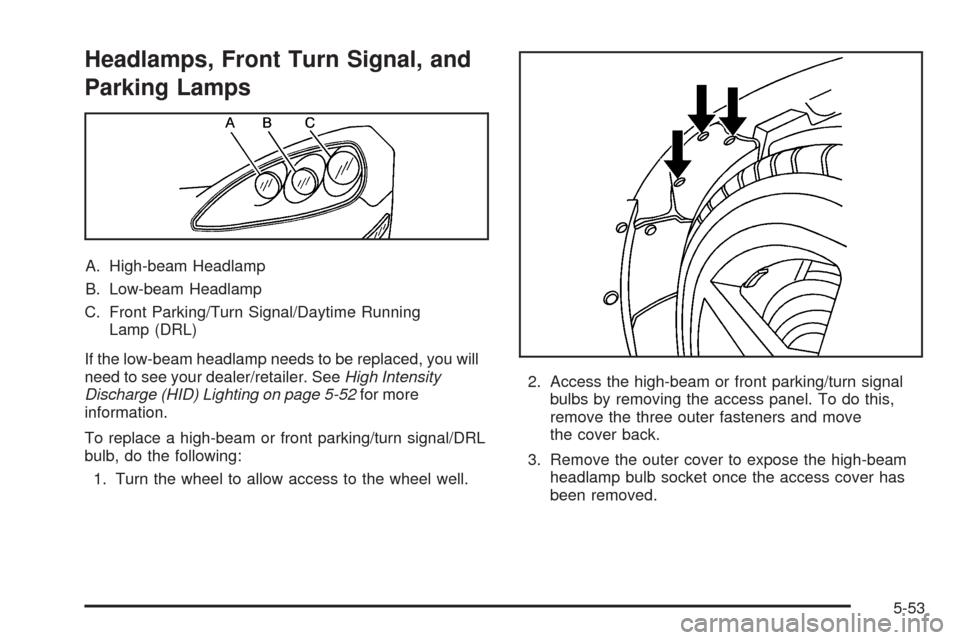
Headlamps, Front Turn Signal, and
Parking Lamps
A. High-beam Headlamp
B. Low-beam Headlamp
C. Front Parking/Turn Signal/Daytime Running
Lamp (DRL)
If the low-beam headlamp needs to be replaced, you will
need to see your dealer/retailer. SeeHigh Intensity
Discharge (HID) Lighting on page 5-52for more
information.
To replace a high-beam or front parking/turn signal/DRL
bulb, do the following:
1. Turn the wheel to allow access to the wheel well.2. Access the high-beam or front parking/turn signal
bulbs by removing the access panel. To do this,
remove the three outer fasteners and move
the cover back.
3. Remove the outer cover to expose the high-beam
headlamp bulb socket once the access cover has
been removed.
5-53
Page 326 of 432
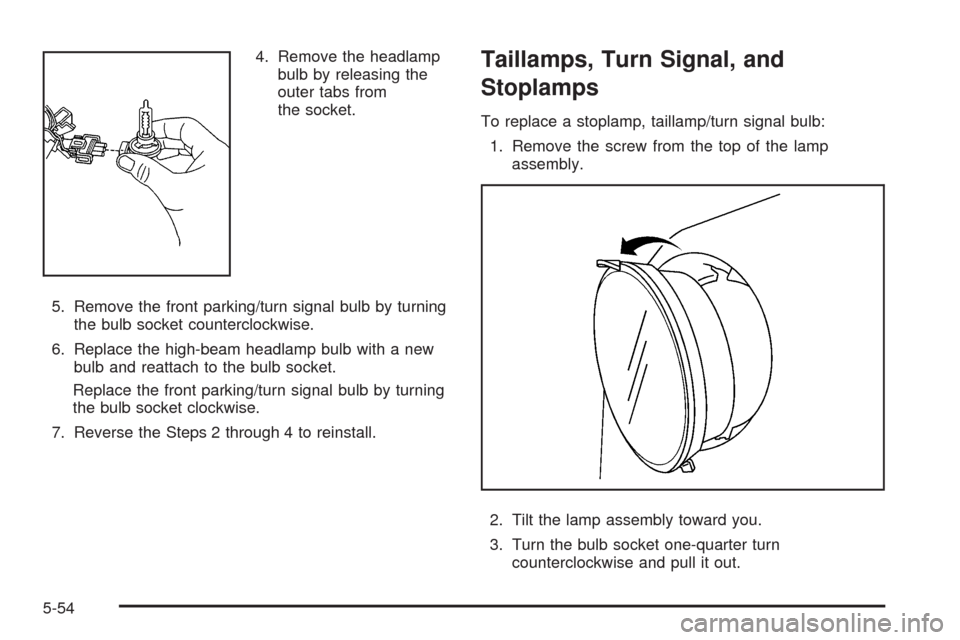
4. Remove the headlamp
bulb by releasing the
outer tabs from
the socket.
5. Remove the front parking/turn signal bulb by turning
the bulb socket counterclockwise.
6. Replace the high-beam headlamp bulb with a new
bulb and reattach to the bulb socket.
Replace the front parking/turn signal bulb by turning
the bulb socket clockwise.
7. Reverse the Steps 2 through 4 to reinstall.Taillamps, Turn Signal, and
Stoplamps
To replace a stoplamp, taillamp/turn signal bulb:
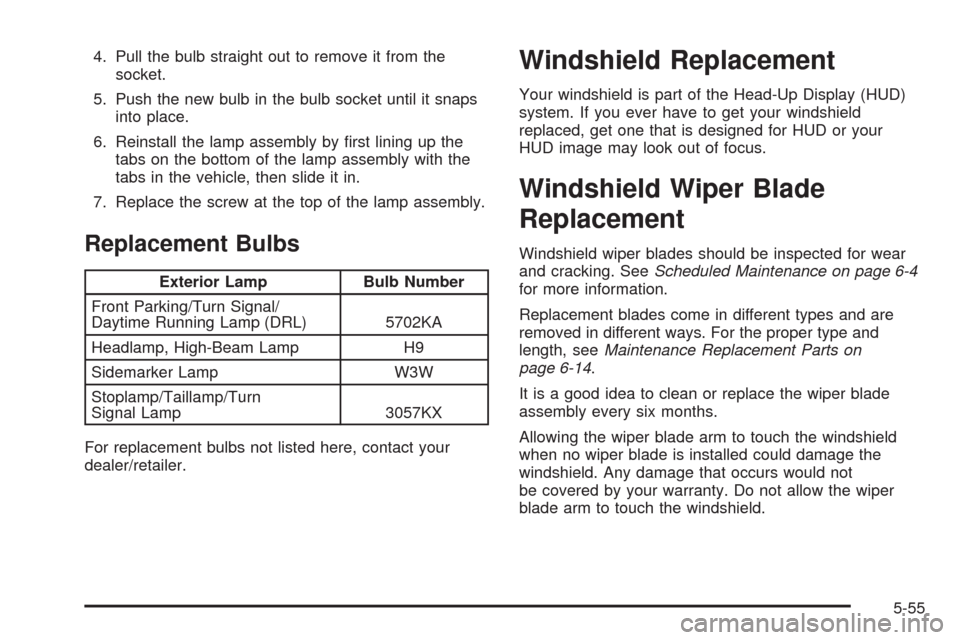
1. Remove the screw from the top of the lamp
assembly.
2. Tilt the lamp assembly toward you.
3. Turn the bulb socket one-quarter turn
counterclockwise and pull it out.
5-54
Page 327 of 432
4. Pull the bulb straight out to remove it from the
socket.
5. Push the new bulb in the bulb socket until it snaps
into place.
6. Reinstall the lamp assembly by �rst lining up the
tabs on the bottom of the lamp assembly with the
tabs in the vehicle, then slide it in.
7. Replace the screw at the top of the lamp assembly.
Replacement Bulbs
Exterior Lamp Bulb Number
Front Parking/Turn Signal/
Daytime Running Lamp (DRL) 5702KA
Headlamp, High-Beam Lamp H9
Sidemarker Lamp W3W
Stoplamp/Taillamp/Turn
Signal Lamp 3057KX
For replacement bulbs not listed here, contact your
dealer/retailer.
Windshield Replacement
Your windshield is part of the Head-Up Display (HUD)
system. If you ever have to get your windshield
replaced, get one that is designed for HUD or your
HUD image may look out of focus.
Windshield Wiper Blade
Replacement
Windshield wiper blades should be inspected for wear
and cracking. SeeScheduled Maintenance on page 6-4
for more information.
Replacement blades come in different types and are
removed in different ways. For the proper type and
length, seeMaintenance Replacement Parts on
page 6-14.
It is a good idea to clean or replace the wiper blade
assembly every six months.
Allowing the wiper blade arm to touch the windshield
when no wiper blade is installed could damage the
windshield. Any damage that occurs would not
be covered by your warranty. Do not allow the wiper
blade arm to touch the windshield.
5-55