2008 CHEVROLET CORVETTE steering wheel
[x] Cancel search: steering wheelPage 144 of 432
Telescopic Steering Column
If your vehicle has this feature, the telescopic steering
column will allow you to adjust the distance the steering
wheel is from the instrument panel.
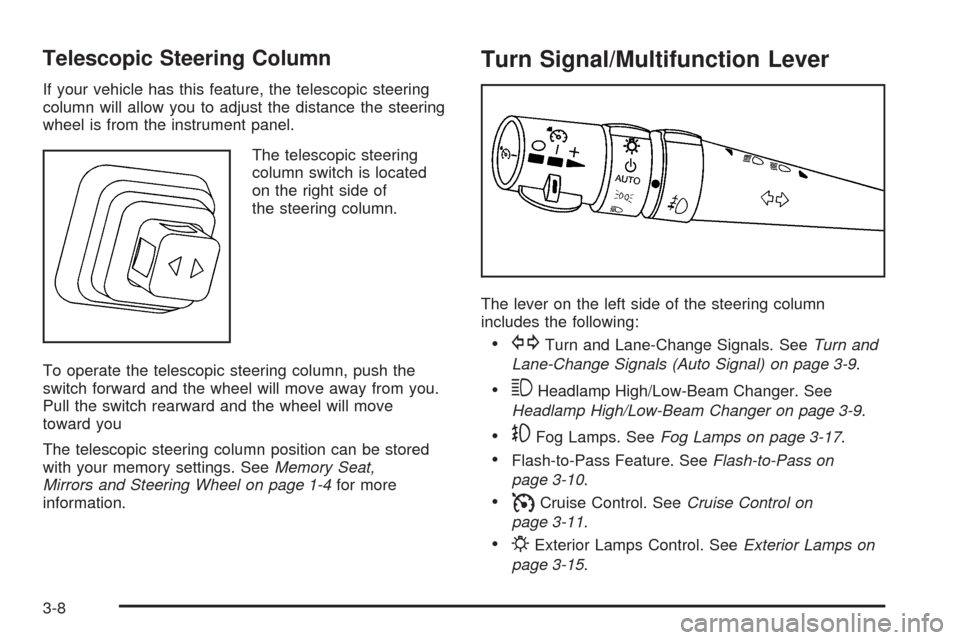
The telescopic steering
column switch is located
on the right side of
the steering column.
To operate the telescopic steering column, push the
switch forward and the wheel will move away from you.
Pull the switch rearward and the wheel will move
toward you
The telescopic steering column position can be stored
with your memory settings. SeeMemory Seat,
Mirrors and Steering Wheel on page 1-4for more
information.
Turn Signal/Multifunction Lever
The lever on the left side of the steering column
includes the following:
GTurn and Lane-Change Signals. SeeTurn and
Lane-Change Signals (Auto Signal) on page 3-9.
3Headlamp High/Low-Beam Changer. See
Headlamp High/Low-Beam Changer on page 3-9.
-Fog Lamps. SeeFog Lamps on page 3-17.
Flash-to-Pass Feature. SeeFlash-to-Pass on
page 3-10.
ICruise Control. SeeCruise Control on
page 3-11.
PExterior Lamps Control. SeeExterior Lamps on
page 3-15.
3-8
Page 151 of 432
Exterior Lamps
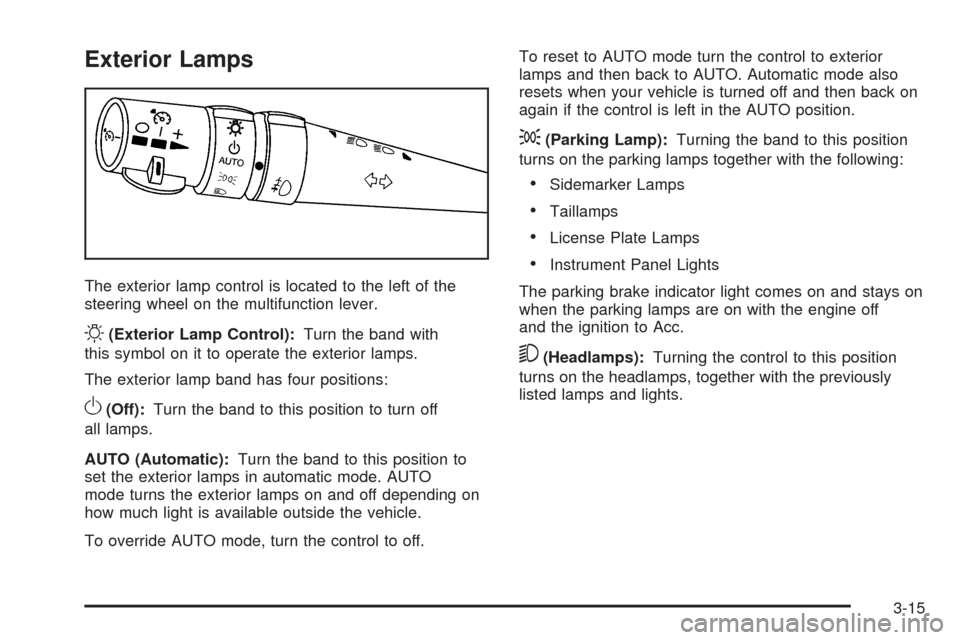
The exterior lamp control is located to the left of the
steering wheel on the multifunction lever.
O(Exterior Lamp Control):Turn the band with
this symbol on it to operate the exterior lamps.
The exterior lamp band has four positions:
O(Off):Turn the band to this position to turn off
all lamps.
AUTO (Automatic):Turn the band to this position to
set the exterior lamps in automatic mode. AUTO
mode turns the exterior lamps on and off depending on
how much light is available outside the vehicle.
To override AUTO mode, turn the control to off.To reset to AUTO mode turn the control to exterior
lamps and then back to AUTO. Automatic mode also
resets when your vehicle is turned off and then back on
again if the control is left in the AUTO position.
;(Parking Lamp):Turning the band to this position
turns on the parking lamps together with the following:
Sidemarker Lamps
Taillamps
License Plate Lamps
Instrument Panel Lights
The parking brake indicator light comes on and stays on
when the parking lamps are on with the engine off
and the ignition to Acc.
5(Headlamps):Turning the control to this position
turns on the headlamps, together with the previously
listed lamps and lights.
3-15
Page 159 of 432
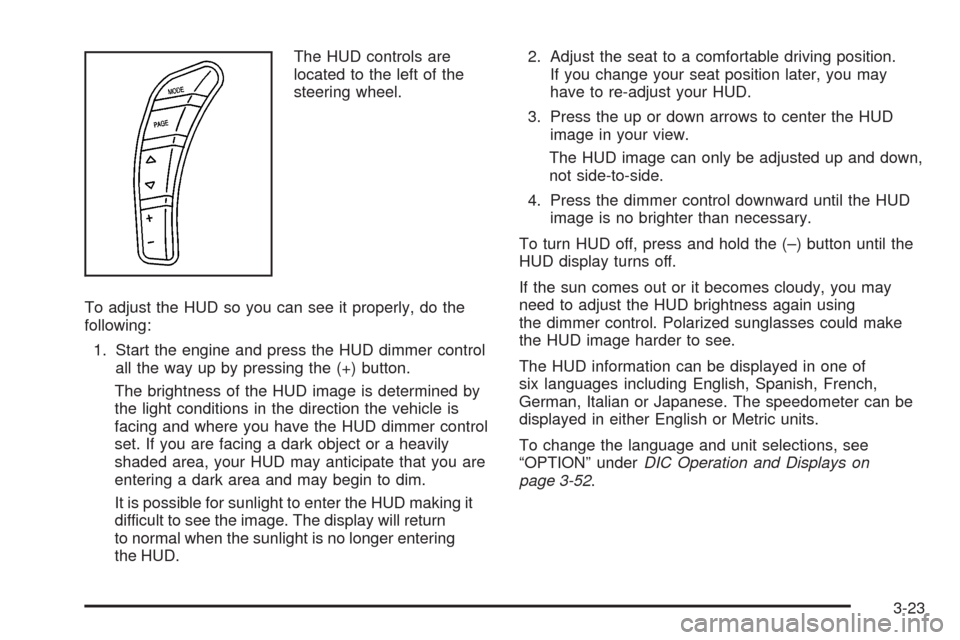
The HUD controls are
located to the left of the
steering wheel.
To adjust the HUD so you can see it properly, do the
following:
1. Start the engine and press the HUD dimmer control
all the way up by pressing the (+) button.
The brightness of the HUD image is determined by
the light conditions in the direction the vehicle is
facing and where you have the HUD dimmer control
set. If you are facing a dark object or a heavily
shaded area, your HUD may anticipate that you are
entering a dark area and may begin to dim.
It is possible for sunlight to enter the HUD making it
difficult to see the image. The display will return
to normal when the sunlight is no longer entering
the HUD.2. Adjust the seat to a comfortable driving position.
If you change your seat position later, you may
have to re-adjust your HUD.
3. Press the up or down arrows to center the HUD
image in your view.
The HUD image can only be adjusted up and down,
not side-to-side.
4. Press the dimmer control downward until the HUD
image is no brighter than necessary.
To turn HUD off, press and hold the (–) button until the
HUD display turns off.
If the sun comes out or it becomes cloudy, you may
need to adjust the HUD brightness again using
the dimmer control. Polarized sunglasses could make
the HUD image harder to see.
The HUD information can be displayed in one of
six languages including English, Spanish, French,
German, Italian or Japanese. The speedometer can be
displayed in either English or Metric units.
To change the language and unit selections, see
“OPTION” underDIC Operation and Displays on
page 3-52.
3-23
Page 205 of 432
SERVICE TRACTION SYSTEM
If this message displays when you are driving, there is a
problem with the Traction Control System (TCS) and
your vehicle is in need of service. See your
dealer/retailer. When this message is displayed, the
system will not limit wheel spin. Adjust your driving
accordingly.
The traction control system (TCS) warning light on the
instrument panel cluster will also turn on and a
chime will sound.
When this message is displayed, the computer
controlled systems will not assist the driver in controlling
the vehicle. Have the system repaired by your
dealer/retailer as soon as possible. Adjust your driving
accordingly. SeeTraction Control System (TCS) on
page 4-6for more information.
To acknowledge the message, press the RESET button.
SERVICE TRANSMISSION
This message displays when there is a problem with the
transmission. See your dealer/retailer for service.
SERVICE VEHICLE SOON
This message displays and a chime sounds when there
may be an electrical or another system problem with
your vehicle. Have your vehicle checked by your
dealer/retailer if this message keeps appearing.
SET PARK BRAKE FOR SEAT RECALL
If your vehicle has a manual transmission, this
message displays if you try to recall the memory
positions when the ignition is on and the parking brake
is not set. If the vehicle is on, you must set the
parking brake in order for the memory positions to
recall. SeeMemory Seat, Mirrors and Steering Wheel
on page 1-4for more information.
SET PARK BRAKE TO MOVE TOP
If your vehicle has a manual transmission, this message
displays and a chime sounds if you try to operate the
power convertible top without �rst setting the parking
brake. Set the parking brake before trying to operate the
power convertible top. SeeConvertible Top (Manual)
on page 2-62orConvertible Top (Power) on page 2-68
for more information.
3-69
Page 211 of 432
DIC Vehicle Personalization
Many features on your vehicle can be personalized.
This means that the operation of these features can be
set to operate differently depending on who is driving
the vehicle. See “Personal Options” later in this section
for the features that you can personalize.
The personalization settings for other features are
automatically updated and saved as the driver adjusts
them. These include the following settings and presets:
The radio presets, tone, volume, fade, balance,
equalization (EQ) settings and source (radio or CD)
The last climate control setting
The Head-Up Display (HUD) position and dimming
level, if your vehicle has this feature
The instrument panel cluster dimming level and last
selected DIC display
Separate personalization settings are saved for
two different drivers. One of the keyless access
transmitters is assigned to driver 1. The other is
assigned to driver 2. The back of the keyless access
transmitters are labelled 1 or 2 to correspond to
each driver.The current driver’s preferences are recalled when one
of the following occurs:
The lock or unlock button on the keyless access
transmitter, labelled 1 or 2, is pressed.
The appropriate memory button, 1 or 2, located on
the driver’s door is pressed. SeeMemory Seat,
Mirrors and Steering Wheel on page 1-4for more
information.
A valid keyless access transmitter is detected upon
opening the driver’s door.
If more than one valid keyless access transmitter is
detected upon opening the driver’s door, the driver
preferences for the lowest driver number will be recalled.
If a keyless access transmitter that is not labelled 1 or 2
is used, the personalization system will not recognize
the transmitter. The Driver Information Center (DIC) will
not display a current driver number and the features
that are normally programmed through the DIC will be
set to the default states. Also, if the OPTION button
is pressed, the DIC does not display the menus used to
set personalizations, but instead displays OPTIONS
UNAVAILABLE for a few seconds.
3-75
Page 213 of 432
Press the OPTION button until AUTO MEMORY
RECALL appears on the display, then press the RESET
button to scroll through the following modes:
YES
NO (default)
If you choose YES, the driver’s seat, the outside
rearview mirrors and the telescopic steering column, if
your vehicle has this feature, positions are recalled when
you turn the ignition on.
If you choose NO, this option will turn off.
When the mode you want is selected, press the
OPTION button to set your choice and advance to the
next personal option.
Auto Exit Recall:If your vehicle has the memory
package, you may have this option. This option allows
the driver’s seat and telescopic steering column, if
your vehicle has this feature, to automatically move to
the current driver’s exit position when one of the
following occurs:
The vehicle is turned off or in Retained Accessory
Power (RAP) or accessory mode and the driver’s
door is opened.
The vehicle is turned off or in RAP and the unlock
button on the keyless access transmitter is
pressed.In order for the Auto Exit Recall feature to work on an
automatic transmission vehicle, the vehicle must be
in PARK (P). On a manual transmission vehicle,
the parking brake must be set.
Press the OPTION button until AUTO EXIT RECALL
appears on the display, then press the RESET button to
scroll through the following modes:
YES
NO (default)
If you choose YES, when you turn the ignition off and
open the driver’s door or press the unlock button on the
keyless access transmitter, the seat and the telescopic
steering wheel, if your vehicle has this feature, will return
to their stored exit positions for an easy exit or an
easy entrance when returning to the vehicle.
The seat and steering wheel will only return to the
stored driving position if you press the appropriate
memory button or activate the auto memory recall
feature.
If you choose NO, this option will turn off.
When the mode you want is selected, press the
OPTION button to set your choice and advance to the
next personal option.
3-77
Page 220 of 432
Audio System(s)
Determine which radio your vehicle has and then read
the pages following to familiarize yourself with its
features.
{CAUTION:
This system provides you with far greater
access to audio stations and song listings.
Giving extended attention to entertainment
tasks while driving can cause a crash and you
or others can be injured or killed. Always keep
your eyes on the road and your mind on the
drive — avoid engaging in extended searching
while driving.
Keeping your mind on the drive is important for
safe driving. SeeDefensive Driving on page 4-2.
Here are some ways in which you can help avoid
distraction while driving.While your vehicle is parked:
Familiarize yourself with all of its controls.
Familiarize yourself with its operation.
Set up your audio system by presetting your
favorite radio stations, setting the tone, and
adjusting the speakers. Then, when driving
conditions permit, you can tune to your favorite
radio stations using the presets and steering wheel
controls if the vehicle has them.
Notice:Before adding any sound equipment to
your vehicle, such as an audio system, CD player,
CB radio, mobile telephone, or two-way radio, make
sure that it can be added by checking with your
dealer/retailer. Also, check federal rules covering
mobile radio and telephone units. If sound
equipment can be added, it is very important to do
it properly. Added sound equipment may interfere
with the operation of your vehicle’s engine, radio,
or other systems, and even damage them. Your
vehicle’s systems may interfere with the operation
of sound equipment that has been added.
Your vehicle has a feature called Retained Accessory
Power (RAP). With RAP, the audio system can be
played even after the ignition is turned off. SeeRetained
Accessory Power (RAP) on page 2-23for more
information.
3-84
Page 239 of 432
Navigation/Radio System
Your vehicle may have a navigation radio system.
The navigation system has built-in features intended to
minimize driver distraction. Technology alone, no
matter how advanced, can never replace your own
judgment. See the Navigation System manual for some
tips to help you reduce distractions while driving.
Theft-Deterrent Feature
THEFTLOCK®is designed to discourage theft of your
vehicle’s radio. The feature works automatically by
learning a portion of the Vehicle Identi�cation Number
(VIN). If the radio is moved to a different vehicle, it
will not operate and LOCKED will appear on the display.
With THEFTLOCK
®activated, the radio will not
operate if stolen.
Your radio has a blinking indicator light located on the
upper left side of the radio. The indicator light is used
to show that the theft-deterrent feature mode is set.
The blinking indicator light will only �ash when the
ignition is in the off position.
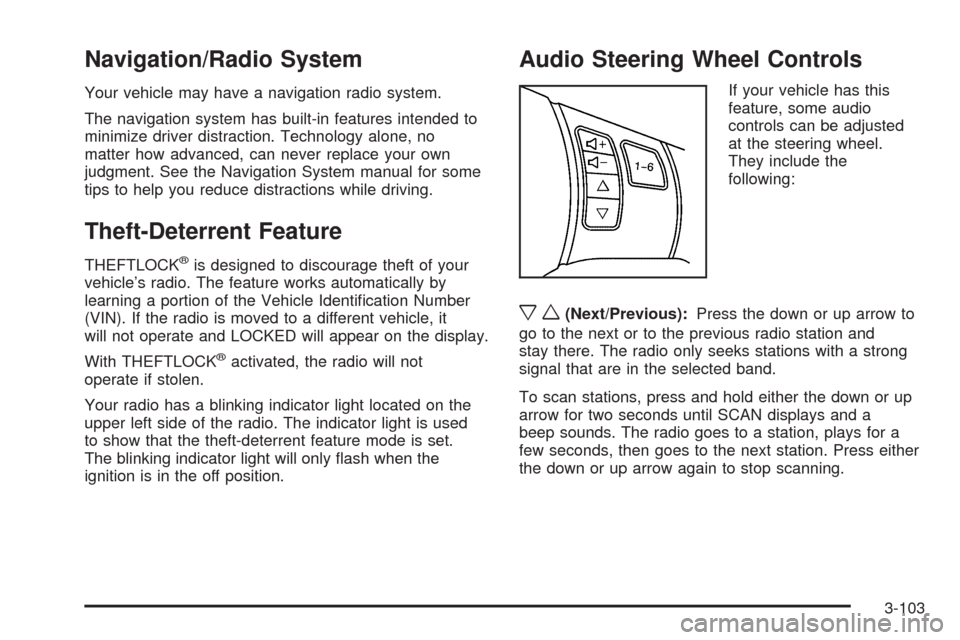
Audio Steering Wheel Controls
If your vehicle has this
feature, some audio
controls can be adjusted
at the steering wheel.
They include the
following:
xw(Next/Previous):Press the down or up arrow to
go to the next or to the previous radio station and
stay there. The radio only seeks stations with a strong
signal that are in the selected band.
To scan stations, press and hold either the down or up
arrow for two seconds until SCAN displays and a
beep sounds. The radio goes to a station, plays for a
few seconds, then goes to the next station. Press either
the down or up arrow again to stop scanning.
3-103