2008 BMW MOTORRAD K 1200 R Rider's Manual (in English)
-
 1
1 -
 2
2 -
 3
3 -
 4
4 -
 5
5 -
 6
6 -
 7
7 -
 8
8 -
 9
9 -
 10
10 -
 11
11 -
 12
12 -
 13
13 -
 14
14 -
 15
15 -
 16
16 -
 17
17 -
 18
18 -
 19
19 -
 20
20 -
 21
21 -
 22
22 -
 23
23 -
 24
24 -
 25
25 -
 26
26 -
 27
27 -
 28
28 -
 29
29 -
 30
30 -
 31
31 -
 32
32 -
 33
33 -
 34
34 -
 35
35 -
 36
36 -
 37
37 -
 38
38 -
 39
39 -
 40
40 -
 41
41 -
 42
42 -
 43
43 -
 44
44 -
 45
45 -
 46
46 -
 47
47 -
 48
48 -
 49
49 -
 50
50 -
 51
51 -
 52
52 -
 53
53 -
 54
54 -
 55
55 -
 56
56 -
 57
57 -
 58
58 -
 59
59 -
 60
60 -
 61
61 -
 62
62 -
 63
63 -
 64
64 -
 65
65 -
 66
66 -
 67
67 -
 68
68 -
 69
69 -
 70
70 -
 71
71 -
 72
72 -
 73
73 -
 74
74 -
 75
75 -
 76
76 -
 77
77 -
 78
78 -
 79
79 -
 80
80 -
 81
81 -
 82
82 -
 83
83 -
 84
84 -
 85
85 -
 86
86 -
 87
87 -
 88
88 -
 89
89 -
 90
90 -
 91
91 -
 92
92 -
 93
93 -
 94
94 -
 95
95 -
 96
96 -
 97
97 -
 98
98 -
 99
99 -
 100
100 -
 101
101 -
 102
102 -
 103
103 -
 104
104 -
 105
105 -
 106
106 -
 107
107 -
 108
108 -
 109
109 -
 110
110 -
 111
111 -
 112
112 -
 113
113 -
 114
114 -
 115
115 -
 116
116 -
 117
117 -
 118
118 -
 119
119 -
 120
120 -
 121
121 -
 122
122 -
 123
123 -
 124
124 -
 125
125 -
 126
126 -
 127
127 -
 128
128 -
 129
129 -
 130
130 -
 131
131 -
 132
132 -
 133
133 -
 134
134 -
 135
135 -
 136
136 -
 137
137 -
 138
138 -
 139
139 -
 140
140 -
 141
141 -
 142
142 -
 143
143 -
 144
144 -
 145
145 -
 146
146 -
 147
147 -
 148
148 -
 149
149 -
 150
150 -
 151
151 -
 152
152 -
 153
153 -
 154
154 -
 155
155 -
 156
156 -
 157
157 -
 158
158 -
 159
159 -
 160
160 -
 161
161 -
 162
162 -
 163
163 -
 164
164
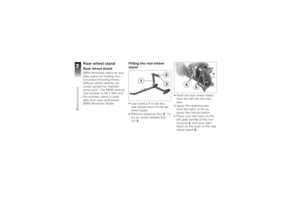
 Luggage
Correct loading
Overloading and
imbalanced loads
can adversely affect the
motorcycle's handling.
Do not exceed the permiss-
ible gross weight and be sure
to comply with the instruc-
tions")
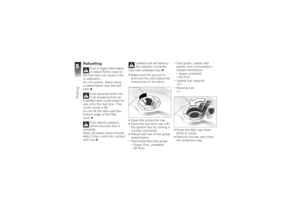
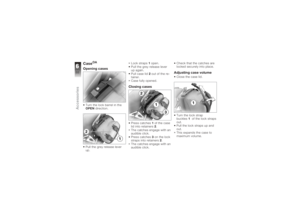
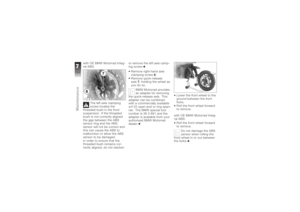
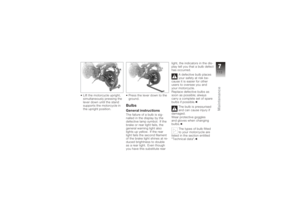
 Case
OA
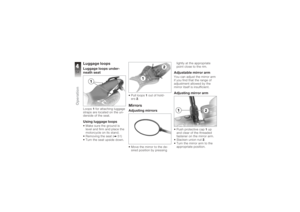
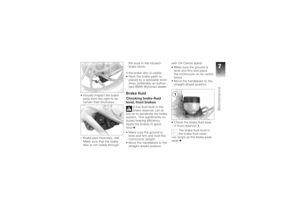
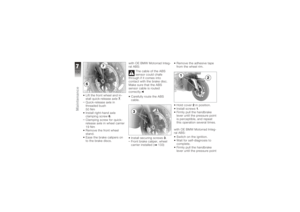
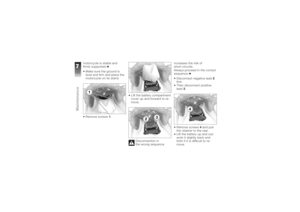
Opening casesTurn the lock barrel in the
OPENdirection.
Pull the grey release lever
up. Lock straps
1open.
Pull the grey release lever
up again.
Pull case lid 2out of the re-
tainer.
Case full")
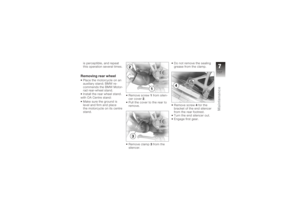
 Close the lock straps.
Press the lock straps
against the case body.
The case volume adapts to
the contents.
Removing the caseTurn the lock barrel in the
RELEASEdirection.
Pull the black release lever")
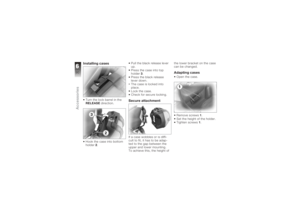
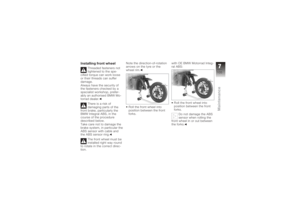
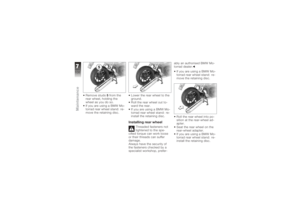
 Installing casesTurn the lock barrel in the
RELEASEdirection.
Hook the case into bottom
holder 2. Pull the black release lever
up.
Press the case into top
holder
3.
Press the black release
lever down.")
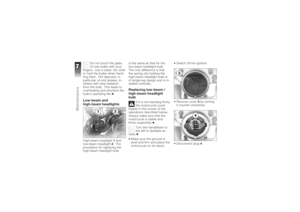
 Maintenance
 - general
instructions................... 92
Toolkit ........................ 92
Overview, toolkit .............. 92
Contents, supplementary
kit
OA
.......................... 9")
 Maintenance - general
instructionsThe 'Maintenance' chapter
describes work involving the
replacement of wear parts
that can be performed with
minimum effort.
If special tightening torques
are")
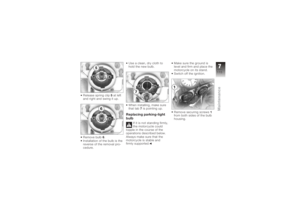
 4Open-ended spanner,
w/f 17
5 TORX wrenches, T40,
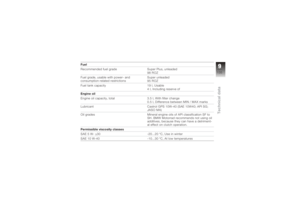
T45, T50Engine oilChecking the engine oil
level
The engine can seize if
the oil level is low, and
this can lead to accidents.
Always make sure that th")
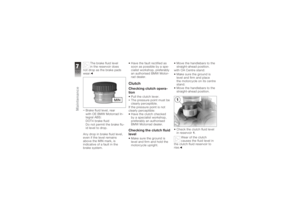
 Between MIN and MAX
marks
If the oil level is below the
MIN mark: Top up the engine oil.
If the oil level is above the
MAX mark: Drain off the engine oil.Topping up the engine oilMake sure the ground")