2008 AUDI TT ROADSTER fuel cap release
[x] Cancel search: fuel cap releasePage 28 of 316

Driver inf ormation sy ste m
On-Board Diagnostic system (08D)
Malfunction Indicator Lamp (MIL )
The Malfunction Indicator Lamp (MIU in the instrument cluster
=:> page 16, fig. 6 is part of the On -Board Diagnos tic (OBD II) system.
The warning/indicator ligh t ill uminates when the ignition is
switched on and goes out after the engine starts and the idle has
stabilized . This indicates that the MIL is working properly .
If th e light d oes not go out after the engine is started, or illuminates
while you are driving, a ma lfunction may exist in the engine system.
If the light starts flashing, the catalytic converter cou ld be damaged .
Continue driving
w ith redu ced pow er (avoiding sustained high
speeds and/or rapid acce lerations) and have the condition
corrected. Contact your authorized Audi dealer.
If the light illuminates, the e lectronic speed limiter may also be
malfunctioning. For more information=:>
page 26, "E lectronic speed
limiter".
An imprope rly clo sed fuel filler c ap m ay als o c au se th e MIL light t o
illumi nate =:. page 216. •
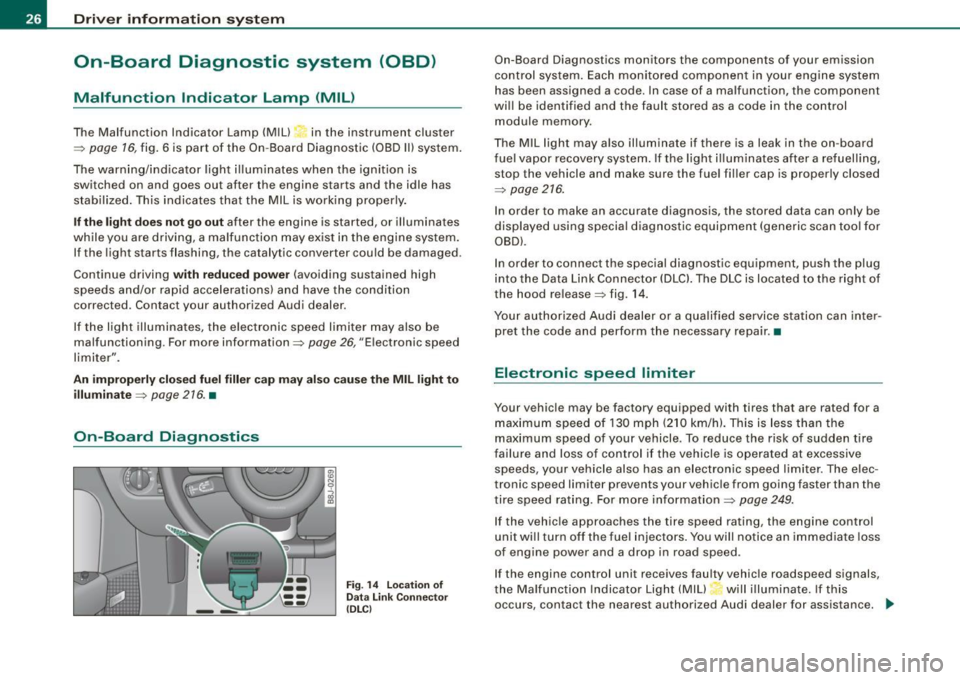
On-Board Diagnostics
F ig . 14 L ocation of
Data Link Co nnector
( DL Cl
On -Board Diagnostics monitors the components of your emission
control system. Each monitored component in your engine system
has been assigned a code. In case of a malfunction, the component
will be identified and the fault stored as a code in the control
module memory .
The MIL light may also illuminate if there is a leak in the on -board
f ue l vapor recovery system. If the light i lluminates after a refuelling,
stop the vehicle and make sure the fuel filler cap is properly closed
=:>
page 216.
In order to make an accurate diagnosis, the stored data can only be
displayed using special diagnostic equipment (generic scan too l for
OBD).
In order to connect the special diagnostic equipment, push the plug
into the Data Link Connector (DLCl. The DLC is located to the right of
the hood release =:> fig . 14.
Your authorized Audi dealer or a qualified service station can inter
pret the code and perform the necessary repair. •
Electronic speed limiter
Your vehicle may be factory equipped with tires that are rated for a
maximum speed of 130 mph (210 km/h). This is less than the
maximum speed of your vehicle. To reduce the risk of sudden tire
failure and loss of control if the vehicle is operated at excessive
speeds, your vehicle also has an electronic speed limiter . The elec
tronic speed limiter prevents your vehic le from going faster than the
tire speed rating. For more in formation=:>
page 249.
If the vehicle approaches the tire speed rating, the engine control
unit will turn off the fue l injectors. You will notice an immediate loss
of engine power and a drop in road speed .
If the engine control unit receives faulty vehicle roadspeed signals,
the Ma lfunction Indicator Light (MIU will illuminate. If this
occurs, contact the nearest authorized Audi dealer for assistance.
~
Page 219 of 316

_____________________________________ F_ u_ e_l _s _u-= pc...:... p_ly =--- a_ n_ d_ f_ i_ ll _in -=: gc.. y -=--- o-u_ r_ fu_ e_l _t _a _n_ k __ fflllll
•
- Select a medium refuelling rate so that the nozzle
switches off automatically when the tank is full.
Putting the fuel cap back on
- After filling your tank, twist the fuel filler cap clockwise
until you hear a definite click.
- Close the fuel filler flap.
To avoid fuel spilling or evaporating from the fuel tank always close
fuel filler cap properly and completely. An improperly closed fuel
filler cap may also cause a message in the driver information system =>
page 24 or cause the MIL lamp=> page 26 to come on.
& WARNING
Improper refueling or handling of fuel can cause fire, explosion
and severe burns .
• Fuel is highly flammable and can cause severe burns and other
injuries.
• Failure to shut the engine off while refueling and/or to insert
the pump nozzle fully into the fuel filler neck could cause fuel to
spray out of filler neck or to overflow. Fuel spray and overflowing
fuel can cause a fire.
• Never use a cellular telephone while refueling . The electromag
netic radiation can cause sparks that can ignite fuel vapors and
cause a fire .
• Never get back into your vehicle while refueling. If in excep
tional circumstances you must get back in your vehicle while refu
eling, make certain that you close the door and touch metal to
discharge static electricity before touching the filler nozzle again.
Static electricity can cause sparks that can ignite fuel vapors
released during refueling.
• Never smoke or have an open flame anywhere in or near your
vehicle when refueling or filling a portable fuel container.
& WARNING (continued)
• For your safety, we strongly recommend that you do not travel
with a portable fuel container in your vehicle. The container, full or empty may leak and could cause a fire, especially in a crash .
• If, under exceptional circumstances, you must transport a
portable fuel container, please observe the following: -Never fill a portable fuel container while it is anywhere in or
on the vehicle (for example, in the luggage compartment, or on
the trunk). Static electricity can build up while filling and can ignite fuel vapors causing a fire.
- Always place a portable fuel container on the ground before
filling.
- Always keep the filler nozzle completely inside the portable
container before and during filling.
- If filling a portable container made of metal, the filler nozzle
must always be in contact with the container. This will help
prevent static electricity from discharging and cause a fire.
- Never spill fuel inside the vehicle or luggage compartment.
Fuel vapors are highly flammable.
- Always observe local and state/provincial laws regarding the
use, storage and transportation of fuel containers
- Make certain the fuel container meets industry standards
(ANSI / ASTM F852-86l.
(D Note
If any fuel has spilled onto the car, it should be removed immedi
ately to prevent damage to the paint.
<£> For the sake of the environment
As soon as the correctly operated nozzle switches off automatically
for the first time, the tank is full. Do not try to add more fuel because
fuel may spill out. In addition, the expansion space in the fuel tank ..,_
Vehicle care
I t •
Page 305 of 316

______________________________________________ A_ l_,_ p _h_ a_ b_e _t_i c_ a _ l _in _ d_e _ x __ lllll
Dimensions ... .. ...... . .... .. .. .... 290 Electronic differential lock (EDU
Dipstick Reading the dipstick properly
Direct Shift Gearbox 224
Emergency release . . . . . . . . . . . . . . . 120
Distance ........ .... ....... ...... ... 40
Driver information system . .... .... ... . 22
Digital speedometer ... .. .... ...... 24
Fuel filler cap ...... ..... .... .... .. 24
Menu button ..................... 28
Menu display ..................... 27
Open door or rear lid warning . ......
24
Outside temperature display .. .... .. 23
Parking brake warning ............. 30
red symbols .. ............. ....... 31
Setting ...... .... ... .... ..... .. .. 28
Sound system disp lay ............ .. 23
Text messages . .... .... .... .... ... 30
Driver seat See Seating position . ............. 130
Driving Run -flat tires . .... .... ....... .... . 258
Dr iving messages ... ..... .. ... .... ... 30
Driving safely . . . . . . . . . . . . . . . . . . . . . . . 128
Driving time ... .... ... ..... .... .... .. 39
Duplicate key .... .... ...... ....... ... 47
Dust filter . ....... .... .... ........ ... 99
E
Electro -mechanical power assist ... 21, 190 How the system works
............ 186
Warning/indicator lights ............ 20
Electronic immobilizer ...... ... .. .. 14, 49
Electronic power cont ro l
EPC warning/indicator light ..... .... 17
Electronic Stability Program .......... 184
Electronic stabilization program (ESP! Warning/indicator lights ........ .... 18
Emergency flasher Warning/ind icator lights .. .... ...... 19
Emergency flashers .................. 75
Emergency locking . ... .... .... ... .. .. 54
Emergency operation Folding top ....................... 64
Rear lid .. .... ....... .... .... .... . 56
Emergency release for selector lever ... 120
Emergency starting ........ ... .... ... 278
Emergency towing .. ............. .. . 281
Engine Cecking and filling locations ... ... . 222
Checking and filling locations ...... 221
Coolant ... .. .... .... ..... .. ... .. 227
Hood . ..... .. ... ... .. .... ..... .. 219
Starting ..................... 106, 107
Starting with jumper cables ........ 278
Stopping .... .... ...... ...... ... . 107
Engine compartment .... ...... ...... 221
Safety instructions ................ 220
Working in the engine compartment 220
Engine coolant sys tem ..... .... ...... 227
Adding coolant .... .... ..... ... ... 228
Checking the engine coolant leve l .. . 228 Radiator fan
... .. .. .. .... .... .... 229
Temperature gauge ................ 13
Engine cooling system Malfunction ... .. .... .... .... ..... 32
Engine data .. ............... .... ... 291
Engine hood Closing .. ... ........ .... ... ..... 220
How to release the hood ... ... ... .. 219
Engine oil . ...... .... .... ... .... .... 222
Adding .... ....... .... ... .... .... 225
Additives .. .... .... ... .... .... ... 225
Changing . .... .... .... ..... ..... . 226
Checking the engine oi l leve l ... .... 224
Indications and conditions requiring extra checking .... .... .... .... .... ... 224
Oil consumption . ...... ..... .. .... 224
Oil grades . ....... .... .... ....... 222
Pressure malfunction .............. 33
Recommended oil check intervals ... 224
Specification and viscosity ......... 222
Engine oi l leve l .. .... .... ... .... .... . 35
Engine oil sensor defective .... ...... .. 35
Environment Break-in period ..... .. ... .... .... . 192
Catalytic converter .......... ... .. . 193
Disposing of your vehic le battery .. . 231
Driving at high speeds . ...... .... . 194
Dr iving to minim ize pollution and noise .
194
Fuel .. .... .... .... ... .... .... ... 216
Fuel economy ......... ........ ... 194
Leakage from your vehicle . .... .... 220
Letting the vehicle stand and warm up ..
195
Controls and equip ment Safety first Vehicle operation
Vehicle care Do-it-yourself service Technical data