2008 AUDI TT ROADSTER water
[x] Cancel search: waterPage 235 of 316
__________________________________________ C_ h _ e_c _k _in _ g =- a_ n __ df _i_ lli _n ___ g __ __
•
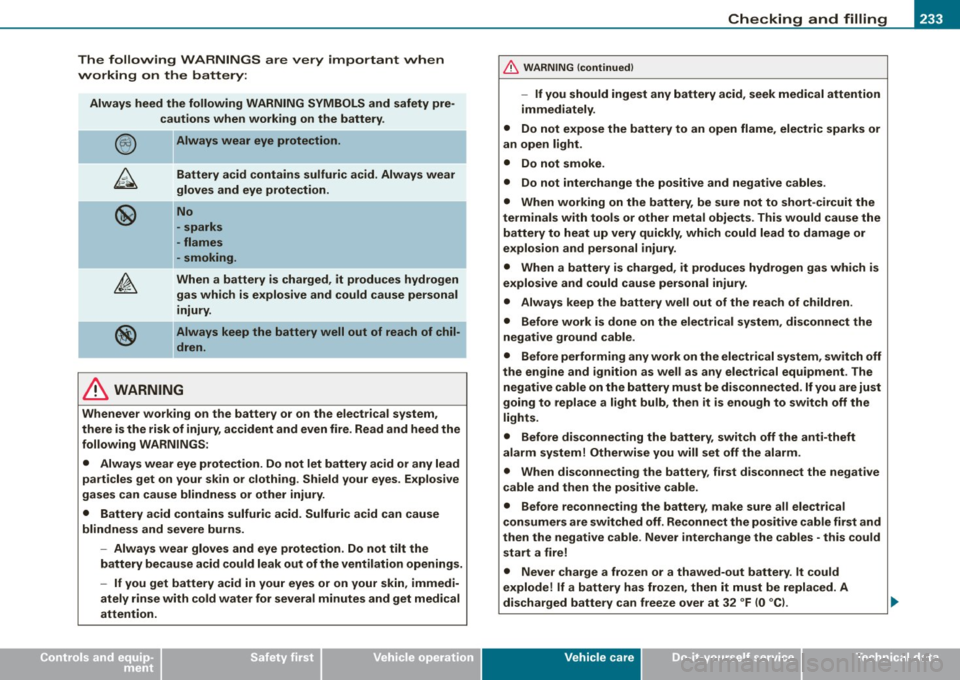
The following WARNINGS are very important when
working on the battery:
Always heed the following WARNING SYMBOLS and safety pre
cautions when working on the battery .
Always wear eye protection.
Battery acid contains sulfuric acid. Always wear
gloves and eye protection.
No
- sparks
- flames
- smoking.
When a battery is charged, it produces hydrogen
gas which is explosive and could cause personal
injury.
Always keep the battery well out of reach of chil
dren.
& WARNING
Whenever working on the battery or on the electrical system,
there is the risk of injury, accident and even fire. Read and heed the
following WARNINGS:
• Always wear eye protection. Do not let battery acid or any lead
particles get on your skin or clothing. Shield your eyes. Explosive
gases can cause blindness or other injury.
• Battery acid contains sulfuric acid. Sulfuric acid can cause
blindness and severe burns.
- Always wear gloves and eye protection. Do not tilt the
battery because acid could leak out of the ventilation openings.
- If you get battery acid in your eyes or on your skin, immedi
ately rinse with cold water for several minutes and get medical
attention.
& WARNING (continued)
-If you should ingest any battery acid, seek medical attention
immediately.
• Do not expose the battery to an open flame, electric sparks or
an open light.
• Do not smoke.
• Do not interchange the positive and negative cables .
• When working on the battery, be sure not to short -circuit the
terminals with tools or other metal objects. This would cause the battery to heat up very quickly, which could lead to damage or
explosion and personal injury.
• When a battery is charged, it produces hydrogen gas which is
explosive and could cause personal injury.
• Always keep the battery well out of the reach of children.
• Before work is done on the electrical system, disconnect the
negative ground cable.
• Before performing any work on the electrical system, switch off
the engine and ignition as well as any electrical equipment. The
negative cable on the battery must be disconnected.
If you are just
going to replace a light bulb, then it is enough to switch off the
lights.
• Before disconnecting the battery, switch off the anti-theft
alarm system! Otherwise you will set off the alarm.
• When disconnecting the battery, first disconnect the negative
cable and then the positive cable.
• Before reconnecting the battery, make sure all electrical
consumers are switched off. Reconnect the positive cable first and
then the negative cable . Never interchange the cables - this could
start a fire!
• Never charge a frozen or a thawed-out battery. It could
explode! If a battery has frozen, then it must be replaced. A
discharged battery can freeze over at 32 °F (0 °CI. .,,_
Vehicle care
I t •
Page 237 of 316
Checking and filling -
------------- --------=----" =---------
0 Note
Do not overfill the battery, otherwise battery acid will overflow
through the vent opening. This can damage the paint and cause
corrosion. •
Checking the battery acid level on
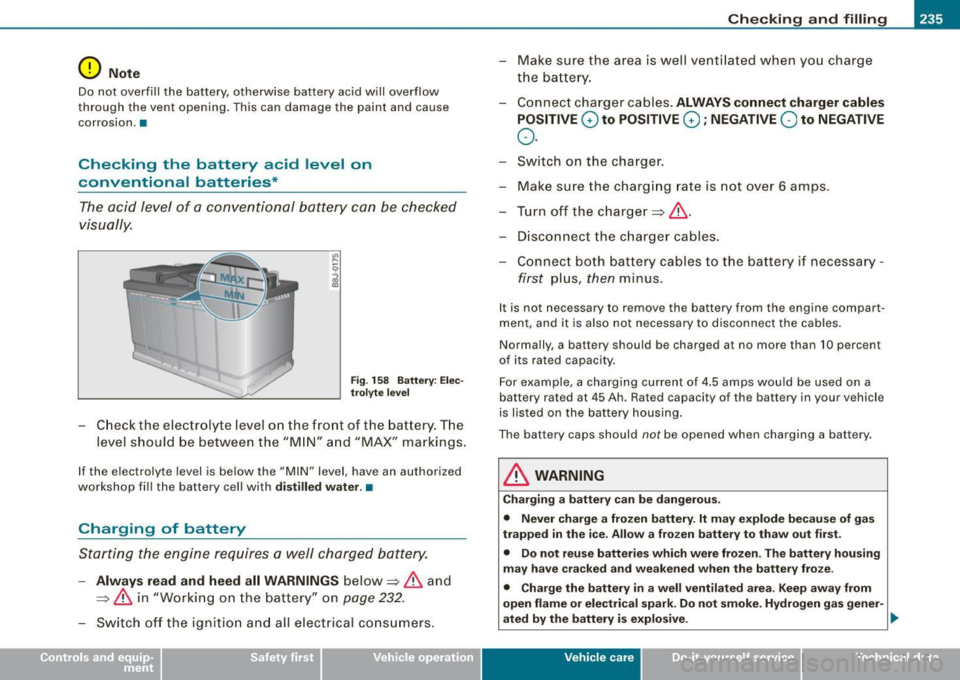
conventional batteries *
The acid level of a conventional battery can be checked
visually.
Fig. 158 Battery : Elec
trolyte level
-Check the electrolyte level on the front of the battery. The
level should be between the "MIN" and "MAX" markings.
If the electrolyte level is below the "MIN" level, have an authorized
workshop fill the battery cell with
distilled water.•
Charging of battery
Starting the engine requires a well charged battery.
-Always read and heed all WARNINGS below => & and
=> & in "Working on the battery" on
page 232.
- Switch off the ignition and all electrical consumers. - Make sure
the area is well ventilated when you charge
the battery.
- Connect charger cables.
ALWAYS connect charger cables
POSITIVE
(v to POSITIVE (v ; NEGATIVE Q to NEGATIVE
o.
- Switch on the charger.
- Make sure the charging rate is not over 6 amps.
- Turn off the charger=>&.
- Disconnect the charger cables.
- Connect both battery cables to the battery if necessary -
first plus, then minus.
It is not necessary to remove the battery from th e engine compart
ment, and it is also not necessary to disconnect the cables.
Normally, a battery should be charged at no more than 10 percent
of its rated capacity .
For example, a charging current of 4.5 amps would be used on a
battery rated at 45 Ah. Rated capacity of the battery in your vehicle
is listed on the battery housing.
The battery caps should
not be opened when charging a battery.
& WARNING
Charging a battery can be dangerous.
• Never charge a frozen battery. It may explode because of gas
trapped in the ice . Allow a frozen battery to thaw out first.
• Do not reuse batteries which were frozen. The battery housing
may have cracked and weakened when the battery froze .
• Charge the battery in a well ventilated area. Keep away from
open flame or electrical spark. Do not smoke. Hydrogen gas gener-
ated by the battery is explosive. .,_
Vehicle care I I irechnical data
Page 238 of 316

___ C_h_ e_ c_k _in --== g'-- a_n _d_ f_il _li _n ..:::g:::..- ___________________________________________ _
& WARNING (continued)
• To reduce the danger of explosion, never connect or disconnect
charger cables while the charger is operating.
• Fast charging a battery is dangerous and should only be
attempted by a competent technician with the proper equipment.
• Battery acid that may spill during charging should be washed
off with a solution of warm water and baking soda to neutralize
the acid.
0 Note
Never use a fast charger as a booster to start the engine. This will
seriously damage sensitive electronic components , such as control
units, relays, radio, etc., as well as the battery charger.
[ i ] Tips
The vehicle battery must not be charged with a standard small
charger that plugs into the cigarette lighter or outlet .•
Windshield /headlight washer
container
Using plain water is not adequate for filling the wind
shield washer system and the headlight washer system*.
Fig . 159 Fender, left:
Windshield washer
fluid reservoir
The washer fluid container is marked with the symbol e.;. on
its cap.
- Before you check anything in the engine compartment,
always read and heed all WARNINGS=> & in "Working
in the engine compartment" on
page 220.
-Lift the filler cap tongue to add washer fluid. You can fill
the container to the top.
- Press the cap back onto the filler neck after filling the
container .
You can find the reservoir capacity in the table in~ page 291.
Use winterized windshield washer solvent during the cold season
even though the vehicle is equipped with heated washer jets. It
helps to keep your windshield clean and prevents the fluid from
freezing in the winter.
Follow the directions on the container for the correct amount to be
used.
~
Page 266 of 316
1111...__W_ h_ a _ t_d_ o_ l _d _o_ n_ o_ vv_ ? ______________________________________________ _
& WARNING (continued)
-if you have been driving with very low tire pressures or tires
with no air
• Seek professional assistance if it is not possible to repair the
tire with the tire sealant.
& WARNING
The tire sealant must not come into contact with skin, eyes or
clothing.
• If you get any tire sealant
in your eyes or come into contact
with it, rinse the affected area thoroughly with clean water. Find a physician immediately!
• Change any clothing contaminated with tire sealant immedi
ately.
• Do not inhale the vapor!
• If you have swallowed tire sealant, rinse your mouth thor
oughly right away and drink plenty of water .
- Do not induce vomiting! Find a physician immediately!
• If you have allergic reactions, find a physician immediately .
• Keep the tire sealant away from children .
0 Note
Do not use commercially available tire sealants. The electrical
components of the tire pressure monitoring system will no longer
work properly.
'i> For the sake of the environment
Used sealant bottles can be dropped off at a recycling facility.
[ i] Tips
• If sealant has run out, allow it to dry. Then you can peel it off.
• Have the tire sealant replaced every 4 years at a dealership. •
Applies to vehic les: with T ire Mob ility System
Preliminary steps
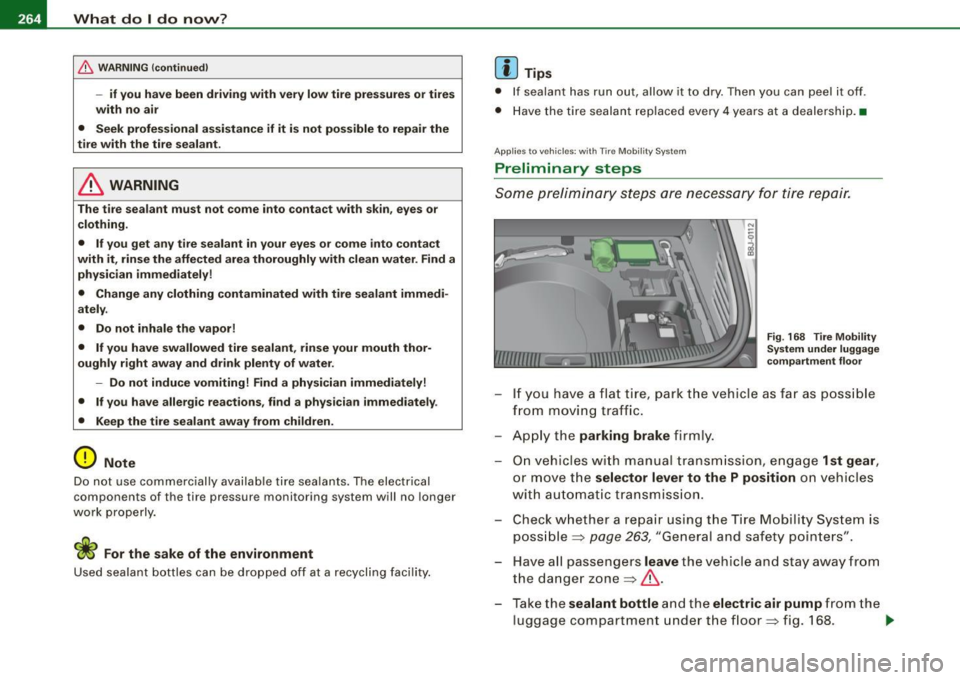
Some preliminary steps are necessary for tire repair .
Fig. 168 Tire Mobility
System under luggage
compartment floor
- If you have a flat tire, park the vehicle as far as possible
from moving traffic.
- Apply the
parking brake firmly.
- On vehicles with manual transmission, engage
1st gear,
or move the selector lever to the P position on vehicles
w ith automatic transmission.
- Check whether a repair using the Tire Mobility System is
possible~
page 263, "General and safety pointers".
Have all passengers
leave the vehicle and stay away from
the danger zone~&.
- Take the
sealant bottle and the electric air pump from the
luggage compartment under the floor ~ fig. 168. .,_
Page 275 of 316

Fuses and bul bs -
------------------
Fuses and bulbs
Fuses
Replacing a fuse
A problem in the electrical system may be caused by a
blown fuse.
Fig . 178 End face o f
i n str ume nt pan el:
re m ov ing cover pla te
t o access f uses
Fig . 179 Left si de o f
engine co mpartm ent:
fu se cover
Fus e cove r on the left end face of the instrum ent
panel
- Switch off the ignition and the e lectr ica l component
affected . - Carefully pry the fuse cover off the instrument panel
using the ignition key or a screwdriver=> fig. 178.
- C heck the fuse listing on the next pages to find out w hich
fuse belongs to the component which has failed => page 274, "F use Location, Instrument Pane l le ft".
- Remove the blown fuse with the plastic clip provided .
The clip is located on the holder in the fuse box .
Replace a blown fuse (recognizable by the melted metal
str ip inside) with a fuse of the same amperage.
- Firmly snap the cover back onto the instrument panel
face.
Fuse cov er in engin e compartment
- Switch the ignition a nd the affec ted co nsumer off .
- Unlatch the fuse cover, push the two s lides forward
=> fig . 179.
- Find out which fuse belongs to the equipment which
stopped working=> page 276, "Fuse location, left side of
engine compartment".
- Remove the plastic from its retainer in the fuse box cover (left face end of the instrument pane l), place it on the
fuse in question and pull it out.
- If the fuse is burned out (recognizable by melted strips of metal), replace it with a new fuse of the same rating.
- Replace the fuse cover.
- Push the two slides to the rear=> fig. 179 . Install the fuse
cover carefully to prevent water from entering. .,
Vehicle care Do-it-yourself service irechnical data
Page 279 of 316
_______________________________________________ F_ u_ s _ e_s _ a _ n_d _ b_ u_ l_ b_ s __ ffllll
•
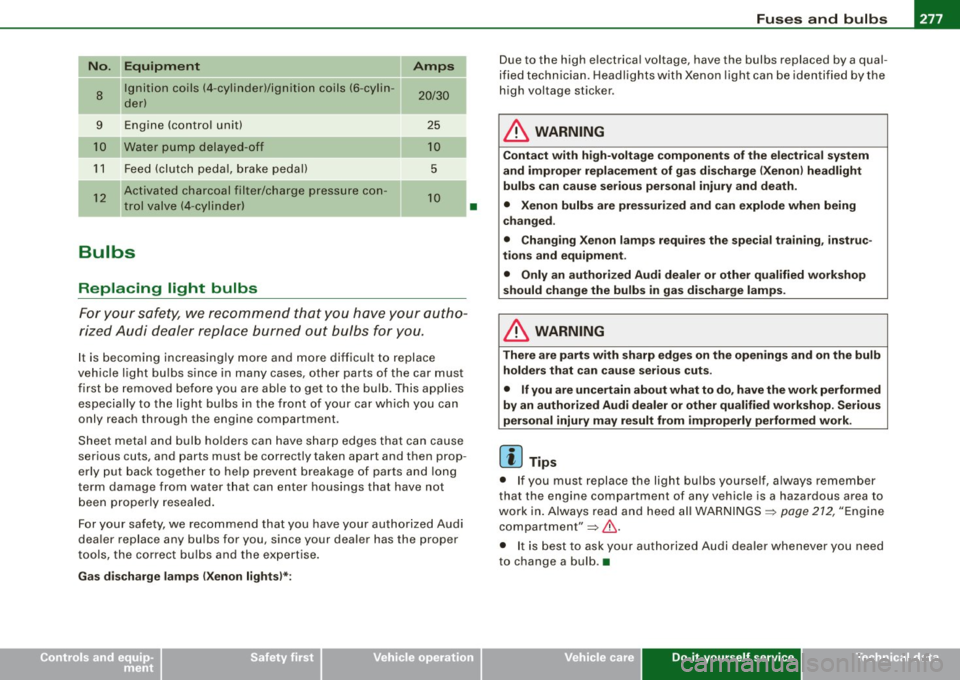
No. II Equipment Amps
8
Ignition coils (4 -cylinder)/ignition coils (6 -cylin -20/30 der)
-
9 Engine (control unit) 25
Water pump delayed-off 10
11 Feed (clutch pedal, brake pedal) 5
12
Activated charcoal filter/charge pressure con-10 trol valve (4-cylinder)
--
Bulbs
Replacing light bulbs
For your safety, we recommend that you have your autho
rized Audi dealer replace burned out bulbs for you.
It is becoming increasingly more and more difficult to replace
vehicle light bulbs since in many cases, other parts of the car must
first be removed before you are able to get to the bulb. This applies
especially to the light bulbs in the front of your car which you can
only reach through the engin e compartment .
Sheet metal and bulb holders can have sharp edges that can cause
serious cuts, and parts must be correctly taken apart and then prop
erly put back together to help prevent breakage of parts and long
term damage from wa ter that can enter housings that have not
been properly resealed.
For your safety , we recommend that you have your authorized Audi
dealer replace any bulbs for you, since your dealer has the proper
tools, the correct bulbs and the expertise.
Gas discharge lamps (Xenon lights)*:
•
Due to the high electrical voltage, have the bulbs replaced by a qual
ified technician. Headlights with Xenon light can be identified by the
high voltage sticker.
& WARNING
Contact with high-voltage components of the electrical system
and improper replacement of gas discharge (Xenon) headlight
bulbs can cause serious personal injury and death.
• Xenon bulbs are pressurized and can explode when being
changed.
• Changing Xenon lamps requires the special training, instruc
tions and equipment .
• Only an authorized Audi dealer or other qualified workshop
should change the bulbs in gas discharge lamps.
& WARNING
There are parts with sharp edges on the openings and on the bulb holders that can cause serious cuts.
• If you are uncertain about what to do, have the work performed
by an authorized Audi dealer or other qualified workshop. Serious
personal injury may result from improperly performed work.
[ i] Tips
• If you must replace the light bulbs yourself, always remember
that the engine compar tment of any vehicle is a hazardous area to
work in. Always read and heed all WARNINGS =>
page 212, "Engine
compartment"=> &.
• It is best to ask your authorized Audi dealer whenever you need
to change a bulb. •
Do-it-yourself service
Page 280 of 316
.,,___E_ m_ e_r -=g :...e_ n _ c-=y _ s_ i_t _u _a _t_ i_o _n_ s _______________________________________________ _
Emergency situations
General
This chapter is intended for trained emergen cy crew s and working
personnel who have the necessary tools and equ ipment to perform
the se operations. •
Starting by pushing or towing
0 Note
Vehicles with an automatic tran smission cannot be started by
pushing or towing . •
Starting with jumper cables
If n ecess ary, the e ngin e c an b e starte d by conne ctin g it to
the ba ttery of anoth er vehicle .
If the engine shou ld fai l to start because of a discharged or weak
ba tte ry, the bat te ry can be connected t o the ba ttery of
another
vehic le, using a pair of jumper cables to start the engine.
Jumper cables
Use
only jumper cables of suffic iently large cross section to safely
c a rr y th e st arter cu rre nt. Re fer to th e m an ufacture r's spec ific a tio ns.
Use on ly jump er cables wh ic h have
insulated termina l c lamps and
a re prope rly marked for distinction :
plus (+l cable in mo st cas es c olo red red
minus (-l cable in most cases co lored black .
& WARNING
Batteries contain electricity , acid , and gas . Any of these can cause
very serious or fatal injury. Follow the instructions below for safe
handling of your vehicle 's battery .
• Always shield your eyes and avoid leaning over the battery
whenever possible .
• A discharged battery can already freeze at temperatures just
below 32 °F (0 °Cl. Before connecting a jumper cable, the frozen
battery must be thawed completely , otherwise it could explode .
• Do not allow battery a cid to contact eyes or skin . Flush any
contacted area with water immediately.
• Improper use of a booster battery to start a vehicle may cause
an explosion.
• Vehicle batteries generate e xplosive gases . Keep sparks, flame
and lighted cigarettes away from batteries.
• Do not try to jump start any vehicle with a low ac id level in the
battery.
• The voltage of the booster battery must also have a 12-Volt
rating . The capacity (Ahl of the booster battery should not be
lower than that of the discharged battery . Use of batteries of
different voltage or substantially different "Ah " rating may cause
an e xplosion and personal injury .
• Never charge a frozen battery. Gas trapped in the ice may cause
an explosion .
• Never charge or use a battery that has been frozen . The battery
case may have be weakened.
• Use of batteries of different voltage or substantially different
capacity (Ah ) rating may cause an explosion and injury . The
capacity (Ahl of the booster battery should not be lower than that
of the discharged battery . .,_