2008 AUDI TT ROADSTER clutch
[x] Cancel search: clutchPage 98 of 316
Seats and storage
& WARNING (continued)
when accelerating or when applying the brakes or when driving
around a corner.
• When you are driving make sure that anything you may have
placed in the center console or other storage locations cannot fall
out into the footwells . In case of sudden braking you would not be
able to brake, depress the clutch or accelerate. •
Glove compartment
The glove compartment is illuminated and can be locked .
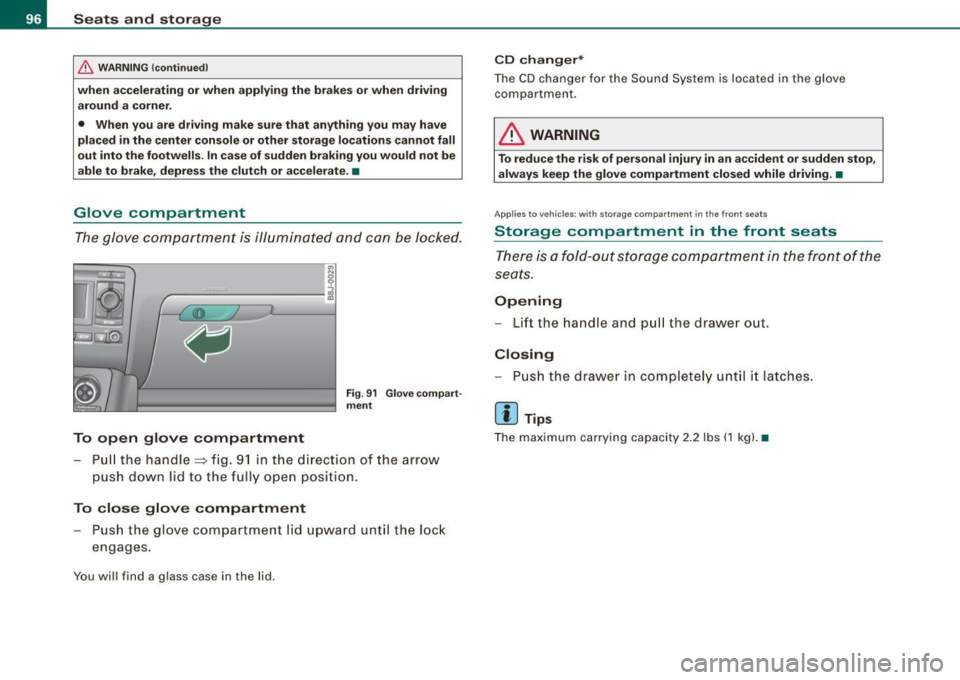
To open glove compartment
Fig. 91 Glove compart
ment
- Pull the handle=> fig. 91 in the direct ion of the arrow
push down lid to the fully open position.
To close glove compartment
Push the glove compartment lid upward until the lock
engages.
You will find a glass case in the lid .
CD changer*
The CD changer for the Sound System is located in the glove
compartmen t.
LJ}. WARNING
To reduce the risk of personal injury in an accident or sudden stop,
always keep the glove compartment closed while driving. •
App lies to veh icle s: w ith sto ra ge co mpart ment in the front seats
Storage compartment in the front seats
There is a fold-out storage compartment in the front of the
seats.
Opening
- Lift the handle and pull the drawer ou t.
Closing
- Push the drawer in completely until it latches.
[ i ] Tips
The maximum carrying capacity 2.2 lbs (1 kg). •
Page 109 of 316
___________________________________________________ O _n_ t_h _ e_ r_ o _ a_ d __ ,n
Starting and stopping the engine
Starting the engine
The engine can only be started with on original Audi key
and the clutch pedal* depressed.
- Set the parking brake.
Move the selector lever to the neutral position (automatic
transmission: selector lever in P or N)
~ & .
- On vehicles with manual transmission, fully depress the
clutch pedal.
- Turn the ignition key to position
G) ~ page 106, fig. 101
- do not depress the gas pedal when starting the engine!
- Let go of the key as soon as the engine starts.
A cold engine may at first be loud after it has been started. This is
due to the hydraulic valves building up the oil pressure . This normal
and no need for concern.
If the engine does not star t immediately, stop trying after 10
seconds and then try to restart the engine about 30 seconds later.
& WARNING
Never start or let the engine run in a confined or enclosed area.
Exhaust fumes from the engine contain carbon monoxide, a color
less and odorless gas. Carbon monoxide can be fatal if inhaled .
• Never leave the engine idling unattended. An unattended
vehicle with a running engine poses a danger of personal injury or
theft.
Controls and equip
ment
0 Note
• Avoid high engine speeds, fast acceleration or heavy engine
loads while the engine is still cold. This could damage the engine.
• The engine cannot be started by pushing o r towing the vehicle.
~ For the sake of the environment
To avoid unnecessary engine wear and to reduce exhaust emis
sions, do not let your vehicle stand and warm up. Be ready to drive
off immediately after starting your vehicle. Maintain moderate
speed until the engine is completely warm. Remember, the engine
performs best at operating temperature. •
Stopping the engine
-Turn the ignition key to position G) ~ page 106 , fig. 101.
& WARNING
• Never turn off the engine until the vehicle has come to a
complete stop.
• The brake booster and servotronic only work when the engine
is running . With the ignition turned off, you have to apply more
force when steering or braking. Since you cannot steer and stop
normally, this can lead to accidents and serious injuries.
• The radiator fan can continue to run for up to 10 minutes even
after you have turned off the engine and removed the ignition key.
The radiator fan can also turn on again if the engine coolant heats
up because of intense sunlight or heat build-up in the engine
compartment. .,
I • •
Page 114 of 316
-On th
e ro ad
..___ ______________ _
- Drive for longer than 5 minutes at more than 5 m ph
(10 km/h) above the st ored speed .
Switching off compl etely
Press lever @ into pos ition 0 (c licked into place), or
- Sw itch the ignition off .
The system retains the saved speed if you deactivate the cruise
control temporarily. To resume the saved speed, release the brake or
clutch peda l and pull the leve r to position
G) .
Switching the igni tion off erases the saved speed .
& WARNING
You should only return t o the saved speed if it i s not t oo f ast for
the current tr affi c c ondition s -ri sk of an accid ent! •
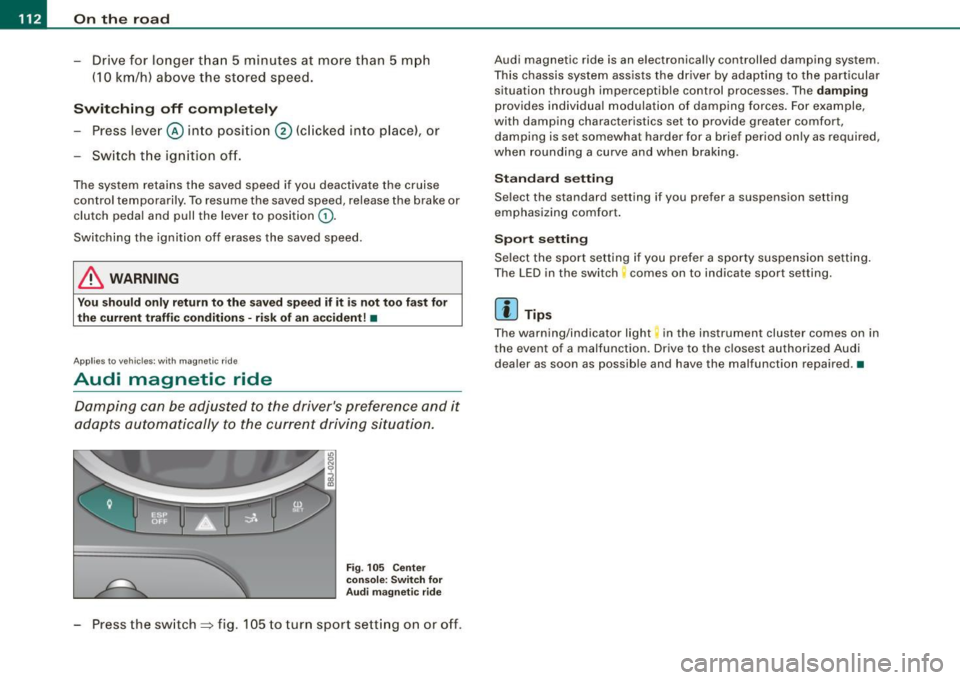
App lies t o vehicles: wit h magn etic rid e
Audi magnetic ride
Damping can be adjusted to the driver's preference and it
a dap ts automa tically t o the current driv ing si tuation.
F ig . 105 C enter
co nsole: Sw itch for
A udi m agn etic ride
Press the switch => fig. 105 to turn sport sett ing on or off .
Audi magnetic ride is an e lectronically controlled damping system.
This chassis system assists the driver by adap ting to the particular
situation through imperceptib le control processes. The
damping
provides individua l modulation of damp ing forces. For example,
with damping characteristics set to provide greater comfort ,
damping is set somewhat harder for a brief period only as required,
when rounding a curve and when braking .
Standard setting
Select the standard setting if you prefer a suspension setting
emphasizing comfort .
Spo rt setting
Se lect the sport setting if you prefer a sporty suspension setting .
The LED in the switch comes on to indicate sport setting.
[ i ] Tip s
The warning/indicator light in the ins trument cluster comes on in
the event of a malfunction. Drive to the c losest authori zed Audi
dea ler as soon as possible and have the malfunction repaired. •
Page 115 of 316

Transmi ssion -_______________ ___.
Transmission
Manual transmission
Applies to vehicles: with manual transmission
Gearshift lever
The clutch pedal must be depressed all the way before
you can start the engine .
The manual transmission in your Audi is equipped with a n
interlock-feature.
-Depress the clutch pedal all the way.
- Start the eng ine with t he gearshift
lever i n Neutra l and
the clutch pedal depressed .
0 Note
Always depress the clutch pedal fully when changing gears. Do not
hold the vehicle on a hi ll with the c lutch pedal partially depressed .
This may cause premature clutch wear or damage .
[ i J Tip s
• Resting your hand on the gearshift lever knob while driving will
cause premature wear in the transmission .
• T he back -up lights go on when you shift into Reverse with the
ignition on .•
Con tro ls and eq uip
ment
App lies to vehicles: with manual transm ission
Gearshift pattern (6-speed manual
transmission )
Engaging reverse gear (R)
Fi g. 106 G ear sh ift
patt ern : 6-s peed
manual tr an sm iss ion
Move the shift lever all the way to t he left, press it dow n,
then pus h it forward .
Especially after driving forward, stop the vehic le completely, shift
into
Neutral and rest the shift lever briefly in Neutral before shifting
into
Reverse. •
S tronic transmission
Applies to vehic les: w ith S tronic®
Introduction
Your vehicle is equipped with a S tronic transmission, also called a
double -c lu tch system/transmission .
Power is transferred between the engine and the transmission by
means of two independent clutches. They replace the torque
tJ,,,
Vehicle care I I irechnical data
Page 117 of 316
Transmission -
----------------
& WARNIN G (continu ed )
vehi cle w it h the footbrake . When idl ing , the tr ansmission of power
does not stop completely -the vehicle "creeps ".
• Do not ac celerate when you change the selector lever position
with the vehicle stationary and the engine running -risk of an acci
dent!
• Never place the selector lever
in the R or N position while the
vehicle is mov ing -risk of an accident !
• If you have to bring your vehicle to a stop while on an incline ,
keep the foot brake depressed all the way down so that the vehicle
does not start to roll backward. You should never hold the vehicle
using the clutch pedal if you are going to be stopped on an incline .
If you do , the clutch will start to slip when it overhe ats cau sed by
the constant overload . This is dangero us because if the vehicle
starts to roll backward , you could cause an accident. If the clutch
should start to slip , you will feel the vehicle "jerk" and the sele ctor
lever display will start blinking.
• Before driving down a steep slope , reduce your speed and shift
into a lower gear with "tiptronic ".
• Do not ride the brakes or apply the brake pedal too often or too
long. Constant braking causes the brakes to overheat and
substantially reduces braking performance , increases braking
di stance or cau ses complete failure of the brake system. •
Controls and equip
ment
Ap plies to vehic les: w ith S tronic®
Selector lever positions
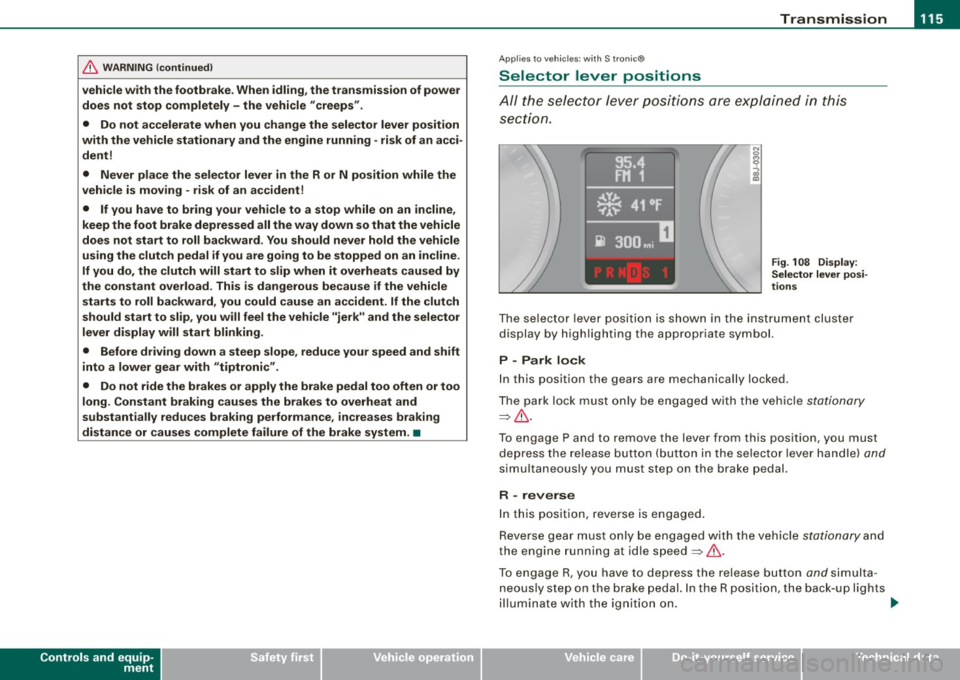
All the selec tor le ver posi tions are e xplai ned in this
se cti on.
Fig . 108 D ispl ay:
Selector lever po si
tion s
The se lector l ever po siti on i s sho wn in t he instr ument cluste r
display by highlighting the appropriate symbol.
P -Park lock
In this position the gears are mechanically locked .
T he pa rk lock must only be e ngage d with th e ve hicle
stationa ry
=> & .
T o engage P and to remove the lever from this position, you must
de press the re lease button (but to n i n the se lec to r l ever ha ndle)
and
simu ltaneously you must step on the brake pedal.
R -reverse
In this positio n, reve rse is engaged.
Reverse gear mus t o nl y be engaged with the vehic le
stationary and
the engine running at id le speed =>& .
To e ngage R, you ha ve to depres s the re lease button
and s im ult a
neous ly st ep on the brake p edal. In the R position, the back -up l ights
il lu mina te with the ig niti on on. ...
I • •
Page 277 of 316

Fuses and bulbs -
----------------
Equipment No. Equipment
Amps
Engine relay, fuel tank control unit, Airbag Off
16 A/C system (control unit) 10
1
light, light switch (switch illumination), diagnos-10
tic connector
17 Tire pressure monitoring system (control unit) 5
18
Not used
ABS, ASR, ESP, brake light switch
5 19
Not used
3 AFS headlight (left) 5
Not used
Oil level sensor (extended maintenance interval)
(WIV), tire pressure monitoring system, switch
21 Fuel injectors (gasoline engine) 10
4 for Electronic Stability Program (ESP), AFS head-5 Wind deflector (Roadster) 30
lights (control unit), A/C system (pressure sen -23 Horn 20 sorl, backup light switch
Automatic headlight range control, AFS head-
24 Transmission (control unit) 15
5
light (right)/ manual headlight range control, 5/10
25 Heater rear window Coupe/heated rear window 30/20
halogen headlights Roadster
Control unit for CAN data transfer (gateway),
26 Driver's side power window 30
6 electromechanical steering, automatic transmis-5
27 Passenger's side power window 30
sion shift gate
28 Not used
Acoustic Park Assist, automatic dipping interior
rear view mirror, garage door opener, heatable
29 Washer pump 15
7
windshield washer nozzles, washer pump, wind 5
30 Cigarette lighter 20
deflector relay (Roadster)
31 Starter 40
8
Haldex clutch 5 32 Steering column module 5
9
Control unit Audi magnetic ride 5 33
Instrument cluster 5
Airbag control unit 5 34 Radio navigation system, radio 15
1 1 Mass airflow sensor, crankcase heating 5/10
35
Audio amplifier 30
12 Door control unit (central locking driver/passen-10
36 Engine (control unit) 10 ger)
13 Diagnostic connector 10 37 CAN (Gateway) 5
Rain sensor, automatic transmission shift gate 5 38 Not used
15 Roof
light (interior lighting) 5 39 Not used
• Do-it
-yourself service
Page 279 of 316
_______________________________________________ F_ u_ s _ e_s _ a _ n_d _ b_ u_ l_ b_ s __ ffllll
•
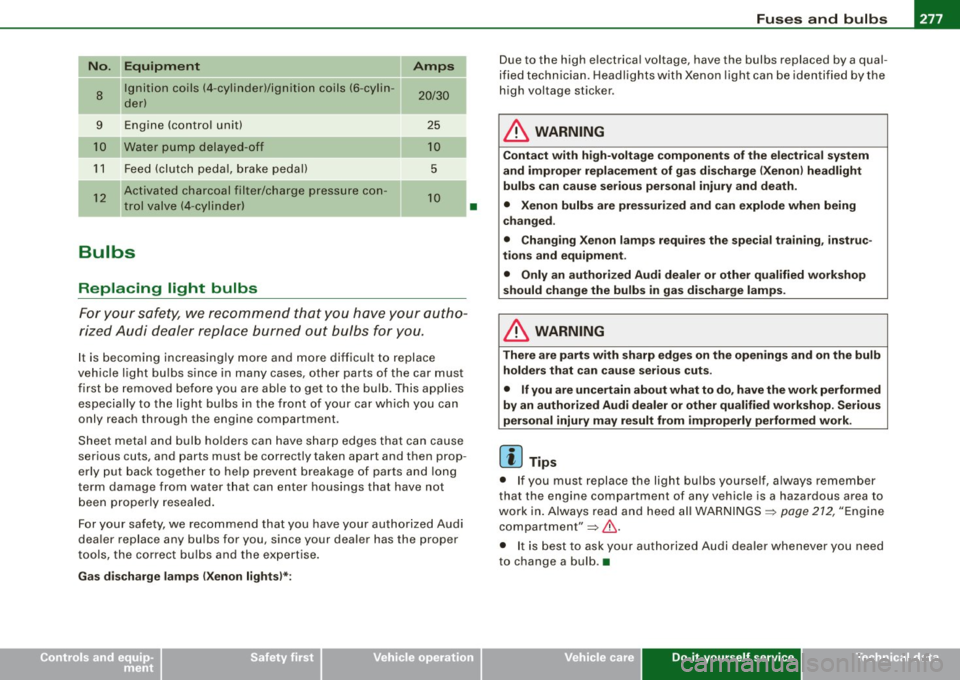
No. II Equipment Amps
8
Ignition coils (4 -cylinder)/ignition coils (6 -cylin -20/30 der)
-
9 Engine (control unit) 25
Water pump delayed-off 10
11 Feed (clutch pedal, brake pedal) 5
12
Activated charcoal filter/charge pressure con-10 trol valve (4-cylinder)
--
Bulbs
Replacing light bulbs
For your safety, we recommend that you have your autho
rized Audi dealer replace burned out bulbs for you.
It is becoming increasingly more and more difficult to replace
vehicle light bulbs since in many cases, other parts of the car must
first be removed before you are able to get to the bulb. This applies
especially to the light bulbs in the front of your car which you can
only reach through the engin e compartment .
Sheet metal and bulb holders can have sharp edges that can cause
serious cuts, and parts must be correctly taken apart and then prop
erly put back together to help prevent breakage of parts and long
term damage from wa ter that can enter housings that have not
been properly resealed.
For your safety , we recommend that you have your authorized Audi
dealer replace any bulbs for you, since your dealer has the proper
tools, the correct bulbs and the expertise.
Gas discharge lamps (Xenon lights)*:
•
Due to the high electrical voltage, have the bulbs replaced by a qual
ified technician. Headlights with Xenon light can be identified by the
high voltage sticker.
& WARNING
Contact with high-voltage components of the electrical system
and improper replacement of gas discharge (Xenon) headlight
bulbs can cause serious personal injury and death.
• Xenon bulbs are pressurized and can explode when being
changed.
• Changing Xenon lamps requires the special training, instruc
tions and equipment .
• Only an authorized Audi dealer or other qualified workshop
should change the bulbs in gas discharge lamps.
& WARNING
There are parts with sharp edges on the openings and on the bulb holders that can cause serious cuts.
• If you are uncertain about what to do, have the work performed
by an authorized Audi dealer or other qualified workshop. Serious
personal injury may result from improperly performed work.
[ i] Tips
• If you must replace the light bulbs yourself, always remember
that the engine compar tment of any vehicle is a hazardous area to
work in. Always read and heed all WARNINGS =>
page 212, "Engine
compartment"=> &.
• It is best to ask your authorized Audi dealer whenever you need
to change a bulb. •
Do-it-yourself service