2008 AUDI TT ROADSTER stop start
[x] Cancel search: stop startPage 43 of 316

Switchin g bet w ee n m enu l ev els
- Tap the Rest button ® briefly to reach the various menu
levels one after the other ("Computer 1 ", "Computer 2",
"Navigation system"* and "Start menu") .
Rese ttin g th e fun ction to z ero
- Select the desired function.
- Push the reset button ® for at least two seco nds .
The trip computer only operates when the ignition is on. When you
turn on the ignition, the function that was in use when you last
turned the ignition off will be displayed .
In addition to the trip computer information (memory level 1 or 2)
and navigation information can be displayed. To switch the display
between the different systems, tap the Reset button
@ briefly .
You can reset the following va lues to zero using the reset button:
• driving time
• average mileage
• average speed
In addition,
a ll the values in the single -trip or the total-trip memory
can be de leted simu ltaneously .
[ i ] Tips
• If you hold down the reset button for longer than 2 seconds, the
current value (for example, average fuel consumption) will be reset
to zero .
• Malfunction displays in Auto -Check Control are shown even with
the display switched off.
• All stored values will be lost if the vehicle battery is
disconnected. •
Controls and equip
ment
Dri ver infor mat io n sy ste m
Tire pressure monitoring system
General notes
As an added safety feature, your vehicle has been equipped with a
tire pressure monitoring system (TPMS) that illuminates a low tire
pressure telltale when one or more of your tires is significant ly
under -inflated. The TPMS only provides a low tire pressure warning
and does not reinflate your tires.
Accordingly, when the low tire pressure tellta le illuminates, you
should stop and check your tires as soon as possib le, and inflate
them to the proper pressure. Driving on a significantly under
inflated t ire causes the tire to overheat and can lead to tire failure .
Under -inflation a lso reduces fuel efficiency and tire tread l ife, and
may affect the vehicle's handling and stopping ability.
(D Note
• Please note that the TPMS is not a substitute for proper tire
maintenance, and it is the driver's respons ib ility to maintain correct
tire pressure, even if under -inflation has not reached the level to
trigger illumination of the TPMS low tire pressure telltale .
• Each tire, including the spare, should be checked monthly when
cold and inflated to the inflat ion pressure recommended by the
vehic le manufacturer on the vehicle p lacard or tire inflation pres
s u re label. (If your vehicle has tires of a different size than the size
indicated on the vehicle placard or tire inflation pressure labe l, you
should determine the proper tire inflation pressure for those
tires.) •
TPMS malfunction indicator
Your vehic le has a lso been equipped with a TPMS malfunction indi
cator to indicate when the system is not operating proper ly . The
TPMS malfunction indicator is combined with the low tire pressure _.,
I • •
Page 44 of 316

Driver inf orm atio n syst em
telltale. When the system detects a malfunction, the telltale will
flash for approximately one minute and then remain continuously
illuminated. This sequence will continue upon subsequent vehicle
starts up as long as the malfunction exists .
When the ma lfunction indicator is illuminated, the system may not
be able to detect or signal low tire pressure as intended.
TPMS malfunctions may occur for a variety of reasons, including the installation of replacement or alternate tires or wheels on the
vehicle that prevent the TPMS from functioning properly. A lways
check the TPMS malfunction tellta le after replacing one or more
tires or whee ls on your vehicle to ensure that the replacement or
a lternate tires and wheels al low the TPMS to continue to function
proper ly .•
Introduction
The tire pressure monitoring system monitors air pressure
in all four road wheels while the vehicle is moving.
As soon as the t ire pressure monitoring system senses a s ignificant
loss of air pressure in one or several tires, text messages and yel low
symbo ls appear in the instrument cluster display to a lert the driver.
The warning light in the instrument c luster comes on when the
tire is significantly underinflated
=> page 17.
The warning light
malfunction . also
illuminates in the case of a system
Be aware that tire pressure is also dependent on the temperature of
the tire . For every 18 °F (10 °C) increase in tire temperature, tire pres
sure increases by about 1 .5 psi (0. 1 bar) . The tire warms up while the
vehic le is moving and tire pressure rises. So you should adjust tire
pressure on ly when they are
cold , when the temperature of the tires
is roughly the same as the ambient air temperature.
In order to keep the tire pressure monitoring system properly ca li
brated, tire pressure on all four tires should be checked at regular intervals, adjusted if necessary and saved in the proper setting
(recommended
pressure)=>
page 44.
The tire pressure is shown on the label located on the driver 's side
B -pillar (visible when the door is open) .
& WARNING
• When the tire pre ssure monitor ing system warn ing light i s lit ,
one or more of your t ir es is s ignificantl y unde r-inflated . You should
s top and check your tire s as s oon as po ssible , and inflate them to
the p rope r pre ss ure as indi cated on th e vehicl e's tire pr essure
label
=> pag e 242. Driv ing on a s ignific antl y un der-inflated t ire
c a use s the tire to overhe at and can le ad to tire fa ilure. Unde r-inf la
ti on also i s lik el y to impair the vehicle' s handling and stopping
ability .
• Do not adju st t ir e pressur e wh en t ire t emp erature is exce ssiv e.
Thi s could le ad to seriou s tire dam age and even cau se the tire t o
bur st, w ith the addition al dan ger of an accident.
W For the sake of the environment
Driving with under -inflated tires reduces fuel efficiency and tire
tread life.
[ i ] Tips
• Each tire should be checked month ly when the temperature of
the tires is abou t the same as ambient air temperature and s et to the
recommended inflation pressure as specified on the tire pressure
label =>
page 242.
• The factory supplied spare whee l is equipped with a se nsor for
the tire pressure monitoring sys tem. As long as the spare wheel is
n ot mounted, the tire pressure of this tire wil l not be monitored.
• T he tire pressure monitoring system he lps the driver to keep an
eye on tire pressures . But the driver still has the responsibility f or
maintaining the correct tire pressure . .,_
Page 60 of 316

Opening and closing
Opening the windows
- Press the switch and hold it down until the window has
reached the desired position.
- Press the switch
briefly to open the window automati
cally. By briefly pressing the switch again, the downward
travel of the window can be stopped in any position
=> & .
Closing the windows
- Pull the switch and hold it until the window has reached
the desired position.
- Pull the switch
briefly to close the window automatically.
By briefly pressing the switch again, the upward travel of
the window can be stopped in any position => & .
Switch @:::::, page 57, fig. 44 operates the window in the driver's
door.
Switch @ operates the window in the front passenger's door.
& WARNING
• Do not leave children unattended in the vehicle, especially with
access to vehicle keys. Unsupervised use of the keys can result in
starting of the engine and use of vehicle systems such as power
windows, etc. which could result in serious injury.
• Remember -you can still open or close the power windows for
about ten minutes after the ignition is switched off. Only when
either of the front doors are opened are the power windows
switched off.
• Be careful when closing the windows. Check to see that no one
is in the way, or serious injury could result!
• Always remove the ignition key whenever you leave your
vehicle.
& WARNING (continued)
• If you lock your vehicle from the outside, no one, especially chil
dren, should remain in the vehicle.
• Do not stick anything on the windows or the windshield that
may interfere with the driver's field of vision.
[ i] Tips
• When the doors are opened, the windows are automatically
lowered 10 mm.
• The windows can still be opened and closed for about ten
minutes after the ignition has been turned off. The power windows
are not shut off until one of the front doors is opened .•
Convenience close /open feature
You can close or open the windows from outside when
you lock or unlock your car with the key.
Closing the windows
Fig. 46 Key turns for
opening and closing
- Insert the key into the lock of the driver's door.
- Make sure that the windows are not blocked=>& .
Page 71 of 316

Clear vision
Lights
Switching the headlights on and off ·'t!-·
Fig. 6 1 Ins trum ent
p ane l: lig ht sw itch
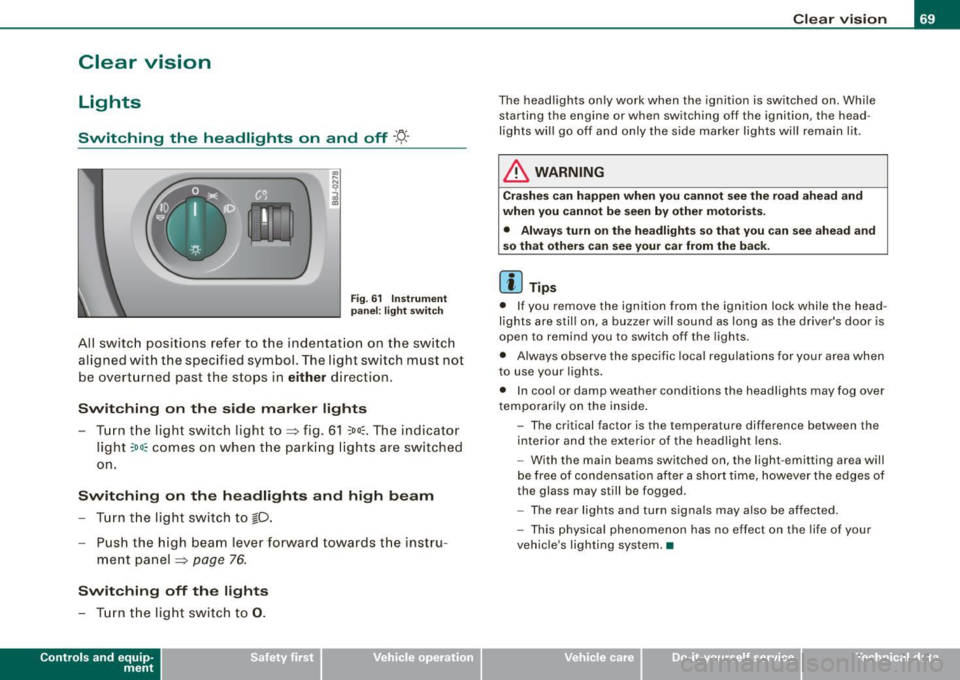
All sw itc h positions refer to the indentat ion on the switch
aligned with the specified symbol. The light switch must not
be overturned past the stops in
either direction .
Switching on the side marker lights
-Tur n t he light switch ligh t to ==> fig. 61 ;oo; . The indi ca tor
light
; oo ~ comes o n when t he park ing lig hts are sw itched
on .
Switching on the headlights and high beam
- Turn t he light switch to lD.
- Push the high beam leve r fo rward towards t he instru -
ment panel ==> page
76.
Switching off the lights
-Tur n t he lig ht switch to 0 .
Con tro ls and eq uip
ment
Clear vision
The headlights only work when the ignition is switched on . While
starting the engine or when switching off the ignition, the head
lights will go off and only the side marker lights will remain lit .
& WARNING
Crashe s can happen when you cannot see the road ahead and
when you c annot be seen by other motori sts.
• Always tu rn on the headlight s so th at you can see ahead and
so that others can see your ca r from the ba ck.
[ i ] Tips
• I f you remove the ignition from the ignition lock wh ile the head
lights are still on, a buzzer will sound as long as the driver's doo r is
open to remind you to switch off the lights .
• Always observe the spec ific local regulations for your area when
to use your lights .
• I n coo l or damp weather conditions the headlights may fog over
tempo ra rily on the inside .
- The critical factor is the t emperature diff erence between the
interior and the ex te rior of the headlight lens .
- With the main beams switched on, the light -emitting area will
be free o f condensation after a short time, however the edges of
the glass may still be fogged .
- The rear lights and turn signa ls may also be affected.
- This physical phenomenon has no effect on the life of your
vehicle 's lighting system. •
Vehicle care I I irechnical data
Page 80 of 316

Clear vision
Wiper and washer system
Windshield wiper ~
The windshield wiper lever controls both the windshield
wipers and the washer system.
Fig. 72 Wiper lever:
windshield wiper lever
positions
T he windshield wiper lever :::::> fig. 72 has the following posi
tions:
One -touch wiping
Move the lever to position G), when you want to wipe the
windshield
briefly.
Intermittent wiping ~ l (activating rain sensor)*
Move the lever up to position 0-
- Move the interval set switch@, to change the inter vals .
Low wiper speed
-Move the lever up to position ©-
High wiper speed
- Move the lever up to position @.
Automatic wiper/washer
- Pull the lever to position© (toward the steering wheel)
and hold.
- Re lease the lever . The washer stops and the wipers keep
going for about four seconds .
Turning off the wipers
-Move the lever back to position @.
The windshield wipers and washer only work when the ignition is
turned on. If you switch off the ignition with th e windshield wiper
lever still in the interval wipe position and then come back a while
later and drive off, the rain sensor will reactivate itse lf after the
vehic le speed has exceeded 4 mph (6 km/h).
The rain sensor* is only activated with the wiper lever set to posi
tion
G) . When it starts to rain, the rain sensor will automatically acti
vate the intermittent wiping mode.
To reduce the sensitivity of the sensor , move switch
@ down . To
increase the sensitivity , move the switch up. The higher you adjust
the sensi tivity, the faster the sensor will react when it senses mois
ture on the windshield. The pauses between wiper turns depend not
only on the sensitivity setting , but on the vehicle speed as well.
During brief stops , e.g. at a r ed light, wiper mot ion wil l automati
cally be reduced to the next lower speed. Wipers a lready turning at
low speed . change to intermittent wip ing.
When the igni tion is turned on, the washer jets are heated.
& WARNING
• Wiper blades are crucial for safe driving! Only when they are in
good condition are they able to clear the windows properly to
provide uncompromising visibility. Worn or damaged wiper blades
are a safety hazard~
page 81 , "Replacing front wiper blades"! ..,_
Page 109 of 316

___________________________________________________ O _n_ t_h _ e_ r_ o _ a_ d __ ,n
Starting and stopping the engine
Starting the engine
The engine can only be started with on original Audi key
and the clutch pedal* depressed.
- Set the parking brake.
Move the selector lever to the neutral position (automatic
transmission: selector lever in P or N)
~ & .
- On vehicles with manual transmission, fully depress the
clutch pedal.
- Turn the ignition key to position
G) ~ page 106, fig. 101
- do not depress the gas pedal when starting the engine!
- Let go of the key as soon as the engine starts.
A cold engine may at first be loud after it has been started. This is
due to the hydraulic valves building up the oil pressure . This normal
and no need for concern.
If the engine does not star t immediately, stop trying after 10
seconds and then try to restart the engine about 30 seconds later.
& WARNING
Never start or let the engine run in a confined or enclosed area.
Exhaust fumes from the engine contain carbon monoxide, a color
less and odorless gas. Carbon monoxide can be fatal if inhaled .
• Never leave the engine idling unattended. An unattended
vehicle with a running engine poses a danger of personal injury or
theft.
Controls and equip
ment
0 Note
• Avoid high engine speeds, fast acceleration or heavy engine
loads while the engine is still cold. This could damage the engine.
• The engine cannot be started by pushing o r towing the vehicle.
~ For the sake of the environment
To avoid unnecessary engine wear and to reduce exhaust emis
sions, do not let your vehicle stand and warm up. Be ready to drive
off immediately after starting your vehicle. Maintain moderate
speed until the engine is completely warm. Remember, the engine
performs best at operating temperature. •
Stopping the engine
-Turn the ignition key to position G) ~ page 106 , fig. 101.
& WARNING
• Never turn off the engine until the vehicle has come to a
complete stop.
• The brake booster and servotronic only work when the engine
is running . With the ignition turned off, you have to apply more
force when steering or braking. Since you cannot steer and stop
normally, this can lead to accidents and serious injuries.
• The radiator fan can continue to run for up to 10 minutes even
after you have turned off the engine and removed the ignition key.
The radiator fan can also turn on again if the engine coolant heats
up because of intense sunlight or heat build-up in the engine
compartment. .,
I • •
Page 111 of 316

_________________________________________________ O .=.:.n.:....: t~h :.::e ::....:.. r.::o :.::a :.:d::...__lfflll
- Wit h a manual transm issi on, engage 1st gea r, or with a n
a utomatic transmission place the se lector lever in P
=> & .
- Remove the ignition key from the ignit io n lock.
Wha t el se you should do wh en parking yo ur v ehi cle on
a n incli ne or d ecline
Turn the steering whee l so that if the vehicle shou ld start to rol l, it
wi ll roll into the curb.
I f you are park ing on a
decline (the front of you r ve hicle facing
downhill) , turn the front wheels to the right so that they poin t
toward the curb .
If you are park ing on an in cline (the font of your vehicle facing
uphill!, turn the front whe els to the left so that they point
away from
the curb .
& WARNING
This is how you can reduce the ri sk of injury when le avi ng your
vehicle .
• Never p ark the vehi cle w here it can come
in cont act w ith dry
gra ss, s pilled fuel or any other flammable mater ial s.
• Never allow anyone -espe cially small ch ildren -to remain
in the
vehicle when it is locked . Locked doors make it more difficult for
re scu ers to ac ce ss the pa ssenger compartment in the e vent of an
emergency . Danger to life!
• Never lea ve childr en un super vis ed in the vehicle . Children
c ould release the parking brake or move the gearsh ift l ever out of
gear . The vehicle could start to r oll away a nd cau se an a ccident .
• No matter what the season i s, the temperature
in a parked
v ehi cle can reach dangerou s level s. •
Controls and equip
ment
Acoustic parking system
A pplies to veh ic les : wit h 4 -ch anne l a cou stic park ass is t
Rear acoustic park assist
Acoustic park assist gives a warning a bout o bstacles
behind the vehicle.
Description
The rear acoustic park assist (4 -channel acoustic park assist) deter
mines the d istance of the vehic le from an obstac le using u ltrasonic
sensors. The sensors are in the rear bumper. The volume and the
pitch of the chimes can be adjusted through the menu display
=> page 27.
The range at which the sensors start to m easure is about :
To the side
Center rear
Acti v atio n
2 feet (0 .60 m)
5 feet (1.60 ml
The pa rking assist is activated when rever se ge ar is engaged . A brief
tone confirms that the system is activated .
Backing up
Distance warning when backing up starts when an obstacle is
detec ted in the range of the park ass ist system . As the distance
decreases, the time interval between the aud ible tones becomes
shorter .
When the distance is less than 1 foot (0.30 m) , the tone becomes
continuous . At this point you should stop backing up.
Please note that low objects a lready signalled by a warning can
disappear from the sys tem's detection range and wil l not continue
t o be signa lled . ..,
I • •
Page 115 of 316

Transmi ssion -_______________ ___.
Transmission
Manual transmission
Applies to vehicles: with manual transmission
Gearshift lever
The clutch pedal must be depressed all the way before
you can start the engine .
The manual transmission in your Audi is equipped with a n
interlock-feature.
-Depress the clutch pedal all the way.
- Start the eng ine with t he gearshift
lever i n Neutra l and
the clutch pedal depressed .
0 Note
Always depress the clutch pedal fully when changing gears. Do not
hold the vehicle on a hi ll with the c lutch pedal partially depressed .
This may cause premature clutch wear or damage .
[ i J Tip s
• Resting your hand on the gearshift lever knob while driving will
cause premature wear in the transmission .
• T he back -up lights go on when you shift into Reverse with the
ignition on .•
Con tro ls and eq uip
ment
App lies to vehicles: with manual transm ission
Gearshift pattern (6-speed manual
transmission )
Engaging reverse gear (R)
Fi g. 106 G ear sh ift
patt ern : 6-s peed
manual tr an sm iss ion
Move the shift lever all the way to t he left, press it dow n,
then pus h it forward .
Especially after driving forward, stop the vehic le completely, shift
into
Neutral and rest the shift lever briefly in Neutral before shifting
into
Reverse. •
S tronic transmission
Applies to vehic les: w ith S tronic®
Introduction
Your vehicle is equipped with a S tronic transmission, also called a
double -c lu tch system/transmission .
Power is transferred between the engine and the transmission by
means of two independent clutches. They replace the torque
tJ,,,
Vehicle care I I irechnical data