2008 AUDI A4 ECO mode
[x] Cancel search: ECO modePage 182 of 342
HomeLink 180
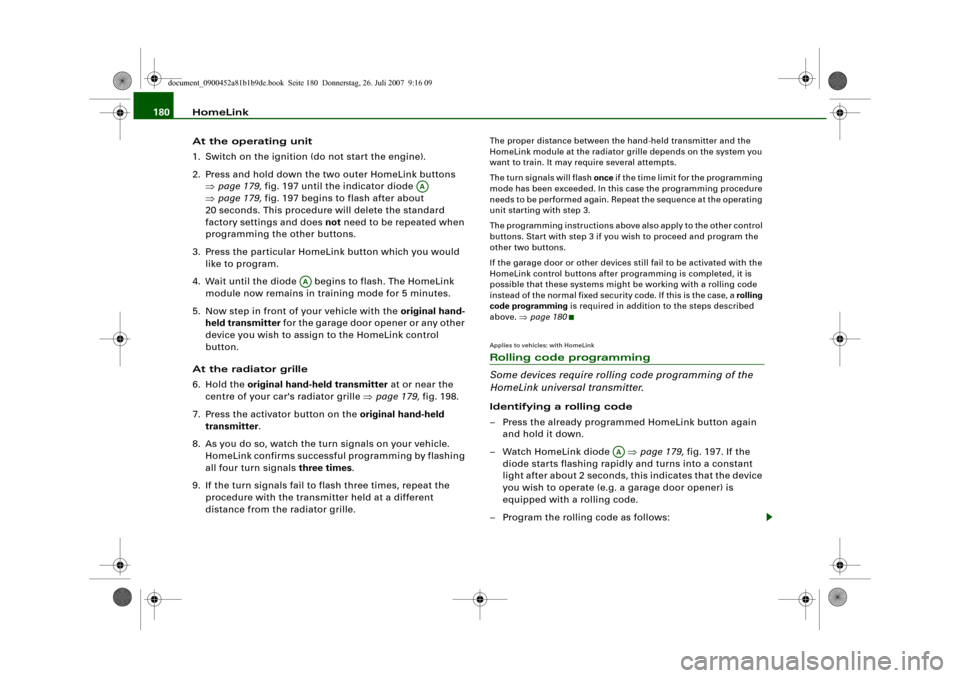
At the operating unit
1. Switch on the ignition (do not start the engine).
2. Press and hold down the two outer HomeLink buttons
⇒page 179, fig. 197 until the indicator diode
⇒page 179, fig. 197 begins to flash after about
20 seconds. This procedure will delete the standard
factory settings and does not need to be repeated when
programming the other buttons.
3. Press the particular HomeLink button which you would
like to program.
4. Wait until the diode begins to flash. The HomeLink
module now remains in training mode for 5 minutes.
5. Now step in front of your vehicle with the original hand-
held transmitter for the garage door opener or any other
device you wish to assign to the HomeLink control
button.
At the radiator grille
6. Hold the original hand-held transmitter at or near the
centre of your car's radiator grille ⇒page 179, fig. 198.
7. Press the activator button on the original hand-held
transmitter.
8. As you do so, watch the turn signals on your vehicle.
HomeLink confirms successful programming by flashing
all four turn signals three times.
9. If the turn signals fail to flash three times, repeat the
procedure with the transmitter held at a different
distance from the radiator grille.
The proper distance between the hand-held transmitter and the
HomeLink module at the radiator grille depends on the system you
want to train. It may require several attempts.
The turn signals will flash once if the time limit for the programming
mode has been exceeded. In this case the programming procedure
needs to be performed again. Repeat the sequence at the operating
unit starting with step 3.
The programming instructions above also apply to the other control
buttons. Start with step 3 if you wish to proceed and program the
other two buttons.
If the garage door or other devices still fail to be activated with the
HomeLink control buttons after programming is completed, it is
possible that these systems might be working with a rolling code
instead of the normal fixed security code. If this is the case, a rolling
code programming is required in addition to the steps described
above. ⇒page 180Applies to vehicles: with HomeLinkRolling code programming
Some devices require rolling code programming of the
HomeLink universal transmitter.Identifying a rolling code
– Press the already programmed HomeLink button again
and hold it down.
–Watch HomeLink diode ⇒page 179, fig. 197. If the
diode starts flashing rapidly and turns into a constant
light after about 2 seconds, this indicates that the device
you wish to operate (e.g. a garage door opener) is
equipped with a rolling code.
– Program the rolling code as follows:
AA
AA
AA
document_0900452a81b1b9de.book Seite 180 Donnerstag, 26. Juli 2007 9:16 09
Page 183 of 342
HomeLink181
Controls
Safety
Driving tips
General maintenance
Self-help
Technical data
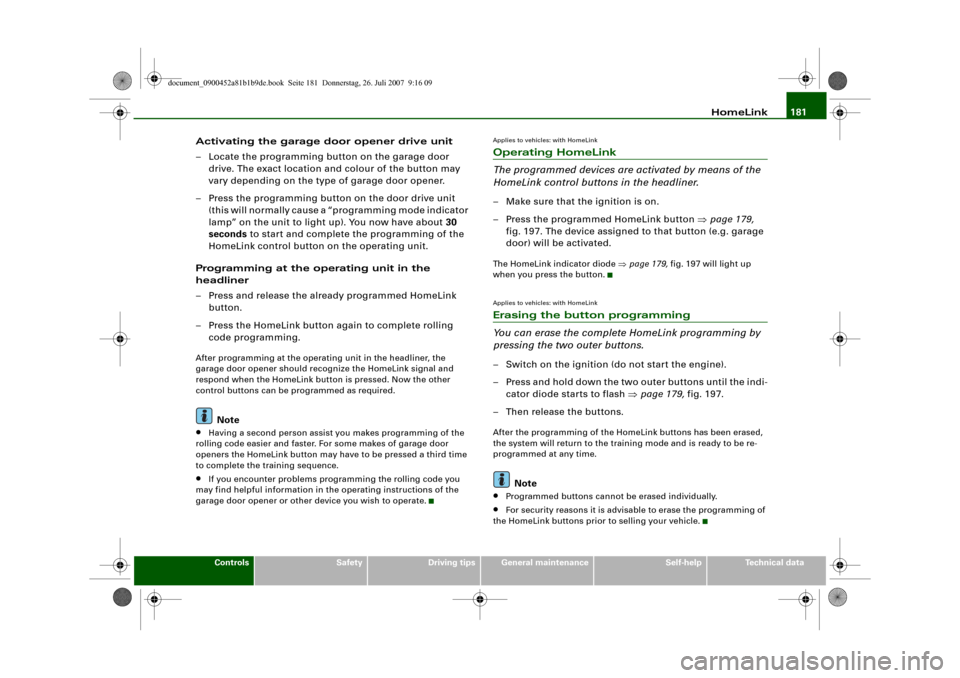
Activating the garage door opener drive unit
– Locate the programming button on the garage door
drive. The exact location and colour of the button may
vary depending on the type of garage door opener.
– Press the programming button on the door drive unit
(this will normally cause a “programming mode indicator
lamp” on the unit to light up). You now have about 30
seconds to start and complete the programming of the
HomeLink control button on the operating unit.
Programming at the operating unit in the
headliner
– Press and release the already programmed HomeLink
button.
– Press the HomeLink button again to complete rolling
code programming.After programming at the operating unit in the headliner, the
garage door opener should recognize the HomeLink signal and
respond when the HomeLink button is pressed. Now the other
control buttons can be programmed as required.
Note
•
Having a second person assist you makes programming of the
rolling code easier and faster. For some makes of garage door
openers the HomeLink button may have to be pressed a third time
to complete the training sequence.
•
If you encounter problems programming the rolling code you
may find helpful information in the operating instructions of the
garage door opener or other device you wish to operate.
Applies to vehicles: with HomeLinkOperating HomeLink
The programmed devices are activated by means of the
HomeLink control buttons in the headliner.– Make sure that the ignition is on.
– Press the programmed HomeLink button ⇒page 179,
fig. 197. The device assigned to that button (e.g. garage
door) will be activated.The HomeLink indicator diode ⇒page 179, fig. 197 will light up
when you press the button.Applies to vehicles: with HomeLinkErasing the button programming
You can erase the complete HomeLink programming by
pressing the two outer buttons.– Switch on the ignition (do not start the engine).
– Press and hold down the two outer buttons until the indi-
cator diode starts to flash ⇒page 179, fig. 197.
– Then release the buttons.After the programming of the HomeLink buttons has been erased,
the system will return to the training mode and is ready to be re-
programmed at any time.
Note
•
Programmed buttons cannot be erased individually.
•
For security reasons it is advisable to erase the programming of
the HomeLink buttons prior to selling your vehicle.
document_0900452a81b1b9de.book Seite 181 Donnerstag, 26. Juli 2007 9:16 09
Page 218 of 342
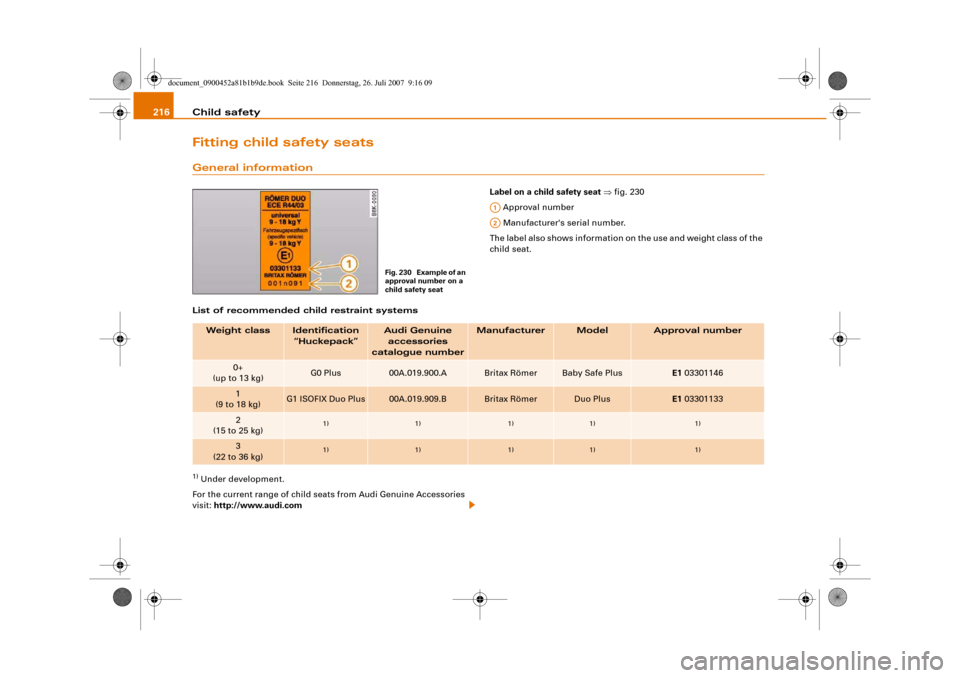
Child safety 216Fitting child safety seatsGeneral information
Label on a child safety seat ⇒fig. 230
Approval number
Manufacturer's serial number.
The label also shows information on the use and weight class of the
child seat.
List of recommended child restraint systems
1) Under development.
For the current range of child seats from Audi Genuine Accessories
visit: http://www.audi.com
Fig. 230 Example of an
approval number on a
child safety seat
A1A2
Weight class
Identification
“Huckepack”
Audi Genuine
accessories
catalogue number
Manufacturer
Model
Approval number
0+
(up to 13 kg)
G0 Plus
00A.019.900.A
Britax Römer
Baby Safe Plus
E1 03301146
1
(9 to 18 kg)
G1 ISOFIX Duo Plus
00A.019.909.B
Britax Römer
Duo Plus
E1 03301133
2
(15 to 25 kg)
1)
1)
1)
1)
1)
3
(22 to 36 kg)
1)
1)
1)
1)
1)
document_0900452a81b1b9de.book Seite 216 Donnerstag, 26. Juli 2007 9:16 09
Page 219 of 342
Child safety217
Controls
Safety
Driving tips
General maintenance
Self-help
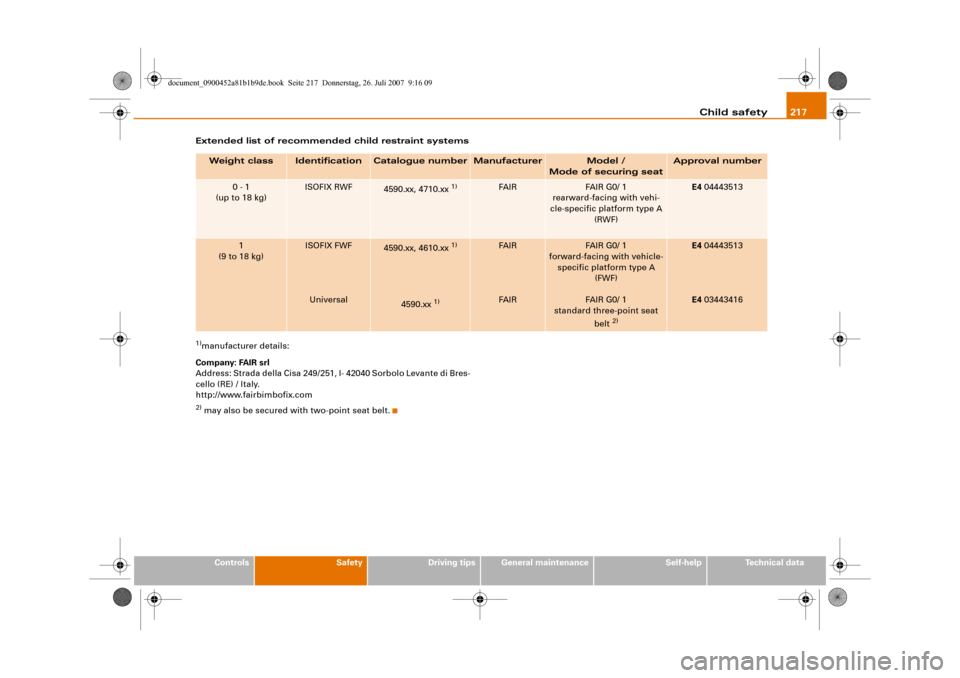
Technical data Extended list of recommended child restraint systems
1)manufacturer details:
Company: FAIR srl
Address: Strada della Cisa 249/251, I- 42040 Sorbolo Levante di Bres-
cello (RE) / Italy.
http://www.fairbimbofix.com2) may also be secured with two-point seat belt.Weight class
Identification
Catalogue number
Manufacturer
Model /
Mode of securing seat
Approval number
0 - 1
(up to 18 kg)
ISOFIX RWF
4590.xx, 4710.xx
1)
FAIR
FAIR G0/ 1
rearward-facing with vehi-
cle-specific platform type A
(RWF)
E4 04443513
1
(9 to 18 kg)
ISOFIX FWF
Universal
4590.xx, 4610.xx
1)
4590.xx
1)
FAIR
FAIR
FAIR G0/ 1
forward-facing with vehicle-
specific platform type A
(FWF)
FAIR G0/ 1
standard three-point seat
belt
2)
E4 04443513
E4 03443416
document_0900452a81b1b9de.book Seite 217 Donnerstag, 26. Juli 2007 9:16 09
Page 228 of 342
Intelligent technology 226Applies to vehicles: with four-wheel driveFour-wheel drive (quattro
®)
On quattro models the engine power is distributed to all
four wheelsGeneral notes
On four-wheel drive vehicles, the engine power is distributed to all
four wheels. The distribution of power is controlled automatically
according to your driving style and the road conditions. Also refer
to ⇒page 222, “Description”.
The four-wheel drive is specially designed to complement the supe-
rior engine power of your Audi. This combination gives the car
exceptional handling and performance capabilities – both on
normal roads and in more difficult conditions, such as snow and ice.
Even so (or perhaps especially for this reason), it is important to
observe certain safety points ⇒.
Winter tyres
Thanks to its four-wheel drive, your car will have plenty of traction
in winter conditions, even with the standard tyres. Nevertheless, we
still recommend that winter tyres or all-season tyres should be fitted
on all four wheels when winter road conditions are expected, mainly
because this will give a better braking response.
Snow chains
On roads where snow chains are mandatory, this also applies to cars
with four-wheel drive ⇒page 273, “Snow chains”.
Replacing tyres
On vehicles with four-wheel drive, all four tyres must have the same
rolling circumference. Also avoid using tyres with varying tread
depths ⇒page 270, “Replacing wheels and tyres”.Off-roader?
Your Audi does not have enough ground clearance to be used as an
off-road vehicle. It is therefore best to avoid rough tracks and
uneven terrain as much as possible.
WARNING
•
Even with four-wheel drive, you should always adjust your
speed to suit the conditions. Do not let the extra safety provided
tempt you into taking any risks when driving – this can cause acci-
dents.
•
The braking ability of your car is limited by the grip of the tyres.
In this respect, your car is no different from a car without four-
wheel drive. So do not be tempted to drive too fast on icy or slip-
pery roads just because the car still has good acceleration in these
conditions (accident risk).
•
On wet roads bear in mind that the front wheels may start to
“aquaplane” and lose contact with the road if the car is driven too
fast. If this should happen, there will be no sudden increase in
engine speed to warn the driver, as with a front-wheel drive car. So
do not drive too fast in the wet: adjust your speed to suit the
conditions (accident risk).
Power managementThis system helps to ensure reliable starting
The power management controls the distribution of elec-
trical energy and thus helps to ensure that there is always
enough power available to start the engine.If a vehicle with a conventional electrical system is left parked for a
long time, the battery will gradually lose its charge because certain
electrical equipment (such as the immobiliser) continues to draw
document_0900452a81b1b9de.book Seite 226 Donnerstag, 26. Juli 2007 9:16 09
Page 231 of 342
Your vehicle and the environment229
Controls
Safety
Driving tips
General maintenance
Self-help
Technical data
Your vehicle and the environmentRunning inA new vehicle should be run in over a distance of 1,500 km. For the
first 1,000 km the engine speed should not exceed 2/3 of the
maximum permissible engine speed – do not use full throttle and do
not tow a trailer or caravan. From 1,000 to 1,500 km you can gradu-
ally increase the engine rpm and road speed.
During its first few hours of running, the internal friction in the
engine is greater than later on when all the moving parts have
bedded down.
How the vehicle is driven for the first 1,500 km also influences the
engine quality. After the first 1,500 km you should continue driving
at moderate engine speeds, in particular when the engine is cold.
This helps to reduce wear and tear on the engine and increases the
potential mileage which can be covered by the engine.
You should also avoid driving with the engine speed too low.
Change down to a lower gear when the engine no longer runs
“smoothly”. Excessively high engine speeds are prevented by an
automatic rev limiter.Emission control systemsCatalytic converter
Applies to vehicles with petrol engine: The vehicle must only be
used with unleaded petrol, otherwise the catalytic converter will be
destroyed.
Never run the tank completely dry. The irregular fuel supply can
cause misfiring, which would allow unburnt fuel to enter the
exhaust system, which could cause overheating and damage the
catalytic converter.Diesel particulate filter
Applies to vehicles with diesel engine: The diesel particulate filter
can filter out almost all soot particles contained in the exhaust gas.
In normal driving conditions the filter is self-cleaning. Should the
self-cleaning function of the filter not be able to operate, e.g. when
the vehicle is continuously used only for short trips, the filter
becomes obstructed with soot and the symbol
for the diesel
particulate filter lights up ⇒page 38.
WARNING
•
Because of the high temperatures which can occur in the emis-
sion control system (catalytic converter or diesel particulate
filter), do not park the vehicle where the exhaust can come into
contact with flammable materials under the car (e.g. on grass or
at the forest edge). - Fire hazard!
•
Do not apply any underseal agents in the area around the
exhaust system - fire hazard!
How to improve economy and minimise pollutionFuel economy, environmental impact and wear on the engine,
brakes and tyres depend largely on the way you drive the vehicle. By
adopting an economical driving style and anticipating the traffic
situation ahead, you can reduce fuel consumption by 10-15%. The
following section gives you some tips on lessening the impact on
the environment and reducing your operating costs at the same
time.
document_0900452a81b1b9de.book Seite 229 Donnerstag, 26. Juli 2007 9:16 09
Page 232 of 342
Your vehicle and the environment 230Anticipate well in advance
A car uses most fuel when accelerating. If you anticipate hazards
and speed changes well in advance, you will need to brake less and
thus accelerate less. Wherever possible, let the car slow down grad-
ually with a gear engaged, for instance when you can see that the
next traffic lights are red. This takes advantage of the engine
braking effect, reducing wear on the brakes and tyres. Emissions
and fuel consumption will drop to zero due to the overrun fuel cut-
off.
Change gear early to save fuel
An effective way of saving fuel is to change up quickly through the
gears. Running the engine at high rpm in the lower gears uses an
unnecessary amount of fuel.
Manual gearbox: Shift up to second gear as soon as possible. If
possible, we recommend shifting up to the next gear at approx.
2,000 rpm.
Automatic gearbox: Press the accelerator slowly and avoid using
the “kick-down” feature.
Avoid driving at high speed
Avoid travelling at top speed. Fuel consumption, exhaust emissions
and noise levels all increase very rapidly at higher speeds. Driving at
moderate speeds will help to save fuel.
Do not let the engine idle for longer than necessary
It is worthwhile switching off the engine when waiting in a traffic
jam, at level crossings or at traffic lights with a long red phase. The
fuel saved after only 30 - 40 seconds is greater than the amount of
fuel needed to restart the engine.
The engine takes a very long time to warm up when it is running at
idling speed. Mechanical wear and pollutant emissions are also
especially high during this initial warm-up phase. It is therefore best
to drive off immediately after starting the engine. Avoid running the
engine at high speed.Regular servicing
Regular servicing can establish a basis for good fuel economy
before you start driving. A well-serviced engine gives you the
benefit of improved fuel efficiency as well as maximum reliability
and an enhanced resale value. A badly tuned engine can consume
up to ten percent more fuel than necessary.
Avoid short trips
The engine and emission control system need to reach their proper
working temperature in order to minimise fuel consumption and
emissions.
A cold engine uses disproportionately more fuel. The engine only
reaches its working temperature after about four kilometres, when
fuel consumption will return to a normal level. This is the reason
why we recommend avoiding short trips wherever possible.
Maintain the correct tyre pressures
Always make sure the tyres are inflated to the correct pressures
⇒page 268 to save fuel. If the tyre pressures are just 0.5 bar too low,
this can increase the fuel consumption by as much as 5 %. Due to
the greater rolling resistance, under-inflation also increases tyre
wear and impairs handling.
Do not use winter tyres all through the year; they will increase fuel
consumption by up to 10 %.
Avoid carrying unnecessary loads
Every kilo of extra weight will increase the fuel consumption, so it is
worth checking the luggage compartment occasionally to make
sure that no unnecessary loads are being transported.
A roof carrier is often left in place for the sake of convenience, even
when it is no longer needed. At a speed of 100-120 km/h your car will
use about 12 % more fuel as a result of the extra wind resistance
caused by the roof carrier - even when it is empty.
document_0900452a81b1b9de.book Seite 230 Donnerstag, 26. Juli 2007 9:16 09
Page 253 of 342
Fuel and filling the tank251
Controls
Safety
Driving tips
General maintenance
Self-help
Technical data
Fuel and filling the tankPetrolApplies to vehicles: with petrol enginePetrol grade
The correct grade of petrol is listed inside the fuel tank
flap.The vehicle is equipped with a catalytic converter and must only be
run on unleaded petrol. Unleaded petrol must comply with the
European EN 228 standard. The petrol grades have different octane
ratings (RON). If, in exceptional circumstances, the correct octane
rating is not available, please note the following:•
For engines which require Premium unleaded petrol (95 RON)
according to ⇒page 323, “Performance, weights and dimensions”:
Regular unleaded fuel with 91 RON can also be used. This will,
however, result in a slight loss of power.
•
For engines which require Super Plus unleaded petrol (98 RON)
according to ⇒page 323, “Performance, weights and dimensions”:
Premium unleaded fuel with 95 RON can also be used. This can,
however, result in a slight loss of power under certain driving condi-
tions. – If premium unleaded petrol is not available, the engine can
be run on regular unleaded petrol with 91 RON as an emergency
measure. In this case only use moderate engine speeds and a light
throttle. Fill up with premium or Super Plus petrol as soon as
possible.Caution
•
Petrol complying with the EN 228 standard can contain small
quantities of ethanol. However, “bioethanol fuels”, which are
retailed under various different names such as E50 and E85, and
which contain a large proportion of ethanol, must not be put into
the vehicle, as this would damage the fuel system.
•
Even one tankful of leaded fuel would permanently impair the
efficiency of the catalytic converter.
•
High engine speed and full throttle can damage the engine when
using petrol with an octane rating lower than the correct grade for
the engine.
DieselApplies to vehicles: with diesel engineDiesel fuel
Please note the information on the inside of the fuel tank
flap.Diesel fuel must comply with the European EN 590 standard. It must
have a cetane number (CN) of at least 51. The cetane number indi-
cates the ignition quality of the diesel fuel.
Winter-grade diesel
Diesel fuel can thicken in winter. For this reason petrol stations in
some countries also offer winter diesel.
Caution
•
The vehicle is not designed for the use of biodiesel (FAME fuel).
The fuel system would be damaged if you used biodiesel.
•
Do not mix fuel additives (“thinners”, petrol or similar additives)
with the diesel fuel.
•
If poor-quality diesel fuel is used, it may be necessary to drain
the water separator on the fuel filter more frequently than is speci-
fied in the Service Schedule. We recommend having this done by a
specialist workshop. If water is allowed to collect in the filter, this
can cause engine performance problems.
document_0900452a81b1b9de.book Seite 251 Donnerstag, 26. Juli 2007 9:16 09