2008 AUDI A4 Position sensor
[x] Cancel search: Position sensorPage 39 of 342
Driver information system37
Controls
Safety
Driving tips
General maintenance
Self-help
Technical data
Light sensor / rain sensor defective
Automatic headlights / automatic wipers defective
If the symbol appears, this means that the light sensor / rain
sensor is not functioning.For safety reasons, the dipped beam head-
lights will then be switched on permanently when the light switch
is set to the AUTO position. However, you can still switch the lights
on and off in the normal way with the light switch. If the rain sensor
is defective, the functions operated via the windscreen wiper lever
will still be available. You should have the light sensor / rain sensor
checked by a qualified workshop as soon as possible.
Brake pads worn
Brake pads!
If the symbol lights up, have the front brake pads (and, for
safety's sake the rear pads as well) inspected by a qualified
workshop.
Applies to vehicles: with bulb monitorBulb monitor
The bulb monitor checks whether the lights on the vehicle
are working.The bulb monitor checks whether the lights on the vehicle are
working. If it detects a defective bulb on the vehicle it will show a
yellow warning symbol together with a message indicating which
light is not working.
Bulb failure
If the symbol
lights up, this means that one of the turn signals
(front or rear), headlights, brake lights, rear lights, fog lights or the
rear fog light is not working.
WARNING
•
Bulbs are sensitive to pressure. The glass can break when you
touch the bulb, causing injury.
•
Incorrect handling of the high-voltage element of xenon gas-
discharge bulbs* can have potentially fatal consequences.Note
Have the components repaired or replaced by a qualified
workshop.Applies to vehicles: with washer fluid warning systemWasher fluid level low
Please top up washer fluid
If the symbol lights up, top up the fluid for the windscreen
washer and headlight washer system* ⇒page 267.
Fuel level low
Please refuel
When this symbol
comes on for the first time, there are about
8 litres of fuel left in the tank. You should fill up as soon as possible
⇒page 252.
If this warning symbol lights up although the fuel tank is sufficiently
filled, there is a malfunction in the fuel tank system. The display will
also show the driver message Tank system malfunction ! Contact
workshop. Please contact a qualified workshop.
document_0900452a81b1b9de.book Seite 37 Donnerstag, 26. Juli 2007 9:16 09
Page 40 of 342
Driver information system 38Applies to vehicles: with battery power warning systemBattery power
If battery power drops to a level at which you may encounter prob-
lems when starting the engine, the display will show the symbol
and the driver message Low battery charge: Battery will be charged
while driving.
Please bear in mind that the starting ability of the engine may be
impaired while this message is shown.
Message comes on and goes out again
If the message appears in the display after the ignition is switched
on or while driving, and goes out again after a period of time, the
battery has been charged up again sufficiently while the vehicle was
being driven.
Message comes on and does not go out
If the message appears in the display after the ignition is switched
on or while driving, and does not go out again, the battery is not
being maintained at the proper power level. Starting reliability may
be impaired. You should have the battery checked by a qualified
workshop as soon as possible.
Engine oil level (without dipstick)
Add oil, max. 1L. You may continue driving.
If the symbol lights up in conjunction with this driver message,
add not more than 1 litre of oil at the next opportunity
⇒page 259.
Check engine oil level (with dipstick)
Please check oil levelIf the
symbol lights up in conjunction with this driver message,
please check the engine oil level as soon as possible ⇒page 258.
Top up the oil at the next opportunity ⇒page 259.
Engine oil sensor defective
Oil level ! Sensor defective
If the
symbol lights up, take the vehicle to a qualified workshop
and have the oil level sensor checked. Until then it is advisable to
check the oil level every time you fill up with fuel ⇒page 258.
Applies to vehicles: with diesel engine and diesel particulate filterDiesel particulate filter obstructed
Particle filter. See Owner's Manual
When the symbol
lights up you can assist the self-cleaning func-
tion of the filter by driving accordingly. You should drive at a speed
of at least 60 km/h (engine speed about 2,000 rpm) for about
15 minutes in 4th or 5th gear, or with the selector lever in position S
on vehicles with automatic gearbox*. As a result of the increase in
temperature the soot in the filter will be burned off. The symbol will
disappear once the cleaning process has been completed success-
fully.
If the symbol
does not go out, please contact a qualified work-
shop and have the fault rectified.
For further information on the diesel particulate filter ⇒page 229.
WARNING
It is essential that you adjust your speed to suit the weather, road,
terrain and traffic conditions. The recommended driving speed
must never lead to the driver disregarding the traffic regulations.
document_0900452a81b1b9de.book Seite 38 Donnerstag, 26. Juli 2007 9:16 09
Page 42 of 342
Driver information system 40The tyre pressure monitoring system makes use of the ABS sensors
to compare the rolling circumference and the vibration of the
wheels. The display in the instrument cluster alerts the driver if
changes are detected on one or more wheels. If only one tyre is
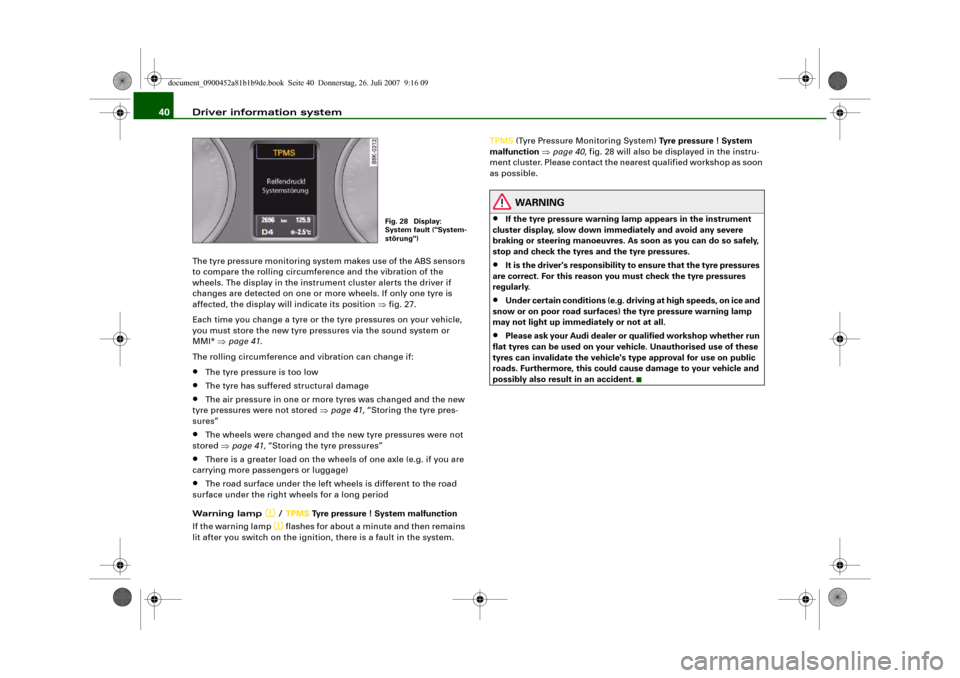
affected, the display will indicate its position ⇒fig. 27.
Each time you change a tyre or the tyre pressures on your vehicle,
you must store the new tyre pressures via the sound system or
MMI* ⇒page 41.
The rolling circumference and vibration can change if:•
The tyre pressure is too low
•
The tyre has suffered structural damage
•
The air pressure in one or more tyres was changed and the new
tyre pressures were not stored ⇒page 41, “Storing the tyre pres-
sures”
•
The wheels were changed and the new tyre pressures were not
stored ⇒page 41, “Storing the tyre pressures”
•
There is a greater load on the wheels of one axle (e.g. if you are
carrying more passengers or luggage)
•
The road surface under the left wheels is different to the road
surface under the right wheels for a long period
Warning lamp
/ TPMS Tyre pressure ! System malfunction
If the warning lamp flashes for about a minute and then remains
lit after you switch on the ignition, there is a fault in the system. TPMS (Tyre Pressure Monitoring System) Tyre pressure ! System
malfunction ⇒page 40, fig. 28 will also be displayed in the instru-
ment cluster. Please contact the nearest qualified workshop as soon
as possible.
WARNING
•
If the tyre pressure warning lamp appears in the instrument
cluster display, slow down immediately and avoid any severe
braking or steering manoeuvres. As soon as you can do so safely,
stop and check the tyres and the tyre pressures.
•
It is the driver's responsibility to ensure that the tyre pressures
are correct. For this reason you must check the tyre pressures
regularly.
•
Under certain conditions (e.g. driving at high speeds, on ice and
snow or on poor road surfaces) the tyre pressure warning lamp
may not light up immediately or not at all.
•
Please ask your Audi dealer or qualified workshop whether run
flat tyres can be used on your vehicle. Unauthorised use of these
tyres can invalidate the vehicle's type approval for use on public
roads. Furthermore, this could cause damage to your vehicle and
possibly also result in an accident.
Fig. 28 Display:
System fault ("System-
störung")
document_0900452a81b1b9de.book Seite 40 Donnerstag, 26. Juli 2007 9:16 09
Page 50 of 342
Doors and windows 48
Locking the vehicle
– Move the selector lever to position P (automatic
gearbox), otherwise it will not be possible to lock the
vehicle.
– Touch the sensor on the door handle once to lock the
vehicle ⇒.
– Touch the sensor a second time within 2 seconds to lock
the vehicle without activating the deadlock mechanism.The vehicle can be locked and unlocked from any of the doors. The
driver's door will always be unlocked as well when the passenger's
door is unlocked. The remote control key has to be within a range of
about 1.5 metres of the relevant door or the boot lid. It does not
matter where you carry the key, for instance whether it is in your
jacket pocket or in a briefcase.
The unlocking function may be affected if the sensor area on the
door handle is touched while the vehicle is being unlocked.
The locking function may be affected if you grasp the door handle
while the vehicle is being locked.
Once the doors have been locked, they cannot be opened again
immediately. This will enable you to check that the doors are prop-
erly closed.
The system will either unlock all the doors or one door only,
depending on the settings you have chosen on the sound system or
MMI* ⇒page 50.
WARNING
Do not leave anyone (especially children) in the car if it is locked
from the outside and the deadlock mechanism is activated: the
doors and windows cannot then be opened from the inside.
Locked doors could delay assistance in an emergency, potentially
putting lives at risk.
Note
Please note the following points if the vehicle is left parked for long
periods:•
To save electrical power, the proximity sensors are switched off
after a few days. You will then need to pull the door handle once to
unlock the vehicle, and a second time to open it.
•
To prevent the battery from becoming discharged and thus
maintain the vehicle's starting ability for as long as possible, the
power management system will gradually switch off convenience
functions that are not required. In this case you may not be able to
unlock the vehicle with this convenience function.
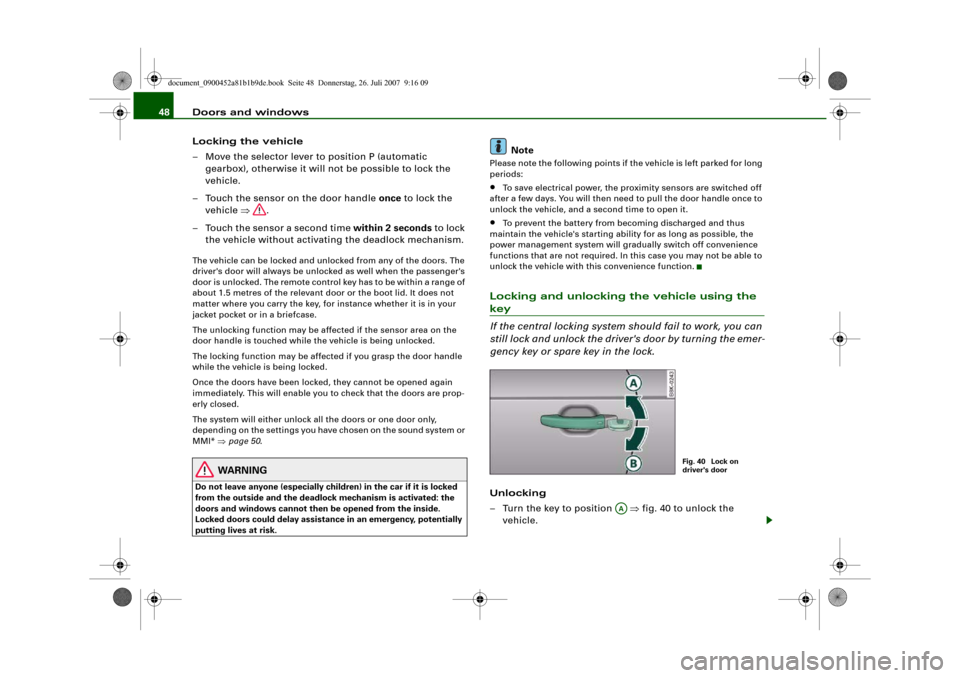
Locking and unlocking the vehicle using the key
If the central locking system should fail to work, you can
still lock and unlock the driver's door by turning the emer-
gency key or spare key in the lock.Unlocking
– Turn the key to position ⇒fig. 40 to unlock the
vehicle.
Fig. 40 Lock on
driver's door
AA
document_0900452a81b1b9de.book Seite 48 Donnerstag, 26. Juli 2007 9:16 09
Page 56 of 342
Doors and windows 54
Rear door (left-side)*
Rear door (right-side)*
Safety switch
Child safety switch
When the safety switch ⇒page 53, fig. 49 is pressed in, the
symbol
in the switch lights up. The window switches in the rear
doors are deactivated.
WARNING
•
Always take the key with you when leaving the vehicle - even if
you only intend to be gone for a short time. This is especially
important if children are left in the car. They might otherwise be
able to start the engine or use power-operated equipment such as
the electric windows - this could lead to injuries. The window
switches are only deactivated when the driver's door or the front
passenger's door is opened.
•
Always be careful when closing the windows. Careless use of
the electric windows can cause severe injuries.
•
When locking the vehicle from the outside, make sure that
nobody is inside the vehicle, as the windows cannot be opened
from the inside in an emergency.Note
The windows can be operated for about ten minutes after the igni-
tion has been switched off. The window switches are only deacti-
vated when the driver's door or the front passenger's door is
opened.
Convenience open/close function
The convenience open/close function allows you to open
and close the windows and the sun roof* with the remote
control key.You can select which windows are opened in the settings on
the sound system or MMI* ⇒page 55.
Convenience open function
– Press and hold the unlocking button
on the remote
control key until the windows have reached the desired
position and the sun roof* is open.
Convenience close function
– Press and hold the locking button
on the remote
control key until the windows and the sun roof* are
closed ⇒.
Convenience close function with advanced key*
– Touch and keep your hand in contact with the locking
sensor on the door handle until the windows and the sun
roof* are closed.
WARNING
•
Take care when closing the windows and the sun roof*. Care-
less or uncontrolled use can cause injuries.
•
For safety reasons, you should only use the remote control
open and close functions within about 2 metres of the vehicle. To
avoid injuries, always keep an eye on the windows when pressing
the button to close them. The windows and sun roof stop moving
as soon as the button is released.
ACADAS
AS
document_0900452a81b1b9de.book Seite 54 Donnerstag, 26. Juli 2007 9:16 09
Page 59 of 342
Lights and vision57
Controls
Safety
Driving tips
General maintenance
Self-help
Technical data
Lights and visionLightsSwitching lights on and off
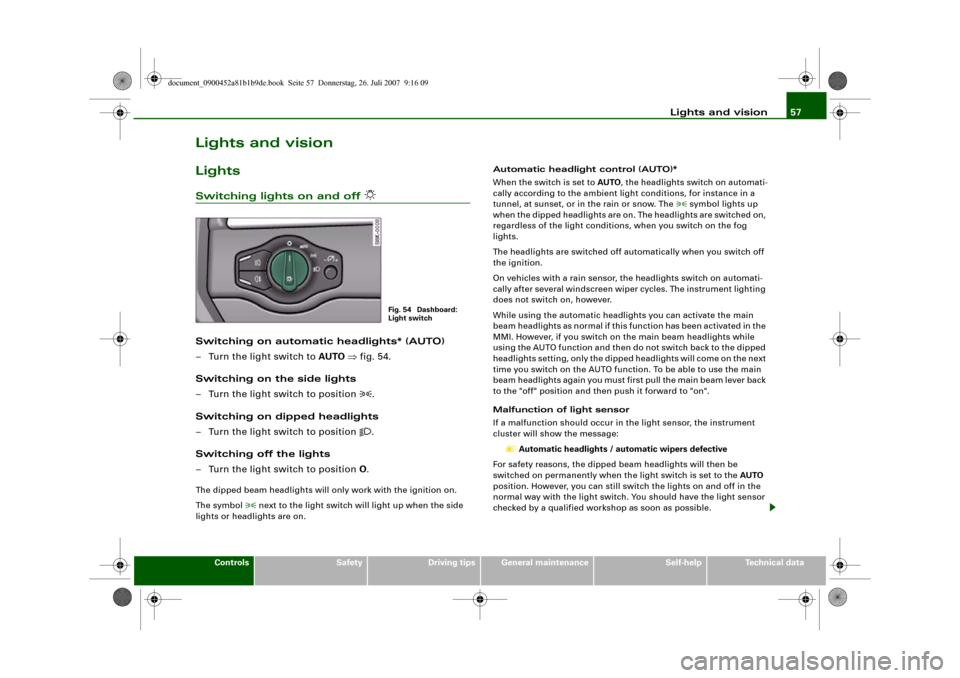
Switching on automatic headlights* (AUTO)
– Turn the light switch to AUTO ⇒fig. 54.
Switching on the side lights
– Turn the light switch to position
.
Switching on dipped headlights
– Turn the light switch to position
.
Switching off the lights
– Turn the light switch to position O.
The dipped beam headlights will only work with the ignition on.
The symbol
next to the light switch will light up when the side
lights or headlights are on.Automatic headlight control (AUTO)*
When the switch is set to AUTO, the headlights switch on automati-
cally according to the ambient light conditions, for instance in a
tunnel, at sunset, or in the rain or snow. The
symbol lights up
when the dipped headlights are on. The headlights are switched on,
regardless of the light conditions, when you switch on the fog
lights.
The headlights are switched off automatically when you switch off
the ignition.
On vehicles with a rain sensor, the headlights switch on automati-
cally after several windscreen wiper cycles. The instrument lighting
does not switch on, however.
While using the automatic headlights you can activate the main
beam headlights as normal if this function has been activated in the
MMI. However, if you switch on the main beam headlights while
using the AUTO function and then do not switch back to the dipped
headlights setting, only the dipped headlights will come on the next
time you switch on the AUTO function. To be able to use the main
beam headlights again you must first pull the main beam lever back
to the "off" position and then push it forward to "on".
Malfunction of light sensor
If a malfunction should occur in the light sensor, the instrument
cluster will show the message:
Automatic headlights / automatic wipers defective
For safety reasons, the dipped beam headlights will then be
switched on permanently when the light switch is set to the AUTO
position. However, you can still switch the lights on and off in the
normal way with the light switch. You should have the light sensor
checked by a qualified workshop as soon as possible.
Fig. 54 Dashboard:
Light switch
document_0900452a81b1b9de.book Seite 57 Donnerstag, 26. Juli 2007 9:16 09
Page 67 of 342
Lights and vision65
Controls
Safety
Driving tips
General maintenance
Self-help
Technical data
– To retract the sun blind automatically when reversing,
select: Function selector button > Windows >
Automatic rear blind > on.If you switch the Automatic rear blind function on in the sound
system or MMI*, the raised sun blind will be retracted automatically
when reverse gear is engaged ⇒page 55. In this way, the rear blind
will not obstruct your vision when reversing. The rear blind returns
to its raised position when reverse gear is disengaged and the
vehicle is driven forwards at a speed above about 15 km/h. The
current setting is automatically stored and assigned to the remote
control key.
If the rear blind was rolled in automatically when reversing and then
the ignition was switched off and on again, the blind will not roll
back out again when you select a forward gear and the speed
exceeds 15 km/h. You will then have to press the button
on the
centre console to extend the blind again.
The sun blind for the rear window switches off automatically when
it reaches the end position. It can be made to move in the other
direction before it reaches its end position by briefly pressing the
switch a second time. If the ignition is turned off while the blind is
still moving, it continues until it reaches the end position before
switching off.
Note
•
An overload cut-out may be activated if the sun blind is operated
repeatedly. There will then be a short delay before the blind can be
operated again.
•
As the material of the sun blind is less flexible at low tempera-
tures the electric actuator is switched off when the temperature in
the car is below -5°C. The blind can only be operated when the
temperature in the car's interior rises above this level.
Windscreen wipersWindscreen wipers
The windscreen wiper lever controls the windscreen
wipers and the automatic wash and wipe.The windscreen wiper lever has the following settings:
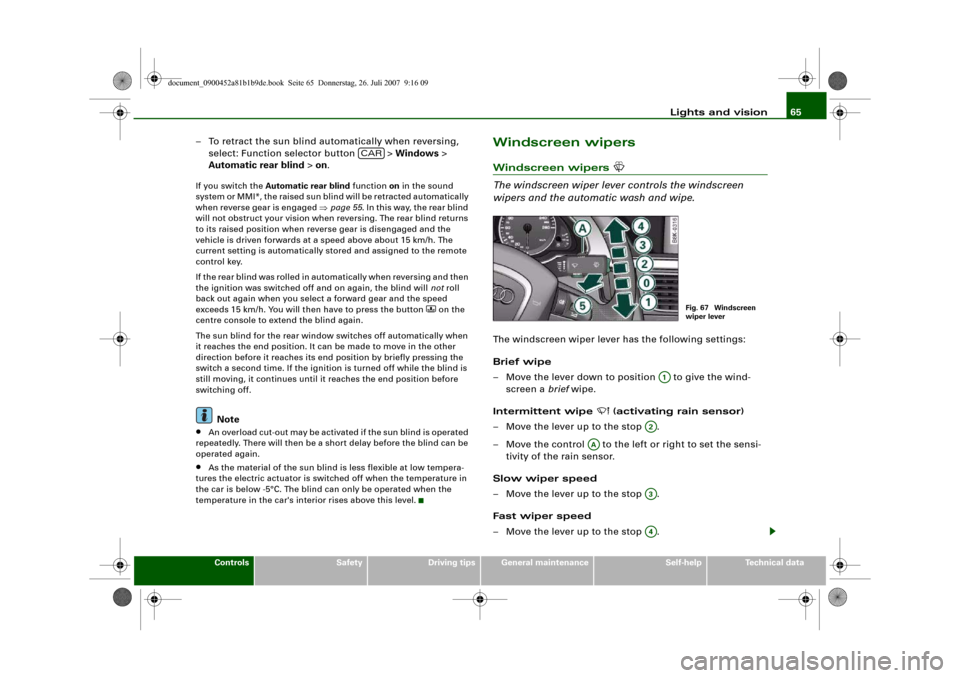
Brief wipe
– Move the lever down to position to give the wind-
screen a brief wipe.
Intermittent wipe
(activating rain sensor)
– Move the lever up to the stop .
– Move the control to the left or right to set the sensi-
tivity of the rain sensor.
Slow wiper speed
– Move the lever up to the stop .
Fast wiper speed
– Move the lever up to the stop .
CAR
Fig. 67 Windscreen
wiper lever
A1
A2
AA
A3A4
document_0900452a81b1b9de.book Seite 65 Donnerstag, 26. Juli 2007 9:16 09
Page 68 of 342
Lights and vision 66
Automatic wash and wipe
– Pull the lever to position .
– Release the lever again. The washer will stop and the
wipers will keep running for approximately 4 seconds.
The number of wipe cycles varies according to the length
of time the lever is pulled.
Switching off the wipers
– Move the lever to the "off" position .General notes
The washers and wipers will only work when the ignition is switched
on.
If you stop briefly, e.g. at traffic lights, the wiper speed will automat-
ically be reduced by one level.
The windscreen washer jets are heated when the ignition is
switched on if the outside temperature is low.
Dribble wipe
About 5 seconds after the wash and wipe cycle has finished, the
windscreen wiper system automatically gives the screen one extra
wipe to remove any dribbles of water.
If you want to deactivate the dribble wipe function while driving,
pull the lever to position again within 10 seconds.
The dribble wipe function will be re-activated the next time the igni-
tion is switched off and on.
Rain sensor*
The rain sensor will only function in the intermittent wipe position.
The intermittent wipe function is activated automatically when it
starts to rain.
Before you reach a road speed of 6 km/h you will have to activate the
rain sensor manually by switching it off and back on again.To reduce the sensitivity level of the rain sensor move control
⇒page 65, fig. 67 to the left. To increase the sensitivity level of the
rain sensor move the control to the right.
If you have selected a high sensitivity level for the rain sensor the
windscreen wipers will react sooner to any moisture on the wind-
screen. The wiper intervals in the intermittent wipe setting are also
varied automatically according to the road speed (in addition to the
sensitivity setting).
WARNING
•
Poor visibility can cause accidents. Always ensure that the
wiper blades are in good condition ⇒page 68, “Changing wiper
blades”.
•
The rain sensor is only intended to assist the driver. The driver
is still obliged to manually operate the windscreen wipers as
required depending on visibility.
•
Do not use water-repellent coatings on the windscreen. In bad
visibility conditions such as light rain, low sun or when driving at
night these coatings can cause increased dazzle, which is a
serious safety hazard. Such coatings can also cause the wiper
blades to judder.Caution
•
In icy conditions, always check that the wiper blades are not
frozen to the glass before using the wiper for the first time. If you
switch on the wipers when the wiper blades are frozen to the glass,
this could damage both the wiper blades and the wiper motor.
•
Make sure you switch off the windscreen wiper system (lever in
position "0") before you use an automatic car wash. This will avoid
inadvertent triggering of the wipers and possible damage to the
wiper system.
A5
A0
A5
AA
document_0900452a81b1b9de.book Seite 66 Donnerstag, 26. Juli 2007 9:16 09