2008 AUDI A4 stop start
[x] Cancel search: stop startPage 127 of 342
Driving125
Controls
Safety
Driving tips
General maintenance
Self-help
Technical data lights or in stop-and-go traffic. When the Audi hold assist function
is on, you don't have to keep your foot on the brake to prevent the
vehicle from accidentally rolling away. Once it detects that the
vehicle is stopped, Audi hold assist keeps the vehicle stationary. The
green symbol
in the instrument cluster indicates that the func-
tion is activated. You can now take your foot off the brake pedal.
As soon as you drive off in the normal way, the parking brake will
automatically be released and the vehicle will start moving.
If the conditions for Audi hold assist change and the function is
switched off as a result, the parking brake will be applied automati-
cally to ensure that the vehicle is parked safely. The diode in the
button will go out when the Audi hold assist function is switched
off.
WARNING
The intelligent technology in Audi hold assist cannot defy the laws
of physics. Do not let the extra convenience provided by Audi hold
assist tempt you into taking a safety risk.•
Audi hold assist cannot keep the vehicle stationary in all condi-
tions on a gradient (e.g. if the road is slippery or icy).
•
Audi hold assist must be switched on again each time the
engine is started – Risk of accident!
•
Never get out of the vehicle when the engine is running and
Audi hold assist is switched on – Risk of accident!
•
Always ensure that the vehicle is stopped properly and safely
to avoid injury to yourself and others.Caution
Switch off the Audi hold assist function before driving the vehicle
into a car wash.
Note
•
Audi hold assist can be switched on only when the driver's door
is closed, the driver's seat belt is buckled and the engine is running.
•
Audi hold assist prevents automatic vehicles from creeping
forwards when the brake pedal is released with the car in gear.
•
When the vehicle has been stationary for an extended period,
Audi hold assist will automatically apply the parking brake. In this
case, the green symbol
in the instrument cluster display will
change to red
.
Cruise control systemApplies to vehicles: with cruise control systemSwitching on
The cruise control system allows you to drive at a
constant speed of 30 km/h or higher.
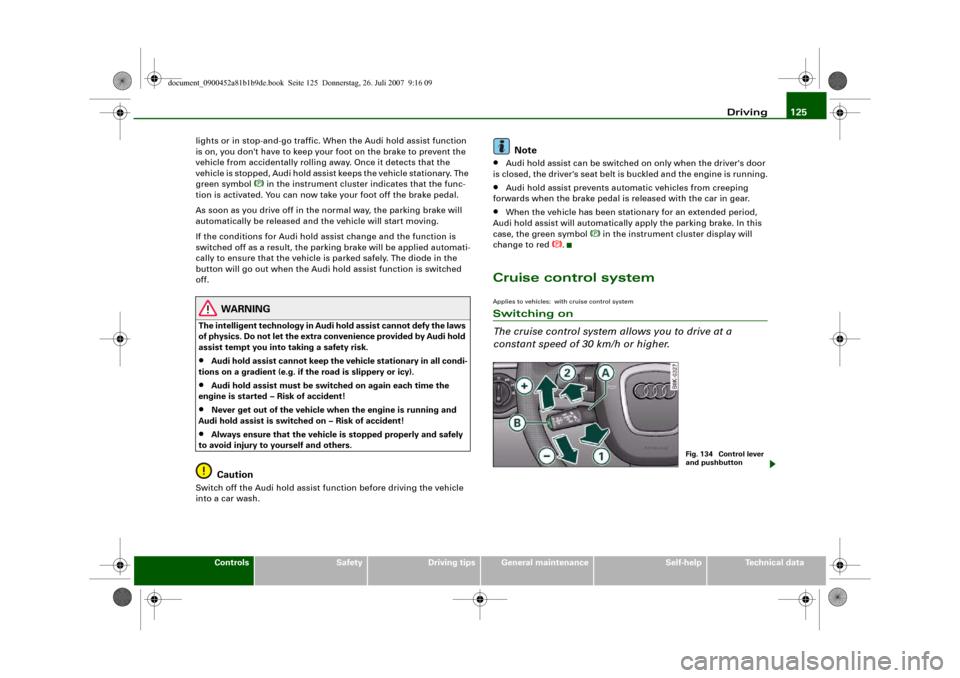
Fig. 134 Control lever
and pushbutton
document_0900452a81b1b9de.book Seite 125 Donnerstag, 26. Juli 2007 9:16 09
Page 162 of 342
Audi drive select 160
Note•
You can select the sport program for gear changes on vehicles
with an automatic gearbox* by activating the DYNAMIC mode. There
is no S position on the selector lever.
•
You may hear a noise on vehicles with dynamic steering* when
you start or stop the engine. This is no cause for concern.
Applies to vehicles: with Audi drive selectSelecting the driving mode
You can choose between COMFORT, AUTO, DYNAMIC and
INDIVIDUAL*.
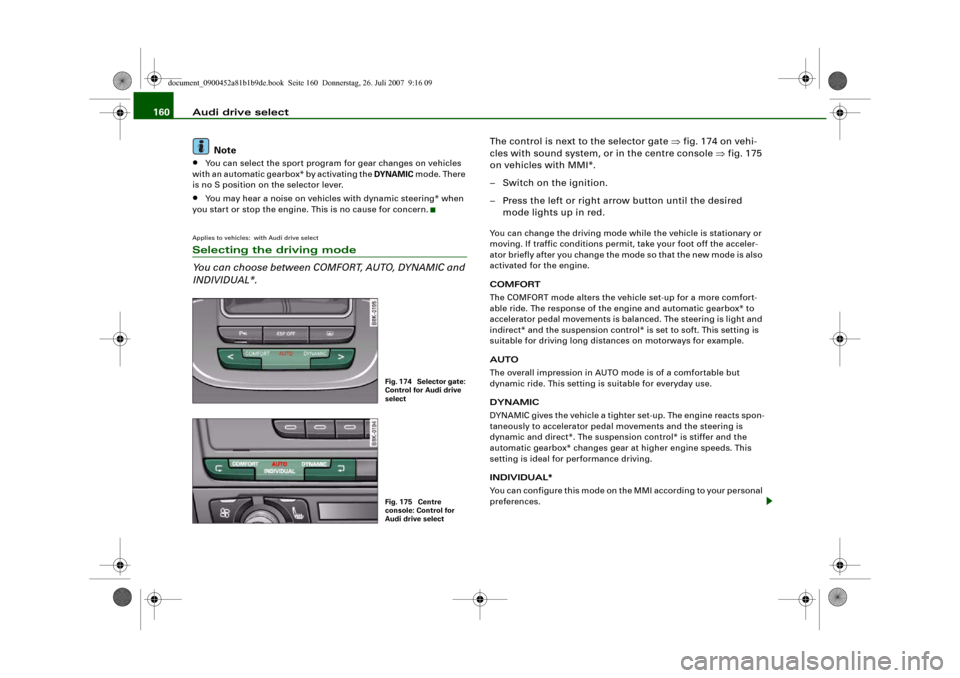
The control is next to the selector gate ⇒fig. 174 on vehi-
cles with sound system, or in the centre console ⇒fig. 175
on vehicles with MMI*.
– Switch on the ignition.
– Press the left or right arrow button until the desired
mode lights up in red.You can change the driving mode while the vehicle is stationary or
moving. If traffic conditions permit, take your foot off the acceler-
ator briefly after you change the mode so that the new mode is also
activated for the engine.
COMFORT
The COMFORT mode alters the vehicle set-up for a more comfort-
able ride. The response of the engine and automatic gearbox* to
accelerator pedal movements is balanced. The steering is light and
indirect* and the suspension control* is set to soft. This setting is
suitable for driving long distances on motorways for example.
AUTO
The overall impression in AUTO mode is of a comfortable but
dynamic ride. This setting is suitable for everyday use.
DYNAMIC
DYNAMIC gives the vehicle a tighter set-up. The engine reacts spon-
taneously to accelerator pedal movements and the steering is
dynamic and direct*. The suspension control* is stiffer and the
automatic gearbox* changes gear at higher engine speeds. This
setting is ideal for performance driving.
INDIVIDUAL*
You can configure this mode on the MMI according to your personal
preferences.
Fig. 174 Selector gate:
Control for Audi drive
selectFig. 175 Centre
console: Control for
Audi drive select
document_0900452a81b1b9de.book Seite 160 Donnerstag, 26. Juli 2007 9:16 09
Page 165 of 342
Automatic gearbox163
Controls
Safety
Driving tips
General maintenance
Self-help
Technical data
– To prevent the vehicle from rolling away, apply the
parking brake before moving off on steep gradients
⇒.
– As soon as you accelerate as normal, the parking brake
will automatically be released and the vehicle will start
moving.
Pa rking the c ar
– Press and hold the brake pedal ⇒.
– Apply the parking brake.
– Press and hold the interlock button, move the selector
lever to P and release the interlock button.The engine c an only be started when the selector lever is at P or N.
On level ground it is sufficient to move the selector lever to P. On a
gradient the parking brake should be applied first and the selector
lever should be moved to P. This reduces the load on the locking
mechanism and makes it easier to move the selector lever out of
position P.
Vehicles with multitronic® gearbox: Your vehicle is equipped with
the hill hold assist function which makes it easier to drive away on
a slope. The system is activated when you press and hold the brake
pedal for a few seconds. When you release the brake pedal the
braking force will be maintained for a moment in order to prevent
the vehicle rolling back when you drive away.
WARNING
•
Do not press the accelerator while selecting a gear with the
vehicle stationary and the engine running, as this could cause an
accident.
•
Please note that some power will still be transmitted when you
stop temporarily with the selector lever in position D, S or R. For this reason, to avoid risking an accident, apply the footbrake firmly
when stopping to prevent the vehicle rolling away.
•
Never move the selector lever to R or P when driving, as this
could cause an accident.
•
Vehicles with multitronic® gearbox: Please note that some
power will still be transmitted when you stop temporarily with the
selector lever in position D, S or R. For this reason, to avoid risking
an accident, apply the footbrake firmly when stopping to prevent
the vehicle rolling away.
Applies to vehicles: with multitronic® or tiptronicSelector lever positions
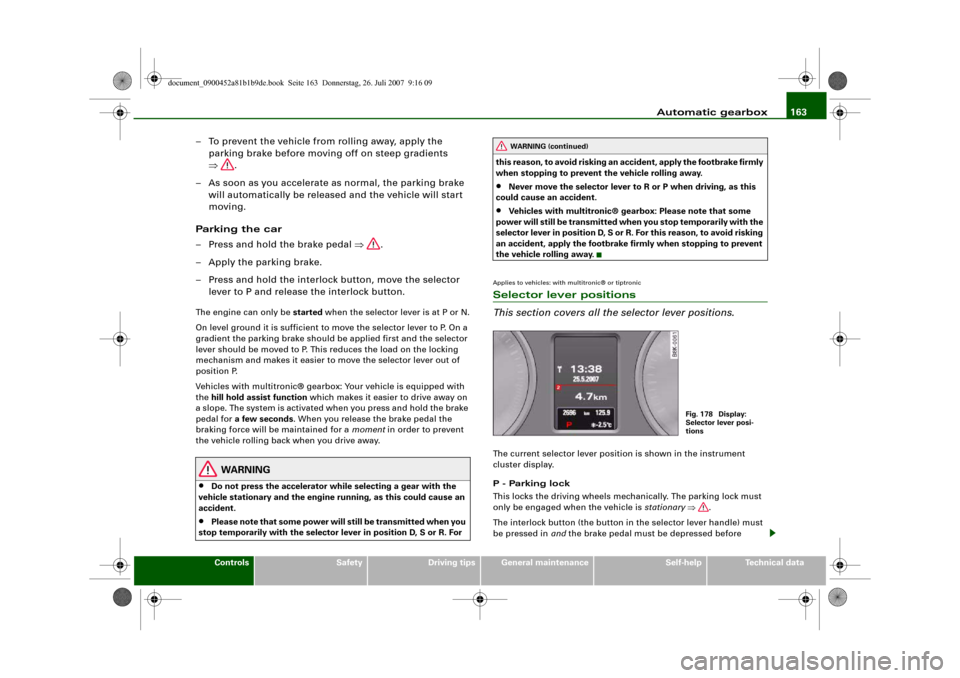
This section covers all the selector lever positions.The current selector lever position is shown in the instrument
cluster display.
P - Parking lock
This locks the driving wheels mechanically. The parking lock must
only be engaged when the vehicle is stationary ⇒.
The interlock button (the button in the selector lever handle) must
be pressed in and the brake pedal must be depressed before
WARNING (continued)
Fig. 178 Display:
Selector lever posi-
tions
document_0900452a81b1b9de.book Seite 163 Donnerstag, 26. Juli 2007 9:16 09
Page 171 of 342
Parking aid169
Controls
Safety
Driving tips
General maintenance
Self-help
Technical data
Parking aidApplies to vehicles: with Audi parking system/plus/advancedGeneral notesVarious systems are available to help you when parking or manoeu-
vring in tight spaces, depending on the equipment fitted on your
vehicle.
The Audi parking system gives an acoustic warning if there are any
obstacles behind the car ⇒page 169.
When you are parking, the Audi parking system plus warns you
acoustically and optically about obstacles in front of and behind the
vehicle ⇒page 170.
In conjunction with a reversing camera, the Audi parking system
advanced shows a picture of the area behind the vehicle. This
picture helps you to manoevre the vehicle backwards and sideways.
In addition, you are assisted by the acoustic signals and graphic
display of the parking aid ⇒page 171.
Note
To ensure that the acoustic parking aid works properly, the sensors
must be kept clean and free of snow and ice.Audi parking systemApplies to vehicles: with Audi parking systemDescription
The Audi parking system is an acoustic parking aid.Sensors are located in the rear bumper. When the sensors detect an
obstacle, you are alerted by acoustic signals (beeps). The measuring
range of the sensors starts at about:The acoustic signals sound with increasing frequency as you
approach the obstacle. A warning tone will sound continuously
when the vehicle is less than approx. 0.30 m away from the obstacle.
Stop reversing immediately!
The volume of the warning beeps will be gradually reduced after
about 4 seconds if the vehicle remains at a constant distance from
a detected obstacle (it will not be reduced if the obstacle is closer
than 0.30 m).
The parking aid is switched on automatically when reverse gear is
engaged. You will hear a brief acknowledgement tone.
WARNING
•
The parking aid cannot replace the full concentration of the
driver. The driver is always responsible for safety during parking
and other manoeuvres.
•
The sensors have blind spots in which obstacles are not regis-
tered. It is particularly important to ensure that there are no small
children or animals near the vehicle, as the sensors may not
always be able to detect them.
•
Always keep a close watch on the area around the vehicle and
make full use of the rear-view mirrors.Caution
Please note that low obstacles detected by the system may no
longer be registered by the sensors as the car moves closer, so the
system will not give any further warning. Certain kinds of obstacles
(such as wire fences, chains, thin painted posts or trailer draw bars, Rear
Side
0.60 m
Centre
1.60 m
document_0900452a81b1b9de.book Seite 169 Donnerstag, 26. Juli 2007 9:16 09
Page 172 of 342
Parking aid 170etc.) may not always be detected by the system, so take care not to
damage the vehicle in such cases.
Note
•
Please refer to the notes on towing ⇒page 177.
•
You can adjust the volume and pitch of the beeps ⇒page 177.
Audi parking system plusApplies to vehicles: with Audi parking system plusDescription
The Audi parking system plus is a parking aid with
acoustic signals and graphic display.Sensors are located in the front and rear bumpers. When the
sensors detect an obstacle, you are alerted by acoustic signals
(beeps) and a graphic display. The measuring range of the sensors
starts at about:
The acoustic signals sound with increasing frequency as you
approach the obstacle. A warning tone will sound continuously
when the vehicle is less than approx. 0.30 m away from the obstacle.
Stop moving immediately!
The volume of the warning beeps will be gradually reduced after
about 4 seconds if the vehicle remains at a constant distance from
a detected obstacle (it will not be reduced if the obstacle is closer
than 0.30 m).
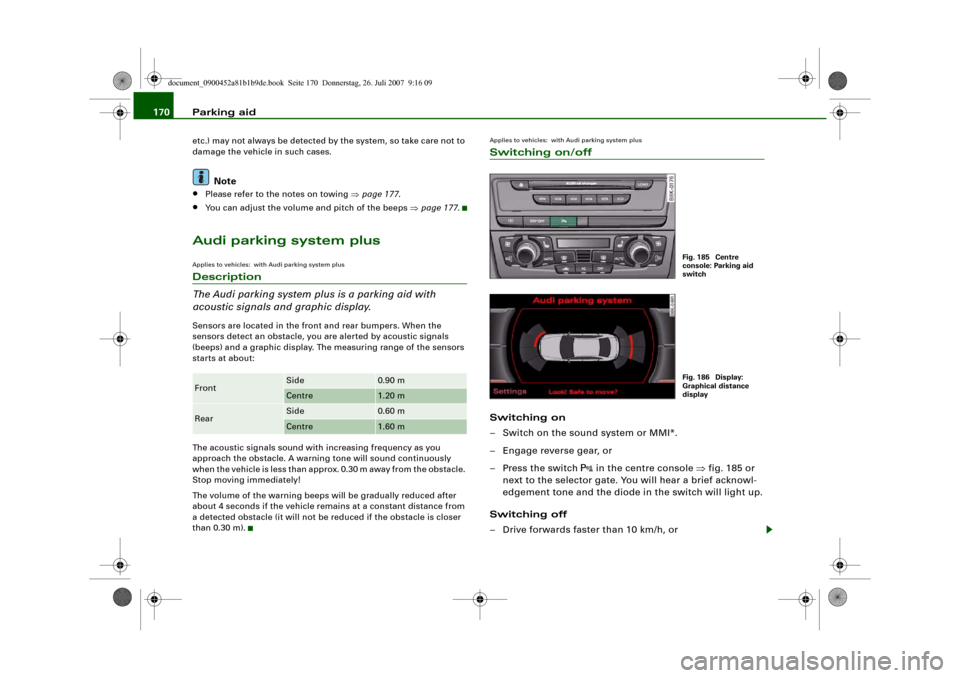
Applies to vehicles: with Audi parking system plusSwitching on/offSwitching on
– Switch on the sound system or MMI*.
– Engage reverse gear, or
– Press the switch
in the centre console ⇒fig. 185 or
next to the selector gate. You will hear a brief acknowl-
edgement tone and the diode in the switch will light up.
Switching off
– Drive forwards faster than 10 km/h, or
Front
Side
0.90 m
Centre
1.20 m
Rear
Side
0.60 m
Centre
1.60 m
Fig. 185 Centre
console: Parking aid
switchFig. 186 Display:
Graphical distance
display
document_0900452a81b1b9de.book Seite 170 Donnerstag, 26. Juli 2007 9:16 09
Page 178 of 342
Parking aid 176
– Press the control button for Mode ⇒fig. 194 on the
MMI control console. Parking mode 2 is displayed.
– Reverse and align your vehicle in such a way that the blue
area marking borders onto the vehicle behind or onto
the parking space line marking. The blue marking is an
extension of the vehicle outline and reaches about five
metres to the rear of the vehicle. The long side of the blue
marking should border onto the kerb. The complete blue
area marking must fit into the parking space.
– When the vehicle is stationary turn the steering wheel to
the left as far as it will go.
– Reverse into the parking space.
– Stop the vehicle as soon as the blue curve touches the
kerb ⇒page 175, fig. 195.
– When the vehicle is stationary turn the steering wheel to
the right as far as it will go.
– Continue to reverse into the parking space until the
vehicle is standing parallel to the kerb. indicates the
rear bumper. You should stop reversing, at the latest,
when the red orientation line is bordering on an
object ⇒! Keep a close watch on the front of your
vehicle ⇒.Parking next to obstacles
If an obstacle (such as a wall) is located next to the parking space,
the clearance at the side of the vehicle must be larger. Position the
long side of the blue marking so that there is sufficient clearance
from the kerb. The marking must not touch the kerb. You must also
start turning the steering wheel much earlier. The blue curve
⇒page 175, fig. 195 must not touch the kerb - make sure there is
sufficient clearance from the kerb.
WARNING
•
The reversing camera does not show the complete area behind
the vehicle. It is particularly important to ensure that there are no
small children or animals near the vehicle, as the reversing camera
may not always be able to detect them (accident risk).
•
Please note that objects which are not touching the ground
may appear to be further away than they actually are (e.g. the
bumper of a parked vehicle, a towing bracket or the rear end of a
truck). In this case you should not use the orientation lines as a
guide when parking the car - accident risk!Caution
The MMI display shows the path of the rear end of the vehicle if you
were to reverse using the current steering angle. NB: The front end
of the vehicle swings out further than the rear. Please make sure you
keep a sufficient distance between the vehicle and any obstacles to
make sure that the exterior mirror or edge of the vehicle do not
collide with the obstacle (accident risk).
Note
The orientation lines and markings appear on the left or right side,
depending on which turn signals are on.
A1
A2
A3
A4
document_0900452a81b1b9de.book Seite 176 Donnerstag, 26. Juli 2007 9:16 09
Page 193 of 342

Safe driving191
Controls
Safety
Driving tips
General maintenance
Self-help
Technical data
Examples of incorrect sitting positions
Occupants can suffer severe or fatal injuries injuries if
they sit in an incorrect position while the vehicle is
moving.Seat belts can only provide maximum protection if the belt
webbing is positioned correctly. Sitting out of position
greatly reduces the effectiveness of the seat belts and
increases the risk of injury since the belt webbing is not
worn in the position for which it is designed. The driver is
responsible for the safety of all vehicle occupants, espe-
cially for children.
– Never allow anyone to sit out of position while the
vehicle is moving ⇒.The following list shows just some examples of incorrect sitting
positions which can be dangerous to all occupants. The list is not
complete, but will help to make you aware of possible dangers
which can be avoided.
Therefore, whenever the vehicle is moving:•
never stand up in the vehicle,
•
never stand on the seats,
•
never kneel on the seats,
•
never travel with the backrest reclined too far,
•
never lean against the dash panel,
•
never lie down on the rear seat,
•
never sit on the front edge of a seat,
•
never sit sideways,
•
never lean out of the window,
•
never put your feet out of the window,
•
never put your feet on the dash panel,
•
never put your feet on the seat cushion,
•
never ride in the footwell,
•
never travel on a seat without wearing the seat belt,
•
never climb into the luggage compartment.
WARNING
Sitting out of position increases the risk of severe injuries.•
Sitting out of position exposes the occupants to potentially
fatal injuries: if the airbags inflate they can strike any occupant
who is not in one of the designed seat positions.
•
Before starting a trip, sit in the correct position and stay in this
position as long as the vehicle is moving. Before every trip, make
sure all passengers are sitting in the correct positions and remain
correctly seated at all times ⇒page 73, “Seats and storage”.
Pedal are aPedal s
The pedals must always be free to move and must never
be obstructed by floor mats or any objects in the footwell.– Make sure that the accelerator, brake and clutch pedals
are not obstructed and can be pressed all the way down
to the floor.
– Make sure that all pedals are able to return freely to their
original positions.Only use floor mats which leave the pedal area free and can be
securely fastened in the footwell.
If one of the brake circuits should fail, increased brake pedal travel
will be required to bring the vehicle safely to a stop.
document_0900452a81b1b9de.book Seite 191 Donnerstag, 26. Juli 2007 9:16 09
Page 226 of 342
Intelligent technology 224
WARNING
You should switch off the ESP only if your driving ability and traffic
conditions allow you to do so safely. Please note that, when the
ASR and ESP are switched off, the driven wheels may start to spin,
causing the vehicle to lose grip, in particular on slippery or wet
roads - danger of skidding!
Note
The ASR and ESP cannot be switched off when the adaptive cruise
control (ACC)* is on.BrakesNew brake pads
New brake pads do not give full braking effect for the first 400 km,
they must first be “bedded in”. However, you can compensate for
the slightly reduced braking effect by applying more pressure on
the brake pedal. Avoid placing a heavy load on the brakes during the
running-in period.
We ar
The rate of wear on the brake pads depends a great deal on how you
drive and the conditions in which the vehicle is operated. Negative
factors are, for instance, city traffic, frequent short trips or hard
driving with abrupt starts and stops.
Wet roads; road salt
When you are driving at a speed higher than 80 km/h and have the
windscreen wipers switched on the brake pads are very briefly
brought into contact with the brake discs. This automatic process
which goes unnoticed by the driver is carried out at regular intervals
and is intended to improve braking response in wet conditions.In certain conditions, such as in heavy rain, or after washing the car
or driving through water, the full braking effect can be delayed by
moisture (or in winter by ice) on the discs and brake pads. The
brakes should be “dried” by pressing the pedal to restore full
braking effect.
The effectiveness of the brakes can also be temporarily reduced if
the car is driven for some distance without using the brakes when
there is a lot of salt on the road in winter. The layer of salt that accu-
mulates on the discs and pads can be removed with a few cautious
brake applications.
Corrosion
There may be a tendency for dirt to build up on the brake pads and
corrosion to form on the discs if the car is used infrequently, or if
you only drive low mileages without using the brakes very much.
If the brakes are not used frequently, or if corrosion has formed on
the discs, it is advisable to clean off the pads and discs by braking
firmly a few times from a moderately high speed ⇒.
Faults in the brake system
If the brake pedal travel should ever increase suddenly, this may
mean that one of the two brake circuits has failed. Drive immedi-
ately to the nearest qualified workshop and have the fault rectified.
On the way to the dealer, be prepared to use more pressure on the
brake pedal and allow for longer stopping distances.
Low brake fluid level
Malfunctions can occur in the brake system if the brake fluid level is
too low. The brake fluid level is monitored electronically.
Brake servo
The brake servo amplifies the pressure you apply to the brake pedal.
It only works when the engine is running.
document_0900452a81b1b9de.book Seite 224 Donnerstag, 26. Juli 2007 9:16 09